Are you looking to make a fun and simple DIY project using common household items? A pen gun, also known as a stationery weapon, is a unique device you can make with just a few items from your desk drawer. While it may look like a harmless office accessory, a pen gun can be surprisingly powerful and is perfect for fun, controlled target practice. In this guide, I'll walk you through everything you need to know about making a functional pen gun using an ordinary ballpoint pen, some elastic bands, and a few basic tools. Let's dive in!
Safety Disclaimer: Proceed with Caution
Before we begin, it's essential to note that a pen gun, although simple, can be powerful enough to cause harm. Never aim this device at people, animals, or fragile objects. Always practice in safe, controlled environments, ideally with protective barriers. Ensure your surroundings are clear of any potential hazards, and never underestimate the strength of the projectile.
Tools and Materials You'll Need
To make a pen gun, you'll need the following items, most of which are readily available in your home or office:
Materials
- Ballpoint pen (preferably one that you can disassemble)
- Elastic band (the stronger, the better)
- Tape (duct tape or strong adhesive tape)
- Scissors or cutting tool
- Targets for practice (e.g., an empty soda can or fruit like a tomato)
Step by Step Instructions
Learn how to safely make a pen gun with our step-by-step guide. Includes tips, disassembly, assembly, and testing for fun projects.
Step 1 – Disassemble the Ballpoint Pen
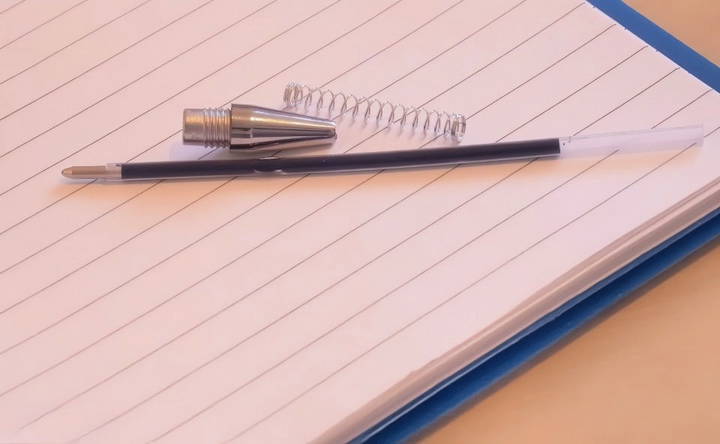
The first thing you'll need to do is take apart the ballpoint pen. A pen with a removable cap or a retractable mechanism works best for this project.
- Unscrew the pen: If your pen has a removable end, unscrew it and set the cap aside.
- Remove the ink tube: Gently pull out the ink tube (the part that contains the ink and the point).
- Remove the spring (if applicable): Some pens, especially those with retractable mechanisms, will have a spring. Remove the spring and set it aside.
- Detach the clip and push-button: If your pen has a push-button or clip at the top, pull them off. You should now be left with a clear hollow tube, which will act as the barrel for your pen gun.
Step 2 – Prepare the Elastic Band
The elastic band is essential because it will provide the tension needed to fire the pen's ink cartridge.
- Cut the elastic band: Using a pair of scissors, cut the elastic band so it becomes a straight strip rather than a loop.
- Attach the elastic band to the pen: Take one end of the elastic band and stretch it around the top of the pen tube (the end where the clip or push-button was removed). Wrap it firmly so it holds in place.
- Secure with tape: Use strong tape to secure the elastic band tightly around the pen tube. Make sure the band is fixed securely, as this will help ensure your pen gun works correctly.
Step 3 – Assemble and Load the Pen Gun
Now that the barrel (pen tube) and elastic band are ready, it's time to load the ink cartridge.
- Insert the ink cartridge: Take the ink cartridge you removed earlier and slide it into the hollow pen tube.
- Pull back the ink cartridge: Hold the cartridge by the tip and pull it backward so the elastic band stretches. This is the moment when the tension builds, preparing the pen gun to fire.
- Release to fire: Aim the pen gun at your target (making sure the area is safe) and release the ink cartridge. The elastic band's tension will propel the cartridge forward, firing it out of the pen tube.
Step 4 – Test the Power
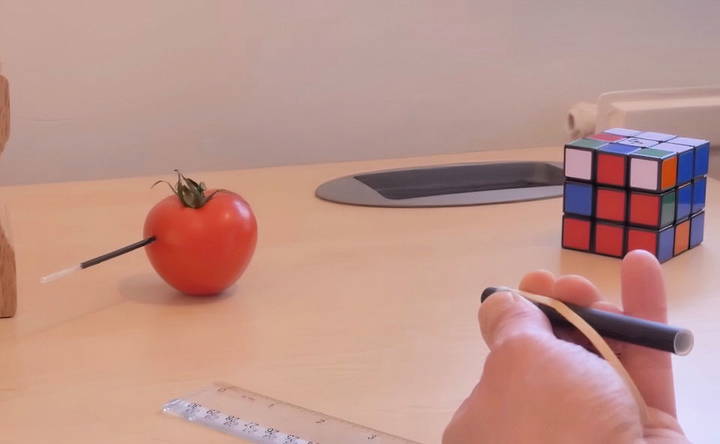
Now that your pen gun is built, it's time to test it. Choose a safe, controlled target, such as an empty soda can or a piece of soft fruit (like a tomato).
- Test on soft targets: You'll be surprised at how powerful this simple device can be. When tested on a tomato, for example, the ink cartridge can easily pierce through the surface.
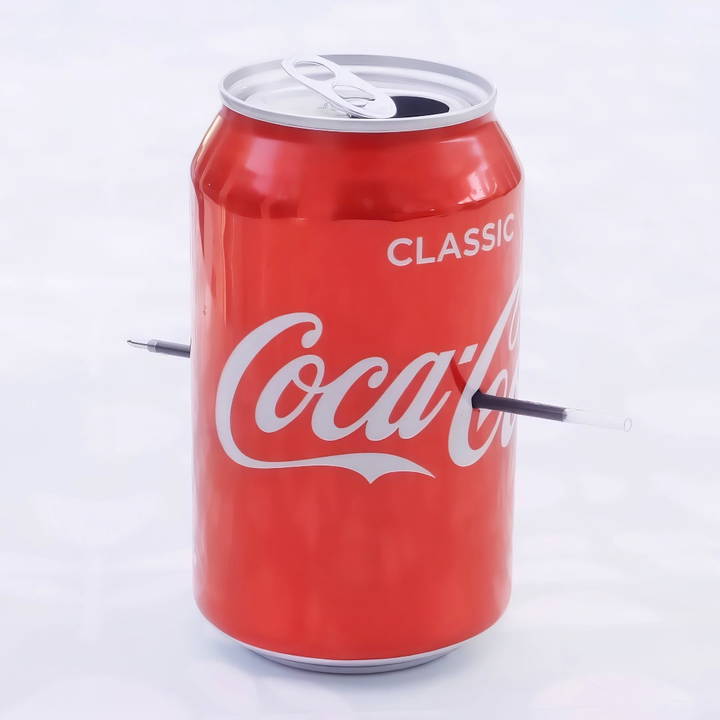
- Try harder targets: If you're feeling adventurous, test it on tougher objects, like a soda can. In many cases, the pen gun is powerful enough to shoot straight through a can, making an impressive exit hole on the other side!

Alternative Assembly Tips and Variations
There are different ways to modify your pen gun to suit your preferences. Here are some variations you can try:
Tying the Elastic Band Instead of Taping
Rather than taping the elastic band to the pen tube, you can tie the band around the pen. This method offers more flexibility, as the elastic can be adjusted or replaced easily.
- Cut the band: Like the original method, cut the elastic band in half.
- Wrap and tie: Instead of using tape, wrap the band around the top of the pen tube and secure it with a knot. This provides a tighter grip and allows for easy adjustments.
Customizing the Pen Gun Design
You can experiment with different types of pens. Look for pens with thicker barrels or longer tubes, which may increase the range or power of your pen gun. Different pens may also offer better grip or more elasticity when paired with different types of rubber bands.
Additionally, consider using decorative tape or stickers to give your pen gun a personalized look.
Potential Uses and Fun Activities
Now that you have your pen gun, there are several creative ways to enjoy it responsibly:
- Target Practice: Make a mini shooting range with household items like soda cans, paper cups, or even small fruits. Set them up at varying distances and test your accuracy.
- Pen Gun Challenges: Get together with friends (while keeping safety in mind) and make different challenges. Who can shoot their pen gun the farthest? Can you knock over a tower of paper cups? These friendly competitions can turn a simple pen gun into hours of fun.
Tips for Maximizing Your Pen Gun's Performance
Here are some additional tips to ensure your pen gun performs at its best:
- Elastic band quality: The tighter the elastic band, the more forceful the shot will be. You can experiment with thicker or thinner bands to find what works best.
- Pen tube length: A longer pen tube may allow for a greater buildup of tension, which can lead to stronger shots.
- Aim carefully: Because the pen gun shoots with surprising speed, take your time to aim accurately before firing.
- Pen durability: If you plan to use your pen gun multiple times, choose a sturdier pen model that can withstand the repeated tension from the elastic band.
Pen Gun Safety: Always a Priority
As fun as the pen gun can be, it's crucial to practice safety at all times. Here are a few golden rules:
- Never aim at people or animals: The pen gun, though a DIY toy, has the potential to cause injuries.
- Only use in controlled environments: Choose safe areas where no one will get hurt, and where objects of value won't be damaged.
- Use safety gear: If you're shooting at a harder target, consider wearing protective glasses, as the ink cartridge or target materials could ricochet.
Conclusion
A pen gun is a fun and simple DIY project that showcases the creative potential of everyday objects. With just a ballpoint pen, an elastic band, and a little bit of tape, you can make a powerful device capable of firing ink cartridges through soft targets and even soda cans. Always remember to prioritize safety, and never use your pen gun irresponsibly. Whether you're challenging your friends to target practice or testing your shooting skills, this project offers a blend of creativity and fun.
Enjoy your DIY pen gun responsibly, and happy crafting!
FAQs About How to Make a Pen Gun
Discover the essential FAQs about how to make a pen gun, covering safety tips, tools, and step-by-step guidance for making your own.
No, not all pens are suitable for making a pen gun. You need a ballpoint pen with a hollow, clear tube after disassembly. Pens that cannot be disassembled or don't have a long, clear barrel will not work as effectively for this project.
Instead of using tape, you can cut the rubber band, then wrap it tightly around the pen’s barrel and tie a secure knot. This allows for more flexibility and makes the band easier to adjust or replace if needed.
If your pen gun isn't firing as expected, check if the rubber band is tight enough. A loose band won’t generate enough force. Also, ensure the ink cartridge can slide smoothly through the barrel without obstruction.
While it can be used for target practice, avoid shooting at people or animals. The ink cartridge can cause serious injury. Test your pen gun on soft targets like tomatoes or empty soda cans in a safe, controlled environment.
Frequent tension from the rubber band can weaken some pen parts, especially the ink cartridge. Use sturdy pens and replace worn-out rubber bands regularly to extend the lifespan of your pen gun.
Yes, with a strong enough rubber band, the pen gun can shoot through thin metal like soda cans. However, the level of penetration depends on the strength of the band and the smoothness of the ink cartridge's slide.
To enhance performance, experiment with thicker or stronger rubber bands for more power. You can also test different types of pens to find the best design that provides a smooth slide for the ink cartridge.
The video is likely age-restricted due to the potential danger associated with making a DIY projectile device. Since the pen gun can shoot through materials like soda cans, it poses a risk of injury, especially to younger viewers.


