Making something unique and personalized has always been a passion of mine. So, when I decided to make my own phone case from scratch, I was filled with both excitement and nervousness. I wanted to craft a phone case that not only protected my phone but also showcased my personality. In this guide, I'll take you through the step-by-step process of how I achieved this, ensuring you can do the same with ease and confidence.

Materials Needed and Why They Are Important
- Silicone: This serves as the base material for the phone case. It's flexible, durable, and easy to mold, making it perfect for our project.
- Cornstarch: Essential for preventing the silicone from sticking to your hands or work surface. It also helps in achieving the right dough consistency.
- Gloves: Silicone can be a hassle to remove from your skin, so gloves are a must to keep your hands clean.
- Cling Wrap and Cardstock: Protects your phone during the molding process. The cardstock, with an arrow drawn on, helps in orienting the phone correctly.
- Rolling Pin: For rolling out the silicone dough to the desired thickness.
- Craft Knife: Helps in making precise cutouts for camera, volume buttons, and charging port.
- Paints and Brushes: For decorating your phone case in your chosen design.
- Glaze: Provides a shiny finish and protects the paint job.
Step by Step Instructions
Learn how to make a phone case step by step with our easy tutorial. Make a custom case for your phone today!
Step 1: Preparing the Silicone Dough
Firstly, wearing gloves is non-negotiable. I learned this the hard way in my previous attempts. Mix the silicone with cornstarch in a bowl until you achieve a dough-like consistency. Ensure it's not too sticky or too dry; you can adjust by adding more cornstarch or silicone as necessary.
Step 2: Protecting Your Phone
Wrapping your phone in cling wrap and placing a cardstock on the screen helps to protect it and ensures you know which side is up. It's a simple step but crucial for a successful outcome.
Step 3: Molding the Phone Case
On a cornstarch-dusted surface, roll out the silicone dough. Remember, not too thin or thick. My first attempt was a bit on the thicker side, which I regretted later. Carefully cover your phone with the dough, cut off any excess, and ensure it's snugly fit.
Step 4: Customizing the Design
This part was my favorite. I chose a cute chick in a strawberry suit. Using additional silicone dough, I shaped the details and attached them to the case. Once satisfied, I let it air dry completely.
Step 5: Removing Your Phone
After the case is fully dried, gently remove your phone. It's a bit nerve-wracking but also exciting to see your handmade case taking shape.
Step 6: Making Precise Cutouts
Using a craft knife, I carefully made cutouts for the camera, volume buttons, and charging port. It's vital to go slow here, ensuring you don't cut too much.
Step 7: Painting
I painted my case with red, yellow, and green to match my chick in a strawberry suit theme. Two to three coats were needed to get a vibrant and opaque finish.
Step 8: Glazing
Finally, applying a glaze gave my phone case a glossy finish and protected the paint. Two layers were enough to achieve the shine I was looking for.
Making a Stylish Phone Case: Design Considerations
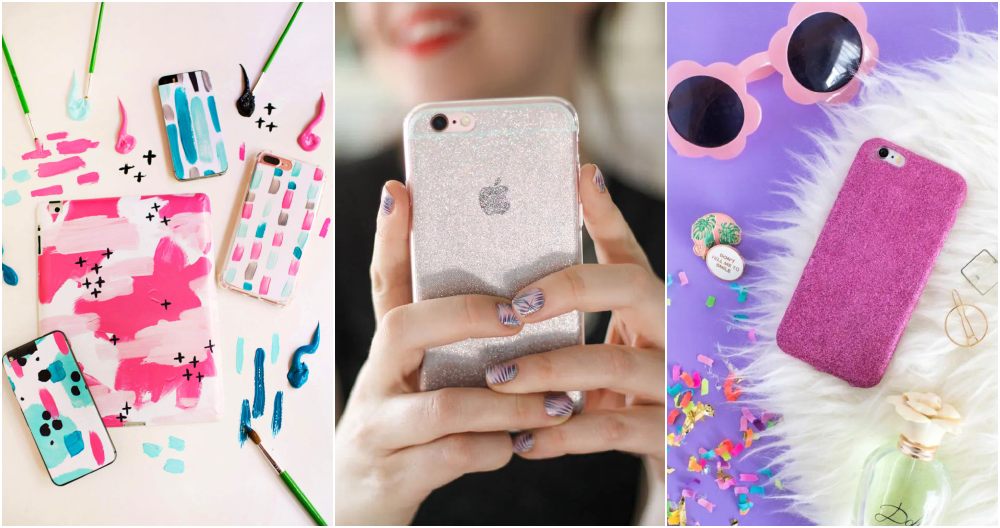
When it comes to making a custom phone case, the design is where your creativity truly shines. Whether you're making a case for yourself or as a thoughtful gift, consider the following design aspects to ensure a stylish and functional end result.
1. Personalization Matters
- Why Personalize? A phone case is an extension of your personality. Think about what makes you unique—favorite colors, patterns, or symbols—and incorporate them into your design.
- Custom Photos: Use personal photos or artwork to make a one-of-a-kind case. Family portraits, travel snapshots, or even your pet's adorable face can add a personal touch.
2. Balance Aesthetics and Functionality
- Slim vs. Protective: Decide whether you want a slim, minimalist case or a more rugged, protective one. Consider your lifestyle—do you drop your phone often or prefer a sleek profile?
- Texture and Grip: Choose materials that provide a good grip. Silicone cases offer a non-slip surface, while hard plastic cases can be slippery. Strike the right balance between aesthetics and practicality.
3. Color Palette and Harmony
- Color Psychology: Colors evoke emotions. For instance:
- Blue: Calming and professional.
- Red: Bold and energetic.
- Green: Fresh and natural.
- Monochromatic vs. Contrasting: Decide if you want a harmonious monochromatic look or prefer contrasting colors. Experiment with combinations to find what resonates with you.
4. Patterns and Prints
- Geometric Patterns: Triangles, chevrons, or herringbone designs add visual interest.
- Floral Prints: Perfect for a feminine touch.
- Abstract Art: Express your creativity with splashes of color or abstract shapes.
5. Minimalism and Negative Space
- Less Is More: Sometimes simplicity speaks volumes. Consider leaving parts of the case blank for a minimalist effect.
- Negative Space: Use empty areas strategically. It draws attention to the design elements that matter most.
6. Functional Cutouts and Buttons
- Precision Matters: Ensure your design aligns with the phone's camera, ports, and buttons. A well-placed camera cutout and responsive button covers are essential.
- Avoid Overcrowding: Don't clutter the case with too many design elements around these functional areas.
7. Texture and Embellishments
- Texture Variety: Explore textured materials like faux leather, fabric, or wood grain. They add tactile interest.
- Embellishments: Rhinestones, studs, or metallic accents can elevate your case. Just remember not to overdo it—subtle embellishments work best.
Take your time, experiment, and enjoy the creative process. Whether it's a sleek marble design or a whimsical cat pattern, make it uniquely yours!

Troubleshooting and Tips: Crafting Your Perfect Phone Case
Making a phone case is an exciting DIY project, but sometimes things don't go as planned. Fear not! Here are some troubleshooting tips and helpful advice to ensure your phone case turns out just right:
1. Air Bubbles and Wrinkles
- Issue: Air bubbles or wrinkles can mar the appearance of your case.
- Solution:
- Smooth Application: When attaching materials (like fabric or adhesive vinyl), work slowly and press out air bubbles as you go.
- Use a Squeegee: A credit card or small squeegee can help smooth out any wrinkles during application.
2. Misaligned Cutouts
- Issue: Your camera or charging port cutout doesn't line up properly.
- Solution:
- Precision Cutting: Double-check your template and cutouts before assembly.
- Trim Gently: If misaligned, trim the edges carefully to realign the openings.
3. Glue Mishaps
- Issue: Excess glue or messy seams.
- Solution:
- Less Is More: Use a thin layer of glue to avoid messy overflow.
- Wipe Excess: Keep a damp cloth handy to wipe away excess glue immediately.
4. Fitting Snags
- Issue: The case doesn't fit snugly or feels loose.
- Solution:
- Test Fit: Before final assembly, test-fit the case on your phone. Adjust as needed.
- Trim Edges: If it's too tight, trim the edges slightly for a better fit.
5. Paint or Ink Smudging
- Issue: Your design smears or smudges.
- Solution:
- Dry Completely: Allow paint or ink to dry thoroughly before handling.
- Seal It: Apply a clear sealant (like Mod Podge) to protect the design.
6. Avoid Over-Embellishing
- Issue: Too many rhinestones, buttons, or stickers overwhelm the design.
- Solution:
- Less Is More: Choose a focal point—maybe a single gem or a unique button.
- Balance: Ensure embellishments enhance, not overpower, the overall look.
7. Protective Coating
- Issue: Your case scratches easily.
- Solution:
- Clear Coat: Apply a clear protective coating (like clear nail polish) to prevent scratches.
- Buff Lightly: If scratches occur, gently buff them out with a soft cloth.
Remember, crafting is about learning and improving. Don't be discouraged by hiccups—each one brings you closer to a perfect phone case! For more detailed instructions, check out resources like WikiHow's guide or Jennifer Maker's DIY phone case tutorial.
FAQs About DIY Phone Case
Get answers to all your burning questions about DIY phone cases with our comprehensive FAQ guide. Find out everything you need to know!
1. How do I prepare the silicone dough for my phone case?
Follow these steps:
- Put on disposable gloves.
- Mix silicone and cornstarch in a bowl until you achieve a dough-like consistency.
- Knead the mixture until smooth and pliable.
2. How do I shape the phone case?
- Dust your work surface with cornstarch.
- Roll out the silicone dough to an adequate thickness.
- Press your wrapped phone into the dough, removing any excess silicone around the edges.
- Add designs or decorations as desired.
3. How long does the silicone case take to dry?
Allow the silicone case to air dry completely. This may take several hours or overnight, depending on thickness and environmental conditions.
4. How do I make precise cutouts for camera, buttons, and charging port?
Once dry, remove your phone from the case. Carefully mark and cut out openings using an Exacto knife.
5. Can I customize the design of my phone case?
Absolutely! Paint your phone case using acrylic paint in your preferred colors. Apply multiple coats if needed for a uniform look. Finish with a glaze for added protection and shine.
Remember, making your own custom phone case is not only creative but also rewarding. Enjoy personalizing your smartphone!
Reflection
Holding the finished phone case in my hands was incredibly rewarding. This project not only allowed me to express my creativity but also provided me with a unique accessory that receives compliments wherever I go. What's more, it's an eco-friendly and cost-effective alternative to buying new phone cases.
Whether you're a seasoned DIYer or a novice, I encourage you to try making your own phone case from scratch. It's a fulfilling project that lets your personality shine through. Remember, patience and creativity are your best tools in this endeavor. Happy crafting!


