Making a pinhole camera can be a fun and educational project for students. This step-by-step guide will show you how to make a simple yet effective DIY pinhole camera using everyday materials. You will learn the basics of photography and explore how light interacts with objects, helping you understand fundamental concepts of physics in a hands-on way.
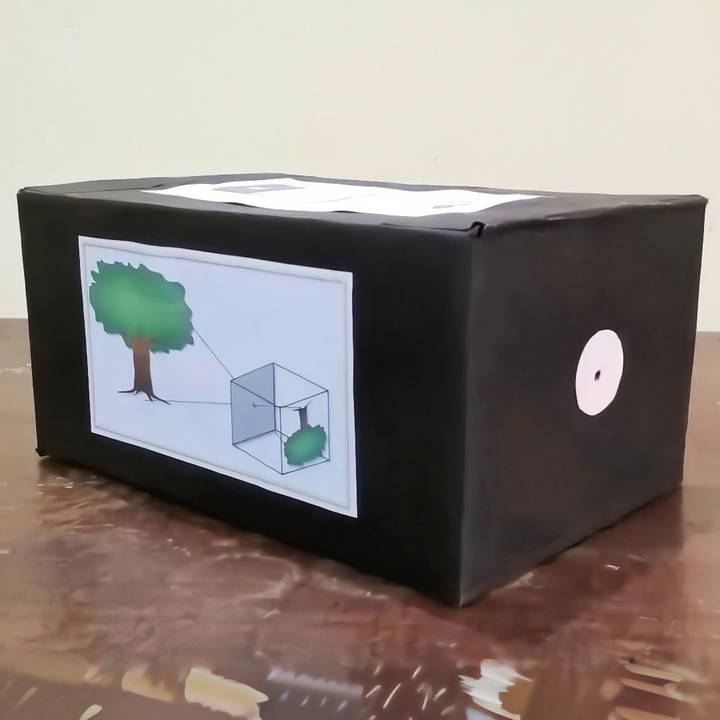
Building a pinhole camera doesn't require any special skills or expensive tools. With materials like a small box, some aluminum foil, black tape, and a pin, you can make this project easily. This guide ensures you gain practical knowledge while enjoying the process.
Continue reading to delve deeper into the instructions, and start your pinhole camera creation today.
Materials You Will Need
Before we start, let's gather all the materials. Each item has a specific role in making our pinhole camera.
- Empty waste cardboard box with a lid: This will serve as the body of our pinhole camera, essential for making a dark space.
- Sharp pencil: Used to make the pinhole, which is the core of this camera.
- Sharp knife: Needed for cutting, but please ask for parental help for safety.
- Ruler: Ensures precise measurements which are key for accuracy.
- Scissors: Useful for cutting papers.
- Butter paper or wax paper: Acts like the film in a real camera, capturing the light image.
- Tape: Helps secure the paper and parts of the cardboard box.
- Black chart paper: Used to cover the inside of the box to minimize light reflections.
- Craft glue: Essential for sticking the papers firmly in place.
Step by Step Instructions
Learn how to make your own DIY pinhole camera with our step-by-step instructions. From preparing the box to using your camera, follow these simple steps!
Step 1: Prepare the Box
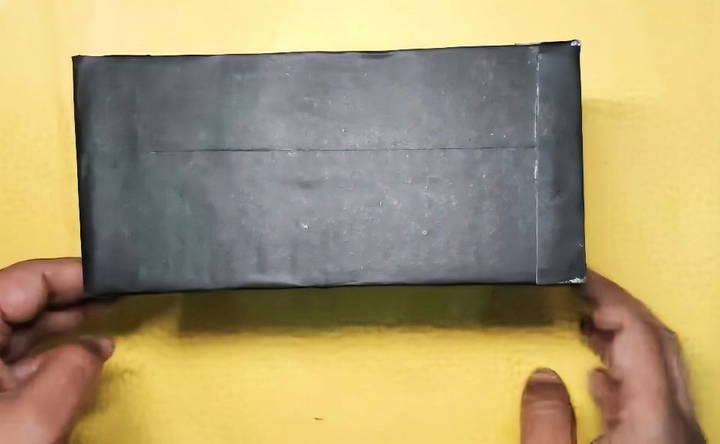
First, take your empty cardboard box. It's important to choose a box that is completely opaque to ensure no unwanted light enters. A shoebox is a perfect example.
- Clean the Box: Make sure it is free from any debris or dust.
- Measure and Cut: Use your ruler to measure an area around one inch square (2.5 cm) on one side of the box.
- Cut a Hole: Carefully cut this square out using a sharp knife. This will be where we make our pinhole.
Step 2: Make the Pinhole
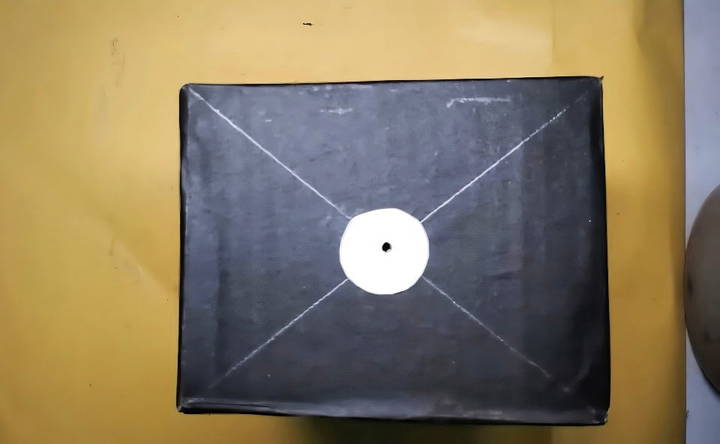
The key part of our device is the pinhole through which light will travel.
- Mark the Center: In the middle of the square hole you just cut, use your sharp pencil to poke a small hole.
- Refine the Hole: Make sure the hole is as small and precise as possible – this is crucial for the clarity of the image.
Step 3: Line the Box with Black Chart Paper
To ensure the best image quality, we need to block any stray light.
- Cut the Black Paper: Measure and cut black chart paper to line the inside of the box.
- Glue and Secure: Use craft glue to stick the black paper securely inside the box. Ensure all inner surfaces are covered.
Step 4: Make the Screen
The screen will capture the image formed by the light entering through the pinhole.
- Cut the Butter Paper: Cut a piece of butter paper or wax paper slightly larger than the one-inch square hole.
- Position and Secure: Tape the butter paper over the square hole inside the box, ensuring it is tight and free from wrinkles.
Step 5: Seal and Darken
To replicate a functioning camera, the box must be completely dark inside.
- Seal Edges: Use tape to seal all edges of the box lid to prevent any light leaks.
- Final Check: Ensure no light can enter apart from through the pinhole.
Step 6: Using Your Pinhole Camera
It's time to test our creation!
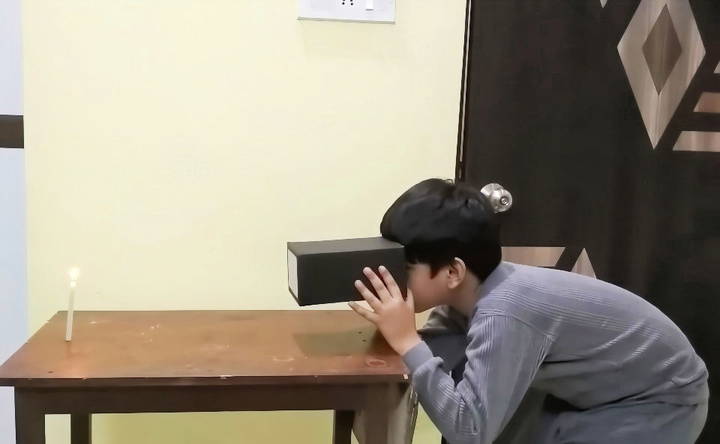
- Hold Steady: Hold the pinhole camera at arm's length from your face.
- Point at Light Source: Aim it at a bright lamp or window.
- Observe the Image: Keep it steady until you see an upside-down image of the lamp on the butter paper screen.
What's Happening?
You might be wondering, how does this fascinating device work?
The Science Behind It
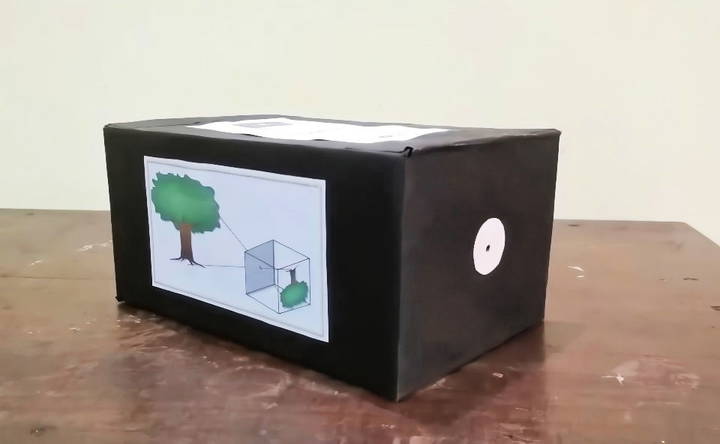
In a real camera, the lens captures light and projects an image onto a film or digital sensor. Our pinhole camera works in a similar way:
- Pinhole as Lens: The tiny pinhole functions like a camera lens, letting in a controlled amount of light.
- Image Formation: Light travels through the pinhole and forms an inverted image on the butter paper, which acts like the film in a traditional camera.
- Image Capture: The dark interior of the box, covered with black paper, ensures that the only light forming the image is from the intended source, preventing distortions.
Photography Tips and Techniques for Pinhole Cameras
Making stunning images with a pinhole camera can be a rewarding experience. Here are some tips and techniques to help you capture the essence of your subject and make memorable photographs:
- Understand Exposure Times: Unlike standard cameras, pinhole cameras require longer exposure times. This can range from a few seconds to several minutes depending on the lighting conditions. Experiment with different exposure times to find what works best for your setup.
- Choose the Right Subject: Pinhole cameras excel in capturing still life, landscapes, and scenes with contrasting elements. Look for subjects that have distinct shapes and lines, as these will translate well into the unique aesthetic of pinhole photography.
- Embrace the Blur: Movement during the long exposure can make a blur effect. Instead of avoiding this, use it creatively to add a sense of motion or ethereal quality to your photos.
- Optimize Lighting Conditions: Good lighting is crucial. Soft, diffused light often works best for pinhole photography. Overcast days can provide excellent lighting conditions, reducing harsh shadows and highlights.
- Stabilize Your Camera: Use a sturdy surface or tripod to keep your camera still during the exposure. Any movement can result in a blurry image.
- Be Patient: The process of pinhole photography is slow and deliberate. Take your time to set up your shot, and don't rush the exposure. Enjoy the process as much as the result.
- Experiment with Angles: Try shooting from various angles to see how it changes the composition and depth of your photos. Low angles can make subjects appear larger and more imposing, while high angles can provide a broader view of the scene.
- Test and Learn: Every pinhole camera is unique, so what works for one might not work for another. Take notes on what settings you use for each photo, so you can learn and improve over time.
The beauty of pinhole photography lies in its simplicity and unique perspective. Keep experimenting, and you'll develop a feel for what techniques work best for you and your camera.
Advanced Modifications for Pinhole Cameras
Taking your pinhole camera to the next level involves some creative thinking and a bit of DIY spirit. Here are some advanced modifications you can try to enhance your pinhole photography experience:
- Adjustable Aperture: Make an adjustable aperture for your pinhole camera. This allows you to control the amount of light entering the camera, giving you more flexibility with exposure times.
- Multiple Pinholes: Experiment with multiple pinholes. This can make interesting overlay effects and patterns in your photos. Be sure to space the pinholes and test different configurations evenly.
- Interchangeable Pinholes: Make the pinhole interchangeable by mounting it on a removable plate. This lets you switch between different pinhole sizes and shapes, affecting the sharpness and character of your images.
- Adding a Shutter: Install a simple shutter mechanism. This can be as basic as a flap of light-proof material that you can open and close manually. It will make controlling exposure times easier and more precise.
- Lens Addition: While it may seem counterintuitive, adding a lens to a pinhole camera can yield interesting results. Try a low-power magnifying glass to focus light differently onto the film or paper.
- Color Filters: Use color filters to add a tint or mood to your photographs. You can place these over the pinhole or directly in front of the photographic medium.
- Pinhole Zoom: Make a ‘zoom' effect by making a sliding box design. This allows you to change the distance between the pinhole and the photographic medium, altering the field of view.
- Electronic Integration: For the tech-savvy, integrate electronic components such as a light meter or a timer to help with exposure accuracy.
Experimenting is key to successful changes. Not all will work, so try various methods and learn from them. Advanced modifications can reveal new possibilities in your pinhole photography.
FAQs About DIY Pinhole Camera
Discover answers to common questions about DIY pinhole cameras. Learn how to build, use, and troubleshoot your homemade camera easily!
A pinhole camera is a simple camera without a lens but with a tiny aperture—a pinhole. It’s a light-proof box with a small hole on one side. Light passes through this hole and projects an inverted image on the opposite side of the box, which can be captured on photo paper.
Technically, yes. Any size box can work if it’s made light-proof. However, for practicality and ease of handling, a shoebox-sized container is often used. The box needs to be completely sealed from light, except for the pinhole.
The pinhole camera works on the principle of camera obscura. Light from an object passes through the small pinhole and projects an inverted image on the opposite side of the box where the photo paper is placed. Because the hole is small, it doesn’t require a lens to focus the light, and the result is a clear image, although it will be inverted and may have a soft edge.
The exposure time can vary greatly depending on the light conditions and the size of the pinhole. For a standard shoebox pinhole camera, an exposure time of 2 to 5 minutes on a sunny day is a good starting point. If it’s overcast, you might need to expose for 10 to 20 minutes. It’s all about experimentation, so don’t be afraid to try different durations to see what works best for your camera.
To develop your photo, you'll need a darkroom or a dark space with a red safelight. You'll also need photo developer and a stop bath solution. After exposing the photo paper in your pinhole camera, place it in the developer solution until the image appears, then quickly transfer it to the stop bath to halt the development process. Finally, place the paper in a fixer solution to make the image permanent. Always follow the instructions provided with your photo paper and chemicals for the best results.
Practical Tips
- Lighting: For the best results, use a bright light source. Natural sunlight works superbly.
- Stability: Be steady while holding the camera to get a clear image.
- Experiment: Try different sizes of pinholes to observe how the image's sharpness and brightness change.
With these simple steps, you have now maked a functioning DIY pinhole camera! This project not only makes a creative school project but also provides a foundational understanding of basic principles of photography and optics. The joy of seeing the inverted image is unmatched and akin to witnessing magic through a small device you've crafted yourself.


