Making a DIY rag rug is a fulfilling and enjoyable project. Start by gathering old t-shirts or fabric scraps to use as material. Cut them into strips and decide on a braiding or sewing method. Braiding the strips together is one popular way to make a sturdy and attractive rug. Follow these easy steps, and you will soon have your very own handmade rug.
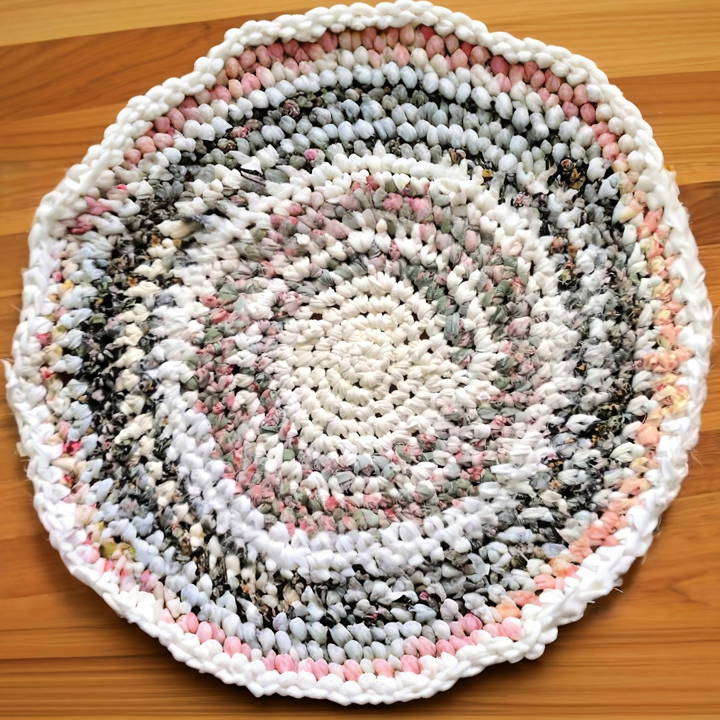
Learning how to make a rag rug opens up a world of creative possibilities. With minimal materials and tools needed, you can craft rugs in various sizes and colors that suit your home decor. If you're new to this craft, start with basic designs and expand your skills over time.
For detailed guidance and tips, proceed to the next section for a step-by-step tutorial.
Gathering Your Materials
Before diving into the process, it's crucial to talk about the materials you'll need. For this project, I used:
- Rags or Scraps of Material: I dug through my closet and found t-shirts, old bed sheets, and even a dress I once botched in a DIY attempt. The beauty of this project lies in its versatility—you can use any fabric you have lying around. The choice of material will influence the color scheme and texture of your rug, so have fun mixing and matching.
- Sewing Scissors or a Rotary Cutter: I opted for a rotary cutter because it sped up the cutting process, but scissors work just fine, too.
- A Large Crochet Hook: Depending on the thickness of your fabric strips, the size of the crochet hook can vary. I used an N-size hook, which I found to be versatile for different fabric thicknesses.
Why These Materials?
Choosing the right materials is key to the success of your rag rug. The variety in fabrics allows for a unique look, while the large crochet hook makes it easier to work with the thick strips. The cutting tool, whether you choose scissors or a rotary cutter, will ensure that your strips are uniform, making the crocheting process smoother.
Step by Step Instructions
Learn how to make a DIY rag rug with our step-by-step instructions. Perfect beginner's guide to making cozy, handmade decor effortlessly.
Cutting Your Fabric Strips
Once you have your materials gathered, the next step is to cut them into strips. I aimed for strips about an inch to an inch and a half wide. Precision isn't critical; as long as they're roughly the same width, your rug will look cohesive. This step reminded me of the importance of patience and enjoying the process. As I cut through an old skirt, memories of past fashion disasters turned into anticipation for a new creation.
Tying Strips Together
After cutting a decent pile of strips, the next step was to tie them together. This step was surprisingly therapeutic. Tying right over left, then left over right, I maked a long string of rags. It's okay if there are little tails sticking out from the knots—they add to the rag rug's charm and will mostly be on the underside.
Starting the Crochet
With my ball of tied rags ready, I began the crochet process. The first step is to make a slip knot and make a foundation chain. This base chain is crucial as it sets the tone for your entire rug. I went for a simple circular rug, so after making a short chain, I connected the ends to form a loop and started working in single crochets around the loop.
The Crochet Process
As my rug began to take shape, the process became meditative. The act of pulling the hook through the loops, watching as the fabric transformed into something new, was incredibly satisfying. I kept my stitches loose, allowing the rug to lay flat without bunching. Expansion was achieved by adding an extra stitch here and there, ensuring the rug grew evenly.
Adding New Colors and Fabrics
Halfway through, I decided to switch colors. Introducing a new fabric was as simple as tying the end of one strip to the beginning of another. This flexibility allowed me to adjust the rug's color pattern on the fly, making the creation process dynamic and engaging.
Finishing Your Rug
When my rug reached the desired size, I tied off the end and weaved in any loose ends with my crochet hook. The sense of accomplishment was immense. Not only had I repurposed old materials, but I'd also crafted something both beautiful and functional.
Design Ideas for DIY Rag Rugs
Making a DIY rag rug is not only a fun and rewarding project, but it also adds a touch of personal flair to your home. Here are some design ideas to inspire your next creation:
- Choose a Color Scheme: Start by selecting a color palette that complements your room. You can go for a monochromatic look with varying shades of the same color or a vibrant mix to add a pop of color. Consider the mood you want to set; warm colors can make a space feel cozy, while cool colors can have a calming effect.
- Experiment with Patterns: Patterns can transform the look of your rag rug. Stripes, chevrons, and geometric shapes are popular choices. For something more unique, try making abstract shapes or floral designs. If you're new to patterns, start with simple shapes and gradually move to more complex designs as you gain confidence.
- Incorporate Textures: Mixing different textures can add depth to your rug. Combine materials like cotton, denim, and wool for a multi-textural feel. You can also play with the thickness of your strips; thin strips will give a finer, more delicate look, while thicker strips will make your rug more plush.
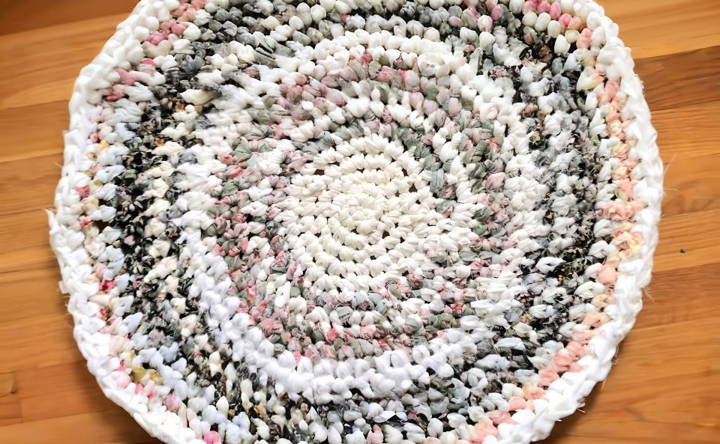
- Size and Shape: Think about where you want to place your rug. A circular rug might be perfect for a small reading nook, while a large rectangular rug could be ideal for the living room. Don't be afraid to go beyond traditional shapes; consider ovals, hexagons, or even freeform shapes.
- Functional Art: Your rag rug can be more than just a floor covering; it can be a piece of art. Make a design that tells a story or represents something meaningful to you. This could be a rug that features a map of your hometown, a scene from your favorite book, or a collage of colors that hold special memories.
- Sustainability: If you're passionate about the environment, highlight this in your design by using recycled materials. Old t-shirts, bed sheets, and other fabric scraps are great options. This not only reduces waste but also gives your rug a story and a sustainable edge.
A DIY rag rug showcases your creativity and style. With no strict rules, you can experiment freely.
Upcycling Tips for DIY Rag Rugs
Upcycling is a fantastic way to breathe new life into old materials, and making a DIY rag rug is a perfect example of this. Here are some tips to help you turn your worn-out clothes and linens into a beautiful and functional piece for your home:
- Start with Sorting: Begin by sorting through your old textiles. Look for materials that are still sturdy. Cotton t-shirts, jeans, flannel shirts, and bed linens are great choices. Separate them by color and texture for easier selection later.
- Prep Your Materials: Once you've chosen your fabrics, wash and dry them thoroughly. Then, cut them into strips. The width can vary depending on the look you want, but 1-2 inches is a good standard. If you're using t-shirts, you can stretch the strips to make curling ‘yarn.'
- Choose a Weaving Method: There are several ways to make a rag rug. The simplest is braiding the strips together and then coiling them into a rug. You can also use a latch hook or crochet for a more intricate design. Pick a method that suits your skill level and the time you have available.
- Mix and Match: Don't be afraid to mix different types of fabric. This can add visual interest and texture to your rug. Denim and cotton, for example, can make a nice contrast. Just make sure the thickness of the strips is consistent.
- Think About the End Use: Consider where the rug will go. If it's for a bathroom, you might want to use towels for their absorbency. For a kitchen, cotton is best as it's easy to wash. For a bedroom, softer fabrics like flannel can add warmth and comfort.
- Secure the Ends: When you finish your rug, make sure to secure the ends properly. You can sew them, tie them, or use a strong fabric glue. This will ensure your rug stays together and is safe to use.
- Embrace Imperfections: Your rug doesn't have to be perfect. In fact, the quirks and irregularities can add character. Embrace the uniqueness of your creation and the story it tells through its varied fabrics.
Following these tips, you'll make a beautiful rag rug and promote sustainability by repurposing materials. Enjoy making something new from something old.
Maintenance and Care for DIY Rag Rugs
Keeping your DIY rag rug in top condition is essential for its longevity and appearance. Here's a straightforward guide to maintaining and caring for your rag rug:
- Regular Cleaning: It's important to clean your rug regularly to prevent dirt and dust from settling. Simple vacuuming can remove surface debris. For rag rugs, use a vacuum with a handheld attachment to avoid pulling on the fabric strips.
- Spot Cleaning: Accidents happen, and when they do, spot cleaning is your best friend. Use a mild detergent and cold water to treat any stains. It's crucial to blot rather than rub to prevent the stain from spreading.
- Avoid Harsh Chemicals: Harsh chemicals can damage the fabric of your rag rug. Stick to gentle cleaning solutions and always test them on a small, inconspicuous area first.
- Beating the Rug: Every few months, take your rug outside and give it a good beating. Hang it over a sturdy clothesline or railing, and use a rug beater or a broom to knock out any embedded dirt.
- Washing Machine Tips: If your rag rug is small and made of machine-washable materials, you can wash it in the machine. Use a gentle cycle and wash it alone to avoid color transfer. For larger rugs, consider a professional cleaning service.
- Drying: Never put your rag rug in the dryer, as the heat can shrink or damage the fabric. Instead, air dry it flat or hang it outside away from direct sunlight to prevent fading.
- Rug Rotation: To ensure even wear, rotate your rug every few months, especially if it's in a high-traffic area. This will help maintain its shape and distribute wear more evenly.
- Storage: If you need to store your rag rug, roll it instead of folding it to avoid creases. Keep it in a cool, dry place to prevent mold and mildew growth.
Follow these care tips to keep your handmade rug lasting for years. Regular upkeep maintains its look and extends its life, making your DIY project a lasting homepiece.
FAQs About DIY Rag Rug
Discover essential faqs about DIY rag rug, from materials and techniques to step-by-step instructions for making your own stylish rag rug at home.
A DIY rag rug is a handcrafted rug made from repurposed fabric scraps, such as old clothes, bed sheets, or towels. These materials are cut or torn into strips and then woven, braided, or crocheted into a rug. It’s a sustainable craft that not only recycles materials but also creates a unique and personalized home decor item.
Yes, there are no-sew methods available. For example, you can braid strips of fabric and interweave them to shape your rug without the need for sewing. Another method involves looping fabric strips through a non-slip rug mat.
Rag rugs are generally durable and easy to care for. Shake out the rug regularly to remove dust and debris. If it's small enough, you can machine wash it on a gentle cycle with cold water and then air dry. For larger rugs, spot cleaning with a mild detergent and water is recommended.
The patterns you can make are limited only by your imagination. Popular patterns include stripes, chevrons, spirals, and concentric circles. You can plan your design ahead of time or let it evolve naturally as you add strips of fabric. For a more cohesive look, consider using fabrics of similar colors or patterns.
The time it takes to make a rag rug varies depending on the size of the rug and the complexity of the method you choose. A small rug may take a few hours, while a larger one could take several days or even weeks. The process can be quite therapeutic, so take your time and enjoy the crafting journey!
Reflections on the Project
Wrapping up, making a DIY rag rug is a fun and fulfilling project. With simple steps and basic materials, you can make a beautiful addition to your home. Follow this guide on how to make a rag rug, and you'll be able to craft wonderful pieces that are both practical and stylish. Happy crafting!


