Learn how to make a robot at home with this simple guide. Building a simple robot at home can be a fun and educational experience. I remember the first time I tried it; I started with basic materials like cardboard, small motors, and batteries. Following step-by-step guides, I was able to design a small robot that could move around. It was thrilling to see my creation come to life with just a few household items.
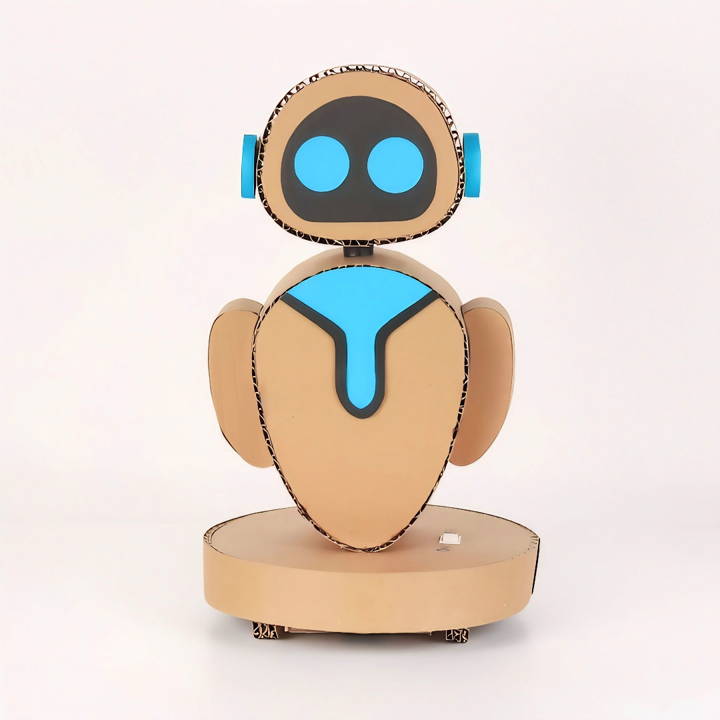
I found online tutorials very useful for learning how to put different parts together. The feeling of accomplishment when my robot took its first steps was incredible. If you want to experience the joy of making your own DIY robot, you can easily get started with basic instructions.
I hope this inspires you to try your hand at building a robot, and I believe you will find it both informative and engaging.
Materials Needed and Why
Before we dive into the building process, let's talk about what you'll need. Each material plays a crucial role in bringing our cardboard robot to life.
- Geared DC Motor: This will be the heart of our robot, giving it movement.
- 9v Battery: This will power our DC motor, breathing life into our creation.
- Popsicle Sticks: Used for making the structure and arms of the robot.
- Bamboo Sticks: These will serve as the axles for our robot's wheels.
- ON/OFF Switch: This will give us control over when our robot moves and when it stays still.
- Hot Glue Gun: Essential for joining all our parts securely.
Step by Step Instructions
Learn how to build your own robot with our step-by-step DIY robot guide. Perfect for beginners and enthusiasts looking to build a custom robot at home.
Step 1: Preparing the Cardboard
The first step is to prepare your cardboard. Download the template provided in the video description I mentioned earlier. This template is a real game-changer, ensuring all pieces fit perfectly without the guesswork. Print it out and trace the shapes onto your cardboard.
Once traced, use a sharp cutter or scissors (be careful and maybe get some help if you're not comfortable) to cut out the shapes. You'll end up with several pieces that will soon form the body of our robot.
Step 2: Assembling the Body
Now, take the popsicle sticks and hot glue them to the cardboard pieces according to the template guidelines. This will start to form the basic structure of our robot. Pay close attention to where the motor and battery will sit; you'll want to ensure they're securely attached with enough space for operation.
Step 3: Installing the Motor and Wheels
This part is where the magic starts! Mount the geared DC motor securely onto the body using hot glue. Once in place, attach the bamboo sticks as axles for your wheels. You can use smaller pieces of cardboard or bottle caps as wheels; just ensure they're sturdy enough to support the robot.
Step 4: Wiring it Up
Here's where things get a bit technical, but fear not, it's simpler than it sounds. Connect the 9v battery to the motor through the ON/OFF switch. This might require a bit of soldering or twisting wires together. If you're unsure, seeking help from someone experienced with electronics can be a wise choice. Safety first!
Step 5: Final Touches
With everything in place and working, it's time to give our robot some personality. Use extra pieces of cardboard, markers, or paint to add details such as eyes, a mouth, or even a nameplate. Let your creativity run wild here.
Now, with a flick of the ON/OFF switch, your cardboard robot should spring to life, moving forward or in whichever direction you've designed it to. Seeing your creation move for the first time is incredibly rewarding. Don't worry if it doesn't work perfectly on the first try; troubleshooting is all part of the fun and learning experience.
Customization Ideas for Your DIY Cardboard Robot
Building a DIY cardboard robot is not just about following instructions; it's about unleashing your creativity and making something unique. Here are some customization ideas to help you personalize your robot and make it stand out:
Choose a Theme
- Personal Interests: Reflect your hobbies or interests in the robot's design. If you love space, build an astronaut robot. If you're into sports, design it after your favorite team's mascot.
- Cultural Inspiration: Draw inspiration from your culture's art and history. Use traditional patterns and colors to give your robot a cultural twist.
Decorate with Colors and Patterns
- Color Schemes: Select a color palette that appeals to you. Bright colors can make your robot look playful, while metallic paints can give it a futuristic feel.
- Patterns and Textures: Add patterns like stripes, polka dots, or even a camouflage print. Use materials like foil, fabric, or textured paper to add interesting textures.
Add Functional Features
- Moving Parts: Incorporate joints, such as knees and elbows, that allow your robot to move. Use brads or string to connect these parts.
- Storage Compartments: Build a small compartment or a backpack on your robot where you can store items like pencils or small toys.
Interactive Elements
- Sound and Lights: Integrate simple circuits to add LED lights for eyes or a small speaker to play sounds when buttons are pressed.
- Control Mechanisms: Attach strings or rods to control the robot's limbs, allowing you to manipulate its movements.
Recycled Add-Ons
- Household Items: Use bottle caps for eyes, paper towel rolls for arms, or old CDs for wheels. This not only recycles but also adds character.
- Nature's Touch: Incorporate elements from nature like leaves for wings or twigs for antennas, giving your robot an eco-friendly aspect.
Educational Enhancements
- Label Parts: Label the parts of your robot with their scientific names, like ‘torso' or ‘limb', to make it educational.
- Simple Machines: Explain how the robot incorporates simple machines like levers (arms) and wheels (legs).
Enjoy the process and let your imagination guide you. Experiment boldly and add personal touches to make your cardboard robot unique.
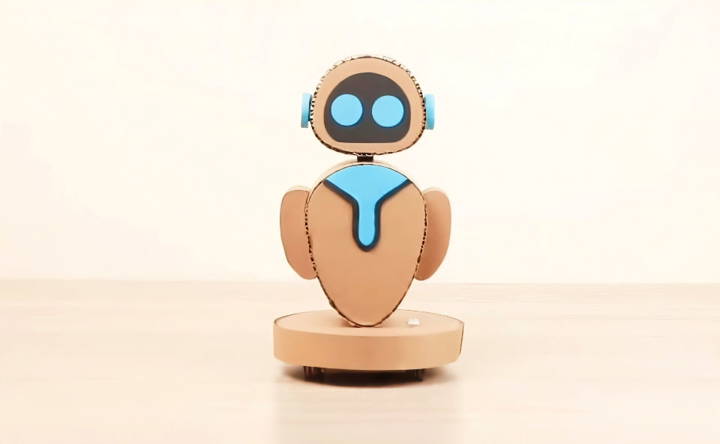
Integration with Technology in Your DIY Cardboard Robot
Incorporating technology into your DIY cardboard robot can bring it to life and make it more interactive. Here's how you can add some tech flair to your creation:
Simple Circuitry for Lights and Sounds
- LED Eyes: Add a pair of LED lights to serve as the robot's eyes. You'll need LEDs, a battery, and some wires. Connect the LEDs to the battery with the wires, ensuring the positive and negative ends match up.
- Sound Effects: Use a small buzzer or speaker to give your robot a voice. Record a message or sound on a simple sound module and connect it to a button on your robot's body.
Motion with Motors
- Moving Arms: Attach small motors to the robot's arms to make them move. You'll need a motor, a battery, and a switch. Secure the motor to the arm and connect it to the battery and switch.
- Wheels for Movement: Fix wheels to the bottom of your robot and connect them to a motor. This will allow your robot to move forward or backward.
Control with Microcontrollers
- Basic Programming: Use a microcontroller like Arduino for more advanced control. Program it to make the robot's lights blink or to play sounds at certain times.
- Remote Control: For an upgrade, add a Bluetooth module to your microcontroller. This will let you control your robot's movements and actions from your smartphone.
Sensors for Interaction
- Touch: Install touch sensors on your robot. When someone touches the robot, it can respond with lights or sounds.
- Obstacle Detection: Use ultrasonic sensors to help your robot avoid obstacles. The sensor will detect objects in front of the robot and stop it from bumping into them.
Solar Power
- Eco-Friendly Energy: If you want to go green, add a small solar panel to power your robot. This is a great way to teach about renewable energy and sustainability.
Educational Aspects
- Learning Electronics: As you add technology to your robot, you'll learn about electronics and circuitry. This is a valuable skill that can spark an interest in STEM fields.
- Coding Skills: Programming a microcontroller will introduce you to coding, which is an essential skill in today's technology-driven world.
Integrate tech into your cardboard robot for fun and learning. Use simple lights and sounds or advanced programming.
Advanced Projects for Enthusiastic Robot Builders
Once you've mastered the basics of cardboard robot construction, you might be eager to tackle more challenging projects. These advanced projects will not only test your skills but also enhance your understanding of robotics and engineering.
Build a Robotic Arm
- Complexity: Increase the complexity of your designs by building a robotic arm. This project involves making a multi-jointed arm capable of simple tasks like lifting objects or drawing.
- Materials: Use sturdy cardboard, string, rubber bands, and straws for joints and tendons.
- Control: Incorporate syringes filled with water to build a hydraulic control system that can move the arm.
Make a Walking Robot
- Bipedal Design: Challenge yourself by constructing a two-legged walking robot. This design requires careful balance and coordination of parts.
- Mechanics: Understand the mechanics behind locomotion. Experiment with different foot shapes and leg lengths to find the most stable walking pattern.
- Motorization: Add small motors to power the legs if you want the robot to walk without manual assistance.
Program an Autonomous Robot
- Microcontrollers: Use a microcontroller like Arduino or Raspberry Pi to program your robot to perform tasks autonomously.
- Sensors: Equip your robot with sensors to detect light, sound, or obstacles, allowing it to interact with its environment.
- Coding: Write code to process sensor data and make decisions based on that information, such as following a line or avoiding obstacles.
Solar-Powered Robots
- Renewable Energy: Take a step towards sustainability by powering your robot with solar panels.
- Energy Storage: Learn about energy storage by adding a rechargeable battery that stores solar power.
- Efficiency: Experiment with different panel angles and positions to find the most efficient setup for solar energy collection.
Robotics Competition
- Community Engagement: Participate in a local or online robotics competition. This is a great way to showcase your work and learn from others.
- Design Brief: Follow a design brief or set of rules to build a robot that can complete specific challenges.
- Teamwork: Collaborate with friends or community members to build a robot together, combining different skills and ideas.
Advanced projects expand the limits of cardboard and basic electronics, deepening robotics skills and creativity. Gather materials and power tools, and build amazing robots!
Troubleshooting Common Issues with DIY Cardboard Robots
When building a DIY cardboard robot, you might encounter a few hiccups along the way. Here's a helpful guide to troubleshooting common issues, ensuring your robot-building experience is smooth and enjoyable.
Parts Not Sticking Together
- Solution: Make sure you're using the right adhesive for cardboard. Glue sticks, double-sided tape, or hot glue guns work best. If parts still don't stick, try using binder clips or clothespins to hold them together while the glue dries.
Robot Parts are Too Flimsy
- Solution: Reinforce parts by doubling up the cardboard. You can also use straws or skewers as a frame to provide extra support.
Robot Won't Stand Up
- Solution: Check the balance of your robot. The feet may need to be wider or heavier. Consider gluing coins or small weights to the base to add stability.
Moving Parts are Stuck
- Solution: Ensure there's enough space at the joints for movement. If they're too tight, gently widen the holes. If they're too loose, add a small piece of cardboard as a filler to tighten the joint.
Decorations are Falling Off
- Solution: Decorations should be lightweight to avoid falling off. Use lighter materials like paper or thin fabric, and secure them well with appropriate adhesives.
Robot Looks Too Plain
- Solution: Add more personality! Use markers, paint, stickers, or any other craft supplies to give your robot character. Think about adding features like a face, buttons, or antennas.
Difficulty Following Instructions
- Solution: Take it one step at a time. If written instructions are confusing, try looking for video tutorials or ask someone with more experience for help.
Building a DIY cardboard robot is a process of trial and error. Don't get discouraged by these common issues. With a little patience and creativity, you'll have a unique cardboard companion in no time!
FAQs About DIY Cardboard Robot
Discover answers to common questions about DIY cardboard robots. Learn tips, materials, and essential steps for building your own!
While a basic DIY cardboard robot won’t move on its own, you can design it with movable joints using brads or fasteners. For a more advanced project, you can incorporate simple motors and controllers to add movement.
Unleash your creativity by using markers, paint, or stickers to add color. You can also attach various craft materials like pipe cleaners, paper cups, or fabric scraps to give your robot unique characteristics.
Absolutely! Building a cardboard robot is an excellent STEM activity. It encourages problem-solving, creativity, and basic engineering skills. It's a fun way to introduce children to the concepts of design and mechanics.
To make your cardboard robot last longer, reinforce the joints and connections with extra layers of cardboard or use duct tape for added strength. Consider coating the finished robot with a clear sealant to protect it from moisture and wear.
Building a DIY cardboard robot can help achieve several educational goals:
Engineering Principles: Understanding the basics of construction and design.
Artistic Skills: Developing a sense of aesthetics and design through decoration.
Environmental Awareness: Learning about recycling and reusing materials.
Programming Basics: If you choose to add electronic components, it can introduce basic coding concepts.
Closing Thoughts
Wrapping up, learning how to make a robot at home is a rewarding and fun project. It offers hands-on experience with basic electronics and engineering. Following simple guides can help you build your own DIY robot with ease. This activity not only teaches you new skills but also provides a sense of accomplishment. I encourage you to try this at home and enjoy the exciting world of robotics.


