Making a DIY rope ladder can be a fun and practical project, especially for those who enjoy outdoor activities like bushcraft, camping, or even backyard adventures. We'll cover everything from choosing the right rope to assembling the ladder, ensuring safety, and disassembling it when needed.
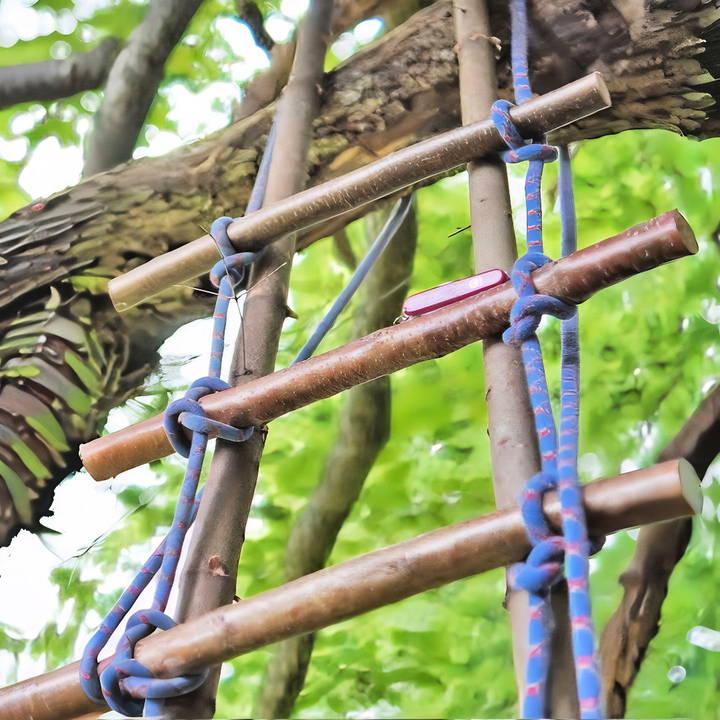
Whether you want to climb trees or access higher spots that a regular ladder can't reach, this tutorial will teach you how to build a rope ladder that is reliable and easy to use. Let's dive in!
Materials Needed for Your Rope Ladder
Before we start, gather the following materials:
- Rope: Natural fiber ropes such as jute or hemp are ideal because they provide better grip and less stretch compared to synthetic ropes. However, if you don't have access to natural fiber rope, a synthetic climbing rope can also work.
- Wooden Rungs: You will need sturdy wood pieces to act as the rungs of the ladder. You can use branches, dowels, or even pre-cut wooden rods.
- Tent Pegs or Ground Anchor: These are used to secure the bottom of the rope ladder while assembling it from the ground.
- A Hammer or Mallet: To drive the tent pegs into the ground.
- A Knife or Saw: For cutting the wooden rungs to the desired length.
Safety Note: Inspect the materials before building to ensure they are in good condition. Avoid using rotten or weakened wood for the rungs, and make sure the rope is strong enough to support your weight.
Step by Step Instructions
Make a sturdy DIY rope ladder with our step-by-step guide. Learn safety tips and techniques from selecting rope to adding stability.
Selecting and Preparing the Rope
Choosing the right rope is essential for the stability of your ladder. As mentioned earlier, natural fiber ropes like jute or hemp are excellent choices due to their low stretch and high friction properties. However, if you're using synthetic rope, ensure it's thick enough (around 8-10 mm in diameter) and strong enough to handle the weight it will bear.
- Measure and Cut the Rope: Depending on how high you want the ladder to be, cut two equal lengths of rope. These will be the sides of the ladder, where the rungs will be tied. Make sure the ropes are longer than the height you need, as you will need some extra length to tie knots and secure the ladder.
- Find the Middle of the Rope: To begin, find the center point of both ropes. This will be important when mounting the ladder onto a high beam or branch.
Mounting the Rope to a High Branch or Beam
One of the unique features of this rope ladder design is that you can mount it to a high place from the ground without needing to climb up first. Here's how:
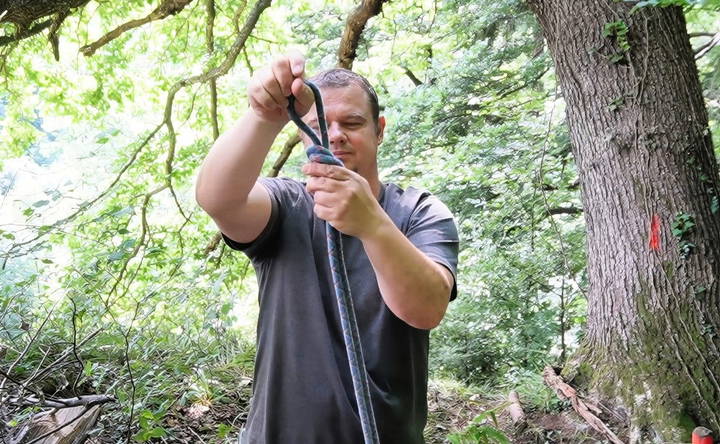
- Make a Loop at the Middle of the Rope: Make a simple overhand knot at the middle of the rope, forming a loop.
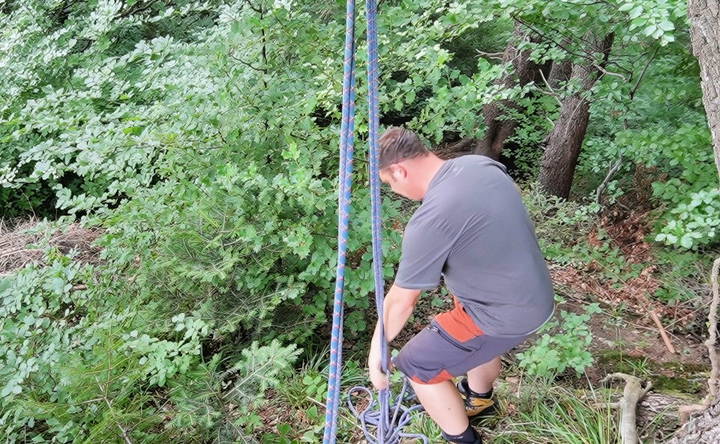
- Throw the Rope Over the Branch: Once you've tied the loop, toss the rope over the branch or beam you want to attach the ladder to. This method allows you to assemble the ladder from the ground, making it perfect for situations where the branch is higher than you can reach.
- Secure the Rope: Pull the rope until the loop reaches the top. Use a tent peg hammered into the ground to secure the rope temporarily, making it easier to work on the ladder assembly without it moving around.
Preparing and Attaching the Wooden Rungs
Now that the rope is secured, it's time to prepare the rungs and attach them.
- Cut the Wooden Rungs: Using a knife or saw, cut your wooden rungs to the desired length. The length of the rungs should be comfortable for stepping on, typically between 12 to 18 inches, depending on the width you want for your ladder.
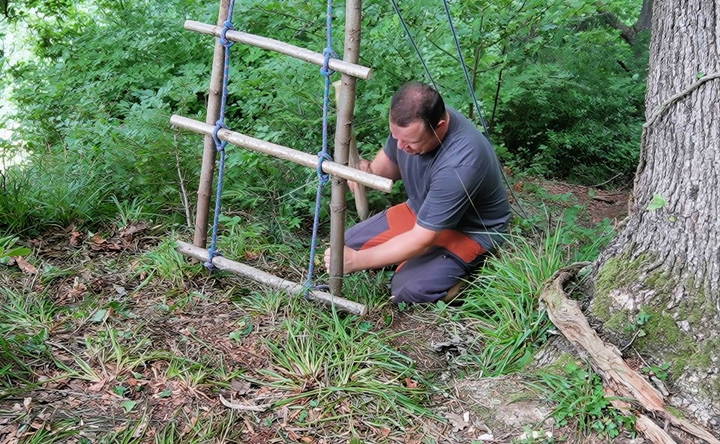
- Attach the Rungs with a Marlin Spike Hitch:
- The marlin spike hitch is a simple and effective knot for attaching the rungs to the rope. Start by holding both strands of the rope with your thumbs pointing downward.
- Make two loops in the rope and pull the standing part of the line through, forming pockets. Insert the wooden rungs into these pockets.
- This knot will keep the rungs parallel and evenly spaced, which is crucial for ladder stability. Repeat this process for each rung.
- Check the Spacing: Ensure that the rungs are spaced evenly, typically around 12 to 18 inches apart. Consistent spacing ensures that the ladder is comfortable and safe to climb.
Final Securing of the Ladder
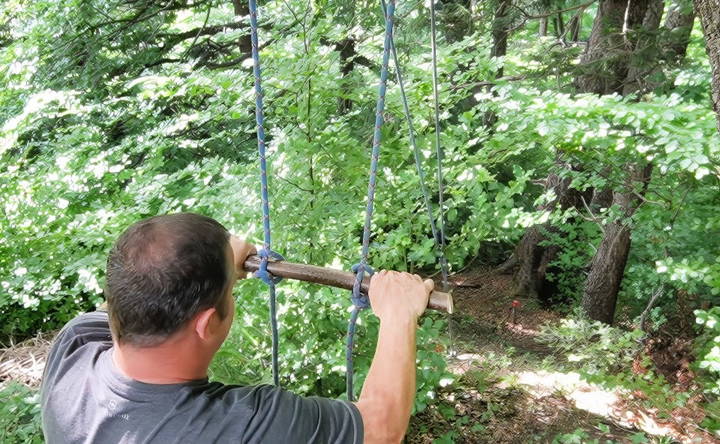
Once all the rungs are attached and the ladder has taken shape, it's time to finalize the attachment to the branch or beam.
- Pull the Rope Tight: Once the top rungs are in place, pull on the rope until the highest rung is positioned just below the branch or beam where the rope is looped.
- Wrap the Rope Around the Branch Again: Throw the rope over the branch a second time. This additional wrap increases friction and helps the ladder stay in place without slipping.
- Secure with a Clove Hitch: As a backup safety measure, tie a clove hitch knot on both sides of the highest rung you can reach. This will lock the ladder in place and prevent the rope from loosening during use.

Adding Stability with Support Poles (Optional)
One common issue with rope ladders is the tendency for the ladder to swing or pull backward when you climb it. To counteract this, you can use two poles to support the ladder:
- Place the Poles Parallel to the Ladder: Take two long poles (long enough to reach the ground from the highest rung) and position them on either side of the ladder.
- Tie the Poles to the Ladder: Use additional rope or string to tie the poles to the rungs. This will help stabilize the ladder and make it feel more like a traditional fixed ladder when climbing.
Climbing and Safety Considerations
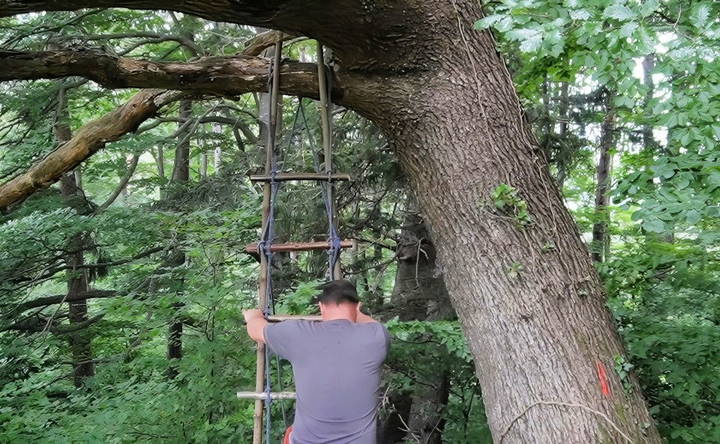
Now that your ladder is built, it's time to climb! However, before you do, take a moment to go over these safety considerations:
- Inspect the Ladder Before Every Use: Rope ladders, especially those made with natural materials, should be inspected before each use. Ensure that none of the rungs are cracked or rotten, and that the knots and anchor points are secure.
- Use with Caution: It's important to remember that a rope ladder is generally meant for temporary use and should not be used for climbing great heights. As a rule of thumb, avoid climbing more than 3 to 4 meters using a rope ladder. For higher climbs, use professional climbing gear.
- Maintain Balance: Rope ladders tend to sway, so it's crucial to maintain your balance when climbing. Always face the ladder and climb slowly, keeping your body close to the rungs.
Disassembling the Rope Ladder
One of the advantages of this rope ladder design is that it can be easily disassembled from the ground. Here's how to take it down:
- Loosen the Clove Hitch Knots: Start by loosening the clove hitch knots securing the top of the ladder.
- Throw the Rope Over the Branch Again: Throw the rope over the branch from the opposite side to release the friction holding the ladder in place.
- Pull the Ladder Down: Once the knots are undone and the friction reduced, you can simply pull the ladder down from the ground.
The marlin spike hitch allows you to easily remove the rungs and store the rope ladder for future use.
Conclusion: Your DIY Rope Ladder is Ready!
Building a rope ladder is a rewarding project that can provide practical solutions for outdoor adventures. With just a few materials, some basic knots, and a little patience, you can make a safe and functional rope ladder that you can mount and disassemble entirely from the ground.
FAQs About DIY Rope Ladder Construction
Discover essential FAQs about DIY rope ladder construction. Learn materials, safety tips, and step-by-step guidance in crafting your own ladder.
It’s best to use natural fiber ropes like jute or hemp, which offer less stretch and more grip than synthetic ropes. However, synthetic ropes such as nylon or polyester can also be used if natural fiber rope isn’t available. Ensure the rope is strong enough to support your weight, ideally with a tow load of 250 kg.
Yes, paracord (specifically 550 paracord) can be used to build a rope ladder. However, it may not be as sturdy as thicker, natural fiber ropes and could stretch under weight, so it is best suited for lighter loads or temporary use.
The best way to keep the rungs level is by using a marlin spike hitch knot. Working on both strands of the rope at the same time helps ensure the rungs are positioned evenly. This method allows you to attach the rungs parallel on the first attempt.
Start by finding the middle of your rope and making a simple overhand knot to form a loop. Toss the loop over the branch, pull on one side until you have the desired length of rope, and secure it with a clove hitch. This allows you to assemble and disassemble the ladder from the ground.
To minimize swaying, you can attach two support poles to the sides of the ladder. This stabilizes the ladder and makes it safer and easier to climb, providing more balance as you ascend.
First, loosen the clove hitch on both sides of the rope ladder. Then, throw the rope over the branch again to reduce friction, and finally, pull the ladder down from the ground. The marlin spike hitch allows for easy removal of the rungs without damaging the rope.
The rungs should be spaced approximately 12 to 18 inches apart for comfortable and safe climbing. Consistent spacing ensures that the ladder remains stable and easy to use.
This rope ladder is best suited for temporary use and lower heights (up to 3-4 meters). For higher or permanent climbing needs, consider using professionally manufactured equipment designed for safety at greater heights.
Always check the ladder before use to ensure all rungs and knots are secure. Inspect for any signs of wear on the rope or wood, and make sure the anchor points and knots haven't loosened.


