When I first discovered how to make a simple rubber band gun, I was surprised at how easy and enjoyable the process could be. I stumbled upon a cool version of a rubber band shooter at a sporting goods store. While it was neat, the price tag—$16 for the gun and an additional $2 for the rubber bands—made me think, "I can definitely do better than that!" So, I started experimenting with materials I had on hand and created a free, equally functional alternative.
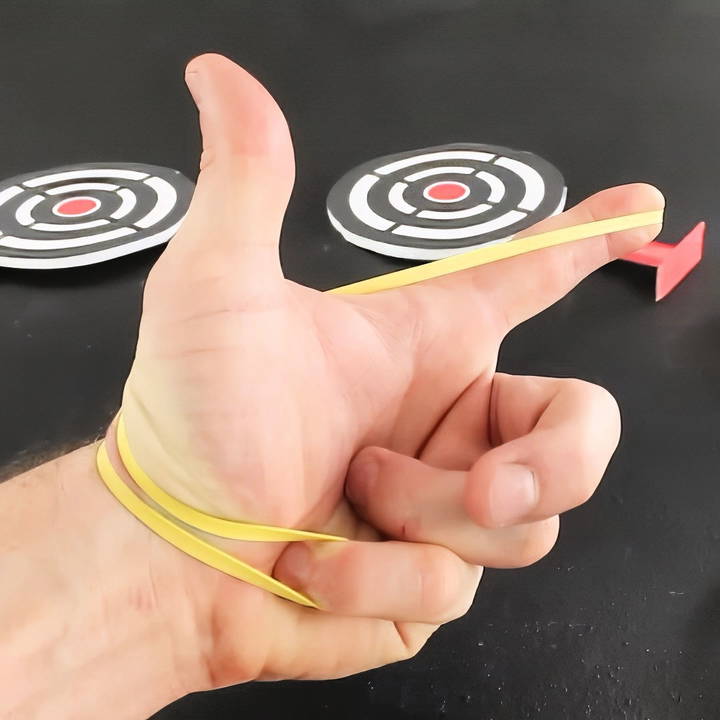
In this guide, I'll walk you through how to make a semi-automatic rubber band gun using just a handful of rubber bands and your fingers. It's a simple, no-cost project that delivers hours of fun, whether you're playing solo or competing with friends.
Materials You'll Need
One of the best things about this project is that you likely already have everything you need:
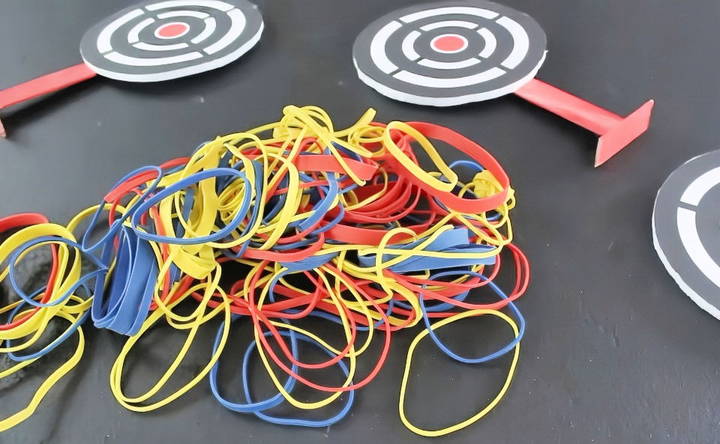
- Rubber Bands: Ideally, you want to use thicker rubber bands, about the width of three fingers pressed together. Thicker bands provide more tension and power, making them perfect for launching. I found that colored rubber bands, which are available at dollar stores, add a fun visual element, but any rubber bands you have lying around will work.
Step by Step Instructions
Now, let's dive into the process. It's quick, easy, and surprisingly effective. With just a few steps, you can build this in minutes.
1. Selecting the Right Rubber Bands
Start by choosing your ammunition. The thicker and wider the rubber band, the better your shots will be. You want to go for bands that are thick enough to generate enough force but not so thick that they become hard to handle. Typically, a width equivalent to three fingers will do the trick.
2. Loading the Rubber Band
To load the rubber band gun, follow these simple steps:
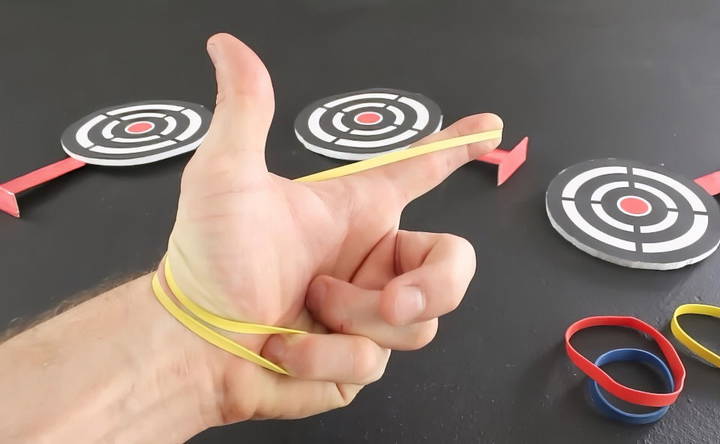
- Hold one end of the rubber band with your pinky finger.
- Stretch it around the back of your hand and secure the other end on the tip of your pointer finger.
And that's it! Your rubber band gun is now primed and ready to fire.
3. Firing the Rubber Band
When you're ready to shoot:
- Use your pointer finger to aim at your target.
- Open your pinky finger to release the rubber band and launch it toward your target.
With a little practice, you'll find that your aim improves quickly. I found this method simple yet satisfying, especially when I was able to hit multiple targets in a row.
Taking It to the Next Level: Semi-Automatic Mode
Now, here's where things get interesting. After learning the basic setup, I realized I had two extra fingers just sitting there. This gave me an idea: What if I could load multiple rubber bands at once? It turns out, you can!
1. Loading Multiple Bands
Here's how you turn your rubber band gun into a semi-automatic:
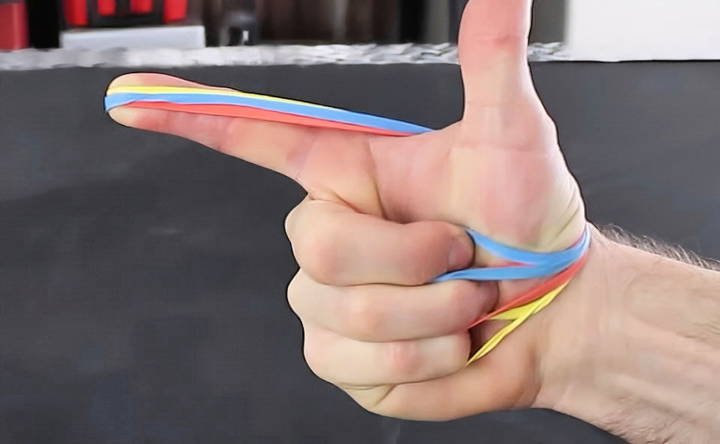
- Load the first rubber band as you did before.
- Take a second rubber band and hook it onto your fourth (ring) finger.
- Finally, add a third rubber band to your middle finger.
2. Semi-Automatic Firing
Now, you're armed with three rubber bands ready to fire in quick succession. Fire the first shot by releasing your pinky finger, then release the second band from your fourth finger, and finally release the third band from your middle finger. With this setup, you can fire at multiple targets without the need to reload each time.
The best part? With some practice, you can shoot those bands with impressive accuracy and speed. This upgrade makes the rubber band gun much more fun to use, especially in friendly competitions.
Advanced Technique: Shotgun Mode
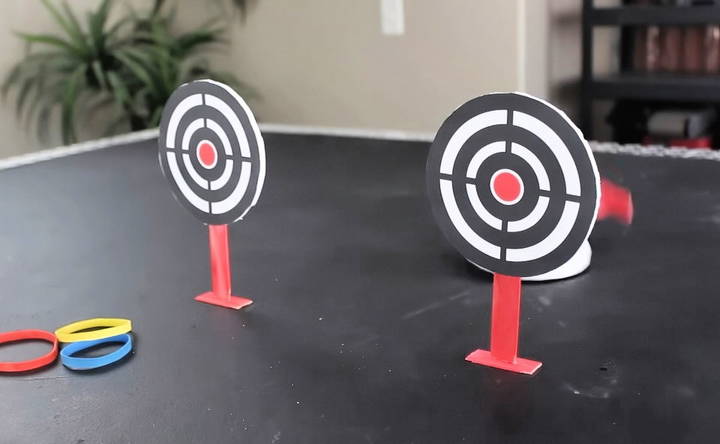
Feeling ambitious? Here's another cool trick I learned: shotgun mode. This allows you to fire all the rubber bands at once, giving you a powerful spread shot that can hit small targets or deliver maximum force to a close-range object.
How to Activate Shotgun Mode
- Load the rubber bands as described in the semi-automatic setup.
- Instead of releasing each band individually, open all your fingers at the same time.
This results in all the rubber bands flying off at once, creating a wider spread. It's great for hitting multiple smaller targets or just adding an extra punch to your shots.
Tips and Tricks for Better Performance
Over time, I've learned a few things that can help you get the most out of your homemade rubber band gun:
- Choose your ammo wisely: As I mentioned earlier, thicker rubber bands work best. Thinner ones don't generate as much force and can be harder to aim.
- Practice your aim: Accuracy improves with practice. Try targeting objects at different distances to get a feel for how much tension to use.
- Play safely: While this rubber band gun is all in good fun, it's still a projectile weapon, so be mindful of where and at whom you're shooting. Avoid aiming at faces, eyes, or fragile items.
Customization Ideas
Customizing your DIY rubber band gun can make the project more fun and personal. Here are some easy and creative ideas to get you started:
Design Variations
- Shapes and Sizes: Experiment with different shapes and sizes. You can make a compact, pocket-sized version or a larger, more elaborate model.
- Materials: Use various materials like wood, plastic, or even metal for different looks and feels.
Decorations
- Paint and Colors: Paint your rubber band gun in your favorite colors. Use spray paint for a smooth finish or acrylic paint for detailed designs.
- Stickers and Decals: Add stickers or decals to give your gun a unique look. You can find themed stickers or create your own.
Advanced Features
- Multi-Shot Mechanism: Upgrade your gun to shoot multiple rubber bands in quick succession. This can be done by adding a rotating barrel or multiple triggers.
- Improved Trigger: Enhance the trigger mechanism for smoother and more reliable shooting. Consider using springs or elastic bands for better performance.
Personal Touches
- Engraving: If you're using wood or metal, consider engraving your name or a special design onto the gun.
- Handles and Grips: Add custom handles or grips for better comfort and control. You can use foam, rubber, or even leather.
Functional Additions
- Sight and Aim: Attach a simple sight to improve your aim. This can be a small piece of plastic or metal aligned with the barrel.
- Storage: Create a small compartment to store extra rubber bands. This can be a hollow section in the handle or a clip attached to the side.
Themed Designs
- Movie or Game Replicas: Design your rubber band gun to look like a weapon from your favorite movie or video game. This can be a fun way to combine your interests.
- Historical Styles: Create a rubber band gun that resembles historical firearms. This can be a great way to learn about history while having fun.
Safety Enhancements
- Soft Tips: Add soft tips to the ends of your rubber bands to make them safer. This can be done with small pieces of foam or rubber.
- Safety Lock: Incorporate a safety lock to prevent accidental firing. This can be a simple switch or latch that blocks the trigger.
By customizing your rubber band gun, you can make it truly your own. These ideas not only enhance the appearance but also improve functionality and safety.
Troubleshooting Guide
Building a DIY rubber band gun can be a fun project, but sometimes, things don't go as planned. Here's a troubleshooting guide to help you solve common issues:
Rubber Bands Not Shooting Properly
- Check Tension: Ensure the rubber bands are stretched enough to create tension. If they are too loose, they won't shoot effectively.
- Correct Placement: Make sure the rubber bands are placed correctly on the gun. They should be securely hooked on the trigger and the firing mechanism.
Trigger Mechanism Issues
- Stuck Trigger: If the trigger is stuck, check for any obstructions. Clean the area and ensure all parts move freely.
- Weak Trigger: If the trigger feels weak, consider reinforcing it with additional materials like a stronger spring or elastic band.
Misfiring or Inconsistent Shooting
- Alignment: Ensure the barrel and trigger are properly aligned. Misalignment can cause the rubber bands to shoot off target.
- Smooth Surfaces: Check that all surfaces the rubber band touches are smooth. Rough edges can snag the rubber band and affect shooting.
Structural Problems
- Loose Parts: Tighten any loose screws or connections. Loose parts can affect the stability and performance of the gun.
- Material Quality: Use sturdy materials for construction. Weak or flimsy materials can lead to structural issues.
Rubber Bands Breaking
- Quality of Rubber Bands: Use high-quality rubber bands that are less likely to break. Cheap rubber bands can snap easily.
- Proper Storage: Store rubber bands in a cool, dry place to prevent them from becoming brittle.
Safety Concerns
- Sharp Edges: Sand down any sharp edges to prevent injuries. Smooth surfaces are safer and more comfortable to handle.
- Protective Gear: Always wear safety glasses when testing the gun to protect your eyes from accidental shots.
Performance Enhancements
- Lubrication: Apply a small amount of lubricant to moving parts to ensure smooth operation.
- Regular Maintenance: Regularly check and maintain your rubber band gun to keep it in good working condition.
Common Mistakes
- Overloading: Avoid overloading the gun with too many rubber bands. This can cause jams and reduce performance.
- Improper Assembly: Follow the assembly instructions carefully. Incorrect assembly can lead to various issues.
By following this troubleshooting guide, you can address common problems and ensure your DIY rubber band gun works smoothly.
FAQs About DIY Rubber Band Guns
Discover FAQs about DIY rubber band guns - learn safety tips, building steps, and customization in our comprehensive guide.
A DIY rubber band gun is a homemade toy that shoots rubber bands. It can be made from simple materials like wood, cardboard, or even popsicle sticks. These guns use the elastic potential energy of stretched rubber bands to launch them as projectiles.
Yes, there are various designs, including:
Pencil peashooters: Made with pencils and clothespins.
Rifles: Made with longer pieces of wood for a more realistic look.
Cardboard guns: Made using cardboard and basic supplies.
Rubber band guns can be safe if used responsibly. Always aim away from people and animals. Wear protective glasses to avoid eye injuries. Supervise children to ensure they use the toy safely.
The shooting distance depends on the design and the strength of the rubber bands. Simple designs can shoot rubber bands up to 10-20 feet. More advanced designs with stronger rubber bands can shoot even farther.
You can set up target practice games, create obstacle courses, or have friendly competitions with friends. Always ensure safety rules are followed during play.
Final Thoughts
Making your own DIY rubber band gun is a simple, cost-free way to have fun and test your aim. It's also a project that encourages creativity, whether you're trying to improve your shooting accuracy, challenge friends, or invent new techniques like the semi-automatic and shotgun modes.
What's great is that you don't need to spend money on fancy equipment to have a good time. With a handful of rubber bands and your hands, you can create hours of entertainment. So, next time you're looking for a quick DIY project or a fun way to spend an afternoon, give this a try—you won't be disappointed!
And remember, practice makes perfect. The more you use your rubber band gun, the better you'll get at hitting targets and impressing your friends with your accuracy. So, grab those rubber bands and get started!


