Making a rug at home can be an enjoyable and rewarding project. You can make a personalized piece that fits perfectly with your decor using simple materials and methods. This guide will walk you through the steps of making a rug with clear and easy-to-follow instructions. You'll learn the basics, from gathering essential supplies to completing your project with a finishing touch.
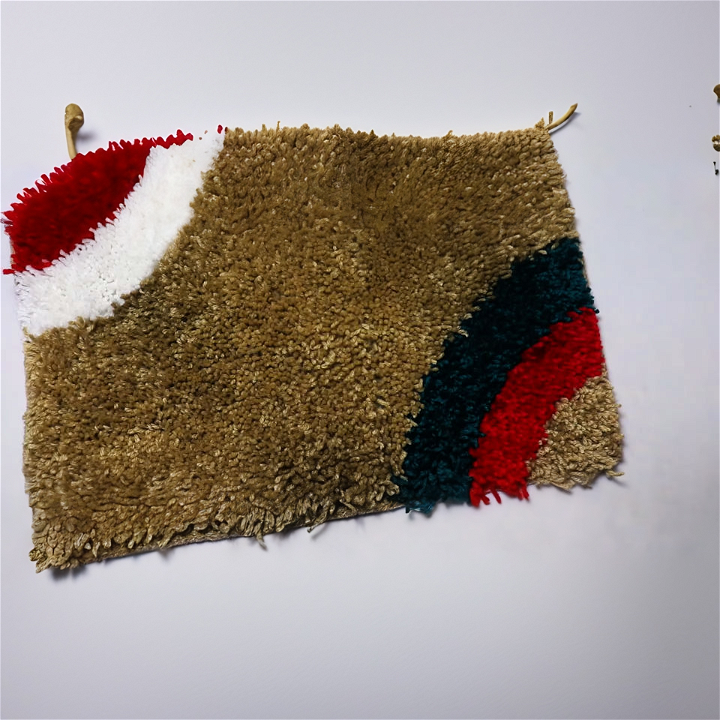
Making a DIY rug gives you the freedom to choose your style, size, and color, ensuring it meets your specific needs. Whether you're using fabric scraps, yarn, or old t-shirts, the process is both fun and creative. Expect to spend some time and effort, but the result will be a beautiful, unique rug that you can proudly display in your home.
Excited to start your rug-making project? Continue to the next section to gather the necessary materials and start crafting your homemade rug.
Materials Needed & Their Importance
Gathering all the necessary materials is crucial before embarking on this project. Here's what you'll need:
- Non-slip Canvas: This serves as the base of your rug. I opted for a non-slip version to ensure safety and durability.
- Scissors: Essential for cutting yarn and trimming the rug.
- Crochet Hook (3mm recommended): This tool is pivotal for pulling the yarn through the canvas holes, making the shaggy effect.
- Chunky Yarn: You can choose a single color or multiple colors for a vibrant, multi-colored rug. The chunky texture is ideal for a cozy feel.
- Yarn Needle (optional): Helpful for weaving in any loose ends, ensuring your rug has a neat finish.
Understanding why each material is needed ensures you're prepared and can streamline the process, making your crafting experience enjoyable and efficient.
Step by Step Instructions
Learn to make a beautiful rug with step-by-step instructions: start with the border, fill in the rug, work on long rows, and add finishing touches.
Starting with the Border
- Beginning the Border: I started by focusing on the border. Skipping the first row and column of the canvas, I inserted the hook into the second row and column. This method helps in making a stable edge that frames the rug.
- Making the Single Crochets: Inserting the hook, pulling through the yarn, and forming a simple chain led to my first stitch. Continuing this technique around the canvas while adding three stitches at each corner ensured a uniform, tight border.
Filling In the Rug
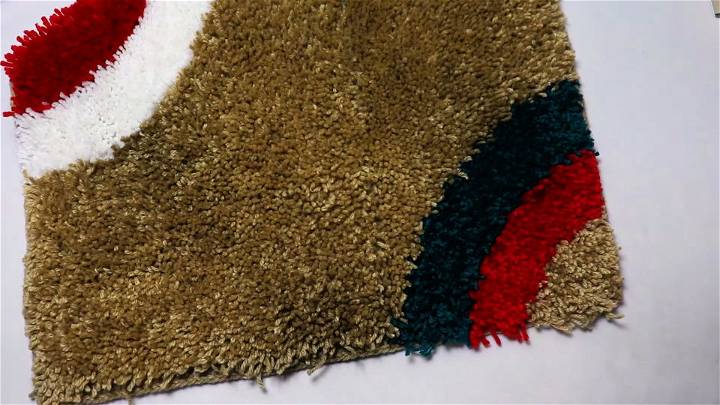
- Starting Any Corner: I chose a corner to begin filling in the rug with my chosen yarn color. Inserting the hook into the canvas and pulling the yarn through to form loops was the central technique.
- Maintaining Loop Size: Ensuring each loop was approximately 1.25 to 1.5 inches tall was essential for consistency.
- Color Changing Technique: As I reached the end of a color section, I secured the yarn by pulling through a loop, then cutting it to switch colors seamlessly.
Working on Long Rows
For longer rows that stretched beyond the needle's capacity, I released loops carefully, continuing the process without losing any work in progress.
Finishing Touches
Once the entirety of the canvas was covered in colorful loops, I examined my rug for any uneven areas. Using scissors to trim down taller loops resulted in a neat, even surface.
Tips and Insights
- Patience Is Key: The process can be time-consuming, especially for larger rugs. Take breaks and work on it in sessions.
- Creative Freedom: Don't hesitate to experiment with colors and patterns. It's a fantastic way to personalize your rug.
- Quality Matters: Opting for durable, soft yarn can significantly impact the comfort and longevity of your rug.
Design Inspiration
When it comes to making your own rug, the design is just as important as the craftsmanship. A well-chosen design can transform a space, adding warmth, texture, and personality. Here’s how to find inspiration and select the perfect design for your handmade rug:
- Explore Color Palettes: Start by considering the color scheme of the room where the rug will be placed. Do you want the rug to stand out with bold colors or blend in with a more muted palette? Use color swatches or online tools to mix and match until you find the perfect combination.
- Consider Patterns and Textures: Patterns can range from simple stripes to intricate geometric shapes. Think about the overall style of your home—is it modern, traditional, or perhaps bohemian? Choose a pattern that complements your decor. Textures also play a crucial role; they can add depth and interest to a rug. Experiment with different materials to achieve the desired feel.
- Draw Inspiration from Nature: Nature is an endless source of inspiration. Whether it’s the organic shapes of leaves and flowers, the flowing lines of landscapes, or the symmetry found in snowflakes and seashells, incorporating natural elements can make a serene and inviting atmosphere.
- Cultural Motifs: Many cultures have a rich tradition of rug-making with distinctive motifs and patterns. Researching these can not only provide design ideas but also help you understand the history and meaning behind the designs.
- Personalize Your Design: Your rug should reflect your personality. Consider incorporating symbols or imagery that have personal significance. This could be anything from a family crest to a favorite animal or even an abstract representation of a cherished memory.
- Sketch and Experiment: Don’t be afraid to sketch out your ideas on paper. Play with shapes and configurations until you find a design that resonates with you. If you’re able, use design software to visualize your rug in the intended space.
- Stay Trend-Aware: While it’s important to choose a design that you love, being aware of current trends can help ensure your rug feels contemporary. Look at interior design blogs, magazines, and social media for the latest styles.
The most important aspect of your rug’s design is that it speaks to you and fits your space.
Advanced Techniques
Having mastered basic rug making, explore advanced techniques to transform your projects into intricate art. Here's a guide to challenge and inspire:
- Tapestry Weaving: This method involves interlacing various colored wefts and warps to make a pictorial design on your rug. It’s a time-honored technique that allows for detailed imagery and complex patterns.
- Hand-Tufting: With a tufting gun or tool, you can push yarn through a fabric base to make a plush, textured surface. This technique is great for making soft, durable rugs with a professional finish.
- Hooking and Punch Needle: These techniques involve pulling loops of yarn or fabric through a stiff woven base to make a pile. Hooking gives you a more traditional look, while the punch needle makes a looped, fluffy texture.
- Overdyed Rugs: Overdying is a coloring technique in which you take a rug with a preexisting pattern and apply a new color over it. The result is a vibrant, modern rug with a hint of traditional design peeking through.
- Shibori Dyeing: Inspired by the Japanese method of resist dyeing, shibori involves folding, twisting, and binding the rug material before dyeing to make unique, organic patterns.
- Carving and Sculpting: After tufting your rug, you can carve and sculpt the pile to make different levels and textures. This adds a three-dimensional aspect to your rug, making it stand out.
- Mixing Mediums: Don’t limit yourself to just yarn or fabric. Incorporate beads, sequins, or even recycled materials into your rug for a unique, eclectic look.
- Advanced Finishing Techniques: Learn how to professionally finish the edges of your rug with binding, serging, or fringing for a polished look that will also prevent fraying.
Explore advanced techniques to push traditional rug-making boundaries and craft unique pieces.
Troubleshooting Common Problems
Making a rug is a rewarding project, but it can come with its own set of challenges. Here are some common problems you might encounter and how to solve them:
Uneven Edges
- Solution: Ensure your tension is consistent when weaving or hooking. Use a ruler to check your work regularly and make adjustments as needed.
Curling Corners
- Solution: This often happens due to tight tension. Try relaxing your grip and use a heavier backing material to keep the rug flat.
Loops Pulling Out
- Solution: If loops are coming loose, your yarn may be too slippery or not tied securely. Use a different yarn, or make sure to secure each loop with a knot.
Color Bleeding
- Solution: Always test your dyes on a small piece of fabric first. If bleeding occurs, set the color with a fixative or use cold water and a gentle detergent for washing.
Pile Flattening
- Solution: Use a rug beater or vacuum without a beater bar to fluff up the pile. Avoid heavy furniture on soft pile rugs.
Fraying Edges
- Solution: Apply a binding tape or make a hem by folding the edges and stitching them down to prevent fraying.
Pattern Distortion
- Solution: This can occur if your foundation fabric isn’t stretched properly on the frame. Make sure it’s evenly taut before starting your project.
Difficulty in Shaping
- Solution: For intricate shapes, use a stencil or pattern as a guide. Cut your fabric or yarn to the exact shape and size before attaching it to the base.
By anticipating these issues and knowing how to address them, you’ll be better prepared to make a beautiful, handmade rug that will last for years.
Maintenance and Care
Caring for your rug properly ensures it remains a beautiful part of your home for years to come. Here’s a straightforward guide to maintaining and caring for your rug:
- Regular Cleaning: Vacuum your rug regularly to remove dirt and dust. Be gentle with fringe and edges to avoid damage.
- Spot Cleaning: Address spills immediately by blotting with a clean, dry cloth. Avoid rubbing, which can spread the stain.
- Deep Cleaning: Once a year, give your rug a deeper clean. You can do this by shaking it out, using a rug shampoo, or hiring a professional cleaner.
- Rotate Your Rug: To wear evenly, rotate your rug every six months, especially if it’s in a high-traffic area.
- Protect from Sunlight: Direct sunlight can fade your rug over time. Use curtains or blinds to protect it during peak sunlight hours.
- Storage: If you need to store your rug, roll it with the pile inside and wrap it in a breathable fabric. Keep it in a cool, dry place.
- Professional Repairs: For tears or serious damage, consult a professional. They have the tools and expertise to repair your rug without further damage.
- Avoid Harsh Chemicals: Harsh chemicals can damage rug fibers. Always use cleaners that are safe for your specific rug type.
Follow these steps to keep your rug looking new. Regular care extends your rug's life. Enjoy your handcrafted piece, knowing how to care for it properly.
FAQs About How to Make a Rug
Discover essential faqs about how to make a rug, including materials, techniques, and tips to craft your own beautiful, handmade rug.
The amount of cotton piping needed depends on the size of your rug and the thickness of the piping. For a 5x8 rug, you may need over 200 yards of cotton piping. Thicker piping will require less yardage.
Absolutely! You can choose different colors of cotton piping or even mix thicknesses to make patterns and textures. Your design choices are limitless, allowing you to make a rug that perfectly matches your style.
The time it takes to make a rug can vary greatly depending on the size and complexity of the design. For a simple 5x8 rug, expect to spend several hours over a few days to complete it. The process involves repetitive actions, so it’s a good project to do while watching TV or listening to music.
Handmade rugs should be vacuumed regularly to remove dirt and dust. If it gets stained, spot clean with a mild detergent and water, but avoid soaking the rug. For a thorough cleaning, consider taking it to a professional, especially if it’s large or heavily soiled.
Yes, there are methods to make a rug without netting. For example, you can braid strips of fabric and then sew them together in a spiral or rectangular shape. This method is more time-consuming but results in a durable and reversible rug.
Conclusion
Wrapping up our discussion on how to make a rug at home, it's clear that crafting your own rug can be a rewarding and creative project. With a few materials and some dedication, you can make a unique piece that adds a personal touch to your space. DIY rug projects not only offer customization but also provide a sense of accomplishment. Start your crafting adventure today and enjoy the results of your handmade rug.


