Making a shadow box can be a fun and fulfilling DIY project for any occasion. In this guide, you will learn how to make a shadow box step-by-step. This detailed instruction will help you choose materials, design your layout, and assemble your shadow box with ease. Whether it’s for a personal memory or a special gift, a shadow box can beautifully display treasured items.
From selecting the perfect frame to arranging your items, our guide simplifies the entire DIY shadow box process. You'll find practical tips and tricks for adding depth and personality to your shadow box.
Read on to discover creative inspirations and make your shadow box a memorable keepsake. Now, let's dive into the essential steps to start your DIY shadow box project!
Historical Context and Significance
Shadow boxes have a rich history that dates back centuries, intertwining with the lives of sailors and soldiers who first maked them. These intricate display cases, originally known as “sailor’s valentines,” were crafted from small wooden boxes and often adorned with seashells, miniature ships, and other maritime memorabilia. They served as a tangible narrative of a sailor’s journey and experiences at sea.
The tradition of the shadow box is deeply rooted in naval superstition. It was believed to be bad luck if a sailor’s shadow touched land before they did upon retirement. To counter this, a shadow box was maked to house the sailor’s “shadow”—a collection of personal items and souvenirs from their travels. This box was then presented to the sailor in a ceremonial fashion, symbolizing their accomplishments and memories made during their service.
Gathering Materials
The first step was gathering the necessary materials. For this project, I needed:
- 12 by 12 White Cardstock: The base material for the shadow box layers.
- Spacers: I opted for foam core strips, but 3D Zots or adhesive foam squares are great alternatives.
- Shadow Box Frame: To enclose and display the artwork.
- LED Light Strips (optional): To backlight the shadow box for a stunning effect.
- Cricut Cutting Machine: Essential for cutting out intricate designs cleanly and precisely.
The choice of materials was driven by the need for durability, ease of use, and the effect I wanted to achieve. Each material played a crucial role in the project's success.
Step by Step Instructions
Learn how to design a shadow box step by step: making focal points, crafting backgrounds, designing frames, adding dimensions, and assembling.
Designing the Shadow Box
My design quest began in Cricut Design Space, where I started by uploading Jennifer's template. The key to a visually captivating shadow box is to have a clear focal point, frames that lead the eye towards this focal point, and a well-thought background that complements the entire scene.
Making the Focal Point
My shadow box's theme was a serene lakeside scene. The focal point was a family of deer standing by the water's edge. I found silhouettes of deer in Cricut Access that perfectly matched my vision. Adjusting their sizes and positions, I made sure they were the scene's stars.
Designing the Frames
For the frames, I envisioned layers of trees around the edges to give depth and lead the eye toward the deer. Using tree silhouettes from Cricut Access, I arranged them around the focal point. Each layer of trees was slightly smaller than the previous to make a 3D effect.
Crafting the Background
The background was simple. I chose to have a moon shining brightly above the tranquil scene. A simple circle behind the deer, positioned where the LED lights could illuminate it, maked a magical night-time effect.
Adding Dimensions
To convert this from a flat design to a multi-dimensional art piece, I used foam core strips as spacers between each layer. This spacing is key to achieving the shadow effect, allowing the backlight to beautifully highlight the layers.
Assembling the Shadow Box
After cutting out each layer with my Cricut machine, I carefully assembled them. Starting from the back, I placed the moon layer first, followed by the tree layers, and finally, the deer. Between each layer, I strategically placed the foam core spacers, ensuring even distribution of light when backlit.
Final Touches
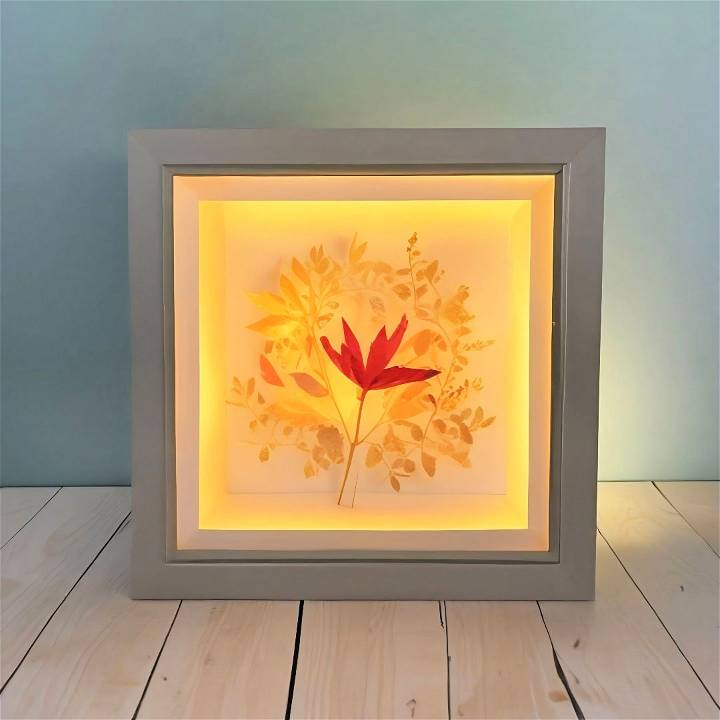
I decided to add LED light strips behind the shadow box for a mesmerizing effect. Placing them around the edge of the frame, I ensured the light was evenly distributed behind the layers. This backlighting brought the entire scene to life, especially in a dimly lit room.
Personalization Tips
Making a DIY shadow box is a wonderful way to display cherished memories and express your creativity. Here are some tips to personalize your shadow box, making it a unique piece that speaks to your experiences and style:
- Reflect Your Journey: Think about the moments that matter most to you. Whether it’s a ticket stub from a concert, a shell from a beach vacation, or a handwritten note, these items tell your story.
- Theme It Up: Choose a theme that resonates with you. It could be as broad as ‘travel’ or as specific as ‘my first marathon’. A cohesive theme brings harmony to your display.
- Color Coordination: Select a color scheme that complements the items you’re showcasing. This can enhance the overall aesthetic and make your shadow box stand out.
- Layer for Depth: Arrange items at different depths to make a 3D effect. Use spacers or stacked elements to give your shadow box more dimension.
- Mix Textures: Combine various textures for a tactile experience. Smooth, rough, soft, or hard—contrasting materials add interest and draw the eye.
- Incorporate Nature: If you love the outdoors, include natural elements like leaves, stones, or wood. These can bring a sense of calm and earthiness to your creation.
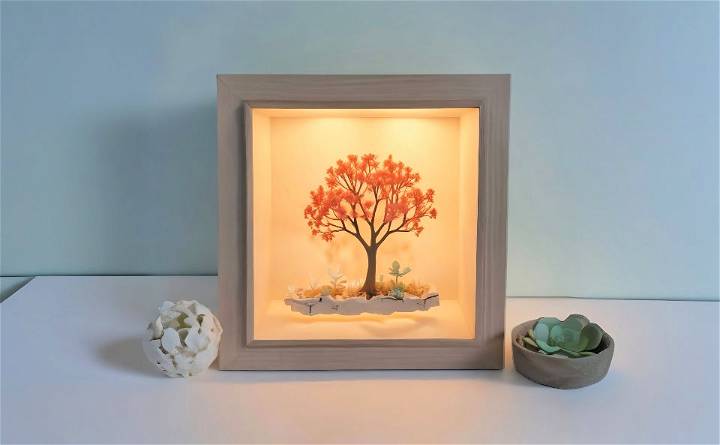
- Light It Up: Consider adding small LED lights or a string of fairy lights to illuminate your shadow box. This can transform it into a night-time focal point.
- Change with Seasons: Make your shadow box dynamic by updating it with seasonal decorations. This keeps it fresh and allows it to evolve with you.
- Add Personal Art: Include your own sketches, paintings, or calligraphy. This adds a personal touch that no one else can replicate.
- Tell a Story: Arrange your items to narrate a story. The layout should guide the viewer through your memories, almost like reading a book.
By following these tips, you’ll make a shadow box that’s not just a collection of items but a heartfelt expression of your life and passions. The most captivating shadow boxes are the ones that are deeply personal and crafted with love.
Advanced Techniques
When you’re ready to take your shadow box to the next level, advanced techniques can add depth, intrigue, and a professional touch. Here’s how to elevate your shadow box with some sophisticated methods:
- Layering: Layer materials to make a multidimensional effect. Use foam or cardboard spacers between each layer to give your display depth and shadow.
- Lighting: Incorporate lighting to bring your shadow box to life. Small LED lights can be placed behind or around objects to highlight them and make ambiance.
- Mixed Media: Combine different materials such as paper, fabric, metal, and wood. This not only adds texture but also interest and complexity to your shadow box.
- Digital Integration: For a modern twist, integrate digital elements like a small screen to display a rotating gallery of images or a short video clip related to your theme.
- Mechanical Elements: If you’re handy with tools, consider adding moving parts. A small motor can rotate an element or make a perpetual motion effect.
- Sound: Adding a sound module can play music or recorded messages when the box is opened or when a button is pressed, making it an interactive experience.
- 3D Printing: Use a 3D printer to make custom objects that fit perfectly within your theme. This allows for a high level of customization and precision.
- Glass Etching: For a more elegant look, etch designs onto the glass of your shadow box. This can be done through stenciling or freehand for a personal touch.
- Interactive Backdrops: Make backdrops that change with viewer interaction. This could be as simple as a material that changes color with heat or a lenticular print that shifts images from different angles.
Using these advanced techniques, your shadow box will stand out in craftsmanship and be a conversation piece. Experiment and enjoy the process. Your shadow box reflects your creativity and skill.
Troubleshooting Common Issues
When crafting a DIY shadow box, you might encounter a few hiccups along the way. Here are some common issues and how to solve them, ensuring your shadow box turns out just as you envisioned:
- Loose Items: If items inside your shadow box move around, secure them with clear double-sided tape or glue dots. These adhesives are strong yet won’t damage your keepsakes.
- Glare on Glass: To reduce glare, position your shadow box away from direct light sources. Alternatively, use anti-reflective glass or a matte display background to minimize reflections.
- Dusty Display: Keep dust at bay by sealing the back of the shadow box tightly. If dust does get in, gently use a can of compressed air to clean the interior without dismantling your arrangement.
- Fading Colors: Protect items from fading due to sunlight by using UV-protective glass. Also, consider placing the shadow box in an area that doesn’t receive excessive natural light.
- Humidity Damage: If you live in a humid climate, include silica gel packets inside the shadow box to absorb moisture and protect against humidity-related damage.
- Alignment Issues: For a straight and even display, use a ruler and level when placing items. Mark light pencil lines on the backing material as guides to ensure everything is aligned.
- Sticking Glass: If the glass front sticks when opening, apply a small amount of clear lubricant on the tracks or edges where the glass slides, ensuring smooth movement.
- Scratched Surfaces: Prevent scratches on the glass by cleaning it with a microfiber cloth and using non-abrasive cleaners. Always handle the glass with care during assembly.
By anticipating these issues and knowing how to address them, you’ll be well on your way to making a beautiful and lasting shadow box display. Patience and attention to detail are your best tools in this creative endeavor.
Maintenance and Preservation
Ensuring that your shadow box remains a timeless display means taking steps to maintain and preserve its contents. Here’s how you can keep your shadow box looking as good as new:
- Choose the Right Materials: Start with acid-free and archival-quality materials to prevent deterioration over time. This includes the backing, adhesives, and any paper or fabric used inside the box.
- Secure Items Properly: Use clear glue dots or archival tape to secure lighter items. For heavier objects, consider sewing them onto the backing with clear monofilament thread.
- Protect from Light: UV-protective glass can shield the contents from fading due to sunlight exposure. Position your shadow box away from direct light to further protect it.
- Control Humidity: Include silica gel packets to absorb excess moisture and protect against humidity, especially important if you’re displaying organic materials like flowers or leaves.
- Dust Regularly: Keep the glass clean and dust-free using a microfiber cloth. If dust accumulates inside, open the box carefully and use compressed air to gently blow it away.
- Prevent Scratches: Handle the glass with care when cleaning or moving the shadow box. Use non-abrasive cleaners to avoid scratching the surface.
- Refresh as Needed: Over time, you may need to replace faded items or update the look. Do so carefully to preserve the integrity of the other items and the overall design.
Follow these steps to keep your shadow box cherished and preserve your memories. A little care keeps your display beautiful and meaningful.
FAQs About DIY Shadow Box
Explore comprehensive faqs about DIY shadow boxes, covering materials, steps, tips, and creative ideas to perfect your custom project.
A shadow box is a display case that allows you to showcase and protect your treasured items, such as photos, memorabilia, and collectibles. It’s like a deep picture frame with a glass front.
Yes, you can convert a regular picture frame into a shadow box by adding depth with spacers or a box attached to the back. Ensure the frame is deep enough to accommodate the items you want to display.
Select items that are meaningful to you and can be safely secured. Consider the theme of your shadow box, such as a memorable trip, a hobby, or a special event. Arrange items in a way that tells a story or creates a visually pleasing display.
When selecting the size for your shadow box, consider the size and number of items you wish to display. Ensure there’s enough space to arrange them without overcrowding. A good rule of thumb is to measure your largest item and add at least 2 inches around it for a comfortable fit.
The arrangement should be aesthetically pleasing and tell a story. Start by placing the largest item first, then arrange smaller items around it. Use layers to make depth, and consider using mounts or stands for three-dimensional objects. Before finalizing, lay out your design on a flat surface to see how it looks.
Conclusion
Wrapping up, learning how to make a shadow box for any occasion is both fun and rewarding. With just a few materials and some creativity, you can make a personalized DIY shadow box to celebrate any event. Remember to gather your mementos, choose a theme, and follow the steps to design a beautiful display. Shadow boxes are perfect gifts or additions to your home decor, offering a unique way to preserve precious memories. Happy crafting!


