Making your own DIY sign can be a fun and rewarding project. Whether it's for home decor, a special event, or just for fun, making signs lets you add a personal touch. You don't need to be an expert to get started; with a few materials and basic tools, anyone can make a beautiful DIY sign. In this guide, you'll learn step-by-step how to make a DIY wood sign that suits your style.
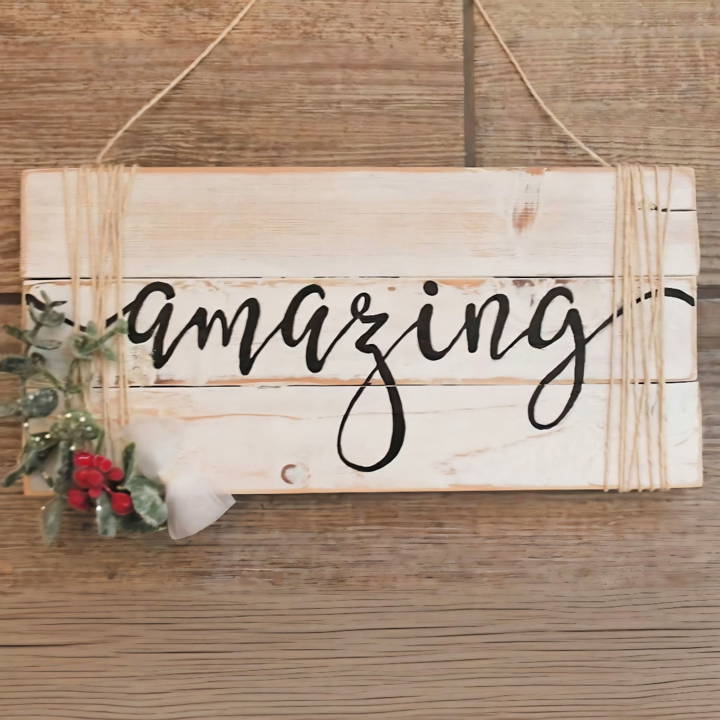
From choosing the right wood to painting and adding final details, this process can be straightforward and enjoyable. You'll begin by gathering necessary supplies like wood, paint, brushes, and stencils.
Following simple instructions, you can make a unique and professional-looking sign. Let's get started, and explore the next section for detailed instructions and tips on making signs at home.
Gathering Your Materials
Before we start, let's talk about what you'll need for this project. Each material plays a crucial role in the transformation process:
- Wood Planks: I chose two planks and cut one in half, but feel free to adjust based on your desired sign size. Wood acts as the canvas for our art.
- Sandpaper: Essential for smoothing out our wooden canvas, ensuring a clean, polished look.
- White or Gray Paint: This will serve as the base color of our sign, setting the stage for our design.
- Fine Brush and Acrylic Paint: For the detailed work, including our lettering and any additional designs.
- Wood Glue and Glue Gun: To bind our wood planks together securely, providing a sturdy base.
- Miscellaneous: A printer for lettering templates, masking tape, and possibly decorative items like string or faux greenery for an extra flourish.
Step by Step Instructions
Learn how to make a DIY sign with step-by-step instructions. From preparing the wood to adding personal touches, make stunning custom signs easily!
1. Preparing the Wood
After selecting and cutting your wood to size, the first step is to glue the pieces together. I apply wood glue for long-term hold and use my glue gun for immediate adhesion. This hybrid method ensures stability as you work and for the final product. Once glued, press the boards together and leave to set briefly.
2. Base Painting
Next, it's time to paint. Opting for a water-based paint for easy clean-up, brush lightly with the grain, ensuring an even, subdued coat. This technique adds depth and character to the wood without overwhelming it. Less is more here; a sparse application achieves a rustic effect.
3. Sanding for Distress
After the paint dries, gently sand the surface and edges. This step is where your sign starts to come to life, revealing the wood's texture beneath the paint, lending a beautifully distressed look. How much you sand depends on the aesthetic you're going for.
4. Transferring Lettering
Now for the creative heart of our project: the lettering. Print out your chosen words or phrases. Scribble on the back of your printouts with a pencil, then tape them onto your sign. Trace over the lettering firmly with a pen or another pencil. This transfers the outline onto the wood, ready for painting.
5. Painting the Details
With your fine brush and black acrylic paint, carefully fill in the lettering. This step requires a steady hand and patience, but it's incredibly rewarding to see your sign come to life.
6. Adding Personal Touches
For a custom flair, I love adding string for hanging and decorative elements like faux greenery or little bows. Use your glue gun to secure these embellishments. This step is your chance to inject a bit of personality and style into the piece.
https://www.youtube.com/watch?v=b6WlGfVokUI&ab_channel=RedRockingBird
Personalization Tips for DIY Home Decor Signs
Making a DIY home decor sign is not just about crafting something with your hands; it's about infusing your space with a piece of your personality. Here are some tips to help you personalize your home decor signs:
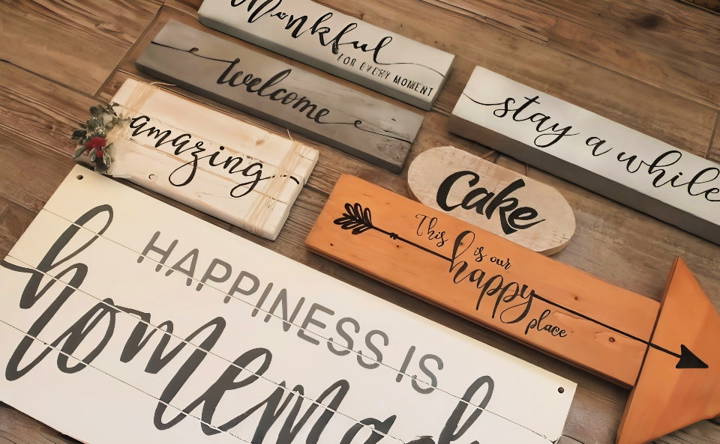
- Reflect Your Interests: Think about what you love. Are you a book lover, a gardening enthusiast, or a music buff? Use quotes, images, or symbols that represent your passions.
- Incorporate Your Name or Initials: Adding your name or initials can instantly make a sign feel more personal. Consider different fonts and styles to match your decor.
- Use Meaningful Dates: Commemorate special occasions like anniversaries, birthdays, or milestones by incorporating dates into your sign design.
- Choose Colors Wisely: Select colors that complement your existing home decor. They should reflect the mood you want to make; calming blues, energizing yellows, or warm neutrals.
- Add a Local Touch: If you have a strong connection to your hometown or a favorite place, incorporate elements from there, such as coordinates, landmarks, or local flora and fauna.
- Involve Family Members: Make it a family affair. Get input from family members or include elements that represent each person in the household.
- Seasonal Themes: Make signs that you can switch out with the seasons or holidays. This keeps your decor fresh and allows for regular updates.
- Handwriting Makes It Unique: Use your own handwriting or calligraphy for an extra personal touch. Even if it's not perfect, it adds character.
- Mix and Match Materials: Don't be afraid to combine different materials like wood, metal, and fabric. This adds texture and interest to your sign.
- Keep It Simple: Sometimes, less is more. A simple design or message can be just as impactful and easier to integrate into various spaces.
The goal is to make something that speaks to you and your family. It's not about perfection; it's about expression. Your DIY sign should make you smile every time you see it.
Troubleshooting Common Issues in DIY Home Decor Signs
When crafting DIY home decor signs, you might encounter a few hiccups along the way. Here's a guide to help you troubleshoot some common issues:
Paint Bleeding
If paint seeps under your stencil, causing blurry edges, make sure to:
- Use a dry brush technique with minimal paint.
- Apply mod podge on the edges of the stencil before painting to seal any gaps.
Wood Splitting
When wood splits as you work on it:
- Pre-drill holes to reduce stress on the wood.
- Use sharp tools to minimize tearing the wood fibers.
Design Transfer Problems
If transferring a design is proving difficult:
- Use graphite paper for an easy transfer.
- Ensure the surface is clean and dry before transferring.
Sticker Residue
Stickers can leave a sticky residue that's hard to remove. Try:
- Rubbing the area with oil (coconut or olive) and then wiping clean.
- Using a hairdryer to heat the residue makes it easier to scrape off.
Uneven Surfaces
For signs with uneven surfaces:
- Sand the area lightly to make a smooth base.
- Apply a primer to even out the texture before painting.
Fading Colors
To prevent colors from fading:
- Use UV-resistant sealants to protect against sunlight.
- Choose high-quality outdoor paints if the sign will be exposed outdoors.
Lettering Issues
If you're struggling with lettering:
- Print out the text and use it as a stencil.
- Practice on scrap material first to get a feel for the brush and paint flow.
Hanging Challenges
For signs that won't hang straight:
- Attach a sawtooth hanger evenly in the center of the sign's back.
- Use double-sided mounting tape for a secure hold without nails.
Patience is key. Take your time, and don't be afraid to try again if something doesn't turn out right. DIY is all about learning and improving as you go!
FAQs About DIY Home Decor Signs
Discover answers to your faqs about DIY home decor signs. Get tips, tricks, and inspiration for making your own unique home decor pieces.
Basic tools will suffice. You might need a hammer, nails, or a nail gun if you’re framing your sign. For cutting wood to size, a saw is necessary. If you’re painting, a simple brush or roller will do.
Absolutely! DIY home decor signs are a great project for beginners. There are many tutorials available that provide step-by-step instructions. Start with a simple design and as you gain confidence, you can try more complex projects.
Smooth plywood is a popular choice due to its even surface and ease of use. Solid pine is another good option. If you prefer a rustic look, reclaimed wood or pallet wood can add character to your sign.
Consider meaningful words or quotes that resonate with you. You can also use symbols, shapes, or even frame a piece of plain paper with your design in a wooden picture frame for a unique twist.
Achieving a professional finish on your painted sign involves a few key steps:
Preparation: Sand your wood surface smoothly to ensure an even application of paint.
Quality Paint: Use high-quality acrylic or chalk paint for a durable finish.
Sealing: After painting, apply a clear sealant to protect your sign from moisture and wear.
Lettering: For crisp lettering, use stencils or a steady hand with paint pens. You can also print out your design and transfer it onto the wood using transfer paper.
Framing: Adding a frame can give your sign a polished look. Use a miter saw or hand saw to cut frame pieces to size and attach them with wood glue and nails.
Final Thoughts
Wrapping up, learning how to make a DIY sign can be a fun and rewarding project. It allows you to express your creativity and personalize your space. DIY wood signs are a great addition to any home decor, adding a personal touch that is uniquely you. Remember, with some effort and the right materials, making your own sign can be a simple and enjoyable process. Happy crafting!


