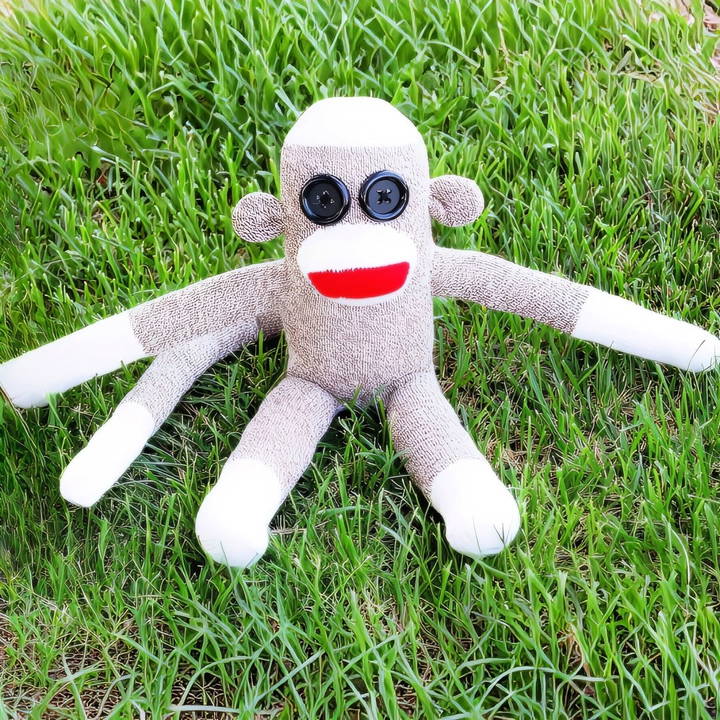
Sock monkeys have a long tradition as cherished homemade toys, dating back to the early 20th century in America. With just a pair of socks and a few simple materials, you can learn how to make a sock monkey—a delightful stuffed animal that will bring joy for years to come. In this guide, we will take you step-by-step, from gathering materials to detailed sewing instructions. Whether you're new to sewing or an experienced crafter, this step-by-step tutorial will help you make a classic sock monkey that's perfect for gifting or keeping as a charming decoration.
Materials Needed
Before diving into the creation process, it's essential to gather all the necessary materials. Here's what you will need:
- A pair of red heel socks: The traditional sock monkey is made using these iconic socks, but you can also choose other socks based on your preference.
- Polyfill or cotton stuffing: This will be used to fill your sock monkey.
- Needle and thread: A strong thread that matches or complements your socks will work best.
- Sewing machine (optional): You can sew by hand, but a sewing machine will make things quicker.
- Scissors: For cutting the fabric.
- Pins: Useful for holding pieces in place as you sew.
- Buttons: For the eyes. You can use safety buttons if you are giving the sock monkey to a child.
- Marking pencil: For drawing guidelines on the fabric.
Step by Step Instructions
Make your own DIY sock monkey with our step-by-step guide, from preparing the sock to adding finishing touches. Perfect for craft enthusiasts!
Step 1: Preparing the Sock
To begin making your sock monkey, set aside one sock for later use, as this will be cut and used for the arms, ears, and tail. For now, take the other sock, turn it inside out, and lay it flat with the heel facing up. This will be the main body and legs of the monkey.
Using a marking pencil, draw a line down the middle of the sock, starting about an inch and a half below the heel. This line will be the division between the legs. At the bottom of the sock (the toe end), draw two curved lines to shape the feet. The next step is to sew down both sides of the central line, making two leg sections without sewing directly on the line itself.
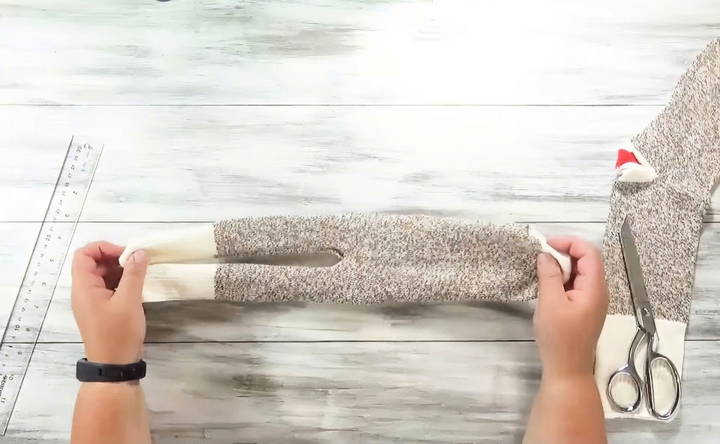
Use a sewing machine or hand sew a quarter-inch seam allowance along the lines. Once sewn, carefully cut between the legs, making sure not to cut into the seams.
Step 2: Turning the Sock Right Side Out and Stuffing
Once the legs are sewn and cut, turn the sock right side out. This will form the main body of the sock monkey. Now, stuff the body with polyfill. Start by filling the legs, ensuring they are firm but not overstuffed. Continue stuffing the rest of the body, packing it tightly to give your monkey a plump and sturdy appearance.
Take your time with this step, as the stuffing process requires more material than you might expect. Be sure to stuff it enough so the monkey holds its shape, but not so much that the fabric stretches too thin.
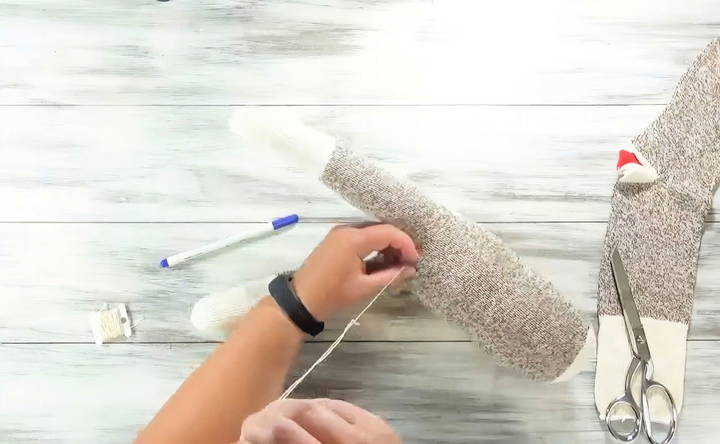
After stuffing, sew up the opening at the top of the monkey. You can do this by hand, making small, tight stitches to keep the stuffing inside. Knot your thread securely and hide the knot by pulling it into the inside of the monkey.
Step 3: Shaping the Feet
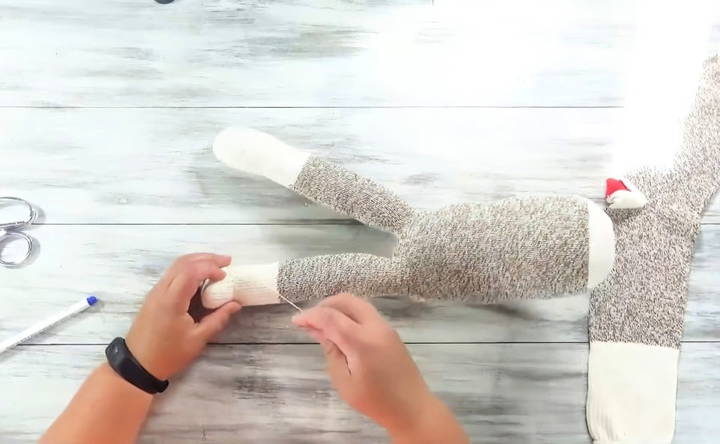
If you want to add more detail to your sock monkey, you can bend the feet slightly to give them more character. To do this, fold the foot area and mark where you want the bend to occur. Sew the two sides together using the same technique as above, keeping the stitches tight. You can adjust the depth of the bend by sewing further or closer to the base of the foot.
Repeat this process on the other foot to make symmetry.
Step 4: Cutting and Sewing the Arms, Tail, and Ears
Now that the body is complete, take the second sock (the one you set aside) and turn it inside out. Lay it flat with the heel pointing to the side. Mark and sew the shapes for the arms, tail, and ears as indicated by your pattern or the guide you are following.
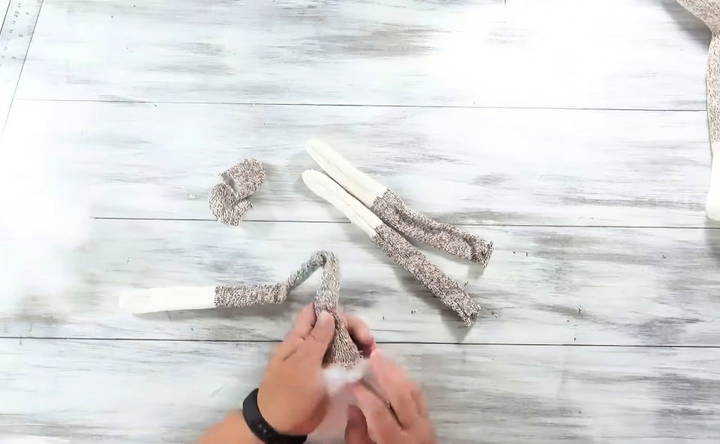
- Arms: Cut two long strips for the arms, sew along the edges, and turn them right side out.
- Tail: Cut a long, slender piece for the tail, sew, and turn it right side out.
- Ears: Cut out small ear shapes, sew them, and lightly stuff them with polyfill.
Once you have all these pieces ready, lightly stuff the arms, tail, and ears with polyfill.
Step 5: Attaching the Muzzle
The muzzle, or mouth area, is a defining feature of the sock monkey. You can cut the muzzle from the second sock, ensuring it's a circular or oval shape large enough to cover the face of the monkey.
Pin the muzzle in place on the face of the monkey. Sew around the edges, leaving a small opening at the top for stuffing. Once the majority of the muzzle is sewn in place, stuff it with polyfill to give it a puffed, rounded look. Sew the remaining part closed and knot your thread securely.
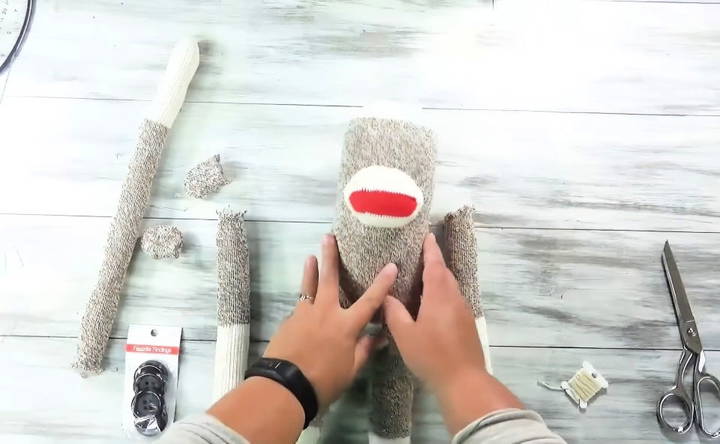
Step 6: Adding the Arms, Ears, and Tail
Now that the muzzle is attached, it's time to add the arms, ears, and tail. Place the arms along the sides of the body, near the bottom of the muzzle. Pin them in place and sew around the edges, making sure to tuck in the raw fabric as you sew.
For the ears, place them at the top of the head, slightly lower than the very top, and sew them in place using tight, small stitches. You can pinch the ears together before attaching them to make a curved shape.
Finally, attach the tail to the back of the monkey, making sure it is centered. Sew it in place, ensuring the tail is secure, especially if the sock monkey is intended as a toy for a child.
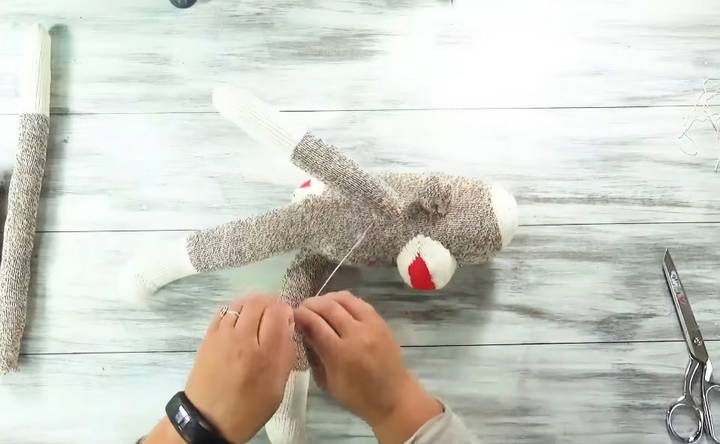
Step 7: Adding the Eyes
For the eyes, you can use buttons or safety eyes. If you're giving the monkey to a child, opt for safety eyes to prevent any choking hazards. Sew the buttons (or safety eyes) onto the face, just above the muzzle, placing them close together for a classic look.
Before sewing, mark the spots where the buttons will go so you can position them perfectly. Sew through the buttonholes and ensure the buttons are tightly secured.
Step 8: Finishing Touches
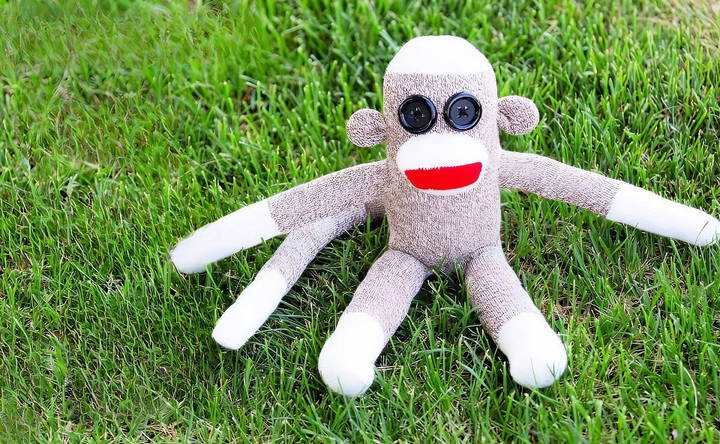
At this stage, your sock monkey is almost complete! If you'd like, you can add additional features such as a stitched mouth or eyebrows. Some people choose to stitch a line across the muzzle to make a smile, but this is optional, as the red heel of the sock often gives the illusion of a mouth on its own.
To finish your sock monkey, take a moment to inspect all the seams and make sure everything is securely sewn. You can also accessorize your sock monkey with a scarf, hat, or bow, giving it a unique personality.
Tips and Tricks for Success
- Be Patient with Stuffing: One of the most critical parts of making a sock monkey is the stuffing process. Don't rush through this step, as the right amount of stuffing will determine how well your sock monkey holds its shape.
- Secure Stitches: Make sure all your stitches are secure, especially if the sock monkey is going to be a child's toy. Pay special attention to the seams around the arms, legs, and tail.
- Experiment with Socks: While red heel socks are the traditional choice, don't hesitate to experiment with different socks. Patterned socks can make for some unique and colorful sock monkeys.
- Safety First: If your sock monkey is meant for a child, opt for safety eyes and avoid using small buttons or embellishments that could become choking hazards.
- Personalize Your Monkey: Add fun accessories like a tiny scarf or hat to give your sock monkey some extra character!
Conclusion
Making a sock monkey is not only a fun DIY project but also a great way to make a keepsake or a toy with a personal touch. With a little patience and creativity, you can transform a simple pair of socks into an adorable, huggable sock monkey that's sure to bring joy to both children and adults alike.
FAQs About DIY Sock Monkey
Discover answers to common questions about DIY sock monkey, from materials needed to step-by-step instructions for crafting your own.
Ensure your stitches are close together, especially when closing openings like the top of the head, muzzle, and limbs. Tight stitches prevent stuffing from coming out, and knotting your thread securely will keep everything in place.
Carefully measure and mark the center line of the sock before sewing the legs. Use pins to secure the fabric, which helps prevent uneven sewing. Double-check your seam allowances before cutting between the legs.
Stuffing is a matter of preference, but generally, you want the sock monkey to be firm without overstretching the fabric. Add more polyfill than you think, and adjust to your desired firmness while keeping the seams intact.
You can use felt, embroidery thread, or purchase safety eyes, especially if the sock monkey is for a child. These options create secure, child-safe eyes while maintaining the classic look.
Avoid overstuffing the monkey. If your fabric stretches too much, use a needle and thread to reinforce the stretched areas or consider using socks with thicker fabric for better durability.
Yes! Many people make variations like sock creatures, sock Sasquatches (without tails), or colorful monkeys using patterned socks. Let your creativity flow by experimenting with different designs and details.
Pin the tail in place first, then use strong thread to sew it securely using tight stitches around the base. This ensures the tail stays firmly attached, especially when used as a child's toy.
If your stitches are visible, try smaller, tighter stitches. You can also use thread that matches your sock color to make the stitching less noticeable.


