Learn how to make a Swedish fire log with easy-to-follow steps. Fire logs, also known as torches, are efficient outdoor cooking methods and add charm to your camping experience. You'll only need a few materials and some basic tools. With this guide, you'll soon build a perfect fire log that burns brightly and lasts long.
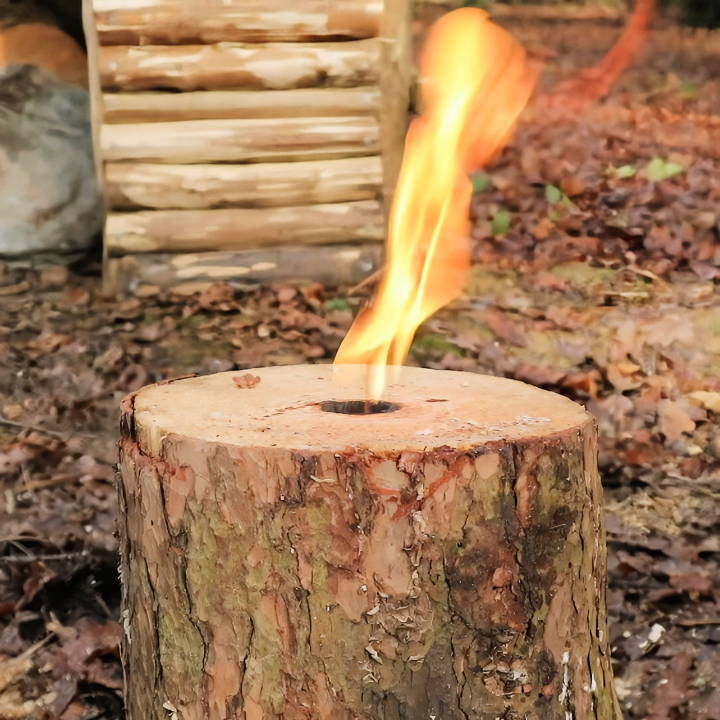
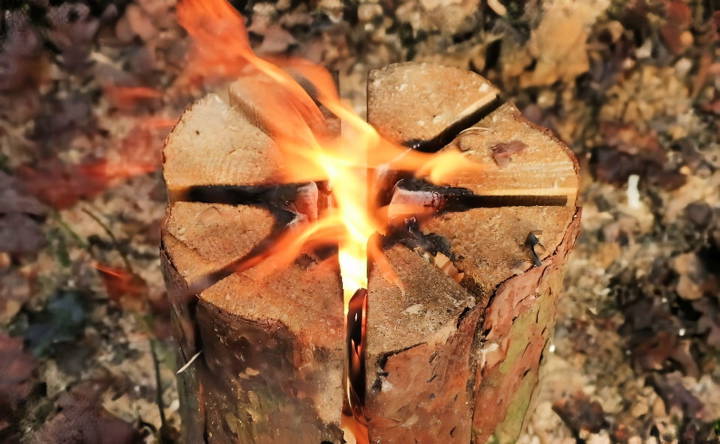
Making a Swedish Torch involves cutting logs in a specific way to allow air circulation and stable burning. It's not only practical but also fascinating to watch. Follow our instructions carefully to make sure you achieve the best results.
Historical Background and Uses
The Swedish torch, also known as a Canadian candle, is a fascinating piece of history with practical uses that have stood the test of time. Its origins can be traced back to the 17th century during the Thirty Years' War. Soldiers needed a reliable source of heat and light that was efficient and could be used for cooking. The Swedish torch was their ingenious solution.
Initially invented by the Finns and later known throughout Europe, the torch provided warmth and a cooking surface for soldiers and forest workers alike. It was particularly useful because it didn't require carrying firewood long distances. Instead, soldiers could use the wood available in the area they were in.
Materials and Why They're Needed
Before diving into each method, let's outline the materials you'll need and why they're essential.
- A log: The core of your Swedish Torch. Opt for cedar, known for its straight grain, if available, to facilitate splitting.
- Hand tools (axe, baton, and saw): Necessary for method one, these tools allow for precise cuts without the need for power tools.
- Chainsaw: Required for method two, offering a way to make quick and efficient cuts for those familiar with this tool.
- Auger: Used in method three, this tool builds the internal air ducts needed for a rocket stove-style Swedish Torch.
- Wire or twine: Helps to keep the log sections together once split.
- Kindling: Essential for starting your fire. You can use wood shavings, sawdust, birch bark, or even manufactured fire starters.
Step by Step Instructions
Learn how to make a Swedish fire log with our step-by-step guide. Perfect for camping or backyard bonfires. Easy and convenient instructions included.
Method 1: Using Hand Tools
Using Hand Tools with our step-by-step guide. Discover easy techniques for perfect results. Suitable for beginners and experts alike.
Step-by-Step Guide
- Splitting the Log: Start with a small log (for manageability), and use your axe and baton to split it into quarters. Aim for a straight-down-the-middle split initially, followed by splitting those halves again, keeping the fragments as uniform as possible.
- Building the Core: Select one-quarter of the log to mark and saw off approximately two-thirds down, ensuring to remove a core section at the top but leaving the base intact for a shelf. Repeat this with all quarters.
- Constructing the Torch: Reassemble the quarters, aligning them so the hollow core runs through the center. Secure the structure with wire or twine.
- Lighting the Torch: Fill the core with kindling - the wood shavings or any other fire accelerant. Light it up, ensuring the flame catches well to start a lasting burn.
Method 2: Chainsaw Technique
Chainsaw Technique with our step-by-step guide. Master efficient cutting techniques easily.
Step-by-Step Guide
- Cutting the Log: With safety gear on, use the chainsaw to make four to six radial cuts, dividing the log about two-thirds of the way down but not completely through.
- Securing the Log: Tie the log tightly with wire or twine to keep the pieces together.
- Starting the Fire: Place your kindling inside the cuts, ensuring it's well-distributed. Light the torch, patiently allowing the flame to catch and spread through the cuts.
Method 3: Auger for a Rocket Stove-Style Torch
Learn how to build a rocket stove-style torch with Method 3: Auger. Follow our step-by-step guide for an efficient and sustainable flame source.
Step-by-Step Guide
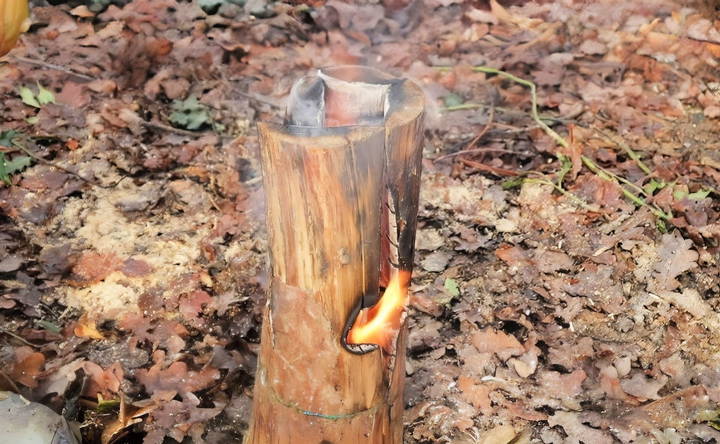
- Drilling the Holes: Position your log upright. Use the auger to drill a central vertical hole, then a horizontal hole to connect with the vertical one, forming an ‘L' shape.
- Clearing the Channels: Ensure both holes are unobstructed, clearing out any debris.
- Ignition: Place kindling inside the vertical channel and at the entrance of the horizontal channel. Light it, and give it a few moments. The design encourages airflow that sustains a strong flame.
Afterthoughts and Tips
Discover insights on Cooking With Swedish Torches, safety tips, and personal learning experiences to elevate your outdoor culinary adventures.
Cooking With Swedish Torches
Regardless of the method, remember that cooking on a Swedish Torch requires unobstructed airflow. Utilize stones or a metal pot stand to ensure your cookware doesn't smother the flame.
Safety and Observation
Each Swedish Torch style has its distinct characteristics. The hand tool method offers precision and customization, the chainsaw method brings efficiency, while the auger method, albeit trickier, provides a prolonged and intense heat ideal for cooking. Always observe your torches – adjustments may be needed, such as re-tightening the wire or adding more kindling.
Personal Learning Experiences
Each method taught me something unique. The hand tool method reinforced the importance of precision and patience. The chainsaw technique highlighted the efficiency and the power of modern tools. Lastly, the auger method underscored resilience - sometimes, you must revisit and adjust your strategy for success.
Advanced Techniques and Variations
When it comes to the Swedish torch, there's more than one way to light a fire. This section explores advanced techniques and creative variations that can enhance your experience with this traditional source of heat and light.
The Classic Cut
The standard method involves cutting a log into quarters and keeping it intact at the base. This ‘flowering' technique allows for airflow and a steady burn. For a longer-lasting flame, opt for hardwoods like oak or maple. These dense woods burn slowly, providing hours of heat.
The Star Cut
For a larger log, consider the star cut. This involves additional slices, making six or eight segments. The increased surface area improves airflow, which is essential for a consistent burn. It's a bit more complex but worth the effort for a robust and enduring fire.
The Chimney Effect
To maximize the chimney effect, stuff the center with kindling before lighting. This draws air up through the log, ensuring a thorough burn. It's a simple trick that can significantly extend the life of your torch.
Cooking with the Torch
The flat top of the torch isn't just for show—it's a cooktop. Place a pan directly on the flame for a rustic cooking experience. Just remember to choose a wood that burns clean, like birch or cherry, to avoid tainting your food with smoke.
Eco-Friendly Options
In line with environmental consciousness, consider using fallen wood rather than cutting live trees. Not only does this protect the forest, but deadwood often burns better due to its lower moisture content.
Safety First
Always set up your Swedish torch in a clear area away from flammable materials. And never leave it unattended. Safety is paramount, especially when dealing with open flames in the wilderness.
Troubleshooting Common Issues
Building a Swedish torch is a rewarding experience, but sometimes, you might encounter a few hiccups along the way. Here's a straightforward guide to solving some common issues you might face:
The Torch Won't Light
If you're struggling to light your torch, check the wood's moisture content. The wood needs to be dry, so if it's damp, it won't light easily. Also, ensure you have enough kindling and that it's placed in the center to catch fire.
The Fire Burns Out Quickly
A fire that fizzles out fast could be due to insufficient oxygen. Make sure your cuts are deep enough to allow air to flow freely. If the cuts are too shallow, the fire can't breathe and will die down.
Uneven Burning
Sometimes, one side may burn faster than the other. This can happen if the torch isn't level. Find a flat surface or make adjustments to the base to keep the torch balanced.
Difficulty Cooking
Cooking on a Swedish torch can be tricky. If you're having trouble, try adjusting the size of your cuts to build a more stable surface. Also, wait until the flames have died down to a steady glow before placing your pan.
Excessive Smoke
Excessive smoke often means the wood isn't dry enough or you're using resinous wood. Stick to dry, non-resinous woods like birch or maple for a cleaner burn.
Safety Concerns
Always set up your torch in a safe, open area away from trees and tents. Keep water or a fire extinguisher nearby in case of emergencies.
Follow these tips to troubleshoot common issues and enjoy a successful Swedish torch. Practice makes perfect; don't be discouraged by initial challenges.
FAQs About How to Make a Swedish Torch
A Swedish Torch, or Fire Log, is a simple, long-burning fire from one log, perfect for camping, outdoor events, or as a backyard feature. Here are five FAQs to help you make one.
A Swedish Torch is a log that has been cut in a specific way to allow it to burn from the inside out, making a self-contained fire source. It's known for its ease of lighting and minimal maintenance.
Hardwoods like oak or maple are preferred because they burn longer and hotter. However, softwoods can be used if hardwood is not available. Ensure the wood is dry, with a moisture content of 20% or less.
Choose a log about 16 inches long and 6-8 inches in diameter. Stand it upright and make 2-3 deep cuts across the top, stopping about ¾ of the way down. The cuts should resemble slices of a pie from above.
Place tinder, like dryer lint or wood shavings, into the cuts at the top of the log. Add kindling on top, then light the tinder. The fire will burn downwards, igniting the rest of the log from within.
Yes, the flat top of the log provides a stable surface for placing a pan or pot. Just ensure the log is cut evenly so it stands upright and provides a level cooking surface.
Conclusion
Wrapping up, learning how to make a Swedish fire log is an excellent skill to learn. This method provides efficient and long-lasting heat, making it perfect for camping or backyard gatherings. Follow these simple steps to enjoy a warm, glowing fire. Appreciate the warmth and simplicity that this traditional Swedish method brings to your outdoor experiences.


