Making a cozy DIY teepee can transform any space into a magical hideaway, perfect for relaxation or playtime. Learning how to make a teepee is straightforward and enjoyable. You'll need a few materials such as fabric, sticks or poles, and some basic tools. By following simple steps, you can build a teepee that is both sturdy and attractive.
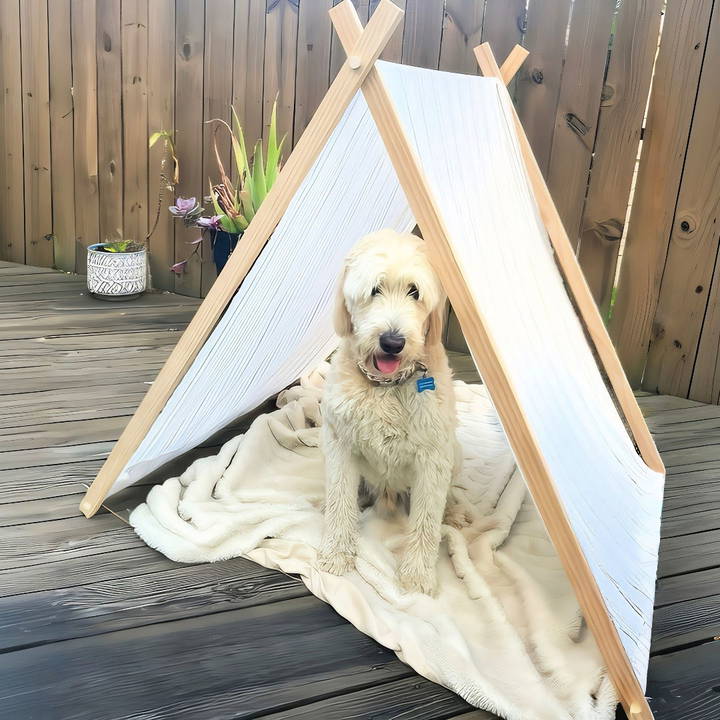
To start, gather your materials and decide on the size and style of the teepee you'd like to construct. Measure the fabric and cut it to fit around your frame. Then, securely tie the poles together and drape the fabric over them. With these easy-to-follow steps, you will have a cozy DIY teepee in no time.
Keep reading to explore detailed instructions on how to make a teepee and tips for customization.
Materials You'll Need
Discover the essential materials and tools you'll need for your next project. From wood to adhesives, get everything ready for successful crafting!
Wood:
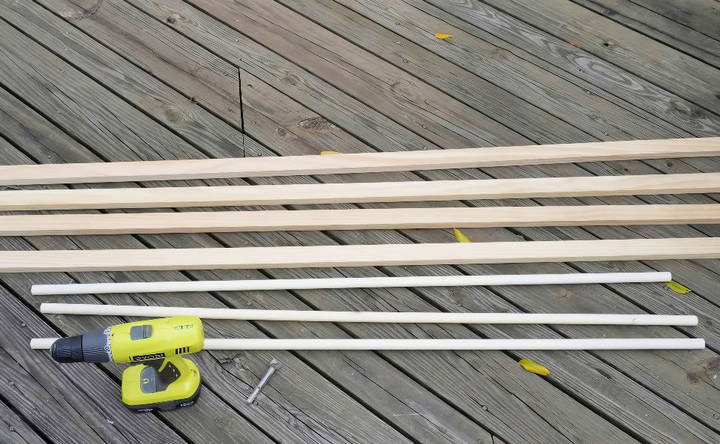
- Four 1x2 Pine Boards: These form the frame of the teepee. Pine is lightweight and easy to work with.
- Three 3/4-inch Dowels: These will hold the structure together and allow it to fold up easily.
Tools:
- Drill: Essential for drilling holes to hold the dowels.
- 3/4-inch Drill Bit: Matches the size of the dowels.
- Miter Saw: Helps ensure precise, even cuts for the wood.
- Clamps: Useful for holding the wood steady while drilling.
- Measuring Tape: Aids in measuring the dimensions accurately.
- Fabric Scissors: Makes cutting the fabric easier and cleaner.
Fabric:
- Fabric with Pattern: Choose something fun and colorful that fits your space. Ensure it's wide enough to cover the frame.
Adhesives:
- Hot Glue Gun: For securing the fabric around the dowels.
Miscellaneous:
- String: Keeps the teepee from sliding open on hardwood floors.
Step by Step Instructions
Learn how to build a DIY teepee with our step-by-step guide. From cutting wood to attaching fabric, our instructions cover everything you need!
Step 1: Measuring and Cutting the Wood
Start by deciding how tall you want your teepee tent to be. I chose a height that would be comfortable for kids to sit in (around 5 feet).
- Using the measuring tape, mark the length on the pine boards where you intend to cut.
- Use the miter saw to cut the 1x2 boards to the required length. I cut two boards at the same time to ensure they were even.
Step 2: Sanding the Wood
Once all the pieces are cut, give them a light sanding.
- Smooth out any rough edges to prevent splinters.
- Make sure all surfaces are smooth for a polished look.
Step 3: Drilling the Holes
Next, we'll need to drill holes for the dowels.
Mark the Drill Points:
- For the top holes, measure 4 inches from the top inwards and mark the spot.
- For the bottom holes, measure 4 inches from the bottom and mark it too.
Drill Holes:
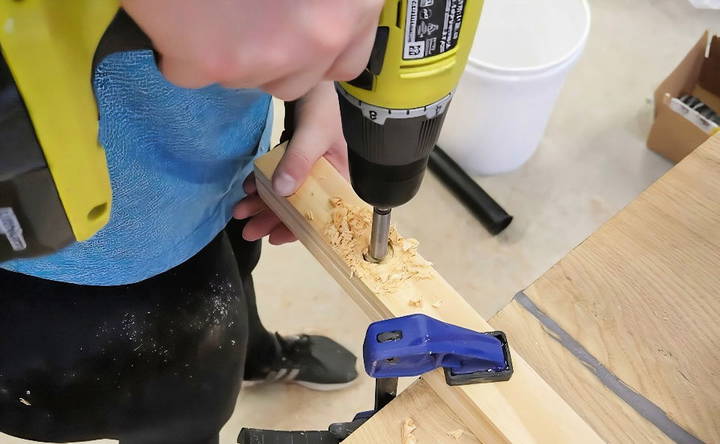
- Clamp two 1x2 boards together on a table. This will ensure the holes are aligned.
- Using the 3/4-inch drill bit, drill holes at the marked points.
Step 4: Assembling the Frame
With all holes drilled, it's time to put the frame together.
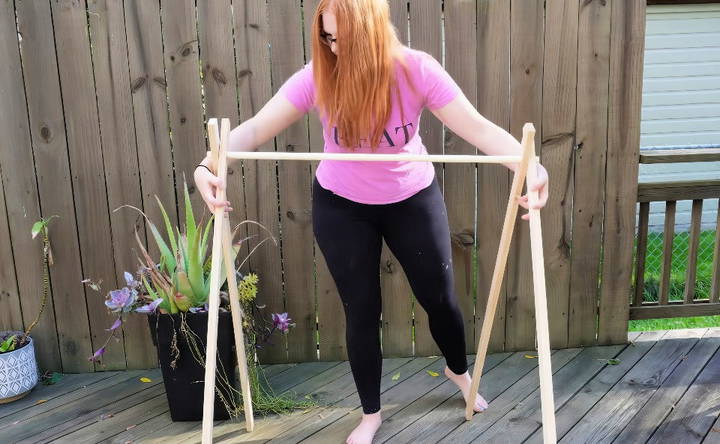
- Insert a dowel into the top holes of two 1x2 boards.
- Spread the two boards apart slightly to mimic the shape of a teepee.
- Repeat with the other two boards and the remaining dowels. Make sure the frame stands firm and is stable.
Step 5: Preparing and Attaching the Fabric
Now comes the fun part—adding the fabric!
Measure the Fabric:
- Drape the fabric over the frame to see how much length and width you need.
- Measure the distance between the 1x2 boards from inside the frame for precise width.
Cut the Fabric:
- Lay the fabric flat and use the fabric scissors to cut it to the right size.
Attach the Fabric:
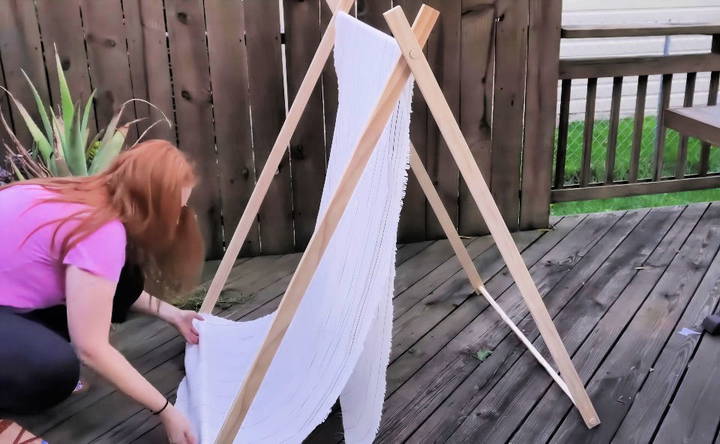
- Drape the cut fabric over the frame, making sure it's centered and taut.
- Use a hot glue gun to glue the fabric around the dowels neatly. This step is super easy, and should you wish to change the fabric in the future, you'll simply need to cut it off.
Step 6: Securing the Base
To prevent the teepee from sliding open on hardwood floors:
- Tie a string across the bottom of the teepee at the maximum open width you want.
- This will hold the frame in place and also make it easy to fold up and store the teepee when not in use.
Finishing Touches
There you have it! A super adorable and easy-to-make teepee tent. Here are a few final considerations:
- Environmental Friendliness: Consider using eco-friendly materials and fabrics to make your teepee more sustainable.
- Safety: Always check the assembly, particularly the drilling and gluing part, to ensure no sharp edges or loose parts are left.
Practical Uses
- For Kids: An exciting play tent that can spark their imagination.
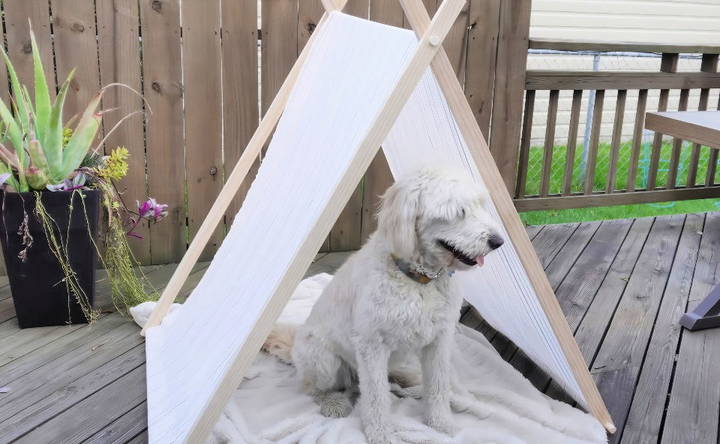
- For Pets: A cozy hideaway for small dogs or cats.
- For Adults: A cute reading nook or meditation space.
Customization Ideas for Your DIY Teepee
Making a DIY teepee is not just about building a structure; it's about crafting a personal space that reflects your style and needs. Here are some customization ideas to make your teepee uniquely yours:
- Choose Your Fabric Wisely: The fabric is the soul of your teepee. Opt for durable materials like canvas or cotton for longevity. For a whimsical touch, consider lace or tulle.
- Paint and Patterns: Unleash your creativity with fabric paints. Geometric patterns, stripes, or even a galaxy theme can add a playful element to your teepee.
- Add Some Comfort: Throw in some cushions, blankets, and a soft rug for a cozy interior. Mix and match colors and textures for a warm, inviting space.
- Light It Up: Fairy lights or a string of LED bulbs can build a magical ambiance. Ensure they are battery-operated for safety and convenience.
- Accessorize: Bunting, pom-poms, or tassels can be hung around the entrance or the top for an extra splash of charm.
- Interactive Elements: If the teepee is for children, consider adding pockets inside for their books or toys or a chalkboard fabric section for drawing.
- Nature-Inspired: Incorporate elements from nature like feathers, pine cones, or floral garlands for an earthy feel.
- Seasonal Themes: Decorate your teepee according to seasons or festivals. Think snowflakes for winter or paper lanterns for festive times.
- Personal Touch: Embroider your name, initials, or a meaningful quote onto the fabric to personalize your space.
Enjoy your DIY project and unleash your creativity. Make your teepee a joyful and comforting space.
FAQs About DIY Teepee
Discover everything you need to know about DIY teepee projects. Find answers to common questions and get started on your own teepee today!
If you’re not using a pre-cut canvas, you’ll need to cut a semi-circle from your fabric, half as wide as it is long. Include notches on the flat side for the poles and flaps in the middle for smoke if you plan to have a fire inside.
Absolutely! Personalize your teepee with fabric paint, hanging ornaments, cushions, and rugs. If it’s outdoors, consider landscaping around it to enhance its appearance.
Keep your teepee clean and make timely repairs to extend its lifespan. If it’s placed outdoors, consider storing it during adverse weather to protect it from damage.
To ensure stability:
Select the right spot: Choose a level area that's free from overhanging branches or power lines.
Secure the poles: After arranging the poles in a tripod shape, wrap the rope tightly around where they meet, and then fan out the remaining poles evenly.
Anchor the cover: Once the cover is on, secure it to the ground with stakes or weights to prevent it from flapping or flying away in the wind.
For safety:
Fire safety: If you plan to use a fire inside, ensure proper ventilation and keep flammable materials away from the flames.
Weatherproofing: Treat your canvas with a water-resistant spray to protect against rain and dew.
Regular checks: Periodically inspect the teepee for wear and tear, especially the ropes and fabric, to prevent any unexpected collapses.
Conclusion:
I hope this step-by-step guide helps you build your very own cute DIY teepee tent. If you enjoyed this project, make sure to subscribe to the Waterfall Woodworking channel for more fun DIY and woodworking projects. See you in the next one!


