Starting with a cozy adventure, I remember the first time I tried to make a DIY tent in my backyard. I gathered some old sheets, ropes, and a few sturdy sticks. The process was straightforward and a lot of fun. It felt so rewarding to see my little structure standing. The kids absolutely loved it and we ended up spending the entire afternoon playing in our new haven.

Let me guide you through how to make a tent using simple materials. Find some strong sticks or poles for support, some sheets or tarps for covering, and ropes to tie everything together. Secure the sticks in the ground and drape the sheets over them. Use the ropes to tie everything in place. It's a quick project that brings a lot of joy.
Building your own DIY tent is easier than you think. With these steps, you can build your own cozy hideaway. I'm happy to help with these tips, and I hope they inspire you to get started.
Gathering the Materials
The materials were straightforward and surprisingly easy to acquire:
- Wooden dowels: Essential for the frame, offering both support and structure. I chose four 6ft dowels for height and space.
- Drill and bits: Needed for making precise holes for assembly. Safety first – eye protection is a must here.
- Saw: For angle cuts at the base of the dowels, ensuring stability.
- Thick, durable fabric: I picked burlap for its rustic charm and durability. Plus, it's quite affordable.
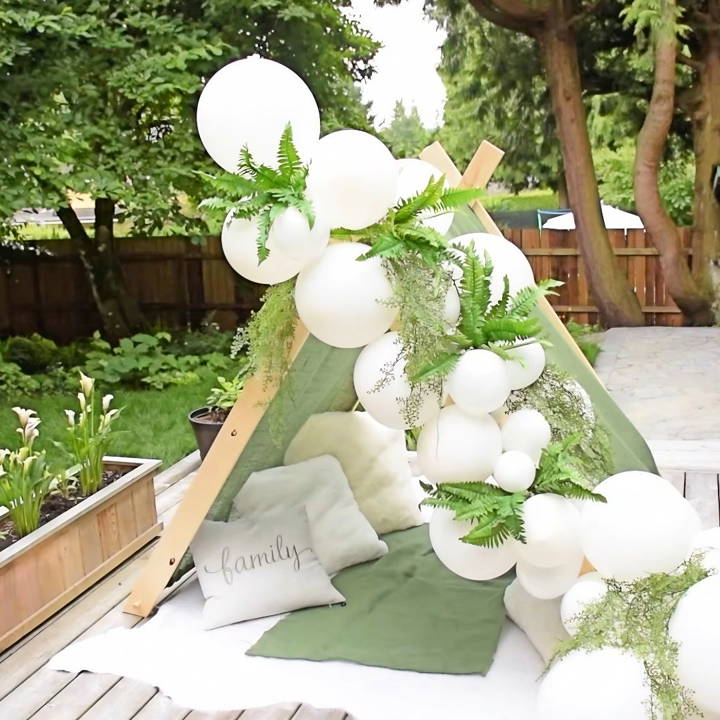
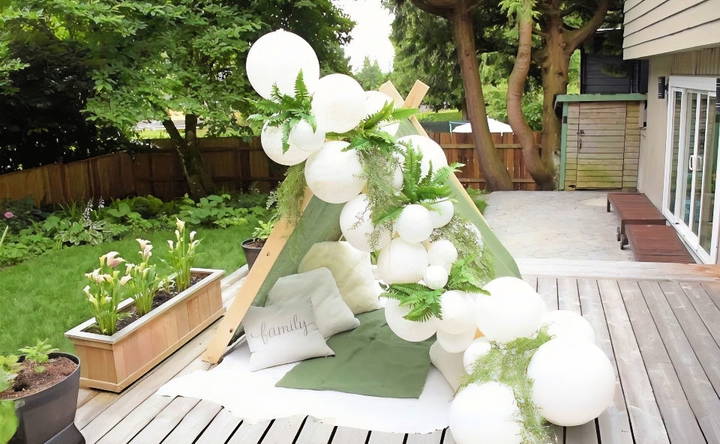
- Decorations (balloons and greenery): To add festivity and vibrancy to the tent. These were easily found at a local dollar store, proving that you don't have to spend much to make something look luxurious.
- Sewing kit or glue gun: For attaching the fabric to the frame. I went with sewing for a more secure hold.
- Rope: This was to ensure the structure remains tightly secured and doesn't splay outward.
Step by Step Instructions
Learn how to make a tent with easy, step-by-step instructions: Prepare the dowels, make a cover, assemble the frame, enhance coziness, and add decorations.
Preparing the Wooden Dowels
I began by marking and drilling holes in each dowel – one set 4 inches from the bottom and another set about 9.5 inches from the top. Smooth sanding was crucial to avoid splinters, especially since kids would be around. After drilling, I cut the base at a 45-degree angle for stability, ensuring the tent wouldn't tip over easily.
Making a Durable and Breathable Cover
Choosing burlap was a no-brainer for me due to its strength and breathability – plus, it added a certain "earthy" feel to the tent. Cutting and sewing the burlap into a suitable shape to drape over the dowels was the most time-consuming part, but also quite fulfilling. For those less inclined to sew, a glue gun can be a quicker alternative, though it may affect the fabric's washability.
Assembling the Frame
With holes drilled and dowels prepared, assembling them into a basic teepee shape was surprisingly straightforward. Crossing the dowels and using the rope to bind them at the intersections gave the structure its needed firmness. Rubber mallets helped secure everything in place, and adjusting the distance between dowels ensured the tent's door was wide enough for easy access.
Enhancing the Coziness
To make the interior inviting, I laid down a soft blanket and scattered plush pillows inside. This not only made it comfortable but also safe, covering any rope or dowel knots that children might trip over. The visual appeal was undeniably crucial, so I spent ample time decorating.
Following a tutorial, I made a balloon garland with various sizes/colors for a whimsical look. Attached to the tent with elastic bands and duct tape, it stayed put. Greenery like ferns and flowers added a fresh, vibrant entrance to the teepee.
Customization Tips for Your Tent
Making a tent that's uniquely yours can be both fun and practical. Here are some tips to help you customize your tent:
Choose Your Fabric Wisely:
- Durability: Opt for materials like ripstop nylon or polyester for their durability and water resistance.
- Breathability: Consider adding mesh panels for ventilation to keep the interior comfortable.
Add Personal Touches:
- Color: Select colors that reflect your style or use patterns to stand out at a campsite.
- Pockets and Loops: Sew in extra pockets for storage or loops to hang lights and gear.
Enhance Comfort:
- Flooring: Add a custom-sized footprint or a soft, insulated layer for extra comfort underfoot.
- Space: Design your tent with enough room to move around comfortably, perhaps with an added vestibule for gear.
Improve Functionality:
- Zippers: Use heavy-duty zippers for longevity, and consider two-way zippers for convenience.
- Weatherproofing: Apply seam sealant and waterproofing sprays to protect against the elements.
Make It Eco-Friendly:
- Materials: Use recycled materials where possible to reduce environmental impact.
- Solar Power: Incorporate solar-powered lights or chargers for an eco-friendly energy source.
Safety First:
- Reflective Materials: Use reflective trims or paints for visibility at night.
- Fire Retardant: Treat fabrics with fire retardant to prevent accidents.
The key to a successful customization is planning. Sketch out your ideas, list the materials you'll need, and take it step by step.

Troubleshooting Common Issues
When you're making or using a tent, you might encounter some issues. Here's how to troubleshoot them:
Tent Leaks During Rain
- Solution: Apply a waterproof sealant to all seams. Make sure the rainfly covers the tent properly.
Broken Tent Pole
- Solution: Use a repair sleeve or duct tape as a temporary fix. Carry a spare pole for emergencies.
The tent is Too Hot
- Solution: Ensure proper ventilation. Open all vents and position the tent to catch the breeze.
Difficulty in Tent Setup
- Solution: Practice setting up your tent at home. Mark poles and corresponding connectors with color-coded tape.
Tent Fabric Tears
- Solution: Patch small tears with repair tape or a fabric patch kit designed for tent materials.
Zippers Get Stuck
- Solution: Clean zippers with water and a soft brush. Lubricate with silicone-based products if necessary.
Tent Pegs Won't Hold
- Solution: Use longer or thicker pegs for soft ground. For hard ground, pre-drill holes with a spare peg.
Condensation Inside Tent
- Solution: Increase airflow by adjusting the rainfly and using a groundsheet to reduce ground moisture.
Tent Smells Musty
- Solution: Air out the tent after each trip. Clean with a mild soap solution and dry thoroughly before storage.
Wildlife Intrusion
- Solution: Keep food and scented items in bear-proof containers away from the tent.
By anticipating these common issues and knowing how to handle them, you'll ensure a more enjoyable and stress-free camping experience.
Safety Precautions
When setting up and enjoying your tent, safety should always be a priority. Here are some key precautions to keep in mind:
Handling Equipment:
- Sharp Objects: Be careful with stakes, poles, and tools. Store them securely and away from sleeping areas.
- Setup Location: Choose a flat area away from cliffs, water, and loose rocks to prevent accidents.
Fire Safety:
- Cooking: Cook outside the tent to avoid fire hazards. Keep flammable materials away from the stove.
- Heating: Never use fuel-burning heaters inside a tent due to the risk of carbon monoxide poisoning.
Weather Awareness:
- Storms: If a storm is approaching, avoid setting up under trees and seek shelter in a safe building.
- Extreme Heat: In hot weather, stay hydrated and keep the tent ventilated to prevent heatstroke.
Wildlife Precautions:
- Food Storage: Store food in airtight containers and away from your tent to avoid attracting animals.
- Insect Protection: Use mesh screens and insect repellents to keep bugs out.
First Aid:
- Kit: Always have a first aid kit on hand for emergencies.
- Knowledge: Know basic first aid procedures or take a course before your camping trip.
Children and Pets:
- Supervision: Keep an eye on children and pets at all times to ensure they don't wander off or get into trouble.
- Safe Play Area: Set up a designated area for play that's away from cooking and equipment storage.
By following these safety precautions, you can enjoy a worry-free outdoor experience in your tent.
FAQs About How to Make a Tent
Find answers to faqs about how to make a tent, including materials, steps, and tips for beginners. Learn all you need for a DIY camping tent.
Look for a spot that is:
Near two trees that are the right distance apart
At a lower elevation to avoid extreme cold
Dry and not in a valley where water can collect
Free of dead or weak branches overhead.
Follow these steps:
Clear the ground of rocks and twigs
Lay the ground tarp flat and centered beneath the rope
Use stakes or rocks to secure the corners of the tarp.
To make the walls:
Tie the rope between two trees at a height lower than half the length of your tarp
Drape the second tarp over the rope
Secure the edges of the tarp to the ground, making an A-frame shape.
To weatherproof your tent:
Make sure the tarps are tightly secured and cover the ground completely
Use additional ropes or cords to reinforce the structure
Consider using a waterproofing spray on the fabric to repel moisture.
To enhance the stability of your tent against wind, consider the following tips:
Position your tent so that the narrowest end faces the wind direction.
Use extra stakes or guy lines to anchor each corner of your tent.
Distribute weight evenly inside the tent to lower its center of gravity.
If possible, build a windbreak using natural materials like branches or rocks.
Conclusion:
Wrapping up, we hope this guide on how to make a tent has been both informative and inspiring. By following these steps, you'll find making a DIY tent is an enjoyable and manageable project. Remember, the key to success lies in your creativity and resourcefulness.


