Building a Tesla coil can be a fascinating and educational project that demonstrates the principles of wireless power transfer. Tesla coils are well-known for producing high-voltage electrical arcs and showcasing the transfer of electricity through the air. This detailed guide will take you step-by-step through building a small Tesla coil at home, perfect for beginners. We'll cover all the materials, steps, and tips you need to successfully make your own Tesla coil.
What is a Tesla Coil?
A Tesla coil is a type of electrical resonant transformer circuit invented by Nikola Tesla in 1891. It is used to produce high-voltage, low-current, high-frequency alternating current (AC) electricity. Tesla coils are used in applications ranging from wireless energy transfer demonstrations to entertaining displays of electrical arcs and sparks.
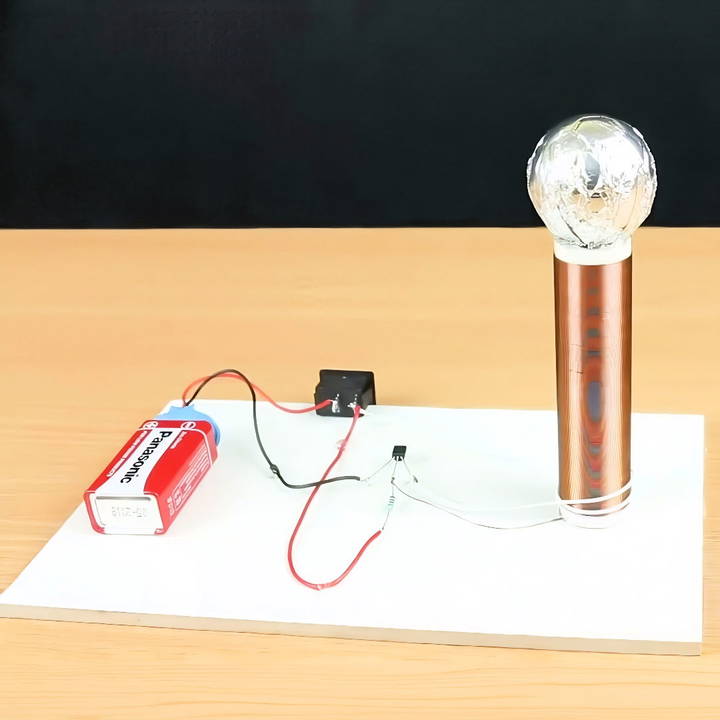
In its simplest form, a Tesla coil consists of two coupled resonant electric circuits—primary and secondary coils. The primary coil generates a magnetic field that induces a high-voltage current in the secondary coil, making an impressive electrical discharge.
Materials You Will Need
Before you begin building your Tesla coil, gather the following materials:
- PVC Pipe (9 cm): This will act as the core for winding the secondary coil.
- Copper Wire (28 AWG): This thin wire will be used for the secondary coil winding.
- 2N2222 Transistor: A small NPN bipolar junction transistor that helps to drive the Tesla coil.
- 2.2k ohm Resistor: This resistor will be used to limit the current flowing through the circuit.
- 9V Battery and Connector: The power source for the Tesla coil.
- ON/OFF Switch: Allows you to easily control the power to the coil.
- Heat Shrink Tubing or Electrical Tape: Useful for insulating and securing electrical connections.
- Plastic or Wooden Base: A non-conductive base to mount the coil and components.
Additional Tools:
- Soldering Iron and Solder
- Wire Cutters and Strippers
- Hot Glue Gun (optional for mounting components)
These components can be easily sourced from electronic supply stores or online. Now, let's go step by step through the process of assembling the Tesla coil.
Step by Step Instructions
Learn how to make a tesla coil with our step-by-step guide. From preparing coils to testing and safety, we've got you covered. Build your tesla coil today!
Step 1: Preparing the Secondary Coil
The secondary coil is the main component that generates the high-voltage output of your Tesla coil. It is crucial to wind it correctly for the best performance.
- Cut the PVC Pipe: Take the 9 cm PVC pipe, which will serve as the base for your secondary coil. Ensure that the pipe is smooth and clean.
- Wind the Copper Wire: Take the 28 AWG copper wire and carefully wind it around the PVC pipe. Begin at one end of the pipe and tightly wrap the wire in a single layer, ensuring there are no gaps or overlaps between turns. Wind the wire until you cover the length of the pipe. Be patient during this process, as neat and consistent winding is essential for optimal performance.
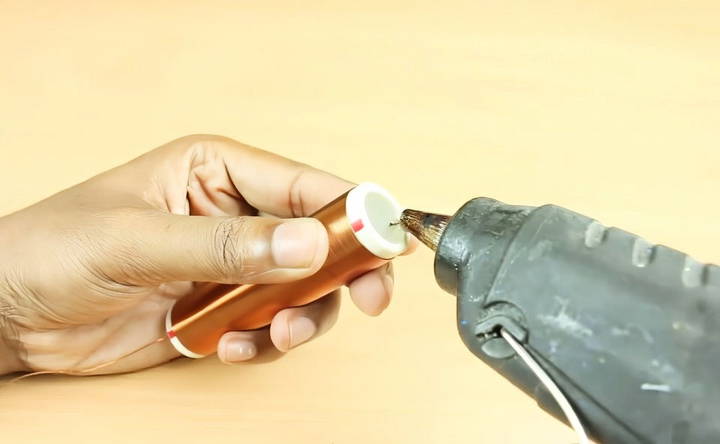
- Secure the Ends: Once you have finished winding the wire, leave a few centimeters of wire at both the top and bottom of the coil. Secure the wire at both ends with tape or hot glue to prevent it from unwinding.
- Strip the Wire Ends: Use wire strippers to remove the insulation from the ends of the wire. These ends will be connected to other components later in the circuit.
Step 2: Constructing the Primary Coil
The primary coil is responsible for making the magnetic field that will induce a high voltage in the secondary coil. It typically consists of fewer turns of thicker wire than the secondary coil.
- Choosing the Wire: For the primary coil, you can use a thicker gauge copper wire, such as 20 AWG or lower. The thicker wire allows for better handling of higher currents.
- Winding the Primary Coil: Wind 5 to 7 turns of the thicker copper wire around the base of the PVC pipe, leaving some space between each turn. The primary coil should be positioned near the bottom of the secondary coil but not overlap with it.
- Connecting the Primary Coil: Once you have wound the primary coil, secure the ends and ensure the spacing is even. The two ends of the primary coil will later be connected to the circuit.
Step 3: Building the Circuit
Now that you have the coils ready, it's time to build the circuit that will power the Tesla coil.
- Prepare the Transistor: The 2N2222 transistor is a small and commonly available NPN transistor. Identify its three leads—collector, base, and emitter. The base will receive the signal to turn the transistor on, the collector will be connected to the primary coil, and the emitter will be connected to the ground.
- Resistor Placement: Connect the 2.2k ohm resistor to the base of the transistor. This resistor will help limit the current flowing into the base and prevent damage to the transistor.
- Connect the Battery: Using a 9V battery connector, attach the positive lead of the battery to one end of the primary coil. Connect the negative lead of the battery to the emitter of the transistor.
- Connecting the Primary Coil to the Transistor: The other end of the primary coil should be connected to the collector of the transistor.
- Adding the ON/OFF Switch: To control the power to the Tesla coil, place the ON/OFF switch between the battery and the rest of the circuit. This will make it easy to turn the coil on and off.
Step 4: Testing and Tuning the Tesla Coil
Before you power on your Tesla coil, ensure that all connections are secure, and double-check your circuit.
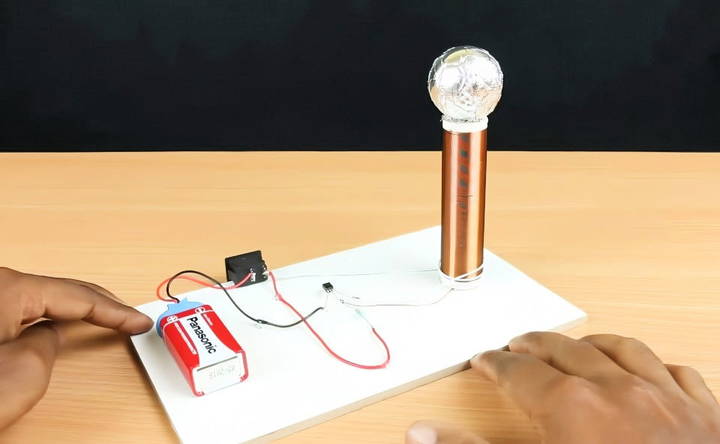
- Power On the Coil: Flip the switch to power on the Tesla coil. You should hear a faint humming sound if the coil is functioning properly.
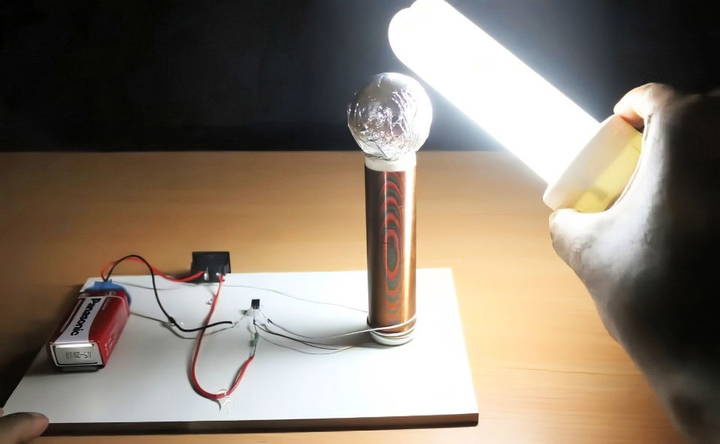
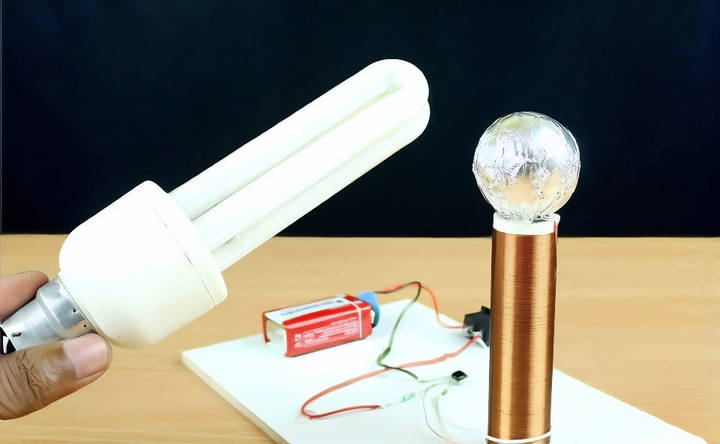
- Check for Wireless Power Transfer: To test the wireless power transfer, bring a small fluorescent bulb or a neon light near the secondary coil. The bulb should light up when it is in close proximity to the coil, demonstrating the wireless transfer of energy.
- Fine-Tuning the Coil: Ensure that the transistor is correctly oriented. Check all connections for secure soldering. Adjust the spacing between the primary and secondary coils if necessary.
Step 5: Safety Precautions
While building and testing your Tesla coil, always follow these safety precautions:
- Handle with Care: Even though this is a small Tesla coil, it can generate high-voltage discharges. Avoid direct contact with the secondary coil while it is powered on.
- Work in a Well-Ventilated Area: The coil generates ozone, which can be harmful in large quantities.
- Keep Flammable Materials Away: The electrical arcs produced by the coil can ignite flammable substances.
- Avoid Prolonged Exposure: Prolonged exposure to high-voltage electrical fields can be harmful to electronic devices and your health.
Troubleshooting Common Issues
If your Tesla coil isn't working as expected, here are some common issues and fixes:
- No Power Output: Double-check all connections, particularly the transistor and battery connections. Ensure that the battery is fully charged.
- No Wireless Power Transfer: Verify that the secondary coil is properly wound and that the primary and secondary coils are not touching.
- Overheating Transistor: If the transistor becomes too hot, try using a heatsink or replacing it with a higher-rated transistor.
Conclusion
Building a Tesla coil is a rewarding project that demonstrates the principles of wireless energy transfer in an exciting and hands-on way. By following the steps outlined in this guide, you can construct a functional Tesla coil with minimal components. Just remember to follow all safety precautions, and have fun exploring the fascinating world of high-voltage electricity!
With practice, you can further experiment with your coil design, possibly increasing the voltage output, or using different transistor configurations. Tesla coils are a great introduction to the basics of electricity, electromagnetism, and electronics.
FAQs About How to Make a Tesla Coil
Discover the essential FAQs on how to make a tesla coil, covering safety tips, material needs, and step-by-step guidance for successful creation.
To increase the power, you can try winding more turns on the secondary coil or increasing the diameter of the pipe. However, a significant change in the size of the coil may require adjustments to the primary coil turns and the resistor value to prevent overheating.
Ensure you are using a 22k ohm resistor, not a 2.2k ohm one. Also, make sure the secondary coil is enameled copper wire, and that you've scraped off the insulation at both ends. Check the wiring carefully and re-solder any loose connections.
The 2N2222 transistor is commonly used, but you may try alternatives like the PN2222A if available. Be aware, using other types of transistors may require adjustments in the circuit or power supply.
This could be due to using a lower resistor value, such as 2.2k instead of 22k. Also, avoid keeping the circuit powered for extended periods, and consider replacing the transistor if it keeps burning out.
The aluminum foil ball’s size does not significantly affect performance in smaller Tesla coils. It is mainly used to shape the field, but larger coils might require fine-tuning of this element.
You can increase the secondary coil turns or the height of the coil. However, this may have diminishing returns unless other parts of the circuit are also adjusted, such as the power source or primary coil turns.
You can use normal insulated copper wire for the primary coil, but aluminum wire can also work if you adjust for its higher resistance by using a thicker gauge.
Even though this is a small coil, avoid touching any parts while it's powered on. The high-voltage arcs can cause burns. If you're getting sparks, it means the coil is working but handle with care to avoid injury.
This often indicates improper wiring or incorrect resistor values. Double-check the direction of your primary and secondary coils and ensure your connections are correct.
For a basic Tesla coil, around 300-350 turns of 28 AWG wire on the secondary coil and 3-5 turns on the primary coil are recommended. The exact number can vary depending on the size of your coil.


