Getting started with making a tire swing can be a fun and rewarding project. I remember the first time I decided to make one for my backyard, it was all about making something safe and enjoyable for my kids. The key to making a strong DIY tire swing is choosing the right tree, rope, and tire. With a few simple tools, it becomes a great outdoor addition.

As you begin, make sure to secure the tire properly and use a solid branch that can hold enough weight. Safety is the most important part of this project. I found that checking the knots and testing the swing before anyone uses it can give peace of mind. I'm helping with this so you can enjoy making your own tree tire swing without any worries!
By following the steps ahead, you'll find it simple to make a fun and safe swing. You'll also feel accomplished once it's set up and ready to enjoy.
Step by Step Instructions
Learn how to make a DIY tire swing with step-by-step instructions on choosing the right spot, prepping the branch, installing eye bolts, and more!
Choosing the Right Spot: Protecting Both Tree and Swing
The first step is selecting the right tree. A strong, healthy tree with a thick branch about 8-12 feet off the ground works best. In my case, I chose an oak tree behind my cabin. Oaks are known for their strong branches, making them ideal for this type of project. Make sure to pick a branch that's a good distance from the trunk to allow for proper swinging motion.
Safety is key, so I always make sure to set up a tall ladder to reach the branch comfortably. One pro tip: always stabilize the ladder before climbing. I prefer to have someone nearby, just in case.
Prepping the Branch: Clearing Obstacles
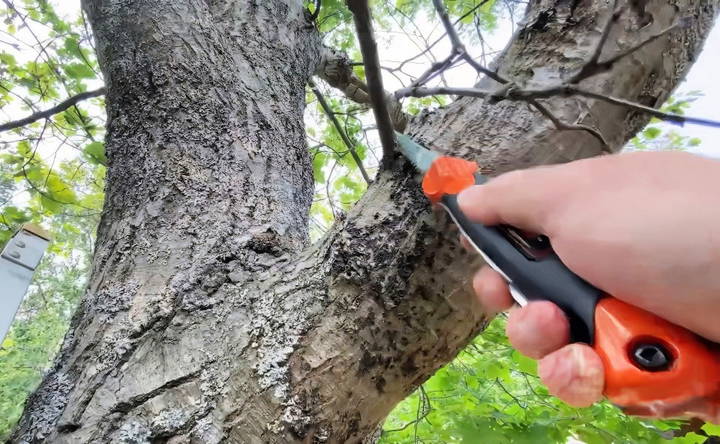
Once you're up on the ladder, it's time to prepare the branch. This step is crucial because small twigs and branches can interfere with the swing and potentially cause injury. I use a pruning saw to clear off any smaller branches around the main branch.
I've learned that trimming these twigs not only prevents them from getting in the way but also keeps the swing area looking clean and organized.
Preparing the Tire: Eye Bolts for Stability
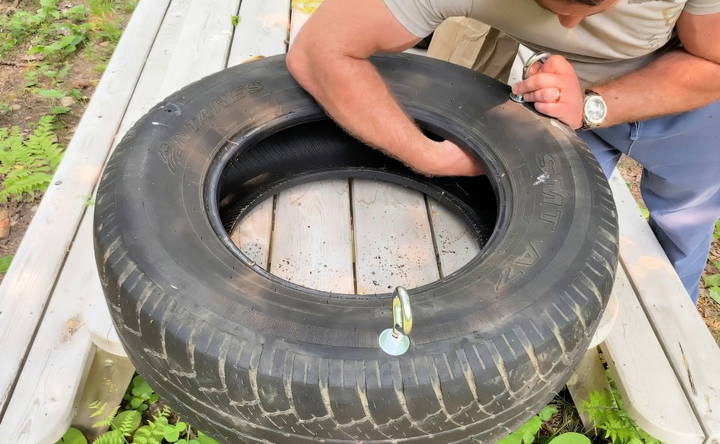
Next, it's time to prep the tire itself. I drill three evenly spaced holes in the sidewall of the tire. This is where the eye bolts will go. I use 6-inch long, half-inch diameter eye bolts, securing them with nuts and washers.
This step is critical because it ensures that the tire is sturdy when it's in motion. After placing the eye bolts through the holes, I hand-tighten them for now. Later, I'll use wrenches to make sure they're fully secure.
Installing the Towing Strap: Protecting the Tree
One of the most important lessons I've learned through this process is how to protect the tree. Instead of looping a chain directly over the branch (which can damage the bark over time), I use a towing strap. This helps distribute the weight and prevents long-term harm to the tree.
I loop the towing strap over the branch and secure it with a large collapsible chain link. Doing this makes it easy to install, but more importantly, it's tree-friendly. Once everything is in place, I double-check that everything is secure before moving on to the next step.

Adding the Chains: Adjusting for Height
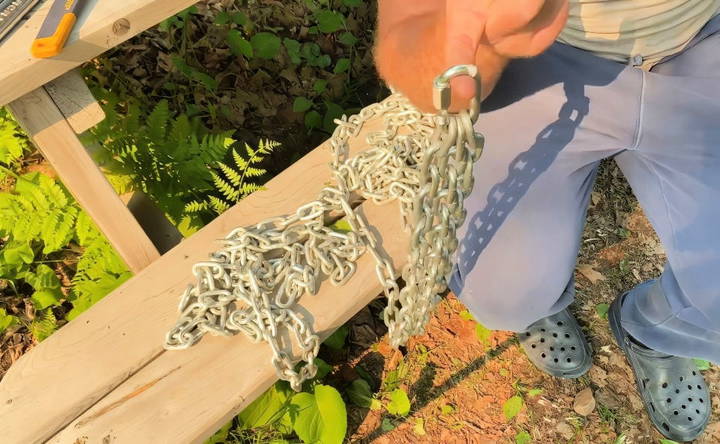
Since the branch on my tree was quite high, I used an extra length of chain to lower the swing to the appropriate height. This is where adjusting comes in. Based on how tall your tree is, you may need more or less chain.
I hooked the extra chain to the towing strap using another collapsible chain link. Then, I attached the three chains that will hold the tire itself to this main chain link. It's always a bit tricky working with chains while balancing on a ladder, but with some patience, it all comes together.
Securing the Tire: Final Adjustments
The final step is attaching the tire to the chains. I hooked each of the three lengths of chain to the eye bolts I'd installed earlier. Once everything was in place, I grabbed my wrenches and tightened all the nuts and bolts.
This step is crucial for safety. You don't want anything coming loose while someone is using the swing. I've learned to always go back and double-check each connection before considering the job done.

Testing the Swing: Ready for Fun
With everything securely in place, it's time to test the swing! Make sure it's hanging at a safe height — not too high, but high enough to swing freely. I always give it a few good swings myself before letting the kids try it out.
In my experience, this method makes a sturdy and fun tire swing that lasts for years. Plus, by using a towing strap, you're ensuring that the tree stays healthy, so the swing can be enjoyed for a long time to come.
Key Tips and Tricks
- Always protect the tree: Using a towing strap instead of looping a chain directly over the branch is a game-changer. It prevents bark damage and helps the tree stay healthy.
- Secure everything: Don't just rely on hand-tightening. Always go back with wrenches and tighten all connections. This ensures that the swing stays safe and secure.
- Take your time on the ladder: Working on a ladder can be tricky, especially when handling tools and chains. Be patient, and if possible, have someone nearby to assist.
Customization Ideas
Customizing your tire swing can make it more fun and unique. Here are some easy and creative ideas to personalize your tire swing:
Painting the Tire
Painting your tire swing is a great way to add color and personality. Use non-toxic, weather-resistant paint to ensure it lasts. Here's how you can do it:
- Clean the Tire: Make sure the tire is clean and dry before painting.
- Choose Your Colors: Pick bright, fun colors that will stand out.
- Apply Primer: Use a primer to help the paint stick better.
- Paint: Apply the paint in thin, even coats. Let each coat dry before adding another.
- Seal the Paint: Use a clear sealant to protect the paint from the elements.
Adding Cushions
Adding cushions can make your tire swing more comfortable. Here's how to do it:
- Measure the Tire: Measure the inside of the tire to find the right size for your cushion.
- Choose a Cushion: Pick a weather-resistant cushion that fits inside the tire.
- Secure the Cushion: Use Velcro strips or ties to keep the cushion in place.
Decorating with Rope
You can use a colorful rope to decorate your tire swing. Here's a simple way to do it:
- Choose Your Rope: Pick a durable, weather-resistant rope in your favorite colors.
- Wrap the Rope: Wrap the rope around the tire in a pattern you like. You can make stripes, spirals, or any design you prefer.
- Secure the Ends: Tie the ends of the rope securely to prevent unraveling.
Adding Handles
Handles can make it easier for kids to hold on while swinging. Here's how to add them:
- Choose Your Handles: Pick sturdy, weather-resistant handles.
- Drill Holes: Drill holes in the tire where you want to attach the handles.
- Attach the Handles: Use bolts and washers to secure the handles to the tire.
Making a Themed Swing
You can make a themed tire swing to match your garden or play area. Here are some ideas:
- Animal Theme: Paint the tire to look like an animal, such as a ladybug or a bee.
- Space Theme: Use glow-in-the-dark paint to make a space-themed swing.
- Nature Theme: Decorate the tire with leaves, flowers, or other natural elements.
These customization ideas will help you make a tire swing that is not only fun but also uniquely yours.
Troubleshooting Common Issues
Even with the best preparation, you might encounter some issues with your tire swing. Here are some common problems and how to fix them:
Swing Stability
- Problem: The swing wobbles or tilts too much.
- Solution: Ensure the tire is balanced. Check that the ropes are of equal length and securely tied. If the swing is still unstable, consider using three ropes instead of one or two to provide better balance.
Fraying Rope
- Problem: The rope starts to fray over time.
- Solution: Use a durable, weather-resistant rope like polypropylene. Regularly inspect the rope for signs of wear and replace it if necessary. You can also wrap the rope ends with duct tape or use heat shrink tubing to prevent fraying.
Water Accumulation
- Problem: Water collects inside the tire after rain.
- Solution: Drill several small drainage holes in the bottom of the tire to allow water to escape. This will prevent the tire from becoming heavy and reduce the risk of mold and mosquitoes.
Tree Health
- Problem: The tree branch shows signs of damage or decay.
- Solution: Regularly inspect the tree branch for cracks, dead wood, or signs of disease. If the branch appears unhealthy, move the swing to a different branch or tree. Avoid using softwood trees like fruit trees, as they are more prone to breaking.
Swing Height
- Problem: The swing is too high or too low.
- Solution: Adjust the rope length to ensure the swing hangs at a safe height. The bottom of the tire should be about 12-18 inches off the ground. This height allows for safe swinging without the risk of hitting the ground.
Rope Slippage
- Problem: The rope slips or loosens over time.
- Solution: Use secure knots like the double bowline or figure-eight knot. You can also use rope clamps or carabiners to keep the rope in place. Regularly check the knots and tighten them if needed.
Insect Infestation
- Problem: Insects like bees or wasps nest in the tire.
- Solution: Regularly check the tire for insect nests. If you find any, carefully remove them using appropriate safety measures. To prevent insects from nesting, consider covering the tire when not in use.
Fixing these issues ensures your tire swing stays safe and fun. Regular checks keep it in good shape for years.
FAQs About DIY Tire Swings
Discover answers to common questions about DIY tire swings, including installation tips, safety guidelines, and material recommendations.
Polypropylene rope is ideal because it is strong and resistant to weather. Ensure the rope is thick enough to support the weight of the tire and the person using the swing.
While chains are strong, they can pinch fingers and rust over time. The rope is generally safer and more comfortable to hold. If you choose to use a chain, ensure it is coated to prevent rust and injuries.
The tire swing should hang about 12-18 inches above the ground. This height is safe for children to get on and off the swing easily.
Yes, you can use a metal frame if it is sturdy and designed to support the weight of the swing and users. Ensure the frame is securely anchored to the ground.
The double bowline knot and the figure-eight knot are both strong and reliable for securing the tire swing. Make sure to double-check the knots for safety.
Conclusion
Building a DIY tire swing may seem like a simple project, but doing it right requires attention to detail. By following this process, you'll end up with a swing that's both safe and fun, and you'll be protecting the tree in the process. Whether you're installing it in your backyard or at a cabin like I did, this method ensures that the fun will last for years.


