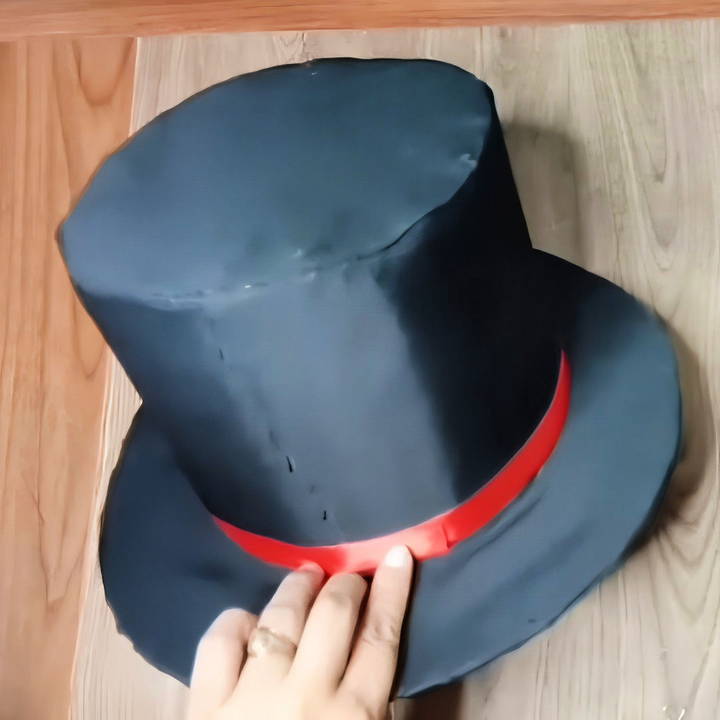
A top hat is an iconic accessory, often worn by magicians, ringmasters, and anyone aiming to add a touch of class and drama to their attire. Crafting your own top hat might seem daunting, but you'll be surprised at how easy and rewarding it is. With just a few supplies—cardboard, fabric, and a bit of hot glue—you can make a top hat at home in less than an hour, even if you have no prior hat-making experience.
This guide will take you through each step, ensuring you have a fantastic hat that's both stylish and durable.
Materials Needed
Before diving into the crafting process, gather the following supplies to make your top hat. These items are inexpensive and easy to find, making this project budget-friendly as well.
- Cardboard: A sturdy yet flexible piece to construct the base and brim.
- Black Fabric: Felt or other fabric to cover the hat and give it a polished look.
- Scissors or Cutter: Essential for cutting cardboard and fabric accurately.
- Hot Glue Gun: Used to secure different parts of the hat.
- Masking Tape: Helps hold the cardboard parts together while assembling.
- Red Ribbon: For a decorative band around the base of the hat, adding a pop of color.
Step by Step Instructions
Learn to make a DIY top hat with our step-by-step guide. From the brim to the final touches, follow these easy instructions for a perfect hat.
Step 1: Making the Brim
The brim is the bottom, flat circle that forms the base of the top hat. Follow these instructions to ensure a perfectly shaped brim.
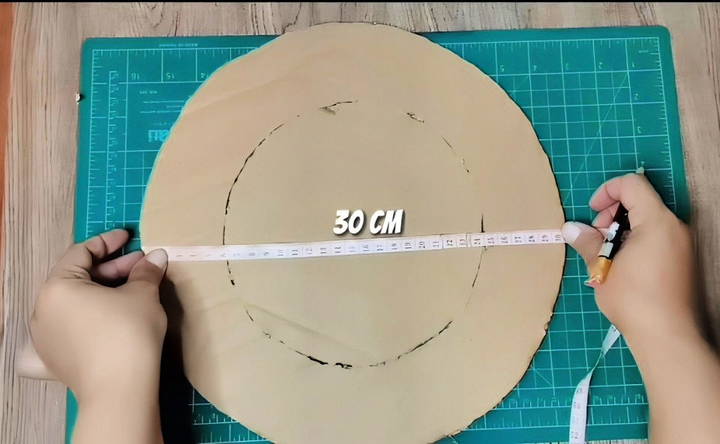
- Measure and Draw the Brim: Using a pencil, draw a large circle (about 30 cm in diameter) onto a piece of cardboard. This circle will serve as the hat's brim.
- Find the center of this circle, and from there, measure 9 cm outward. Draw another, smaller circle within the first one; this inner circle will make the space where the hat's cylindrical body will fit.
- Cut Out the Brim: Carefully cut along the lines of both circles. You should now have a donut-shaped piece of cardboard that will serve as the base of your hat.
Step 2: Constructing the Cylinder (Hat Body)
The next part is to build the main structure of your top hat, which will form the tall, cylindrical shape characteristic of this classic style.
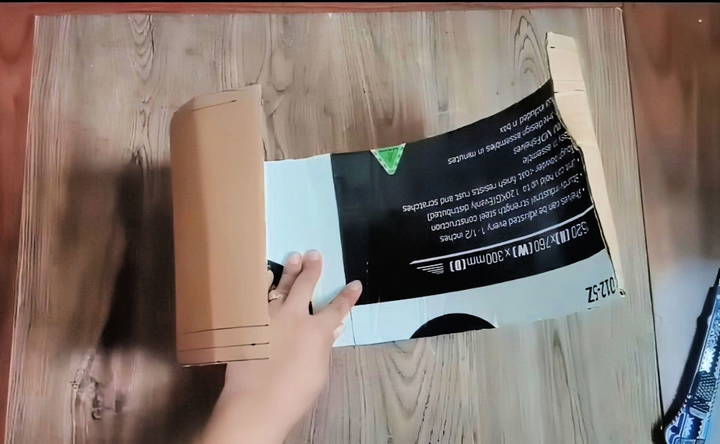
- Prepare the Cardboard Rectangles: Cut two rectangles from cardboard, each measuring 12.5 inches in width and 6 inches in height.
- These rectangles will form the sides of the cylinder.
- Add Notches: Leave a 1–2 cm allowance along both the top and bottom edges of each rectangle. Use scissors to cut small notches along this allowance; this will make it easier to secure the cylinder to the brim and the top piece later.
- Form the Cylinder: Bend the cardboard rectangles into a cylindrical shape, taping them together securely along the seam. Use strips of masking tape along the side to maintain the shape and prevent it from unraveling.
Step 3: Attaching the Cylinder to the Brim
Now that you have the brim and the cylinder, it's time to bring them together.
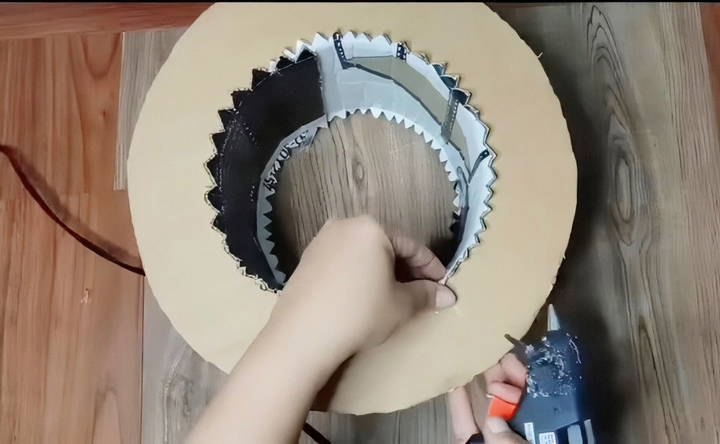
- Fit the Cylinder to the Brim: Position the cylinder over the inner circle of the brim, aligning it carefully to ensure it sits evenly.
- Slide the cylinder into the opening until it fits snugly.
- Secure with Glue:
- Once aligned, fold the notches around the brim's inner circle and use hot glue to attach the cylinder to the brim firmly. This step makes the basic shape of your top hat, making it look almost finished.
Step 4: Adding the Top of the Hat
The top of the hat completes the structure, covering the cylinder's open end and giving it a finished appearance.
- Cut a Circular Top: Measure and cut a circular piece of cardboard that fits exactly over the open end of your cylinder.
- Glue the Top in Place: Apply hot glue along the edges of the top piece, pressing it onto the cylinder's open end. Ensure it sits securely, covering the top completely.
Step 5: Covering with Fabric
With the structure in place, covering the hat in fabric will give it a polished, professional appearance.
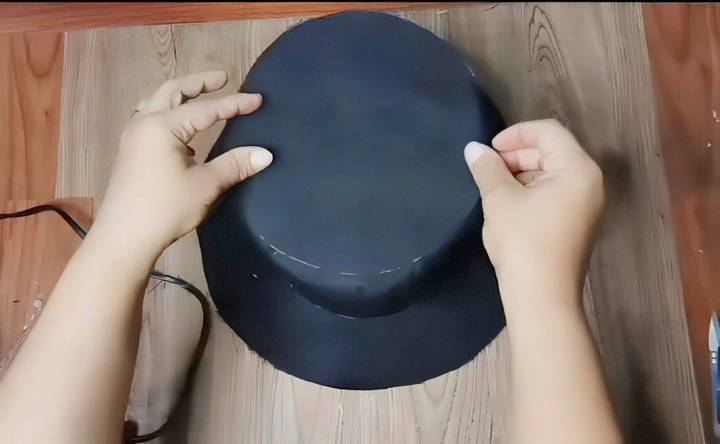
- Trace and Cut Fabric Pieces: Lay the cardboard pieces on the black fabric and use a white pencil to trace around each shape. Cut out the fabric shapes to fit each cardboard part:
- A rectangle for the cylinder (main body)
- Circular pieces for the top and bottom of the brim.
- Donut-shaped pieces cover the top and bottom of the brim.
- Attach the Fabric to the Cylinder: Apply a thin line of hot glue around the top edge of the cylinder, pressing the fabric rectangle onto it. Wrap the fabric around the cylinder, gluing it down gradually to avoid wrinkles or gaps.
- Cover the Brim: Position a donut-shaped piece of fabric over the brim (the large donut cardboard shape), smoothing it out and securing it with glue around the edges.
- Do the same for the underside of the brim, ensuring both sides are covered and look seamless.
- Finish with the Top: Glue a circular fabric piece over the top of the cylinder. Then, fold any excess fabric neatly over the edges to conceal any cardboard.
Step 6: Adding Final Touches
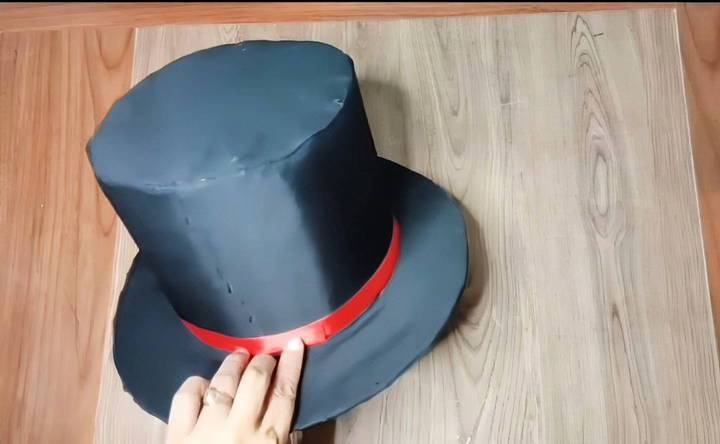
For a pop of color and a professional look, add a red ribbon around the base of your top hat.
- Attach the Ribbon: Measure a length of red ribbon to fit around the circumference of the base of your cylinder.
- Use a dab of hot glue to secure one end of the ribbon, wrap it around the hat's base, and glue the other end in place.
- Check for Any Finishing Details: Look over your top hat for any loose ends or areas that might need a bit more glue. Smooth out any creases in the fabric and ensure the ribbon sits flat.
Tips for Success
Crafting a top hat is straightforward, but here are some additional tips to ensure your hat looks its best:
- Use Thin Glue Layers: To prevent glue from seeping through or making bumps under the fabric, apply glue sparingly and press down each section firmly for a smooth, even look.
- Take Your Time with Fabric: Wrapping fabric around cardboard shapes can be tricky. Work slowly to prevent wrinkles, especially on the cylindrical body.
- Cut Carefully: Precise cutting of both cardboard and fabric shapes ensures your top hat has a clean, professional finish.
- Try Variations: Want a different look? Experiment with fabric colors, add embellishments like feathers or beads, or swap out the red ribbon for another color to match a costume.
In Less Than an Hour, Your Top Hat is Ready!
With the final touches in place, you're all set to show off your DIY top hat! Whether for a costume party, a play, or a magician's outfit, this classic top hat is both affordable and fun to make. Plus, you get the satisfaction of knowing you maked it yourself from scratch.
Enjoy wearing your new hat and making a stylish, memorable impression!
FAQs About DIY Top Hat
Discover all you need to know about DIY top hats with our comprehensive FAQs. Make crafting your own top hat simple and enjoyable!
For a standard adult-sized top hat, draw a 30 cm diameter circle for the brim. The inner circle should be 9 cm in diameter, where the cylindrical body will fit through.
Use strips of masking tape along the cylinder’s seam to secure it as you bend it into shape. Apply tape evenly along the height to keep the cylinder from unrolling.
Yes, simply adjust the height of the rectangular cardboard pieces that form the cylinder. Taller hats need rectangles longer than 6 inches, while shorter ones should be smaller.
You can use strong craft glue, but it may take longer to dry. Ensure each glued section has dried completely before moving on to avoid misalignment.
Yes, you can experiment with different fabrics, like velvet or cotton. Choose materials that are easy to cut and can be glued without fraying excessively.
Work slowly, gluing small sections at a time. Press the fabric down evenly as you go to avoid bubbles and ensure a smooth finish.
Adjust the colors or add details specific to the character. For Zorro, try a black ribbon; for Frosty, use a slightly larger brim and a few decorative buttons.


