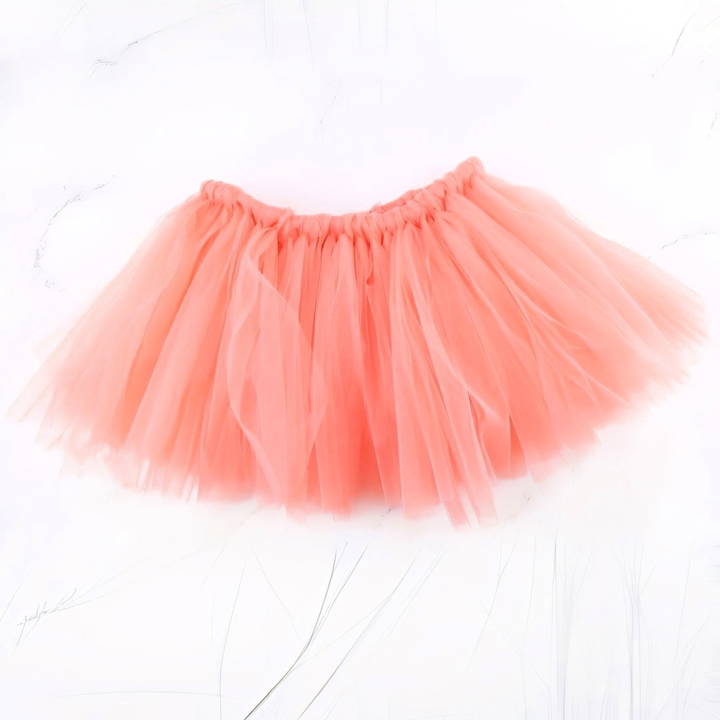
Making a tutu skirt is a fun and fulfilling DIY project perfect for costume parties, dress-up play, or even special occasions like birthdays and weddings. The best part? You can make a beautiful, fluffy tutu without any sewing! Discover all the steps, materials, and tips you need to successfully make a no-sew tutu skirt, even if you're a beginner.
Why Make a DIY Tutu?
Tutus are not just adorable; they also spark creativity and imagination, especially for children. With a tutu, kids can explore fantasy play, becoming fairies, princesses, or even superheroes. A DIY tutu is affordable, customizable, and, most importantly, an enjoyable project for parents and kids alike.
Materials Needed for a DIY No-Sew Tutu
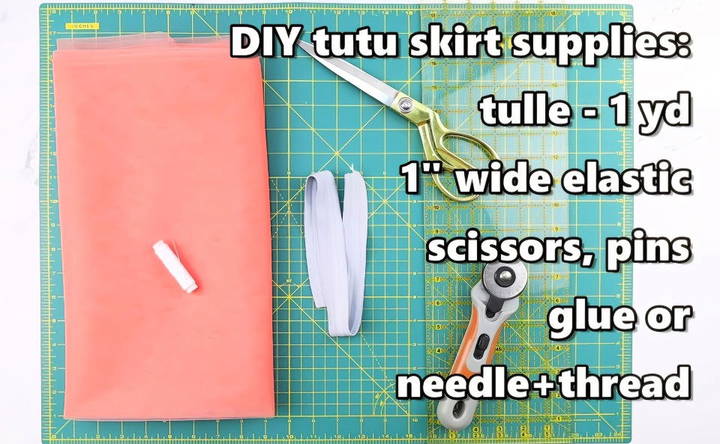
Before diving into the project, gather the following supplies:
- Tulle: Use extra-wide tulle (118 inches/3 meters is ideal) for fluffy layers. A yard or more is typically required, depending on the size of the tutu.
- Elastic: A 1-inch-wide elastic band will serve as the waistband.
- Scissors: Sharp scissors for precise cutting.
- Pins: Optional, to hold the fabric while cutting.
- Glue or Needle and Thread: For securing the elastic band. (This step is minimal and does not require advanced sewing skills.)
Step by Step Instructions
Learn how to make a DIY tutu with step-by-step instructions, from measuring materials to assembling and customizing your perfect tutu.
Step 1: Measure and Prepare the Materials
Learn how to measure, prepare materials, and cut elastic for the perfect tutu length. Get step-by-step guidance to make your custom tutu!
Determine the Tutu Length
- Decide how long you want the tutu to be. For example, a knee-length tutu might be 15 inches long.
- Multiply your desired length by 2 and add 3 inches. This accounts for folding and tying the tulle.
- For a 15-inch tutu, you'll need tulle strips that are 33 inches long (15 x 2 + 3).
Cut the Elastic
- Measure the elastic around the waist of the wearer, ensuring it fits comfortably.
- Overlap the ends of the elastic by 1 inch and secure them with glue or a few hand stitches.
Step 2: Cutting the Tulle
To save time and ensure uniform strips, use the following method:
Fold the Tulle
- Start with a piece of extra-wide tulle.
- Fold it in half lengthwise, then fold it again three times to make eight layers.
Cut the Tulle into Strips
- Cut the folded fabric into strips that are 4 inches wide. Each strip will be used to make a single section of the tutu.
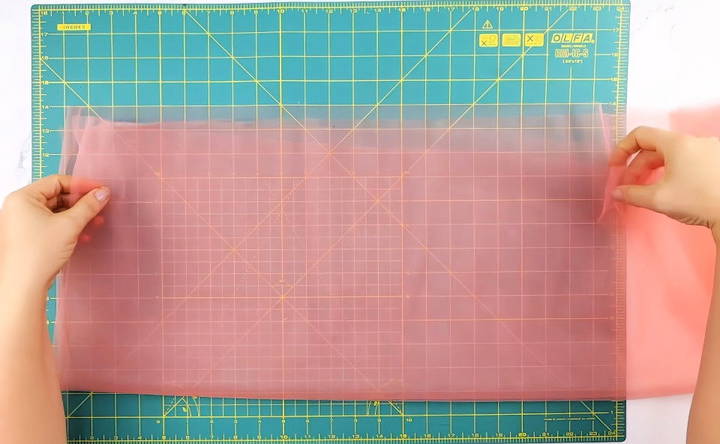
Unfold the Strips
- Once unfolded, each strip will measure the full length needed for the tutu. Repeat this process until you have enough strips for a full skirt.
Step 3: Assemble the Tutu
This part involves looping the tulle strips onto the elastic waistband:
Secure the Elastic
- Place the elastic around a rounded object like a water bottle or a roll of paper towels. This keeps it stretched and steady while you work.
Tie the Tulle Strips
- Take one strip of tulle and fold it in half to form a loop at the top.
- Slide the loop under the elastic band.
- Pull the two loose ends of the strip through the loop, securing it tightly onto the elastic.
- Adjust the knot to ensure it is snug but not overly tight.
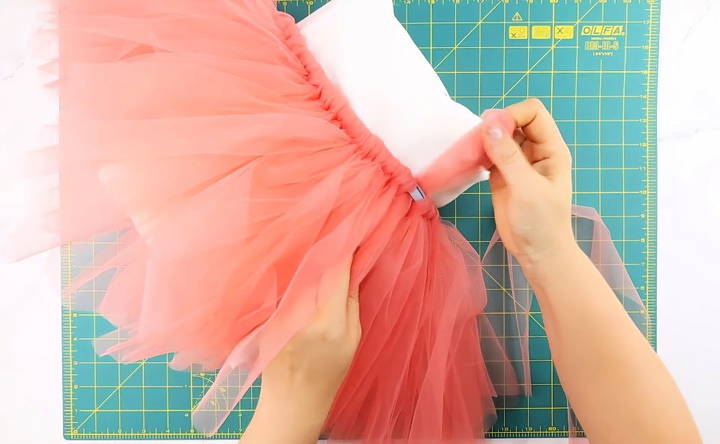
Repeat: Continue adding strips around the elastic, pushing them close together for a fluffy appearance. Use as many strips as needed to cover the waistband completely.
Tips for a Perfect Tutu
- Layer for Extra Fluff: Add more tulle strips for a denser, fuller tutu. You can even mix colors for a fun, layered effect.
- Trim the Edges: After assembling the tutu, check for uneven lengths. Trim as necessary for a polished look.
- Use Glitter or Printed Tulle: For extra pizzazz, incorporate glittery or patterned tulle alongside solid colors.

Customizing Your DIY Tutu
One of the best parts of making a tutu is personalizing it to match your vision. Here are a few ideas:
- Color Themes: Match colors to a party theme or holiday (e.g., orange and black for Halloween).
- Make a rainbow effect by using strips of different colors.
- Add Embellishments: Attach small bows, flowers, or rhinestones to the tulle for added decoration.
- Make it Versatile: Pair the tutu with matching accessories like headbands, wands, or shoes to complete the look.
Final Thoughts
A DIY no-sew tutu is a delightful project that anyone can tackle. Whether for a child's dress-up box, a special occasion, or just for fun, this fluffy tulle skirt is sure to bring joy and creativity to anyone who wears it. With simple tools and a bit of time, you can make a magical piece that will spark smiles and memories for years to come.
By following this comprehensive guide, you'll have all the tools and techniques to make a stunning tutu that's both budget-friendly and customizable. So grab your tulle, and let's get crafting!
FAQs About DIY No-Sew Tutu Skirt
Explore FAQs about DIY no-sew tutu skirt: easy steps, materials needed, and styling tips for making your perfect tutu without sewing.
For most sizes, you can complete a no-sew tutu in 1–2 hours, depending on your experience and the number of layers.
Absolutely! Follow the same steps and adjust the measurements for an adult’s waist size and desired length.
Yes, but ensure that the knots are secure and the tulle strips are trimmed to prevent tripping. Always supervise toddlers when wearing the tutu.
While tulle is the most popular choice, you can experiment with lightweight fabrics like chiffon, voile, or organza for different textures. Bridal-quality tulle or organza provides a more polished look but may cost more.
The yardage depends on the wearer’s size and the desired fullness. For adults, plan for at least 2–3 yards of tulle for standard sizes. For plus sizes, consider purchasing 3–4 yards or more.
Tutus can bunch up due to low-quality tulle. Use higher-quality materials like bridal tulle or organza for better durability. Storing the tutu hanging up instead of folded can also help maintain its shape.
Yes, adding a bottom layer, such as a taffeta petticoat, is a great idea. For maximum fullness, cut the taffeta in a circular or gathered style before attaching it under the tulle layers.
If you don’t want to sew the elastic ends, you can glue them using strong fabric adhesive or tie the ends securely. Both methods work for a no-sew project.
If you're struggling with fabric movement, try pinning the tulle layers together before cutting or working on a non-slippery surface. Folding the fabric as described in the tutorial also helps with stability.
Start with small, manageable steps like cutting fewer strips at a time. Practice tying the tulle to the elastic before tackling the entire project. Take breaks if needed—it gets easier with practice.


