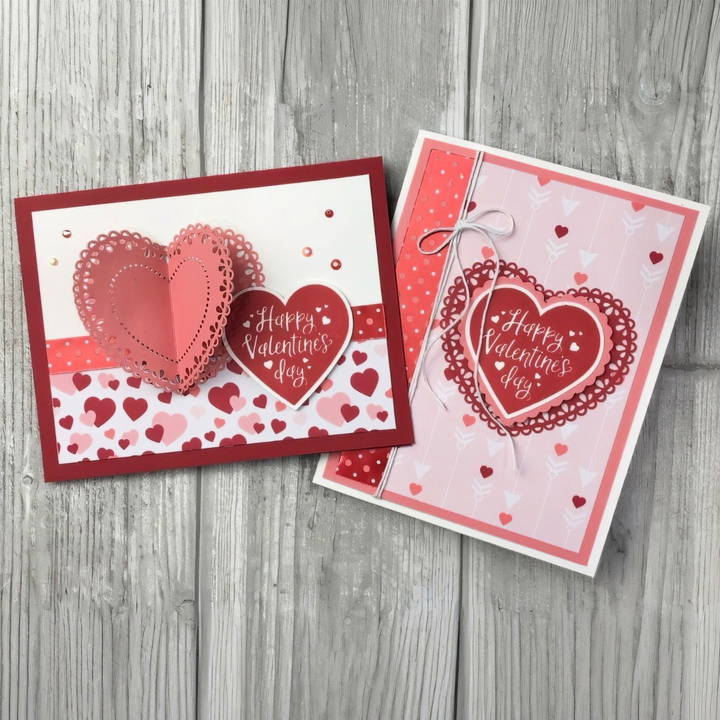
Valentine's Day is a wonderful opportunity to express love and care through thoughtful gestures, and what could be more heartfelt than a handmade card? Making a personalized Valentine's Day card allows you to convey affection in a truly unique and meaningful way. In this guide, you will learn how to make a Valentine's day card, inspired by Lynn Dunn's tutorial on Stamptastic Designs. This project is perfect for all crafting levels, whether you're a seasoned crafter or a beginner.
Supplies You Will Need
Before starting, gather all the necessary materials. Here's a list of what you'll need for this project:
- Cardstock: White, Real Red, and Flirty Flamingo (or colors of your choice for accents and the card base)
- Patterned Paper: Any Valentine's Day-themed pattern will work, but for this tutorial, Lynn uses the "From My Heart" designer series paper.
- Heart Punches or Dies: To make the pop-up hearts, you'll need heart-shaped punches or dies. If you don't have these, you can also cut hearts manually.
- Heart-shaped Doilies: Optional, but they add a beautiful and intricate touch.
- Stamp Set: Any Valentine's Day-themed stamps will work. Lynn uses the Heartfelt stamp set by Stampin' Up!
- Ink Pads: Colors like Real Red and Flirty Flamingo work well for Valentine's Day.
- Liquid Glue: Essential for adhering the heart shapes together.
- Baker's Twine: A nice touch for tying around the card.
- Faceted Gems or Rhinestones: For embellishing the card.
- Bone Folder or Scoring Tool: For precise folds.
With all your materials in place, you're ready to begin!
Step by Step Instructions
Learn how to make a Valentine's day card with step-by-step instructions, from preparing the card base to adding sentiments and decorating the inside.
Step 1: Preparing the Card Base
First, you need to make the foundation for your card. Here's how to get started:
Cut the Cardstock:
- Take a piece of Real Red cardstock and cut it to 5.5 inches by 8.5 inches.
- Score the cardstock at 4.25 inches along the 8.5-inch side. Fold along the scoreline to make the card base. Use a bone folder or your fingers to make a clean, sharp crease.
Prepare the Layers:
- Cut a piece of white cardstock to 5 inches by 3.75 inches. This will be the top layer of your card, which you will decorate later.
- Cut a piece of heart-patterned paper to 1.5 inches by 5 inches. This will serve as a decorative strip across the card.
Assembling the Card Front:
- Adhere the heart-patterned paper across the bottom of the white cardstock layer using liquid glue.
- Cut a smaller strip of patterned paper, 0.5 inches by 5 inches, and adhere it just above the heart-patterned strip, slightly overlapping it. This makes a layered look.
Attach the Layer to the Card Base:
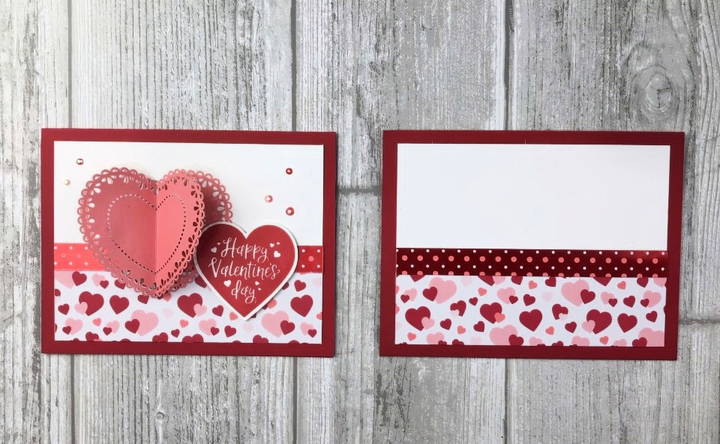
- Once the decorative layer is complete, glue the entire white cardstock piece onto the Real Red card base. Now your card is ready for the 3D pop-up heart embellishment!
Step 2: Making the Pop-Up 3D Hearts
The heart of this card (pun intended!) is the 3D pop-up element. These dimensional hearts can be made using heart-shaped doilies, cardstock hearts, or a combination of both.
Punch or Cut Heart Shapes:
- For each pop-up heart, you'll need 3 to 5 heart shapes. You can use heart punches, dies, or cut them by hand. If using heart-shaped doilies, you can skip the cutting.
Score and Fold the Hearts:
- Score each heart directly down the middle from the top point to the bottom point. Fold each heart shape in half along the score line.
Adhere the Hearts Together:
- Start by applying liquid glue to one half of the folded heart. Attach another heart to this glued side, aligning the edges carefully.
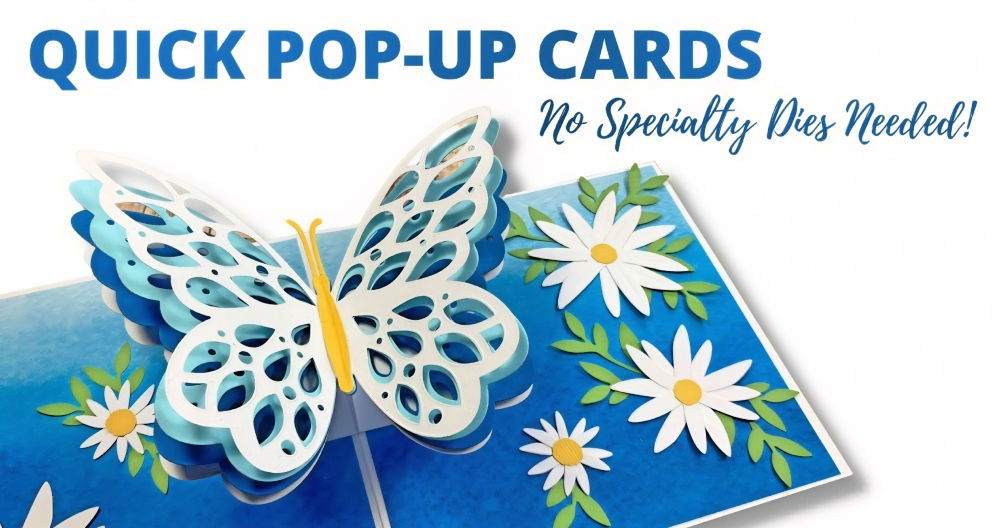
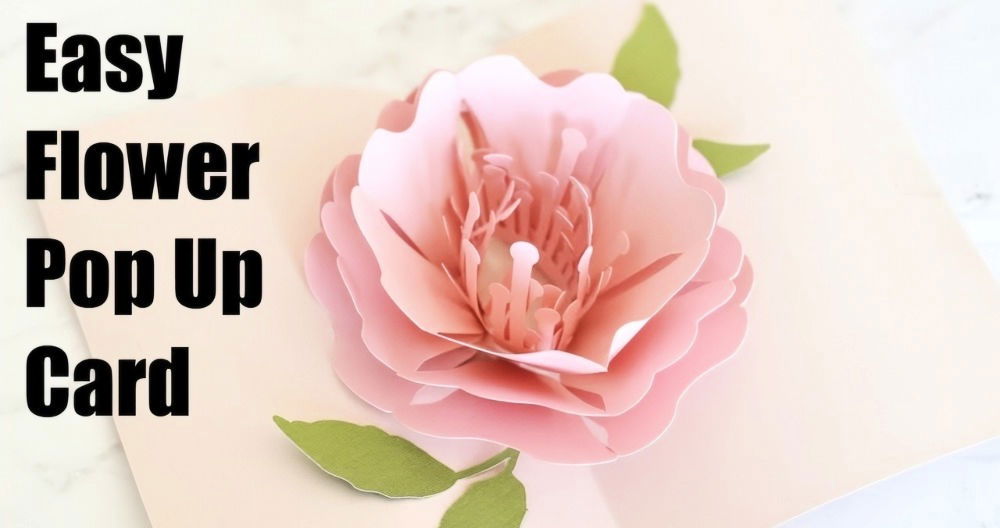
- Repeat this process until all hearts are adhered together. You now have a layered accordion heart that will pop up when the card is opened.
Attach the Pop-Up Heart to the Card:
- Once your 3D heart is complete, adhere the back side of the last heart to the card's front using liquid glue. Position it on the left side of the card, slightly overlapping the decorative strips.
- If you prefer, you can make an additional 3D heart to add inside the card for a surprise pop-up element when the card is opened.
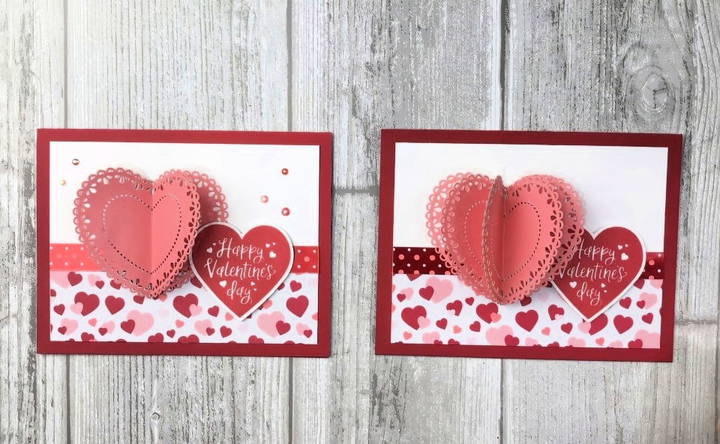
Variation: Cardstock vs. Doilies
If you decide to use cardstock hearts instead of doilies, follow the same process for cutting, scoring, and folding. The only difference is that the cardstock hearts will have a cleaner, simpler look compared to the intricate design of the doilies. Both options make beautiful results—choose whichever fits your style!
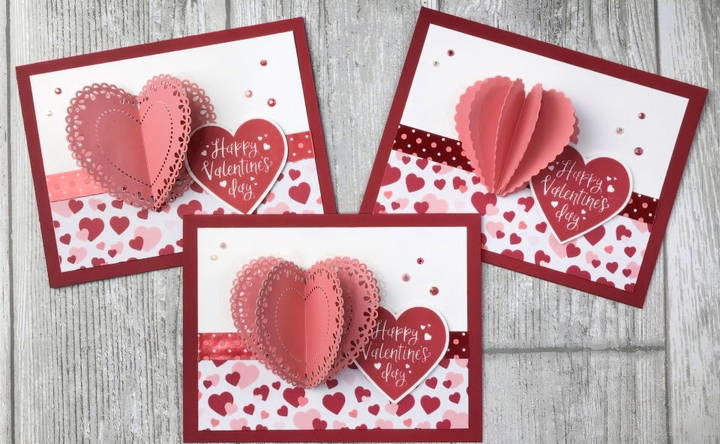
Step 3: Adding Sentiments and Embellishments
Now that your 3D heart is in place, it's time to finish decorating the card:
Stamp a Sentiment:
- Using your stamp set, choose a Valentine's Day sentiment, such as "Happy Valentine's Day" or "You Have My Heart."
- Stamp the sentiment onto a scrap piece of white cardstock using red ink.
- Punch or cut out the sentiment using a heart punch or die.
Add the Sentiment to the Card:
- Using foam dimensionals, adhere the sentiment heart to the card, slightly overlapping the 3D pop-up heart for a cohesive design.
Embellish the Card:
- For extra sparkle, add faceted gems or rhinestones to the card. Place them around the sentiment or near the 3D heart for a decorative touch.
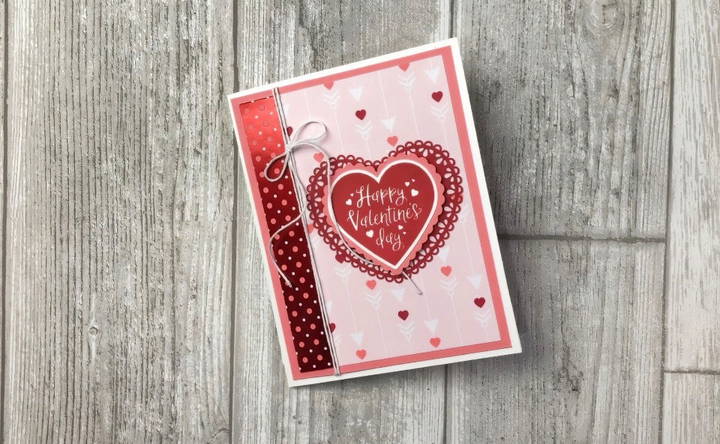
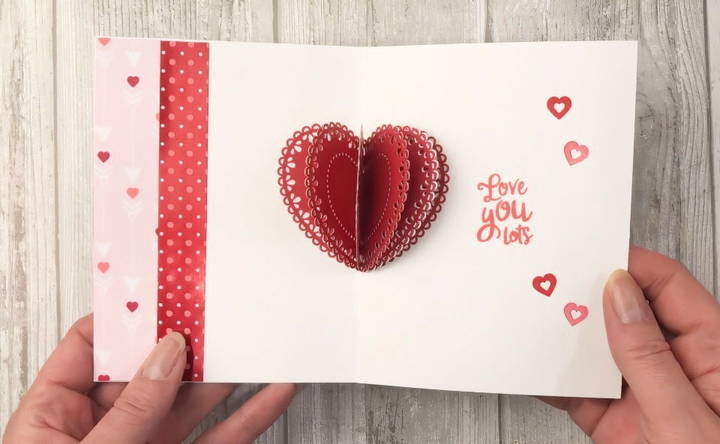
Step 4: Decorating the Inside of the Card
Don't forget to add a little something to the inside of your card. After all, it's what's inside that counts!
Patterned Paper Strips:
- Cut a piece of patterned paper 5.5 inches by 1 inch and adhere it to the left side of the inside of the card.
- Cut another strip of patterned paper, 0.75 inches by 5.5 inches, and adhere it right next to the first strip. This adds a decorative border to the inside of your card.
Pop-Up Heart Inside:
- If you want to add a pop-up element inside, repeat the steps from the 3D heart creation. Glue the back of the last heart to the center of the card's fold line, making sure it aligns perfectly with the card's crease.
- When the card is closed, the hearts will fold flat, and when it's opened, they will pop up to surprise the recipient.
Stamp a Message:
- Use your stamp set to add a personalized message inside. You can stamp small hearts or a sweet sentiment to complete the inside design.
Tips for Success
- Liquid Glue: Liquid glue is preferable because it gives you time to adjust the placement of your elements. It dries quickly but allows enough time to make sure everything is positioned perfectly.
- Choosing Colors: While Lynn uses a traditional color palette of red, pink, and white, feel free to personalize your card by using colors that resonate with you or the recipient.
- 3D Heart Variations: You can experiment with other shapes to make pop-up elements. For example, stars or circles can also be used for different occasions.
FAQs About How to Make a Valentine's Day Card
Get answers to FAQs about making Valentine's day cards. Learn tips, tools, and steps to make the perfect handmade card for your loved one.
If you don’t have heart-shaped doilies, you can easily substitute them with cardstock hearts. Simply cut out heart shapes by hand, use a heart punch, or employ a die-cutting machine. The process of folding and adhering the hearts together remains the same.
You can use either 3 or 5 hearts. A 3-heart pop-up gives a lighter, simpler look while using 5 hearts creates a fuller and more impressive effect. Both are great, but for a bolder design, 5 hearts work best.
Liquid glue is recommended for adhering to the hearts because it allows flexibility in positioning. You can adjust the alignment of the hearts before the glue sets, ensuring precise placement for the pop-up effect.
Yes! The 3D heart pop-up lays flat when the card is closed, making it perfect for mailing. Just ensure that your card isn’t too thick for standard postal sizes, especially if you use embellishments like faceted gems.
If you don’t have designer-patterned paper, you can make your own patterns using stamps, markers, or even leftover scraps of paper. Alternatively, use plain cardstock in complementary colors to add visual interest to your card.
If your hearts don’t fold perfectly, use a bone folder or a ruler to gently crease the fold lines. Ensuring the hearts are scored and folded precisely will help them adhere correctly and pop up evenly.
Feel free to use any shape you prefer, such as stars or circles. The pop-up technique works the same way with different shapes, allowing you to adapt the design for various occasions beyond Valentine’s Day.
Yes, decorating both the inside and outside of the card adds an extra layer of surprise. Consider placing a 3D pop-up heart inside for a fun reveal, while keeping the card front more straightforward with stamps and embellishments.
Absolutely! The pop-up card technique is versatile and can be adapted for birthdays, anniversaries, or any event where you want to add a creative touch. Simply change the shape and theme to suit the occasion.
To avoid making your card too bulky, use flat embellishments like stickers, faceted gems, or thin ribbons. Avoid layering too many items in one area, and always test closing the card to ensure it folds flat for mailing.
Conclusion
With just a few supplies and some creativity, you can make a stunning DIY Valentine's Day card that will surely impress your loved ones. This tutorial provides a simple yet elegant design, with plenty of room for customization. Whether you use heart-shaped doilies or cardstock hearts, this 3D heart technique is versatile and can be adapted for many occasions beyond Valentine's Day.
Happy crafting, and may your handmade Valentine's Day cards bring joy and love to everyone who receives them!


