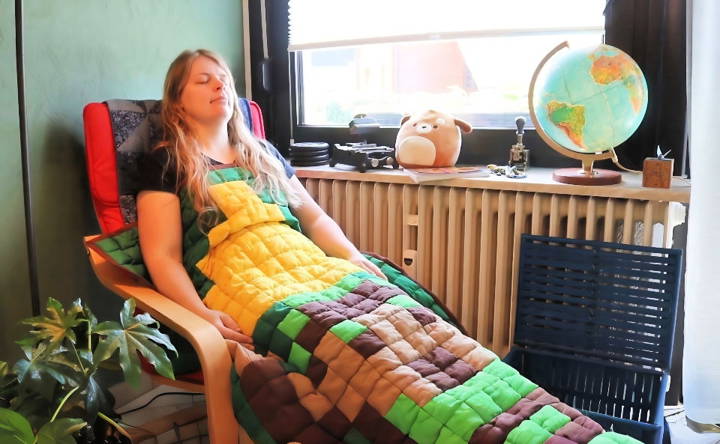
Making a DIY weighted blanket for better sleep has been one of my most rewarding projects. One winter night, I decided to make my own weighted blanket using simple materials like cotton fabric and tiny beads. The process was straightforward but required a bit of patience. I measured, cut, and sewed the fabric to make pockets where the beads would go.
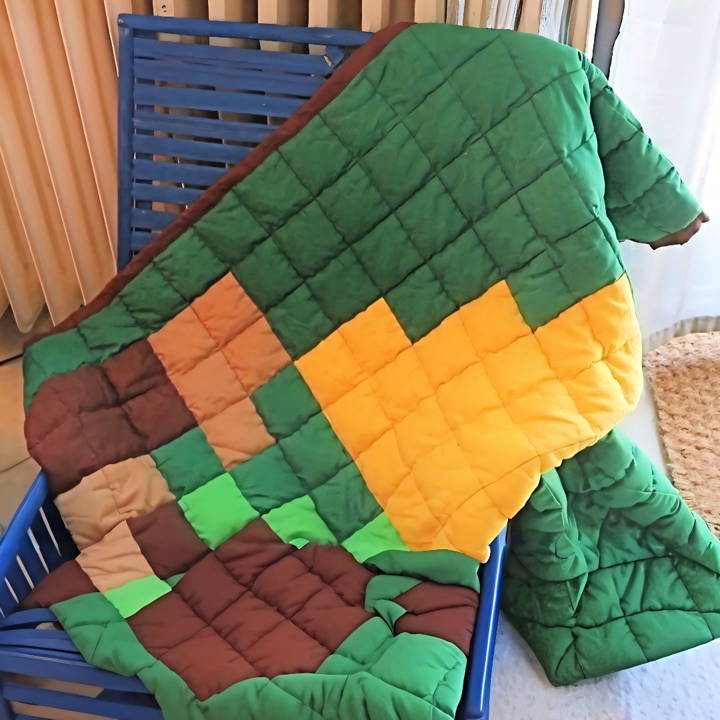
These weighted blankets help by applying gentle pressure, which feels like a hug. To start, I divided the blanket into small squares and filled each with an equal amount of beads. This ensures an even distribution of weight. By the end, I had a cozy, therapeutic blanket that greatly improved my sleep quality. Give it a try; it's easier than you think, and I'm here to guide you through.
Understanding Weighted Blankets
Weighted blankets are more than just a cozy cover; they're a type of at-home therapy known for their benefits in improving sleep and reducing anxiety. Here's a simple breakdown of what they are and how they can help you.
What is a Weighted Blanket?
A weighted blanket is a heavy blanket filled with materials like glass beads or plastic pellets. The weight varies, but it's typically around 10% of your body weight. This kind of blanket is designed to provide gentle, even pressure across your body, mimicking a therapeutic technique called Deep Touch Pressure (DTP).
How Does Deep Touch Pressure Work?
Deep Touch Pressure is the firm but gentle squeezing, hugs, or holding that relaxes the nervous system. It's like getting a hug! This pressure can help increase serotonin and melatonin levels, making you feel more relaxed and sleepy while decreasing cortisol levels, which are associated with stress.
Why Use a Weighted Blanket?
People use weighted blankets to help with several issues, including:
- Insomnia: The pressure can help you fall asleep faster and sleep more deeply.
- Anxiety: It can reduce feelings of anxiety by providing a sense of security.
- Restless Leg Syndrome: The blanket's weight can provide a soothing sensation for your legs.
- Sensory Processing Disorder: It can help calm down an overstimulated nervous system.
Weighted blankets can help many but aren't for everyone. Consult a healthcare provider if you have respiratory, circulatory, or temperature regulation concerns.
Gather Your Materials
Discover the essential materials you need and understand why each is crucial for your project. Gather your materials efficiently with our expert guide.
Materials Needed:
- Quilt (pre-made)
- 2 layers of additional fabric (for the inner layer and backing)
- Curved safety pins
- Polyester filling beads
- Fabric for edge binding
- Sewing machine and gray thread
- Funnel and paper or plastic tube
- Long pins and clips
- Sewing needle (for hand finishing)
Why Each Material is Needed:
- Quilt: Serves as the decorative top layer.
- Additional fabric layers: These provide structure and encase the filling beads.
- Curved safety pins: Essential for basting the layers together; their curved shape makes handling easier.
- Polyester filling beads: The core element that adds weight to the blanket.
- Fabric for edge binding: It gives a neat finish and contains everything securely.
- Sewing materials: For assembling the blanket step by step.
Step by Step Instructions
Learn how to make a weighted blanket with our easy step-by-step guide. Perfect for improving sleep and reducing anxiety. Follow these simple instructions!
Step 1: Baste the Layers Together
Laying out my quilt and its two additional fabric layers, I oversaw my workspace. It's crucial to keep these layers oversized to compensate for any shifts during the sewing process. Using curved safety pins, I basted them together, placing pins about 20 centimeters apart. This preparation ensured the layers stayed aligned, preventing missteps later on.
Step 2: Quilting in Parallel Lines
With my layers basted, it was time to quilt. I aimed to sew down the middle first, gradually working outward in parallel lines. This technique maked separate channels, a crucial detail for later when I'd fill the blanket with beads. To avoid poking myself and ensuring the quilt could pass through my sewing machine, I rolled the sides up neatly.
Step 3: Adding Polyester Filling Beads
The heart of a weighted blanket lies in its beads. Determining you need about 10% of your body weight in beads for your blanket, I calculated I needed 5.8 kilograms of beads, given my quilt's initial weight. Adding these evenly is challenging but necessary to avoid all beads congregating in one spot. My approach involved turning each quilt square into a compartment for filling, though I later realized fewer, larger compartments might simplify this process.
Step 4: Dealing with Filling Challenges
Filling the quilt with beads was the most daunting task. I started using a funnel but found a paper tube worked better for guiding the beads without clogging. Each filled row then had to be sewn shut, a process made difficult by the beads that wanted to escape their confines and possibly break my needle. Patience, along with careful maneuvering of beads away from the sewing line, was key here.
Step 5: Final Touches with Edge Binding
With all rows filled and sealed, trimming the excess fabric and adding edge binding were my final steps. The edge binding not only enhanced the blanket's appearance but also ensured all beads stayed securely inside. I chose to hand-finish this part, sewing the binding for a polished look.
Customization Tips
Making a weighted blanket gives you the freedom to tailor it to your personal needs and style. Here's how you can customize your blanket for maximum comfort and appeal:
- Choose Your Fabric Wisely Selecting the right fabric is crucial. You want something that feels good against your skin and is easy to clean. Cotton is a popular choice because it's breathable and washable. The minky fabric is soft and warm, perfect for cooler climates. If you're sensitive to textures, opt for a smooth fabric like satin.
- Pick the Perfect Filling The filling gives the blanket its weight. Glass beads are commonly used because they're small, dense, and washable. Plastic poly pellets are another option; they're larger and make your blanket bulkier. For a natural option, consider using rice or millet, but keep in mind these can't be washed.
- Get Creative with Design Your weighted blanket doesn't have to be plain. Add a personal touch with patterns or colors that make you happy. You can even sew on patches or embroidery. If you're making a blanket for a child, let them pick out a fabric featuring their favorite cartoon character or animal.
- Adjust the Weight The general guideline is for the blanket to be about 10% of your body weight, but this isn't a one-size-fits-all rule. Start with less weight; you can always add more. It's important that you feel comfortable and not overwhelmed by the weight.
- Consider the Size. You might want a blanket that covers your whole bed or just one that covers you. Think about where you'll use it most. A smaller blanket is easier to carry around and could be a good choice if you want to use it on the couch or in a chair.
- Secure Stitching is Key No matter how you customize your blanket, make sure the stitching is secure. This keeps the filling in place and extends the life of your blanket. If you're not confident in your sewing skills, consider getting help from someone who is.
By following these tips, you can make a weighted blanket that's as unique as you are. Remember, the goal is to make something that helps you feel relaxed and comfortable, so focus on what feels right for you.
Troubleshooting Common Issues
When crafting a DIY weighted blanket, you might run into a few hiccups along the way. Here's a straightforward guide to solving some common problems you may encounter:
- Uneven Weight Distribution If your blanket feels lumpy or the weight isn't evenly distributed, check your pockets. They should be uniform in size. If they're not, measure and sew them again. Make sure you're filling each pocket with the same amount of beads or pellets.
- Filling Leakage Finding beads everywhere? Your stitching might not be tight enough. Double-check your seams and reinforce any loose ones. Consider using a stronger thread or a smaller stitch length to prevent future leaks.
- Fabric Bunching If your fabric is bunching up after adding the filling, it's often because the fabric isn't taut enough. When sewing, pull the fabric slightly to keep it tight. Ironing the fabric before you start can also help prevent this issue.
- Weight Feels Too Heavy or Light: The ideal weight of your blanket is personal. If it feels off, adjust the amount of filling. Remember, it's easier to add more weight than to take it away, so start lighter and increase gradually if needed.
- Difficulty Sewing Through Thick Layers Sewing through multiple layers can be tough. Use a walking foot or a heavy-duty needle on your sewing machine. If you're hand-sewing, a thimble can save your fingers and make pushing the needle through easier.
- Washing and Drying Concerns Weighted blankets can be heavy when wet, and some fillings aren't washable. Always check the care instructions for your materials. For non-washable fillings, consider making a removable cover that can be easily laundered.
By keeping these tips in mind, you'll be well-equipped to handle any challenges that arise during your DIY weighted blanket project.
Safety Considerations
When it comes to DIY weighted blankets, safety is paramount. Here's a clear and straightforward guide to ensure your weighted blanket is used safely and effectively:
Weight Guidelines
- Adults: Choose a blanket that's around 10% of your body weight. This provides enough pressure for comfort without being overwhelming.
- Children: For kids, the blanket should be lighter—about 10% of their body weight plus one or two pounds.
- Consult Healthcare Providers: If you have any health concerns, such as respiratory issues or claustrophobia, talk to a healthcare provider before using a weighted blanket.
Using the Blanket Safely
- Never Restrict Movement: A weighted blanket should never be so heavy that you can't move freely under it.
- Keep Your Face Clear: Always ensure your head and especially your face are not covered by the blanket to avoid any breathing difficulties.
- Supervision for Children: When children use a weighted blanket, they should be supervised to ensure they can remove the blanket if needed.
Choosing Materials
- Non-Toxic Fillers: Use fillers that are non-toxic and not a choking hazard, especially if children will use the blanket.
- Quality Fabric: Select durable fabric that can hold the weight without tearing.
Making the Blanket
- Secure Seams: Make sure all seams are strong and secure to prevent any spillage of the blanket's filling.
- Even Weight Distribution: Distribute the weight evenly across the blanket to ensure consistent pressure.
By following these safety considerations, you can enjoy the benefits of your DIY weighted blanket with peace of mind, knowing that you've prioritized safety in its creation and use.
FAQs About DIY Weighted Blanket
Discover faqs about DIY weighted blanket, providing answers on materials, weight guidelines, sewing tips, and care instructions for a perfect homemade blanket.
A DIY weighted blanket is a homemade version of the commercially available blankets designed to provide gentle pressure on the body, simulating the feeling of being held or hugged. This sensation can help reduce anxiety and improve sleep. The weight in these blankets comes from materials like poly-pellets, glass beads, or even dried beans, which are distributed evenly across the blanket in pockets or channels.
The size of your weighted blanket should match the dimensions of your bed or be suitable for the intended user. A common guideline for the weight is to use approximately 10% of the user’s body weight. For example, a person weighing 150 pounds might use a 15-pound blanket. Remember to add about 4 inches to both the length and width of your fabric to accommodate the fill.
Yes, but it depends on the materials you use. If you choose machine-washable poly-pellets and fabrics, your blanket will be easier to clean. It’s best to check the care instructions for each material to ensure they are compatible with washing. Some people prefer to make a removable cover for easy washing.
Weighted blankets are not recommended for very young children due to the risk of suffocation. Additionally, if you have respiratory or circulatory conditions, consult with a healthcare provider before using a weighted blanket. Ensure that the fill materials are securely enclosed to prevent any choking hazards.
To ensure your DIY weighted blanket remains in good condition, follow these maintenance tips:
Wash Sparingly: Frequent washing can wear out the fabric and filling. Spot clean small stains and only wash the entire blanket when necessary.
Use a Removable Cover: A cover can protect the blanket from spills and stains. It's easier to wash a cover regularly than the weighted blanket itself.
Even Distribution: Periodically check that the weight is evenly distributed. Shake the blanket out if you notice any bunching or shifting of the fill.
Storage: When not in use, store your blanket in a cool, dry place to prevent mold and mildew. Avoid folding it tightly, which can cause the fill to bunch up.
Final Thoughts:
By following these steps, you can make a DIY blanket that helps you sleep better every night. It's practical, cost-effective, and very satisfying to make. I encourage you to start this project; it might be the perfect solution for enhancing your sleep.


