Making an epoxy mold is a rewarding process that allows for beautiful resin art, custom resin tables, and a variety of other creative projects. With just a few materials and tools, you can make your own epoxy mold at home. This tutorial guides you step-by-step, detailing the key tools, materials, and techniques for crafting a reliable epoxy resin mold.
Materials Needed for Making an Epoxy Mold
To make a simple and functional epoxy mold, you'll need the following materials, many of which are common in woodworking and crafting shops:
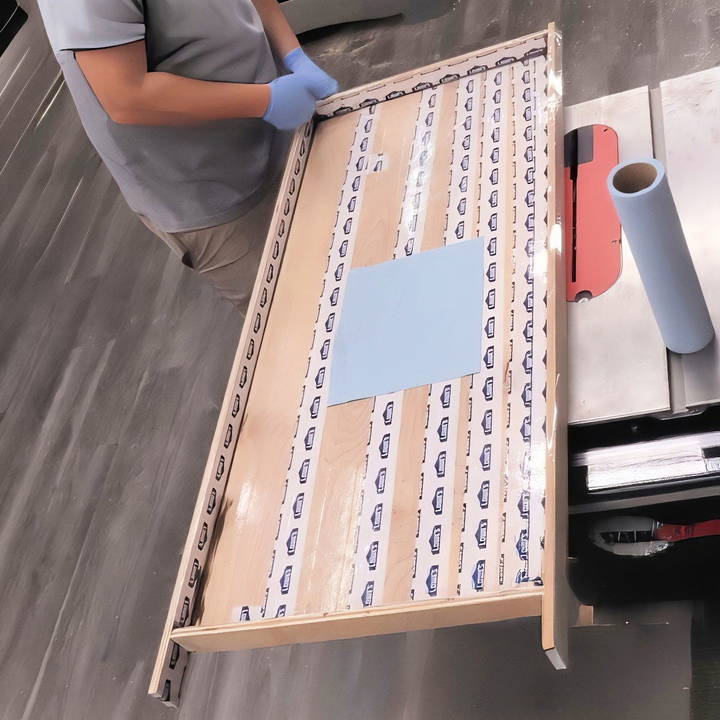
- Plywood: Serves as the base and sides of your mold. It should be thick enough to support the weight of the epoxy resin.
- Packing Tape: Regular packing tape or sheathing tape works best for covering the plywood to prevent epoxy from sticking.
- 100% Silicone Sealant: Used to seal the seams and corners of the mold to prevent leaks.
- Nitrile Gloves: Protect your hands when working with silicone and epoxy.
- Brad Nails: For securing the mold's walls to its base.
Essential Tools
You'll also need some basic tools to assemble and secure the mold:
- Table Saw: To cut plywood into precise strips for the mold walls.
- Brad Nailer: To attach the walls to the base of the mold.
- Hammer and Crowbar/Chisel: For disassembling the mold after the epoxy has cured.
- Flat Surface: A sturdy, level surface is crucial for preventing uneven epoxy pours.
Step by Step Instructions
Learn how to make an epoxy mold with detailed, step-by-step instructions and expert tips. Ensure perfection with our common issues guide and safety tips.
Step 1: Cut the Plywood
Begin by cutting the plywood into strips to make the walls of your mold. Here's how to approach it:
- Measure Your Desired Dimensions: Set your table saw's fence to the thickness of the epoxy piece you're aiming to make, adding the thickness of the plywood strips. This extra thickness allows for easier removal later.
- Leave Some Extra Space: Ensure there is a bit of additional room in the measurements for flexibility when breaking the mold apart after the epoxy cures.
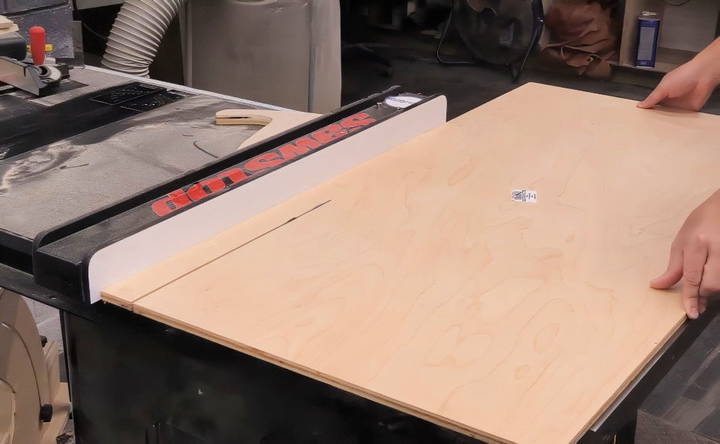
Step 2: Assemble the Mold Walls
Once you have the plywood cut into strips, it's time to assemble the mold's frame:
- Cover with Tape: Use packing tape to cover the bottom and sides of the mold. Make sure to overlap each layer slightly so that no resin can stick to the plywood underneath.
- Secure the Walls to the Base: Place the mold on a flat surface and use a brad nailer to attach the walls to the bottom piece. Be sure that the bottom of the mold is flush with the walls to ensure even epoxy distribution during pouring.
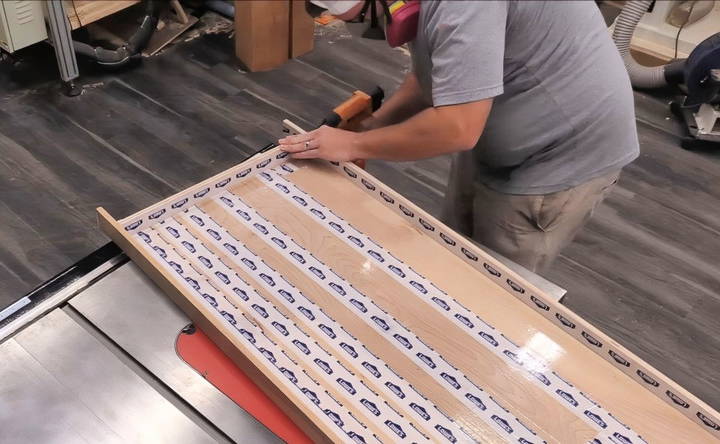
Step 3: Apply the Silicone Sealant
Silicone is critical for preventing epoxy leaks. Follow these steps to apply it properly:
- Seal the Corners and Seams: Apply a bead of 100% silicone along all the seams and corners inside the mold.
- Use Gloves to Smooth the Silicone: Wear nitrile gloves and use your finger to press the silicone into the seams, ensuring complete coverage.
- Check for Gaps: It's helpful to use a silicone color that contrasts with your plywood (e.g., brown) to easily spot any gaps that might cause leaks.
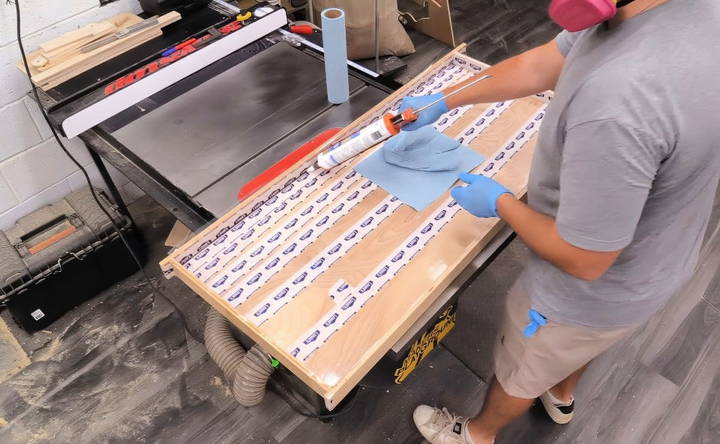
Step 4: Pouring the Epoxy
Now that your mold is ready, it's time to pour the epoxy:
- Level the Mold: Make sure your mold is sitting on a flat surface. This will ensure an even pour and prevent uneven layers in your resin.
- Mix and Pour the Epoxy: Follow the manufacturer's instructions for mixing your epoxy resin, ensuring that it is well-mixed before pouring it into the mold.
- Allow the Epoxy to Cure: Curing time varies based on the type of epoxy and the thickness of the pour. Make sure to check the instructions for the specific resin you are using.
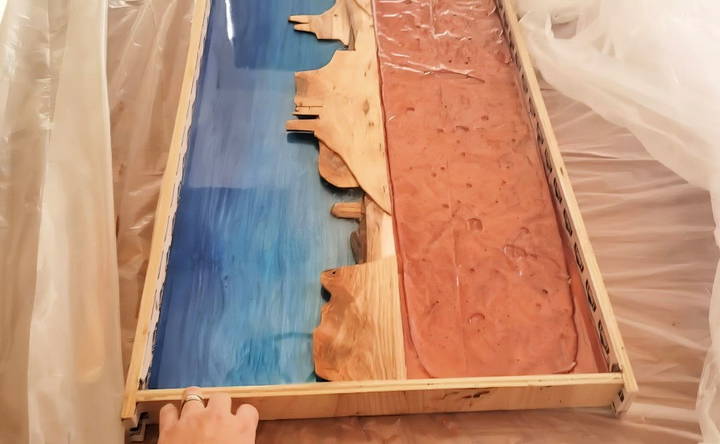
Step 5: Remove the Mold
Once your epoxy has fully cured, it's time to take apart the mold and release your resin piece:
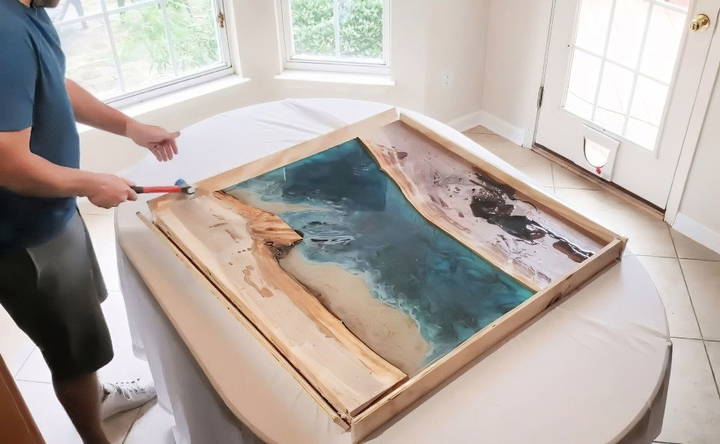
- Disassemble the Mold: Use a hammer and a crowbar or chisel to carefully pry the mold apart. The extra space you left earlier will come in handy here, allowing you to easily break the walls away from the base.
- Avoid Damage: Be gentle during this process to prevent damaging your epoxy piece. The packing tape should have done its job, ensuring the epoxy does not stick to the mold.
Tips and Tricks for a Perfect Epoxy Mold
- Use Sheathing Tape in a Pinch: If you run out of packing tape, sheathing tape is an excellent alternative for covering plywood.
- Apply Multiple Layers of Tape: Overlapping layers of tape ensures that no epoxy can seep through to the plywood, making it easier to remove the cured epoxy.
- Work in a Well-Ventilated Area: Epoxy resin can emit fumes that are harmful when inhaled. Ensure that your workspace is well-ventilated to keep the air clean and fresh.
- Test for Leaks: Before pouring a large quantity of epoxy, test your mold with a small amount of water to ensure that there are no leaks in the corners or seams.
Common Issues and How to Solve Them
Even with a well-made mold, some issues may arise. Here are solutions to common problems:
- Leakage: If you notice epoxy leaking from your mold, it is likely due to gaps in the silicone. You can add additional silicone to the leaking area and let it cure before proceeding with your pour.
- Uneven Epoxy Surface: If the surface of your epoxy piece is uneven, it may be due to an unlevel mold. Always double-check that the mold is on a flat surface before pouring the resin.
- Difficulty Removing the Mold: If the mold is tough to break apart, you might have used too many brad nails. Using fewer nails will make disassembly easier while still keeping the mold secure during the curing process.
Safety Precautions When Working with Epoxy
- Wear Protective Gear: Always wear nitrile gloves when handling epoxy and silicone to avoid skin contact, as these substances can cause irritation.
- Avoid Inhalation: Use a respirator mask if you are working in an area that isn't well-ventilated, as epoxy fumes can be hazardous over time.
- Follow Manufacturer's Instructions: Epoxy resins vary in their mixing ratios and curing times, so make sure to follow the instructions provided with your specific product.
Why Make Your Own Epoxy Mold?
Making your own epoxy mold can save you money and allows for customization that might not be possible with pre-made molds. Here's why making your own mold is beneficial:
- Cost-Effective: With basic materials like plywood, tape, and silicone, you can make molds at a fraction of the cost of store-bought options.
- Custom Sizing: Making your own mold gives you control over the size and shape, making it easier to fit your specific project needs.
- Reusability: If constructed properly, the mold can be reused for multiple projects, adding to its value over time.
Conclusion: Making Beautiful Epoxy Projects with Custom Molds
Making an epoxy mold is a straightforward process that allows for a wide range of creative possibilities. By following this guide, you can build a durable and reusable mold that will enable you to make stunning resin pieces with ease. Whether you're working on resin art or custom furniture, the ability to make your own molds will empower you to explore new projects and perfect your epoxy skills.
With a little practice, you'll find that making your own epoxy mold is not only satisfying but also a great way to ensure your resin projects are exactly what you envision. Happy crafting!
FAQs About DIY Epoxy Mold
Learn how to make a DIY epoxy mold with this easy guide. Perfect for crafting unique resin pieces at home with professional results.
Yes, molds made with plywood and tape can be reused. Use screws instead of nails for easier disassembly. Before each use, check for any damaged tape or silicone and replace as needed. For a more durable solution, consider using HDPE sheets instead.
Packing tape is the most affordable option for lining molds, and it works well to prevent epoxy from sticking. Sheathing tape is more durable and provides better adhesion, but it is significantly more expensive. Packing tape is usually sufficient for most projects.
No mold release is required when using tape or HDPE sheets. However, if you are using melamine as a base, applying a mold release agent is recommended. Tape alone typically allows the epoxy to separate easily without additional release agents.
For deep pours, use a resin designed for deep casting, such as SuperClear Deep Pour, which helps bubbles rise to the surface. Stir the resin slowly for 8-10 minutes to minimize bubbles. After pouring, wait 15-20 minutes and use a heat gun or propane torch to pop any remaining bubbles.
To remove the epoxy piece, use a hammer and a smooth wedge or pry tool to gently separate the mold's sides. Start at the corners and work slowly to avoid damaging the cured epoxy. If the piece is difficult to remove, ensure that the tape is not sticking to any corners.
Hot glue can be used, but it is not recommended. It can be harder to apply neatly and may be difficult to remove afterward. Silicone is easier to spread and provides a more reliable seal for preventing epoxy leaks.
To make a mold for curved edges or round shapes, use a flexible material like thin MDF or hardboard. Wrap the material around a circular base and secure it with screws or nails, using tape to prevent sticking. Silicone the seams for a tight seal before pouring epoxy.
Yes, tape may leave lines or imprints on the surface of the cured epoxy. These can be sanded out with fine-grit sandpaper or covered with a thin flood coat of epoxy for a smoother finish. Alternatively, using HDPE as a base can result in a smoother finish without the need for additional sanding.
For tables, a minimum thickness of 1 inch is recommended, with 1.5 inches being ideal for stability. Thinner pours are suitable for smaller art pieces but can be more prone to warping. Always ensure the mold is on a flat, level surface during the curing process.
Yes, you can keep the epoxy in the mold if you want the mold to serve as a frame or base for your table. Skip the tape on the bottom, allowing the epoxy to bond with the wood. Seal the seams well with silicone to prevent leaks.


