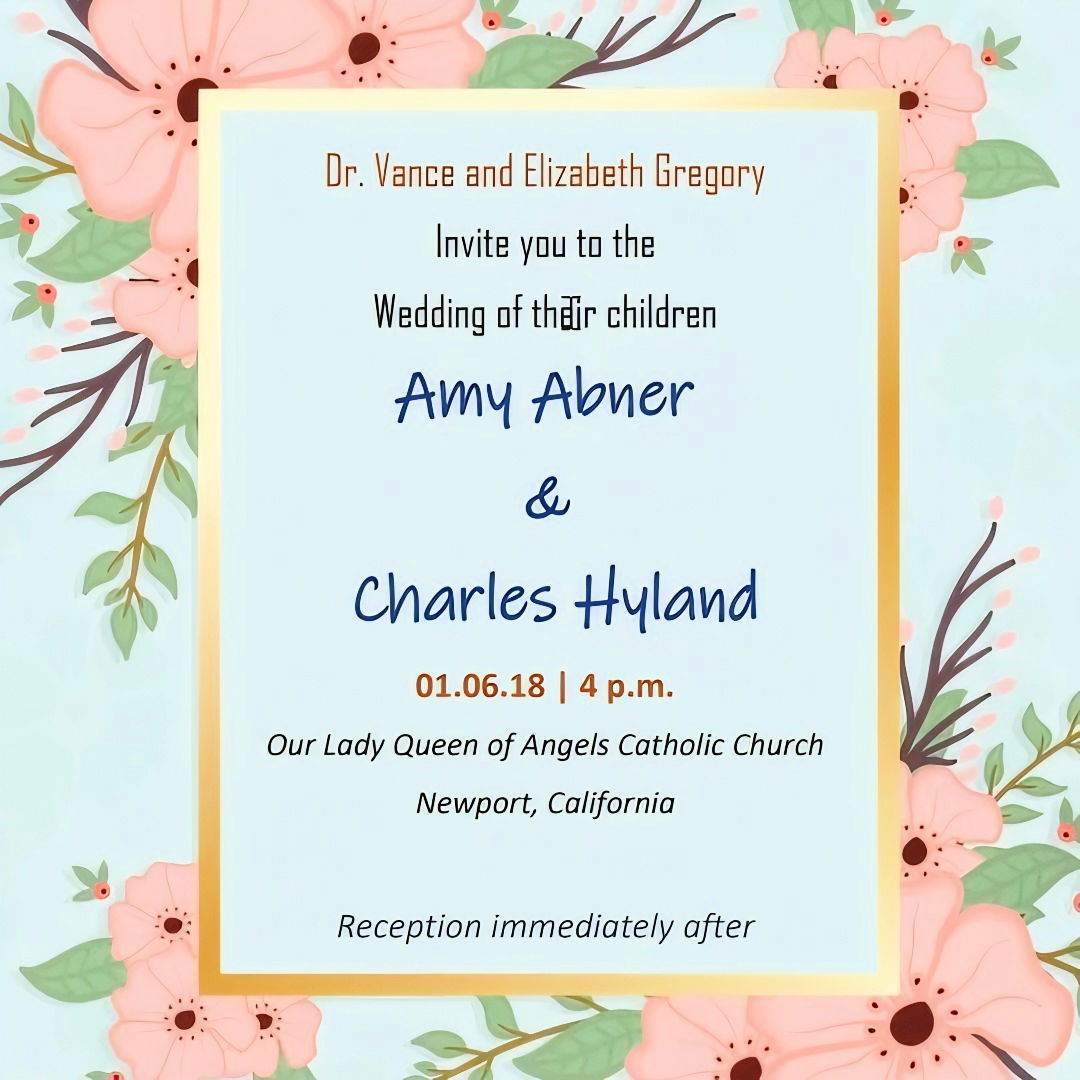
Making an invitation card is not just a task but an opportunity to express creativity and personalization. Whether you're designing an invitation for a wedding, birthday, or corporate event, crafting it with a personal touch adds to its charm. Today, making invitation cards has become much easier with various tools and software. One of the simplest and most accessible tools for making an invitation card is Microsoft Word. This comprehensive guide will walk you through the steps needed to make a beautiful and professional invitation card using Microsoft Word.
Step by Step Instructions
Learn how to make an invitation card with our step-by-step guide, from setting up your document to printing and sharing. Perfect for any event!
1. Setting Up Your Document
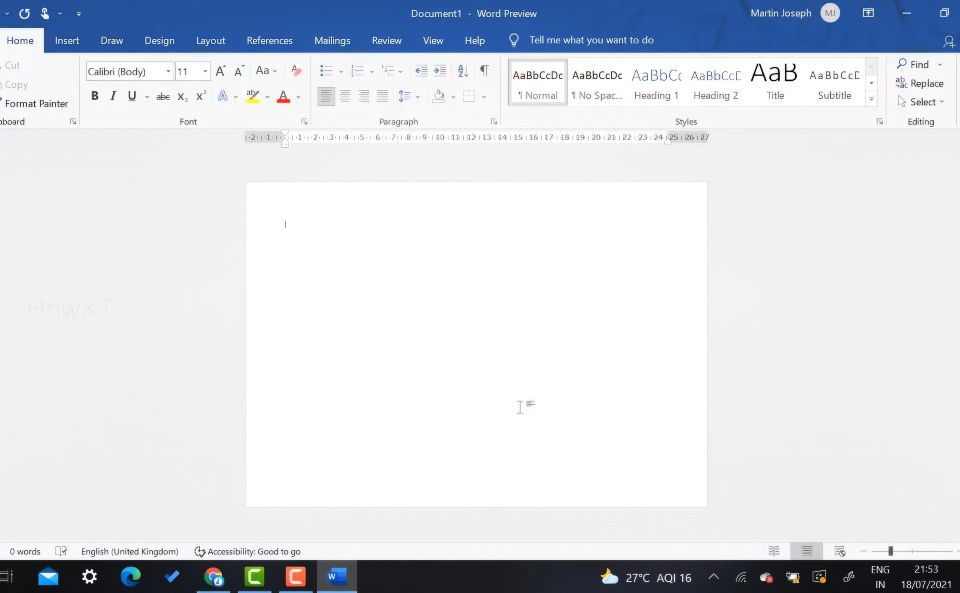
The first step in making an invitation card is to set up the document correctly. The size of the document is essential because it determines the final output size of the invitation card. Most invitations are printed on A5 or A4 paper in either landscape or portrait orientation. Here's how to set up the document:
- Open Microsoft Word on your computer.
- Click on File and choose New to open a blank document.
- Go to the File tab again, select Print, and then click on Page Setup. Here you will be able to choose your preferred page size, which could be A5, A4, or even a custom size based on your preference.
- Choose between Portrait or Landscape orientation depending on your design. For instance, landscape orientation is typically used for a horizontal invitation card, while portrait orientation is for vertical cards.
2. Choosing a Background Image
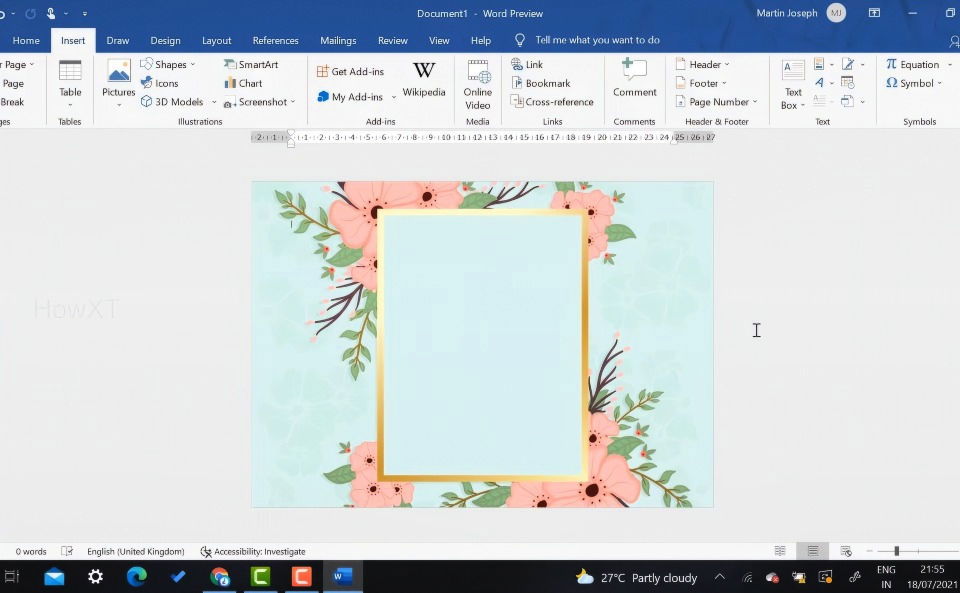
Once your document setup is complete, it's time to add a background image to your invitation card. This will make your design stand out. Microsoft Word allows you to add any image to the background, and this can be sourced from the internet or maked yourself.
Here's how to add a background image:
- Search for an appropriate background. For a wedding invitation, you might want to search for floral backgrounds, while for a birthday party, balloons or colorful patterns could be used.
- Right-click the image you like and copy it.
- Return to your Word document and paste the image using Ctrl + V.
- To ensure that the image doesn't interfere with your text, you'll need to set it as a background. To do this, click on the image, go to the Layout Options menu, and choose Behind Text.
- You can now resize the image to fit the entire document or as needed.
3. Inserting Shapes and Decorative Elements
To further enhance the visual appeal of your invitation card, you can add various shapes and design elements, such as borders, hearts, stars, or banners. Microsoft Word has a wide range of shape options available:
- Click on Insert and then choose Shapes.
- Select the shape you want (e.g., rectangle for borders, heart for wedding invitations).
- You can also change the color, outline, and fill of the shapes to match the overall theme of your invitation.
For example, a floral background might benefit from a rectangular border around the invitation text to keep things looking neat.
4. Adding Text to Your Invitation
The main feature of any invitation card is the text. This includes the details of the event, such as the date, time, venue, and names of the people involved. To add text:
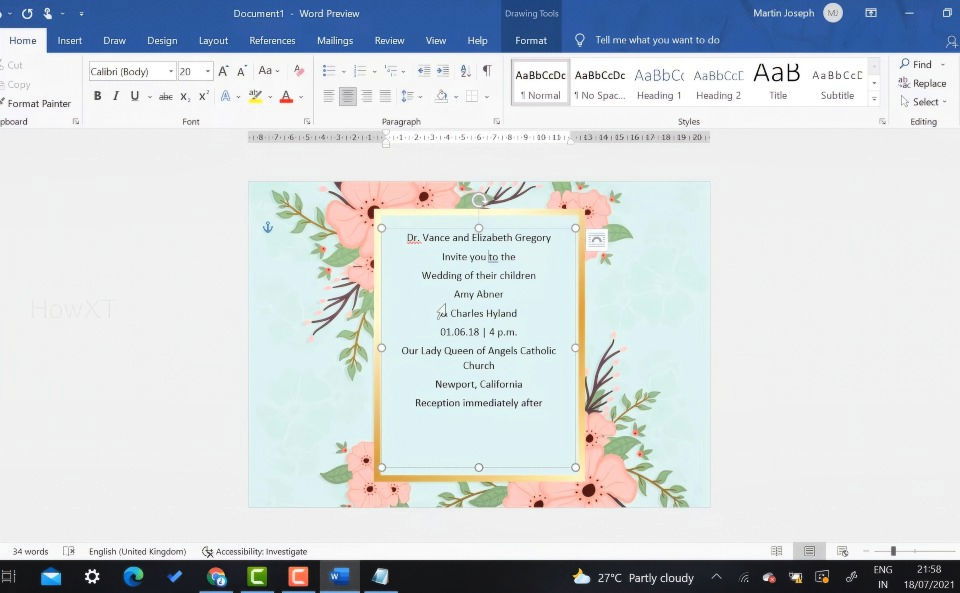
- Go to Insert, click Text Box, and select Simple Text Box.
- Type the invitation details inside the text box. For instance, for a wedding invitation, you might write: “Dr. Elizabeth cordially invites you to the wedding of their children, Amy & Charles, on [Date] at [Venue]. Reception to follow.”
Once the text is in place, there are several ways you can format it:
- Remove the default background and border of the text box by selecting Shape Fill and choosing No Fill. Then, select Shape Outline and choose No Outline. This will make your text box transparent and blend it with the background.
- Customize the font. Microsoft Word offers a variety of fonts that can enhance the look of your invitation. Fonts such as Ink Free or Script MT Bold are commonly used for wedding invitations, giving it a handwritten or signature-style look. You can experiment with different fonts until you find one that complements your theme.
- Adjust the font size and alignment. Highlight the text, go to the Home tab, and increase the font size. You can also center-align the text or position it however you like on the card.
- Color your text to match the theme. If your background has floral patterns in pastel colors, consider using a dark color, like navy blue or black, for the text to make it stand out.
5. Highlighting Important Details
Certain aspects of your invitation, such as the event's date, time, or names of the hosts, should be more prominent. To do this:
- Select the text that needs emphasis and increase the font size.
- Consider bolding the text or changing the font style to something more decorative.
- You can also use color to highlight specific sections. For example, use a vibrant color like red or dark blue for names, while using a subtle, lighter color for the rest of the content.
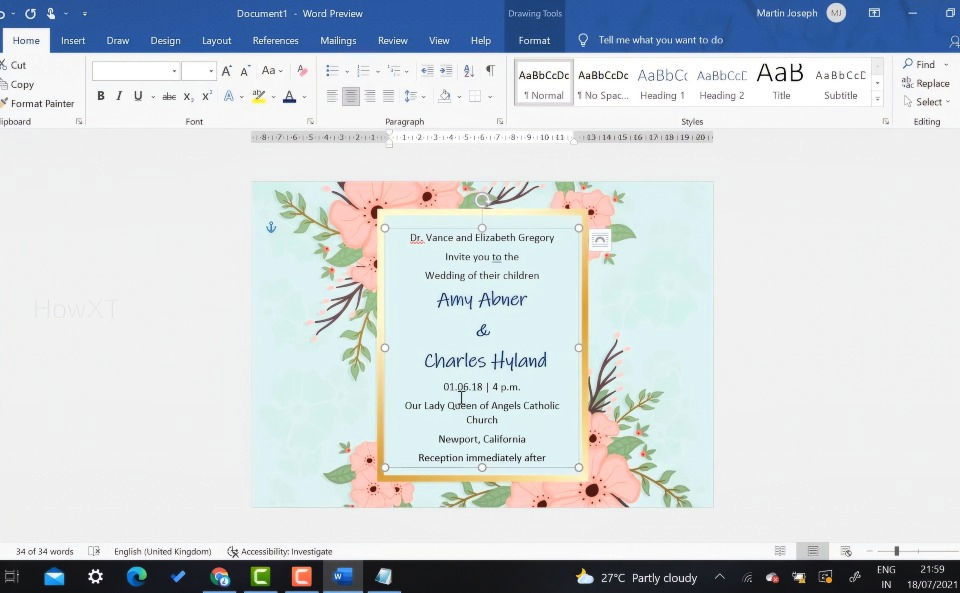
6. Final Touches: Adding Event Details and Notes
Once the main text is set, the next step is adding additional details. This might include a short note about the reception, attire requirements, or directions to the venue.
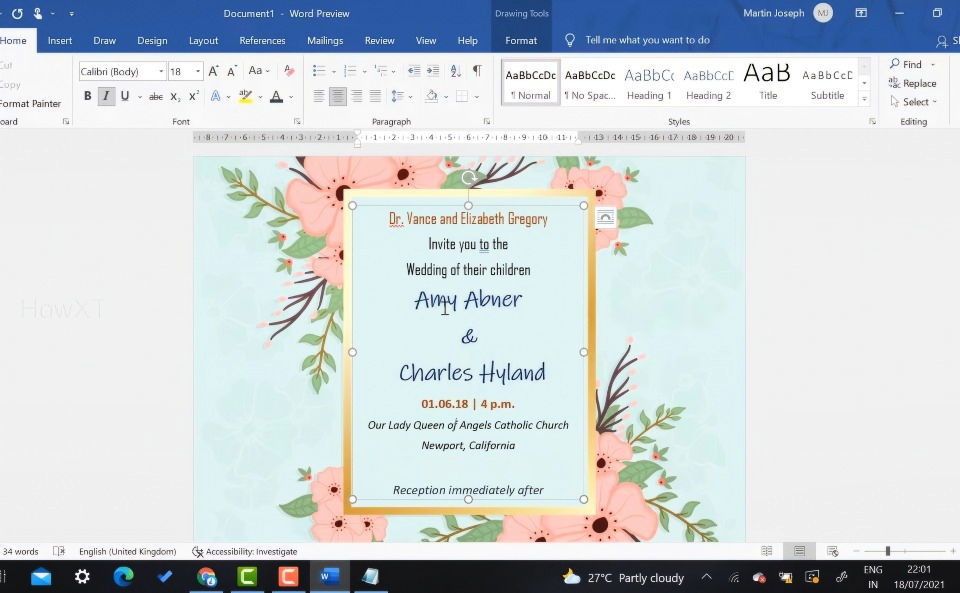
- You can use a smaller font for these details, usually in an italic style to differentiate them from the main body of text.
- For example, you might add: “Reception to be held at the Royal Garden Hall immediately following the ceremony.”
- Be mindful of the overall design balance. Ensure the text doesn't overwhelm the background or clash with any decorative elements.
7. Saving and Exporting Your Invitation
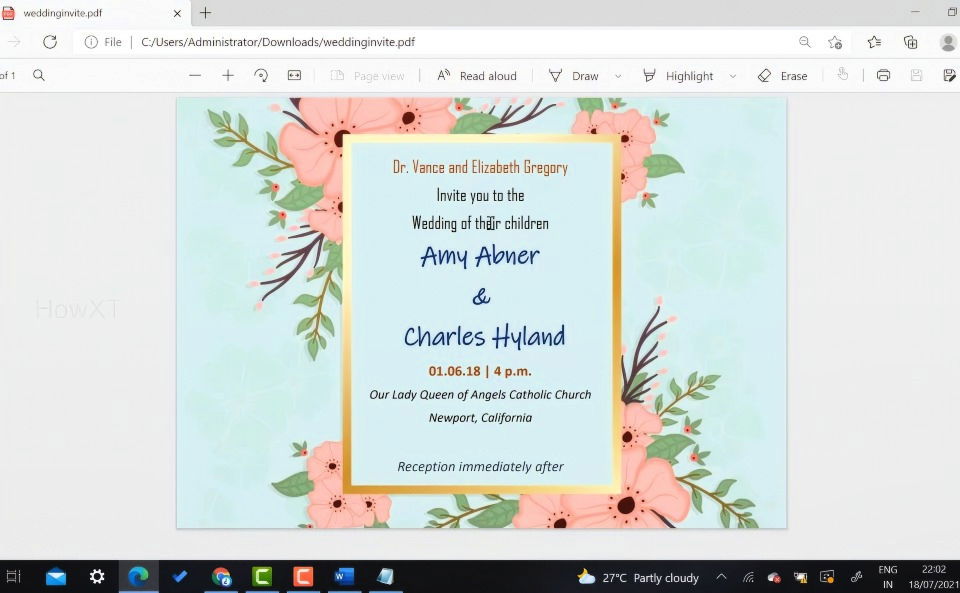
Once you are happy with the design of your invitation card, the next step is to save and export it. Microsoft Word allows you to save your document in several formats, including PDF and JPEG, which are commonly used for sharing and printing invitation cards.
Here's how to save the invitation:
- Go to File and click Save As.
- Choose a location to save the file.
- Under the file name, select PDF from the dropdown list if you want to send it digitally or print it later.
- If you want to save it as an image (JPEG), first save it as a PDF and then convert the PDF to JPEG using an online tool.
This ensures that the quality of your invitation is preserved and that it can be printed or shared digitally.
8. Printing and Sharing Your Invitation
If you're planning to print your invitations, it's a good idea to do a test print on plain paper to check the layout, text, and colors before printing on high-quality paper. You can use A4 or A5 glossy or textured paper for a more professional look.
To share your invitation online, you can attach the PDF or image to an email or send it via social media. Some people prefer making digital-only invitations, especially for informal events, making PDF and image formats more convenient.
Step-by-Step Video Tutorial
FAQs About How to Make an Invitation Card
Learn how to make an invitation card with our comprehensive FAQ. discover tips, tools, and templates to make perfect invites for any occasion.
When pasting images into Microsoft Word, the resolution might appear lower, especially if the image was copied directly from a website. To maintain high resolution, download the image first and then insert it through Insert > Pictures. This ensures that the original quality is preserved when printing.
Yes, you can make an invitation card using the mobile version of Microsoft Word. However, some features may be limited compared to the desktop version, especially when handling images and formatting. For more control, it's best to use a desktop or laptop.
To save your card for use on mobile devices, first export it as a PDF or JPEG. Go to File > Save As and select PDF or JPEG under file type. This format is universally accessible and maintains the design integrity across different devices.
Transferring files between devices might compress images, reducing their quality. To avoid this, use high-resolution images and save your invitation as a PDF before transferring it. PDFs retain the image quality better across devices.
After inserting a text box, go to the Format tab. Under Text Alignment, you can align your text to the center, left, or right. You can also adjust vertical alignment for more precise positioning within your text box or shape.
Yes, you can insert custom shapes or images into your invitation by downloading them and using Insert > Pictures. After adding them, use Wrap Text options to position the elements as needed.
The most common sizes for printing invitation cards are A4 and A5. A5 is typically used for smaller cards, while A4 might be used for more formal or larger invitations. You can also set custom paper sizes depending on your event's needs.
Use the Text Wrapping feature by selecting your background image and choosing Behind Text from the Layout Options. This ensures that your text appears on top and remains legible, even with a detailed background.
For formal events like weddings, use elegant fonts like Ink Free or Script MT Bold. For casual events such as birthdays, playful fonts like Comic Sans or Arial Rounded work well. Always match the font to the tone of your event.
To convert your document into an image, save your invitation as a PDF first. Then, use an online converter or a photo editing software to convert the PDF into JPEG or PNG formats for easy sharing.
Conclusion
Making an invitation card in Microsoft Word is a simple and cost-effective way to make professional-looking invites for any occasion. By following these steps—setting up the document, choosing a background, adding shapes and text, and saving the design—you can make personalized invitations that reflect your style and the nature of the event. Best of all, with Microsoft Word's accessibility, anyone can craft beautiful invitations without needing advanced design skills or expensive software.
Whether it's for a wedding, birthday, or corporate event, your invitation can make the first impression, and with the right tools and techniques, you can ensure it's a great one!


