Transforming wood into charcoal was an enlightening endeavor I embarked on one sunny weekend. It was not just about making something useful; it was about understanding the art and science behind it. Join me on this journey as I walk you through the simplest method to make charcoal. While the process might seem daunting, rest assured that with each step, my experience will guide you, bringing practicality and expertise to the task.
Materials Needed
Before we start, here's a list of the essential materials you'll need:
- A Steel Container: This is crucial for containing the wood during the burning process. It must withstand high temperatures, making an old oil drum the ideal choice. Its sturdy nature helps in maintaining the integrity of the process.
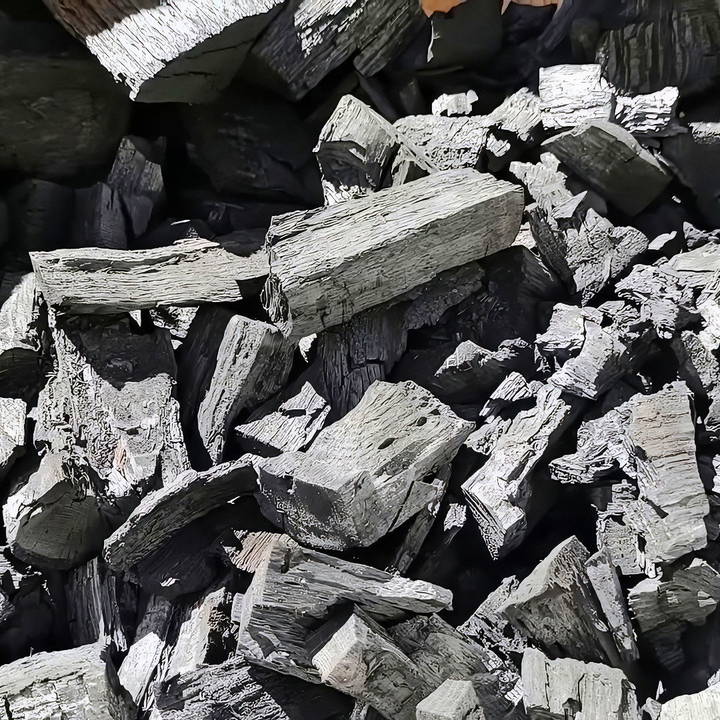
- Hardwood (Oak is preferred): Hardwood is dense and burns longer, producing better-quality charcoal. Oak, in particular, makes lump charcoal that is highly effective for fuel.
- Kindling and Wood Scraps: Essential for igniting the fire. These small bits of wood catch fire quickly, ensuring the larger pieces in the drum start burning evenly.
- A Shovel and Sand: For sealing any openings in the steel container. Sand acts as an excellent barrier, preventing unnecessary airflow which could disturb the process.
- Protective Gear: Safety first! Ensure you have gloves and eye protection to safeguard yourself from the heat and possible sparks.
Step by Step Instructions
Learn how to make charcoal at home with our step-by-step DIY guide. From preparing the container to cooling and storing, master the entire process now!
Preparing the Steel Container
Learn how to prepare a steel container with step-by-step guidance on finding and modifying the right steel container for your needs.
Step 1: Find the Right Steel Container
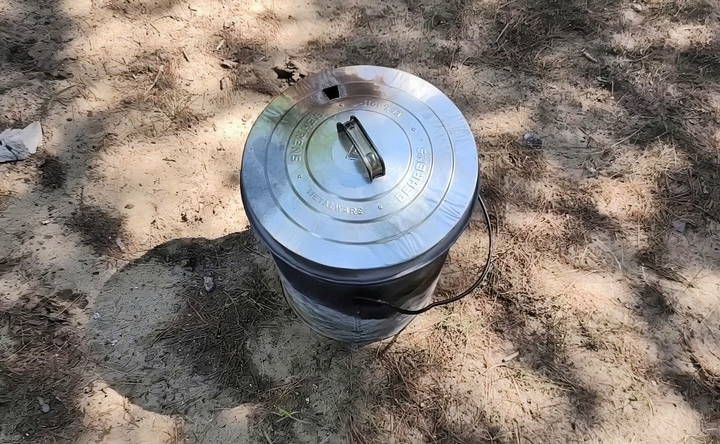
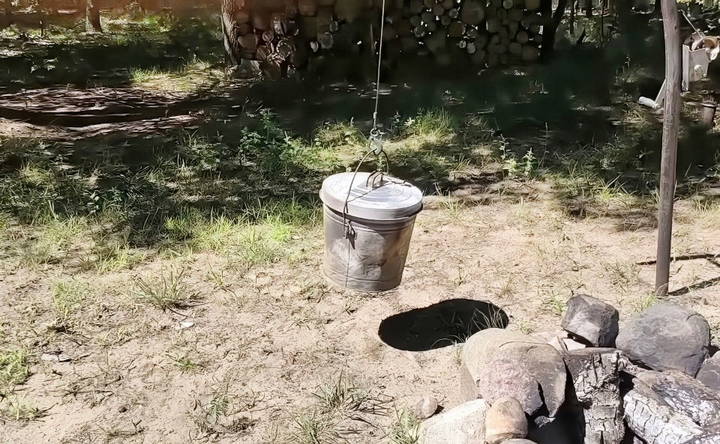
The first step in this journey is securing a suitable steel container. I repurposed an old oil drum, which was perfect due to its size and durability. I thoroughly cleaned it to remove any residue that could interfere with the charcoal-making process.
Step 2: Modifying Your Container
Modifying the drum is important. I used a drill to make small holes near the bottom to allow just enough airflow for the burning process. These holes help in controlling the combustion and gasification of the wood.
Preparing the Hardwood and Setting Up
Learn all about preparing and setting up hardwood, from selecting and cutting the wood to wrapping and arranging it effectively.
Step 1: Selecting and Cutting the Wood
Choosing the right wood is crucial. I selected hardwood, specifically oak, because of its density, which transfers into better-quality charcoal. Using a saw, I cut the wood into manageable pieces to fit inside the drum.
Step 2: Wrapping and Arranging the Wood
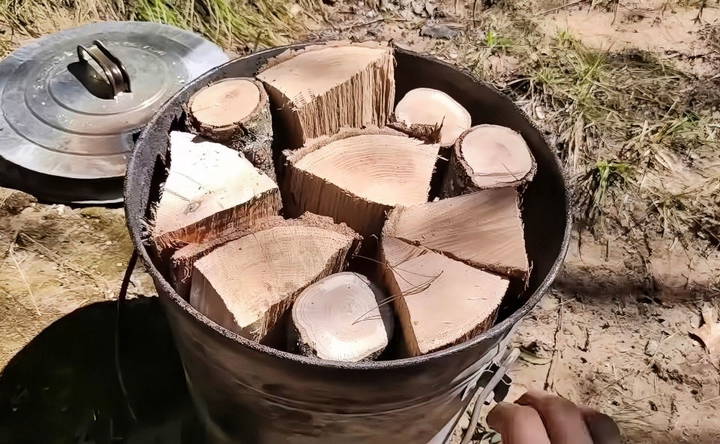
Start by packing the drum. At this stage, attention to detail is key. I carefully arranged the oak pieces in the drum, ensuring there were small spaces between them for efficient burning. This packing method maximizes the amount of wood that can be turned into charcoal.
Igniting the Fire
Learn igniting the fire with steps like setting up and lighting the fire. Perfect guide for successfully starting any fire.
Step 1: Setting Up the Fire
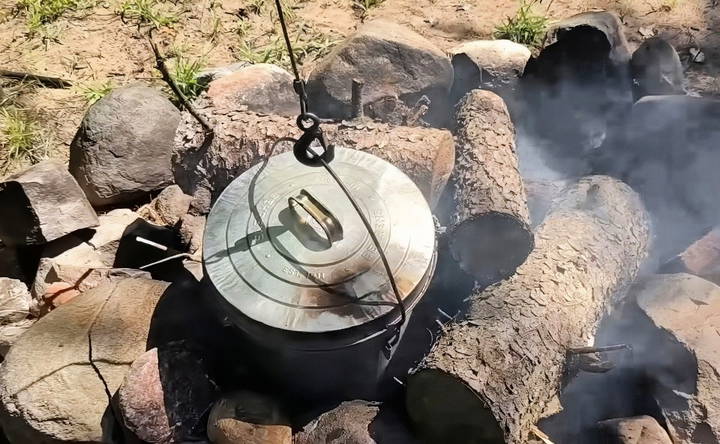
Next, place your steel drum on a bed of kindling. I used small wood scraps and some old twigs, carefully arranging them under the drum. This forms the base of the fire that will ignite the wood inside the container.
Step 2: Lighting the Fire
With the kindling in place, it was time to light up. I used a match to ignite the kindling, watching as it quickly caught fire and began to transfer heat to the steel drum. Safety is paramount here; make sure you're wearing protective gear and standing a safe distance from the flame.
The Charcoal Making Process
Learn the charcoal making process step-by-step from gasification and pyrolysis to the crucial waiting game for perfect results.
Step 1: Understanding Gasification and Pyrolysis
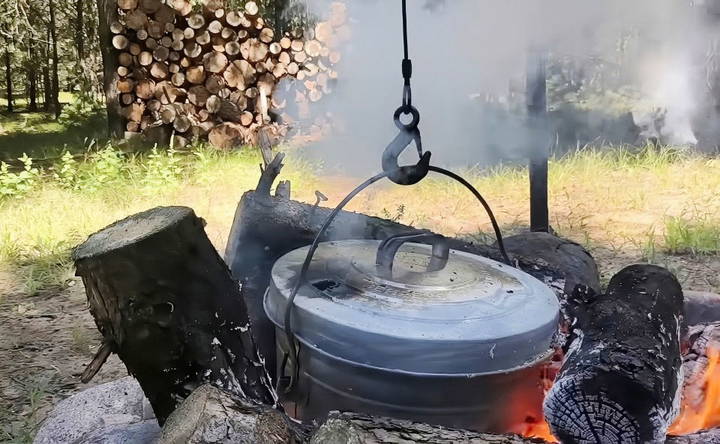
As the wood begins to burn, it undergoes a process known as gasification. Essentially, the lack of oxygen inside the drum causes the wood to decompose into charcoal instead of burning into ash. It was fascinating to witness science in action as white smoke signaled the release of volatile gases.
Step 2: The Waiting Game
Patience is an underrated companion in this process. It took several hours for the wood to fully carbonize. I ensured the drum stayed hot throughout the afternoon, adding more kindling if necessary to maintain the fire.
Cooling Down and Storing Charcoal
Learn the best practices for cooling down and storing charcoal efficiently. Follow these steps for optimal charcoal management. Step-by-step guide included.
Step 1: Observing the Signs
Knowing when the charcoal is done is crucial. I checked for telltale signs: the smoke reduced, and the drum cooled slightly. Before opening, I ensured there were no visible fumes, which indicated that the transformation was complete.
Step 2: The Cooling Process
Once I was confident the charcoal was ready, I carefully covered any air openings with sand using a shovel. This step is vital as it cuts off oxygen, preventing the charcoal from reigniting.
Step 3: Harvesting and Storing
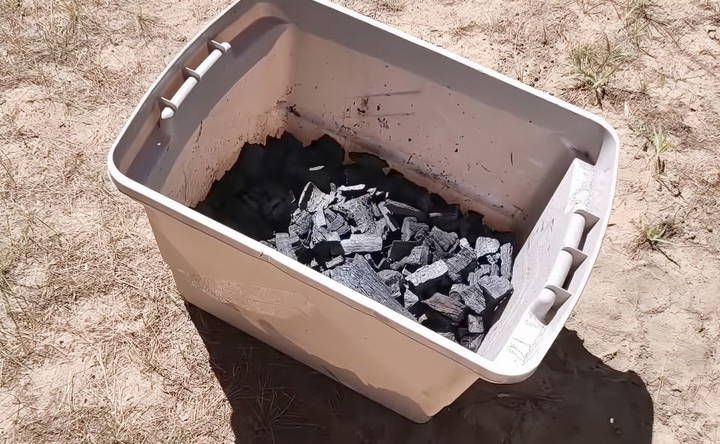
After allowing adequate cooling time, I opened the drum. Inside, I found beautifully formed charcoal, ready for storage. I placed the pieces in a dry container, ensuring they stayed moisture-free and operational for future use.
Learning from the Experience
Reflecting on this experience made me appreciate the meticulous nature of charcoal making. From choosing the right materials to having the patience to see the process through, these steps culminate in a rewarding transformation.
Safety and Environmental Considerations
Throughout the process, safety and environmental responsibility were at the forefront of my mind. Using protective gear ensured safety, while the self-contained burning process limited environmental impact. By reusing materials like the steel drum, I embraced a sustainable approach.
Benefits of DIY Charcoal
Homemade charcoal has numerous benefits. It's cost-effective and often higher in quality than commercial options. Additionally, its versatile use in cooking and gardening makes it a valuable asset in any household.
Common Mistakes and Troubleshooting
Making your own charcoal can be rewarding, but it's easy to make mistakes. Here are some common pitfalls and how to avoid them.
Using the Wrong Type of Wood
- Mistake: Using green or wet wood.
- Solution: Always use dry, seasoned hardwood like oak, hickory, or maple. Wet wood produces more smoke and less charcoal.
Improper Kiln Construction
- Mistake: Not sealing the kiln properly.
- Solution: Ensure your kiln is airtight to prevent oxygen from entering. Oxygen can cause the wood to burn completely instead of turning into charcoal.
Incorrect Temperature Control
- Mistake: Not maintaining a consistent temperature.
- Solution: Monitor the temperature closely. Use a thermometer to keep the temperature steady. Too high or too low temperatures can ruin the charcoal.
Inadequate Ventilation
- Mistake: Blocking the vents too early.
- Solution: Allow the wood to burn until it reaches the right stage before sealing the vents. This ensures proper carbonization.
Not Allowing Charcoal to Cool Properly
- Mistake: Removing the charcoal too soon.
- Solution: Let the charcoal cool completely before opening the kiln. Premature exposure to air can cause it to ignite.
Poor Storage Practices
- Mistake: Storing charcoal in a damp place.
- Solution: Store your charcoal in a dry, airtight container to keep it from absorbing moisture.
Ignoring Safety Precautions
- Mistake: Not taking fire safety seriously.
- Solution: Always have a fire extinguisher nearby. Wear protective gear and work in a well-ventilated area.
Troubleshooting Tips
- Charcoal Not Burning Well: Ensure it's completely dry and properly carbonized.
- Excessive Smoke: Check if the wood was too wet or if the kiln wasn't sealed properly.
- Uneven Burn: Make sure the wood pieces are of uniform size and the temperature is consistent.
By avoiding these common mistakes and following these troubleshooting tips, you can produce high-quality charcoal efficiently and safely.
Safety Precautions
Making your own charcoal can be a fun and rewarding project, but it's important to prioritize safety. Here are some key precautions to ensure a safe and successful charcoal-making process.
Choose a Safe Location
- Distance from Structures: Set up your charcoal-making area at least 10 feet away from buildings, vehicles, and vegetation to prevent accidental fires.
- Ventilation: Work in a well-ventilated area to avoid inhaling smoke and fumes.
Wear Protective Gear
- Gloves: Wear heat-resistant gloves to protect your hands from burns.
- Safety Glasses: Use safety glasses to shield your eyes from sparks and debris.
- Masks: Wear a mask to avoid inhaling dust and smoke.
Fire Safety
- Fire Extinguisher: Always have a fire extinguisher nearby in case of emergencies.
- Water Source: Keep a bucket of water or a hose ready to douse any unexpected flames.
Proper Kiln Handling
- Sealing the Kiln: Ensure the kiln is properly sealed to prevent oxygen from entering, which can cause the wood to burn completely instead of turning into charcoal.
- Cooling Period: Allow the charcoal to cool completely before opening the kiln to avoid accidental ignition.
Handling and Storage
- Dry Storage: Store charcoal in a dry, airtight container to prevent it from absorbing moisture.
- Safe Handling: Handle charcoal with care to avoid making dust, which can be a fire hazard.
Environmental Considerations
- Sustainable Practices: Use sustainably sourced wood to minimize environmental impact.
- Waste Disposal: Dispose of any waste materials responsibly to avoid pollution.
By following these safety precautions, you can enjoy making your own charcoal while minimizing risks.
FAQs About DIY Charcoal
Discover everything you need to know about DIY charcoal in our comprehensive FAQ. tips, benefits, and step-by-step guides for successful charcoal making.
DIY charcoal is homemade charcoal maked by heating wood in a low-oxygen environment. Making your own charcoal can be cost-effective and environmentally friendly. It allows you to control the quality and type of wood used, ensuring a natural product without additives. Plus, it can be a rewarding and educational experience.
Hardwoods are ideal for making charcoal because they burn longer and hotter. Some popular choices include:
Oak
Maple
Hickory
Birch Avoid using softwoods like pine, as they contain resins that can produce unwanted smoke and flavors.
Store your DIY charcoal in a dry, cool place to prevent it from absorbing moisture. Use it in your grill or smoker just like store-bought charcoal. It’s perfect for barbecuing, providing a natural, smoky flavor to your food.
Yes, you can make charcoal briquettes at home. Here’s a simple method:
Gather materials: You’ll need charcoal dust, a binder (like cornstarch), and water.
Mix ingredients: Combine the charcoal dust with the binder and water to form a thick paste.
Shape the briquettes: Mold the paste into small, uniform shapes.
Dry the briquettes: Let them dry in the sun for several days until they are hard and dry.
DIY charcoal, also known as biochar, can be beneficial for gardening. Here's how:
Soil improvement: Biochar helps retain moisture and nutrients in the soil.
pH balance: It can help balance the pH levels of your soil.
Microbial growth: Biochar promotes the growth of beneficial microbes.
Carbon sequestration: It helps capture and store carbon, reducing greenhouse gases.
Final Thoughts
Making charcoal at home is a fulfilling and educational experience. It bridges the gap between ancient techniques and modern needs, allowing us to engage directly with the materials we often take for granted. With this guide, you're not just making charcoal; you're mastering a time-honored craft that brings self-reliance and sustainability into your reach. Enjoy the process, respect the resource, and remember—every step is a lesson learned towards mastering the art of backyard charcoal making.


