Learn how to make friendship bracelets with simple step-by-step instructions, creative designs, and easy-to-follow patterns for all skill levels. Friendship bracelets have long been a beloved craft for symbolizing connection and creativity. Whether you're looking to make one for yourself or as a heartfelt gift, learning the art of crafting these colorful accessories is both fun and rewarding. This comprehensive guide will provide everything you need to get started, covering essential supplies and mastering various patterns.

Supplies Needed to Make Friendship Bracelets
Before starting your bracelet, gather these essential tools and materials:
- Embroidery Floss: Available in a wide range of colors, embroidery floss is the foundation of every friendship bracelet.
- Holding Tools: You can use masking tape, a clipboard, or a safety pin to secure your bracelet while working on it.
- Scissors: A good pair of scissors ensures clean cuts for your threads.
Pro Tip: Cut generous lengths of floss—around 36 to 72 inches—depending on whether you double up threads for loops or single strands.
Step by Step Instructions
Learn how to make friendship bracelets with step-by-step instructions, from mastering basic knots to making advanced chevron and diamond patterns.
1. The Basics of Friendship Bracelet Knots
Understanding the four fundamental knots is crucial, as these form the backbone of all friendship bracelet designs:
Forward Hitch
- Make a forward hitch by making a “4” shape with the left thread over the right.
- Pull the left thread under and through the loop of the “4.”
- Tighten the knot by pulling the thread upward to the right while keeping the right thread taut.

Backward Hitch
- Form a backward “4” with the right thread over the left.
- Bring the right thread under and through the backward “4.”
- Tighten the knot to the left while keeping the left thread taut.
Forward Backward Knot
- Start with a forward hitch followed by a backward hitch on the same thread.
- This knot changes the direction of the active thread.
Backward Forward Knot
- Begin with a backward hitch, then make a forward hitch on the same thread.
- Like the forward backward knot, this switches the working thread's direction.
Once you've mastered these, you can tackle any bracelet pattern with confidence.
2. Simple Friendship Bracelet Patterns for Beginners
Let's explore beginner-friendly bracelet designs, starting with basic two-string bracelets and gradually moving to more complex patterns.
Two-String Friendship Bracelet
This straightforward bracelet uses only forward hitches and two threads.
Setup:
- Cut two strands of floss (36 inches each) in contrasting colors.
- Tie a simple overhand knot at the top, leaving a small loop for closure.
Method:
- Using one thread, tie a forward hitch around the other thread. Repeat with the opposite thread.
- Alternate between threads to make a braided appearance.
Finishing:
- Once the desired length is reached, secure the ends with a knot and trim any excess.

This pattern is perfect for practicing your forward hitch technique.
3. Spiral Staircase Friendship Bracelet
The spiral staircase bracelet features a fun, spiraling effect and uses only one type of knot.
Setup:
- Select 3–4 colors and cut each to 36 inches.
- Tie a knot at the top, ensuring a small loop for fastening.
Method:
- Choose a single thread to work with and tie forward knots around the rest of the group repeatedly.
- As you continue, the spiral pattern will emerge naturally.
Customizing:
- Switch colors at any point for a multicolored spiral.
- Repeat until you achieve your desired bracelet length.

4. Candy Stripe Bracelet
This diagonal stripe pattern introduces multiple threads and builds on the forward knot.
Setup:
- Cut four strands of floss (36 inches each) in different colors.
- Arrange the threads in your preferred order and secure them with tape or a clipboard.
Method:
- Starting with the leftmost thread, tie forward knots over each subsequent thread in the row.
- Once you've used all the threads in the row, start again with the next leftmost thread.
Tips:
- The color sequence will determine the diagonal stripe pattern.
- Make sure to pull knots tight for an even design.

5. Moving to Intermediate Designs
As you grow more comfortable, try patterns that incorporate a combination of forward and backward knots.
Chevron Friendship Bracelet
The chevron pattern is a classic V-shaped design that requires mirroring knots.
Setup:
- Use four different colors, doubled to make eight strands, with the outermost strands matching.
Method:
- Work from the outermost strands inward, tying forward knots on the left side and backward knots on the right.
- When the two middle strands meet, tie a forward-backward or backward-forward knot to join them.

Styling:
- Adjust the spacing and number of rows for a tighter or looser chevron look.
6. Diamond Friendship Bracelet
The diamond pattern involves intricate designs and careful threading. It's a stunning bracelet that shows off your crafting skills.
Setup:
- Cut four strands of floss (72 inches each) in different colors.
- For the outer diamond colors, cut an extra 10 inches of floss, as these strands will be used more frequently.
- Double the strands to make eight threads and tie a looped knot at the top.
Arranging Threads:
- Mirror the threads so that the outermost colors match, followed by pairs of the same colors moving inward.
Making the Diamond:
- Start with the two center threads and tie a backward knot to form the top of the diamond.
- On the right side, use the rightmost thread to tie forward knots over the other threads until it reaches the center.
- On the left side, use the leftmost thread to tie backward knots over the other threads until it meets the right thread in the middle.
- Tie these two center threads together with a backward-forward knot.

Filling the Diamond:
- Use the next pair of threads to make an inner diamond shape by following the same steps above but stopping before the edges.
Repeat and Expand:
- Continue this process to add more diamond layers, adjusting the placement of knots as you go.
Finishing:
- Tie off the bracelet when you reach the desired length and trim the ends.
This pattern may require extra practice but produces a stunning geometric effect.
Tips for Troubleshooting and Perfecting Your Bracelets
Even with experience, challenges can arise while crafting friendship bracelets. Here are some common issues and how to address them:
Uneven Tension
- Problem: Some sections of the bracelet are looser than others.
- Solution: Practice consistent knot tightening. Pull each knot snugly without over-tightening, which can distort the pattern.
Thread Tangles
- Problem: Threads become knotted or tangled while working.
- Solution: Use shorter working lengths for intricate patterns or secure the strands with clips to keep them organized.
Running Out of Thread
- Problem: A thread becomes too short before completing the bracelet.
- Solution: Add a new thread by tying a small knot at the back of the bracelet. Avoid visible joins on the front.

Finishing Techniques for Friendship Bracelets
After completing the bracelet, you'll want to finish it securely and neatly. Here are some popular methods:
- Tying a Knot: Make a simple overhand knot at the end of the bracelet, leaving a few inches of thread for tying it around your wrist.
- Braided Ends: Divide the leftover threads into three groups and braid them. Tie a knot at the end to secure the braid.
- Loop-and-Knot Closure: Incorporate a loop at the starting point and make a large knot at the end. This allows the bracelet to fasten securely through the loop.
Experimenting with Colors and Patterns
As you gain confidence, experiment with the following ideas to make your bracelets unique:
- Color Combinations: Use ombre effects, complementary colors, or even metallic threads for a modern twist.
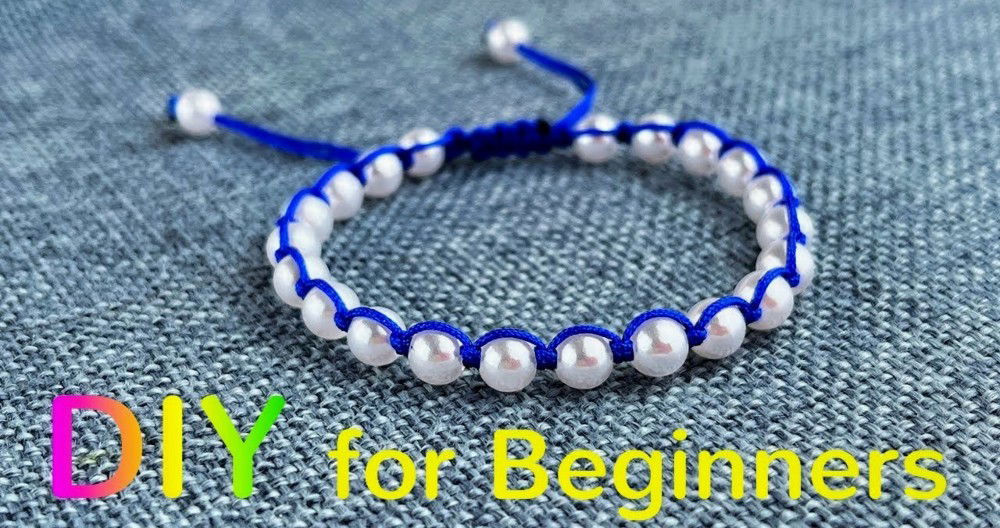
- Beads and Charms: Add small beads or charms between knots for an enhanced design.
- Pattern Variations: Combine multiple patterns like candy stripes with chevrons or diamonds.
Sharing and Preserving Your Work
Friendship bracelets aren't just crafts—they're memories. Here's how to cherish and share them:
- Gifting: Present them as thoughtful gifts to friends and family.
- Showcasing: Wear them or display them as wall art by attaching them to a decorative pinboard.
- Teaching Others: Pass on your skills by teaching the art of bracelet-making to others.
Conclusion:
Making friendship bracelets is a timeless craft that brings joy to both the maker and the recipient. From simple two-string designs to intricate diamond patterns, there's something for everyone, regardless of skill level. With practice, patience, and creativity, you can master these designs and make bracelets that are as unique as your friendships.
Now it's time to gather your supplies, choose your favorite pattern, and start crafting! Happy bracelet-making!
FAQs About DIY Friendship Bracelet
Discover everything about DIY friendship bracelets, from materials to techniques, in this ultimate FAQ guide for creative crafting.
Cut the strings about four times the circumference of the wrist you’re making the bracelet for. For a wrist measuring 17 cm, cut strings approximately 68 cm long. Add extra length for tying knots at the ends.
The simplest method is to gather all the threads at the end and tie a large overhand knot. For added security, leave about 2–3 cm of thread for the knot.
To avoid tangling, work with well-organized threads. Secure the ends with tape or clips, and use shorter lengths for complex patterns to minimize excess thread.
Embroidery floss is recommended for its durability and color range, but you can experiment with yarn, crochet thread, or even thin paracord for different textures and effects.
If you notice a mistake, gently untie the incorrect knots using a pin or needle. Avoid pulling too hard to prevent fraying or damaging the threads.
Absolutely! Mixing forward, backward, and combination knots can make unique patterns. Experiment with different techniques to design your own custom look.
Use masking tape to stick the top to a table, a safety pin to attach it to your pants, or a clipboard to keep it in place. These methods help maintain stability as you work.
Yes, beads and charms can be threaded between knots for added decoration. Ensure the holes are large enough for your floss to pass through easily.
Measure the recipient’s wrist, then add about 2–3 cm for tying. Adjust the length during crafting by periodically wrapping it around the wrist to check.
To maintain the bracelet's quality, avoid prolonged exposure to water, and gently clean it with a damp cloth if needed. Store it in a dry place when not in use.


