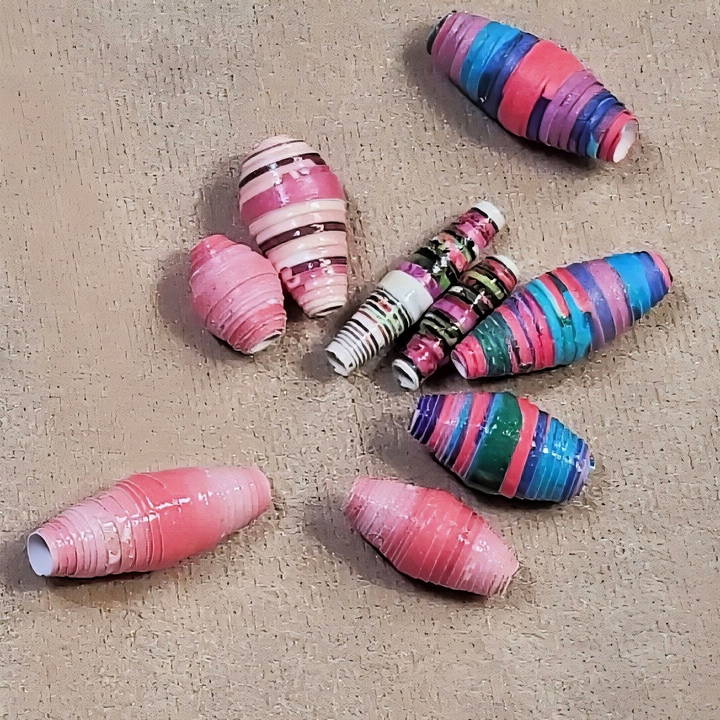
Want to turn old magazines or scrap paper into something beautiful? Making paper beads is a fun, easy way to make personalized jewelry or decorations while recycling materials you already have. In this guide, you'll learn everything you need to make your own paper beads—from selecting the right paper to rolling and sealing them for lasting durability. Whether you're crafting a unique necklace or just exploring a creative hobby, this step-by-step tutorial will show you how to make colorful, eco-friendly beads that are uniquely yours!
What You'll Need
The materials required for making paper beads are minimal and can often be found around the house. Here's a list of the essential supplies:
Paper
You can use various types of paper for making beads, including:
- Scrapbook paper: Thin paper, typically around 60 pounds in weight, is perfect for bead-making.
- Magazines or flyers: Using old magazines or advertisements adds a colorful and glossy touch to your beads.
- Recycled paper: Crafting with recycled materials adds an eco-friendly twist to your project.
Tools
- Toothpick or Skewer: For rolling the beads, a round toothpick or skewer works well. Avoid square toothpicks as they don't provide a smooth surface for rolling.
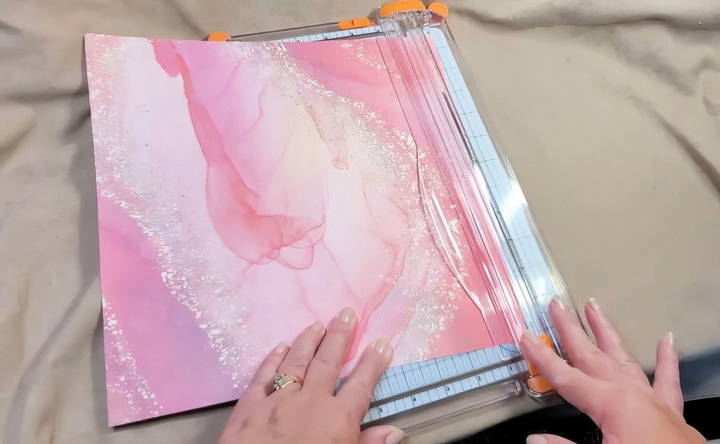
- Paper Cutter or Scissors: Precision in cutting the paper ensures the beads come out neat and uniform. A paper cutter is recommended, but scissors or an X-Acto knife will also work.
- Adhesive: A good adhesive will help hold the bead shape together. You can use any white glue such as Elmer's Glue or something stronger like Barely Arts Glue.
- Nail Polish or Varnish: To finish the beads and give them a glossy look, you can use clear nail polish or a specific varnish made for bead crafting.
Optional:
- Bead Roller: While toothpicks and skewers work fine, a bead roller can make the process quicker and easier by providing better grip and control.
Now that we have everything ready, let's dive into the bead-making process!
Step by Step Instructions
Learn how to make DIY paper beads with step-by-step instructions, from cutting and rolling to sealing. Perfect for unique jewelry projects!
Step 1: Cutting the Paper
The size and shape of the bead largely depend on how you cut your paper. The basic shape for a traditional bead is a long, narrow triangle, but you can also experiment with other shapes for different results.
Using a Paper Cutter or Scissors:
- Take a piece of scrapbook paper, magazine page, or recycled paper.
- Align one end of the paper at the 1-inch mark on your cutter and the other end at the cutting line to make a perfect strip.
- For different bead sizes, experiment with cutting strips that are 1 inch, 3/4 inch, and 1/2 inch wide. Thinner strips will make smaller beads, while wider strips make larger ones.
Step 2: Starting the Roll
The hardest part of making paper beads is often getting the paper to roll evenly at the beginning. Here's how to do it:
Toothpick Method:
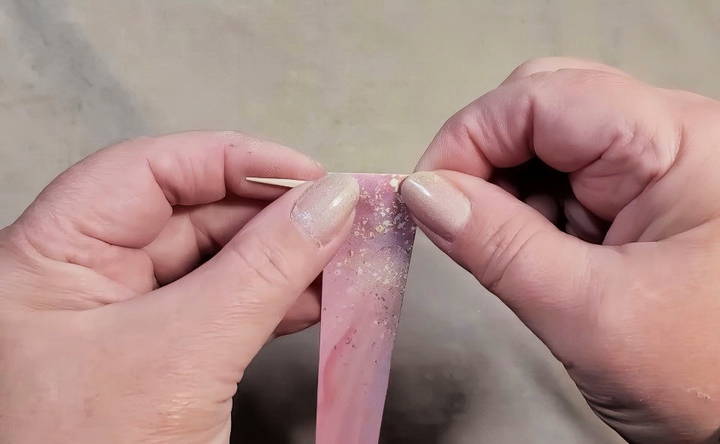
- Start by rolling the thin end of your paper strip over a round toothpick.
- Once the paper is tightly wrapped around the toothpick, you can transfer it to a bamboo skewer or continue rolling directly on the toothpick.
- Make sure to roll the bead slowly and evenly, keeping the strip of paper centered. This ensures the bead doesn't end up crooked or lopsided.
Bead Roller Method (Optional):
- Insert the thin end of your paper strip into the slot of a bead roller.
- Begin rolling the paper, keeping it tight and even. This method can be easier on the hands, especially when making large batches of beads.
Step 3: Applying Adhesive
Once you're near the end of your paper strip, it's time to apply glue to secure the bead:
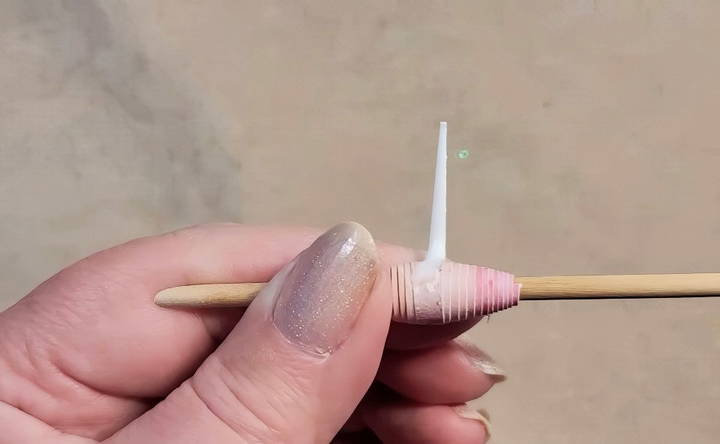
- Add a small amount of glue to the remaining end of the paper and press it firmly against the bead.
- Roll the bead between your fingers to ensure the glue is evenly spread and that the bead stays intact. If any glue seeps out, don't worry—it can easily be cleaned off later.
- For extra durability, you can also apply a thin layer of glue around the entire bead before letting it dry.
Step 4: Let the Bead Dry
Allow the glue to dry completely before removing the bead from the toothpick or skewer. This will take only a few minutes for most white glues. Once the glue is dry, carefully slide the bead off.
Step 5: Sealing the Bead
To give your beads a finished, professional look and protect them from wear and tear, you'll need to seal them:
Nail Polish Method:
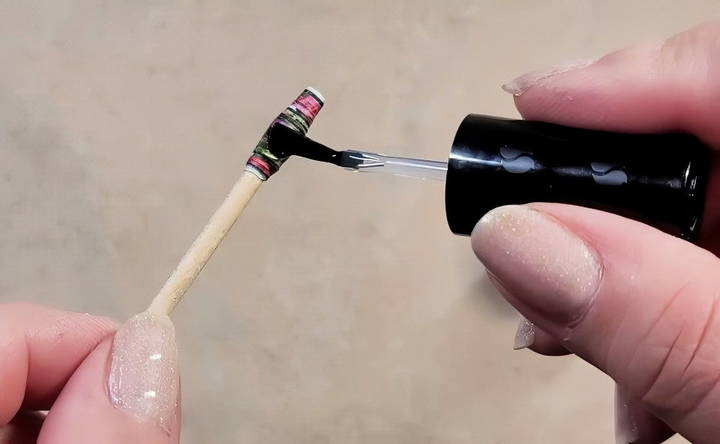
- You can use clear nail polish to seal the bead. Simply apply a thin coat to the bead while it is still on the skewer or toothpick.
- Let the nail polish dry completely before removing the bead from the stick.
Varnish Method (Optional):
- If you plan on making lots of beads, investing in a specific varnish for bead-making may provide a stronger, more durable seal.
- Apply the varnish with a small brush, and let it dry for several hours before handling.
Advanced Tips and Tricks
Now that you've mastered the basics, here are some additional tips to take your paper bead-making skills to the next level:
Using Different Papers for Unique Effects
The type of paper you use significantly impacts the final appearance of your bead. For example:
- Glossy magazine paper: Provides a smooth, shiny finish without the need for extra polish.
- Thick scrapbook paper: Produces sturdier beads with more vibrant colors.
- Recycled materials: Add an eco-friendly element and make beads with interesting textures and patterns.
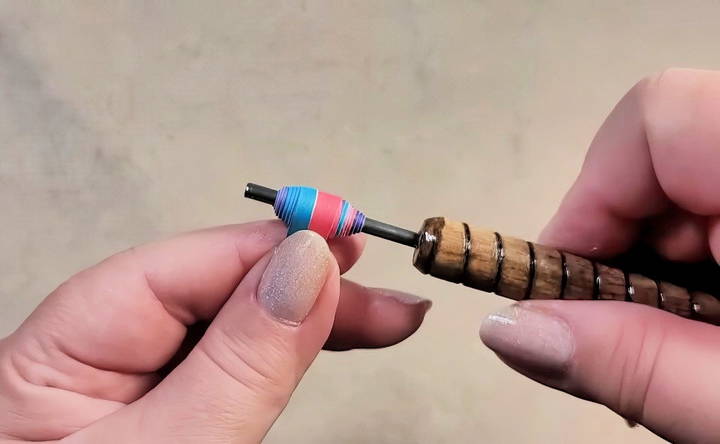
If you're using very thin paper, such as magazine pages, you may want to roll several layers of paper to achieve a thicker bead. This is especially useful when you want a bead with more volume and substance.
Fixing Common Problems
While rolling beads, it's common to encounter issues. Here's how to troubleshoot:
- Uneven Rolling: If the bead starts to roll unevenly, unroll the paper to where it was even and start again.
- Loose Beads: If your bead feels loose or slides off the skewer, try adding a bit more glue while rolling to secure it better.
- Paper Sticking Out: Sometimes, small ends of the paper stick out from the sides of the bead. You can trim these with scissors or gently file them down with an emery board.
Making Different Bead Shapes
Experiment with cutting the paper into different shapes to make beads of varying designs:
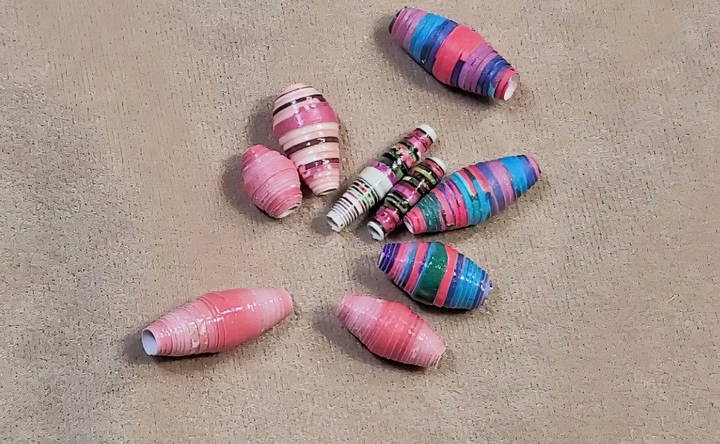
- Barrel Beads: Use strips of paper with straight edges for a cylindrical shape.
- Round Beads: Cut your paper into a triangle or a narrow trapezoid for more rounded beads.
- Disc Beads: For flat, saucer-like beads, cut very thin strips of paper.
Embellishing Your Beads
Once your beads are rolled and sealed, you can get creative by decorating them with paint, glitter, or even small rhinestones. Adding embellishments gives your beads a unique flair, perfect for statement jewelry pieces.
Making Jewelry with Paper Beads
Now that you've made your paper beads, it's time to put them to use! Here are some ideas for how to incorporate your beads into different jewelry projects:
- Necklaces: String your paper beads together with other beads or charms to make colorful, lightweight necklaces.
- Bracelets: Paper beads make great stacking bracelets. Try pairing them with elastic cord for easy, adjustable bracelets.
- Earrings: Use wire or headpins to attach paper beads to earring hooks for a fun, personalized accessory.
Conclusion
Making paper beads is a simple, creative, and eco-friendly craft that anyone can enjoy. With just a few basic materials, you can make unique beads that are perfect for jewelry making or decoration. By following this guide, you'll have the skills and knowledge to make your own beads, and with a bit of practice, you can experiment with new shapes, papers, and designs. Now, gather your supplies and start rolling your way to beautiful paper beads!
FAQs About Making DIY Paper Beads
Discover answers to common questions about making DIY paper beads, including materials, techniques, and tips for perfecting your craft.
Yes, some crafters prefer square toothpicks. Although the center hole might look slightly square, it works well for most projects. The paper grips the square toothpick securely, making it easier to roll.
If the paper slips or unrolls, simply fold the tip slightly to create a small hook, then reinsert it into your rolling tool or skewer. This helps keep the paper secure while you roll.
Yes, wallpaper is a great option for making paper beads. Its thickness and vibrant designs can make stunning beads, though it may require more effort to roll tightly.
Tissue paper is generally too thin and fragile for bead-making on its own. However, you could layer it with other papers or apply glue to strengthen it.
To fix an uneven bead, unroll it to the point where it was straight and start again. You can also try applying glue as you roll to keep the paper aligned.
If your bead slides off unevenly or distorts, you may be rolling too tightly. Try rolling a little more loosely or add tape to the skewer to prevent slipping.
Yes, old cards can make sturdy beads with interesting textures and designs. Just ensure the paper is thin enough to roll smoothly, and use strong glue for thicker materials.
If you notice small pieces sticking out, you can trim them with scissors or gently file them with an emery board for a smoother finish.
If you don't have a bead roller, toothpicks, skewers, or even cotter pins work just as well for rolling beads. Experiment to find which tool feels most comfortable.
Yes, clear nail polish is a convenient and effective way to seal beads, especially for beginners. It gives the beads a glossy finish and protects them from damage.


