One day, tired of the plain clothing in my closet, I decided to make patches to add some flair to my outfits. I gathered a few supplies: fabric, thread, a needle, and an iron. I looked for easy patterns online and found a simple one I liked. This gave me the push I needed. Making DIY patches was going to be fun and rewarding.
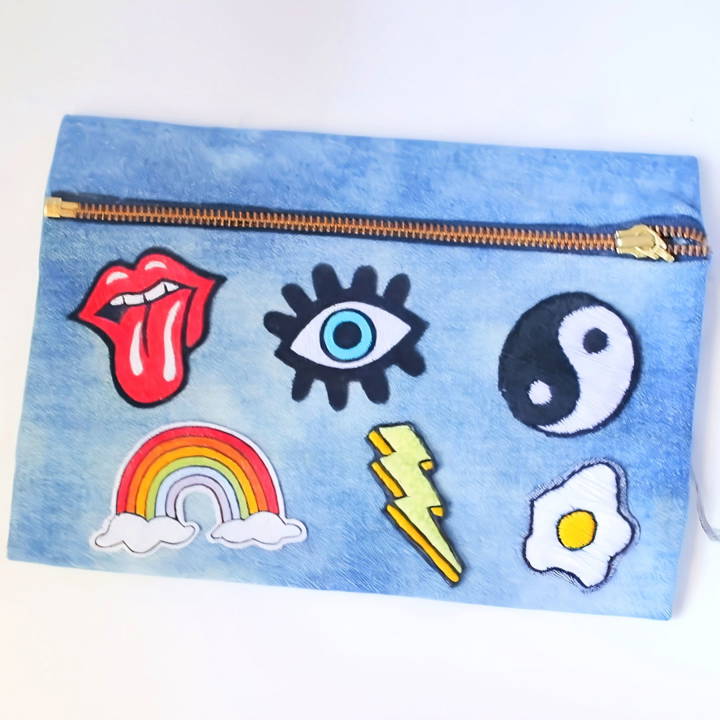
Starting my first patch, I chose a small design. I traced it onto the fabric and began sewing. It took a bit of patience, but seeing the design come together was satisfying. Once finished, I ironed it onto my jacket. Now, with a unique piece, I felt proud and creative.
I'm sharing this to help you make your own patches and enjoy the process just like I did.
Choosing Your Materials
The first step in making DIY patches is to gather your materials. Here's what I used and why:
- Thick Fabric: I opted for denim because of its durability and because I had some old jeans lying around. Denim is great because it doesn't fray as easily as thinner fabrics when you're working with it.
- Sharpies: Perfect for drawing and detailing on fabric, especially if you're not using fabric paint for your design.
- Acrylic or Fabric Paint: If you plan on washing the items with patches, fabric paint is the way to go. For everything else, acrylic works just fine.
- Hot Glue Gun (for no-sew patches): This acts as the adhesive for the iron-on patch method.
- Embroidery Thread and Needle (for sewn patches): Choosing different colors can really make your design pop.
- Fabric Glue: This helps prevent the edges from fraying, making your patch look neater and last longer.
- Iron: Needed for attaching the no-sew patches to your fabric of choice.
Step by Step Instructions
Learn how to make DIY patches with no-sew, embroidered, and transfer methods. Follow our step-by-step instructions for easy patch-making and attaching.
Making No-Sew Patches
- Design: I started by flipping my denim and drawing on the backside with a sharpie. If drawing isn't your forte, you can always trace designs from the internet.
- Painting: Next, I painted my designs using fabric paint and a small brush for precision. For finer details, I went back with a sharpie.
- Cutting Out: After the paint dried, I cut around my design, leaving a small border.
- Making It Iron-On: Here's where it gets fun. I applied hot glue generously over the back, smoothing it out. This layer, once cool, acts as the adhesive for ironing the patch onto your fabric later.
- Finishing Touches: Lastly, I went over the edges with a sharpie for a clean finish and applied fabric glue to prevent fraying.
Embroidered Patches – A Step Further
The process of making an embroidered patch is quite similar to the no-sew method in the beginning stages:
- Design and Paint: I sketched my design on denim and painted over as a base color.
- Embroidering: Using colored embroidery thread, I stitched over the painted design, filling it out completely for a textured look.
- Cutting and Sealing: After embroidering, I cut around the design and used fabric glue on the edges.
The Transfer Method – For Those Who Hate Drawing
This method is fantastic if you're not confident in your drawing skills:
- Image Transfer: I found a design online and printed it out. Using a pencil, I shaded heavily over the back of the printout, placed it onto the denim, face down, and traced over the design. This transferred the image onto the fabric.
- Embroider or Paint: From there, you can either paint or embroider the design onto the denim.
Attaching Your Patches
For no-sew patches, an iron can quickly and easily attach your creation to your chosen fabric:
- Ironing: Place the patch glue-side down on your fabric, cover it with a thin cloth, and press down with a hot iron for about 10-20 seconds.
- Cooling: Let it cool completely to ensure the hot glue sets and adheres to the fabric.
And that's it! You've just maked your very own personalized patches using simple materials from around the house. This project not only allowed me to upcycle old clothes but also helped me add a personal flair to my wardrobe without breaking the bank. Whether you're crafting for fun or to personalize your gear, these DIY patches are an easy and creative way to express yourself.
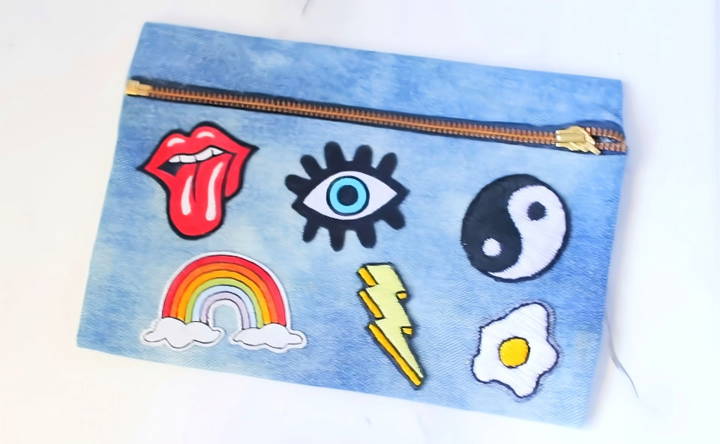
Customization Tips for DIY Patches
Making DIY patches is a fun and creative way to express your personality and style. Here are some tips to help you customize your patches in a way that's unique to you:
- Choose Your Design Wisely: Think about what you love and what represents you. It could be your favorite animal, a symbol that has a special meaning, or even a quote that inspires you. Your patch should be something that resonates with you personally.
- Play with Colors: Colors can set the mood and tell a story. Use colors that you're drawn to, but also consider how they complement each other. A color wheel can be a helpful tool to find appealing color combinations.
- Mix Textures and Materials: Don't be afraid to mix different textures like cotton, felt, or leather. Adding beads, sequins, or metallic threads can also give your patch an eye-catching sparkle.
- Size Matters: Consider the size of your patch. Smaller patches can be subtle and fit anywhere, while larger ones make a bold statement. Think about where you'll place the patch and choose a size that fits well.
- Placement is Key: The placement of your patch can change its impact. Common places are on the back of a jacket, on a bag, or on the sleeve. Try pinning it in different spots before you make your final decision.
- Personalize with Initials or Dates: Adding initials, significant dates, or small personal symbols can make your patch truly one-of-a-kind.
- Sketch Before You Stitch: Before you start making your patch, sketch out your design. This will help you visualize the end product and make any necessary adjustments before you commit to stitching.
- Keep It Simple: Especially if you're new to making patches, start with simple designs. As you get more comfortable, you can try more intricate patterns and techniques.
The beauty of DIY is that there are no rules. Have fun with it, and don't be afraid to experiment. Your patch is a reflection of you, so make it as unique as you are!
Advanced Techniques for DIY Patches
When you're ready to take your DIY patch-making skills to the next level, these advanced techniques will help you make professional-looking patches that stand out. Here's how you can elevate your patch game:
- 3D Embroidery: Add dimension to your patches by incorporating 3D embroidery. This technique involves layering stitches to make a raised effect, giving your patches a lifelike quality.
- Sublimation Printing: Combine vibrant colors and intricate details using sublimation printing. This method transfers your design onto the patch material with heat, allowing for high-resolution images and a smooth finish.
- Combination Patches: Mix embroidery with sublimation printing to make a patch that has both texture and detailed graphics. This hybrid approach can give you the best of both worlds.
- Rubber Patches: For a modern twist, try making rubber patches. They're flexible and durable and add a unique style to any garment or accessory.
- Leather Patches: Leather patches offer a timeless look. You can emboss, engrave, or stitch designs into leather for a sophisticated touch.
- Interactive Patches: Incorporate elements like LED lights or smart textiles that interact with smartphones to make your patches not just decorative but functional.
- Mylar Patches: Use Mylar to add a shiny, reflective surface to your patches. This material can be layered with embroidery to make eye-catching designs.
- Laser Cutting: For precise edges and intricate designs, laser cutting is the way to go. It allows you to cut complex shapes with ease, making your patches look sharp and professional.
These techniques may require specialized materials and equipment, but the results are worth it. Your patches will have a quality that truly reflects your craftsmanship and creativity.
Troubleshooting Common Issues in DIY Patch Making
When crafting DIY patches, you might encounter a few hiccups along the way. Here's a guide to solving some of the most common issues you may face, ensuring your patch-making process is smooth and enjoyable.
- Thread Tangling: If your thread tangles as you sew, it can be frustrating. To prevent this, use a shorter thread length. Around 18 inches should suffice. You can also run your thread through beeswax to smooth it out and reduce friction.
- Uneven Stitches: For even stitches, practice is key. Consider using a fabric marker to draw a guide around your patch. This will act as a roadmap for your needle, helping you maintain consistent stitch lengths.
- Patch Shifting: It's annoying when your patch moves as you sew. To keep it in place, use more pins. Alternatively, baste the patch with large, temporary stitches before you begin the final sewing.
- Difficulty with Thick Fabrics: Sewing through thick fabrics can be tough on your fingers. A thimble can protect your finger and make pushing the needle through much easier.
- Choosing the Right Needle: The needle size matters. A medium-sized, sharp needle works best. It should be sturdy enough for thick fabrics but fine enough not to damage delicate materials.
- Selecting the Proper Thread: Polyester thread is strong and versatile. Match the thread color to your patch or the fabric for a seamless look.
- Finishing Off: When you've stitched around the entire patch, secure your thread with a knot on the inside of the fabric. Trim any excess thread to keep things neat.
- Iron for Perfection: Ironing your patch and fabric before and after sewing ensures a flat, smooth finish. It's a simple step that makes a big difference.
By following these tips, you'll be able to tackle common patch-making problems with ease.
Care and Maintenance of DIY Patches
Taking care of your DIY patches is essential to ensure they last long and keep looking great. Here's a simple guide to maintaining your patches:
Washing Tips:
- For patches attached with glue or iron-on materials, wash the item on a gentle cycle and avoid high heat to prevent the patch from peeling off.
- If your patch is sewn on, you can wash it normally, but it's a good idea to check the stitching from time to time to make sure it's still secure.
Ironing:
- When ironing the garment with the patch, use a low heat setting and place a thin cloth over the patch to protect it.
Storage:
- Store your patched clothing in a cool, dry place to prevent any adhesive from melting or becoming sticky.
Repairs:
- If the edges of your patch start to lift, you can reattach them with a bit of fabric glue or by sewing a few stitches along the edge.
Avoiding Damage:
- Keep your patches away from abrasive surfaces that could snag or fray the edges.
By following these straightforward care instructions, you can enjoy your custom DIY patches for a long time, adding a personal touch to your wardrobe that's truly your own.
FAQs About DIY Patches
Discover everything you need to know about DIY patches in our comprehensive faqs. Learn the basics, materials, and application tips.
Designing a patch is all about creativity. You can draw your design freehand or use a stencil. If you’re not confident in your drawing skills, you can print a design from the internet and trace it onto your fabric. Remember to keep it simple, especially if you’re new to embroidery or sewing.
Yes, you can! If sewing isn’t your thing, you can use iron-on transfer paper. Simply print your design onto the transfer paper, then iron it onto your fabric. This method is great for beginners and doesn’t require any sewing skills.
There are several ways to attach patches to clothing:
Sewing: This is the most durable method. Sew around the edges of the patch to secure it to the garment.
Ironing: For iron-on patches, place the patch on the garment, cover it with a cloth, and press it with a hot iron.
Adhesive: Fabric glue can also be used, but it may not be as durable as sewing or ironing.
To ensure your patches and garments stay in good condition:
Wash gently: If possible, hand wash the garment or use a gentle machine cycle.
Avoid high heat: Don’t use high heat in the dryer as it can loosen the adhesive on iron-on patches.
Check the edges: After washing, check the edges of sewn-on patches to make sure they’re still secure.
To make sure your DIY patches endure through wear and tear, consider the following tips:
Choose the right fabric: Opt for durable fabrics like denim or canvas for the base of your patch. These materials can withstand multiple washes and daily use.
Secure edges: If you're sewing the patch, make sure to sew the edges securely. A tight zigzag stitch can prevent fraying and keep the patch in place.
Quality adhesive: For iron-on patches, use a high-quality heat-activated adhesive. This will ensure that the patch sticks well and doesn't peel off after a few washes.
Reinforce with sewing: Even if you're using an iron-on patch, sewing around the edges can provide extra durability.
Avoid direct heat: When ironing garments with patches, avoid placing the iron directly on the patch. Use a pressing cloth to protect the patch from melting or scorching.
Conclusion:
In conclusion, making your own DIY patches is easier than you might think. With simple tools and the right guidance, you can make something special that stands out. You can do it too!


