I remember the first time I made DIY pins for my crafts. I was sitting at my small kitchen table with some old fabric scraps, safety pins, and glue. It was a simple idea but turned out to be much more fun than I expected. I felt proud of each pin I made, and I couldn't wait to share this creative activity with my friends.
Making pins for your crafts is not only enjoyable but also a fantastic way to add a personal touch to your projects. From picking out the right materials to assembling your pin, the process is very rewarding. Now, whenever I look at my collection of handmade pins, I feel a sense of accomplishment. Trust me, starting this craft can be a fun experience
I'm helping with this guide on how to make pins for your crafts. Follow these simple steps, and you'll make beautiful pins in no time. These easy instructions will assist you in crafting amazing pins.
Materials You Will Need and Why
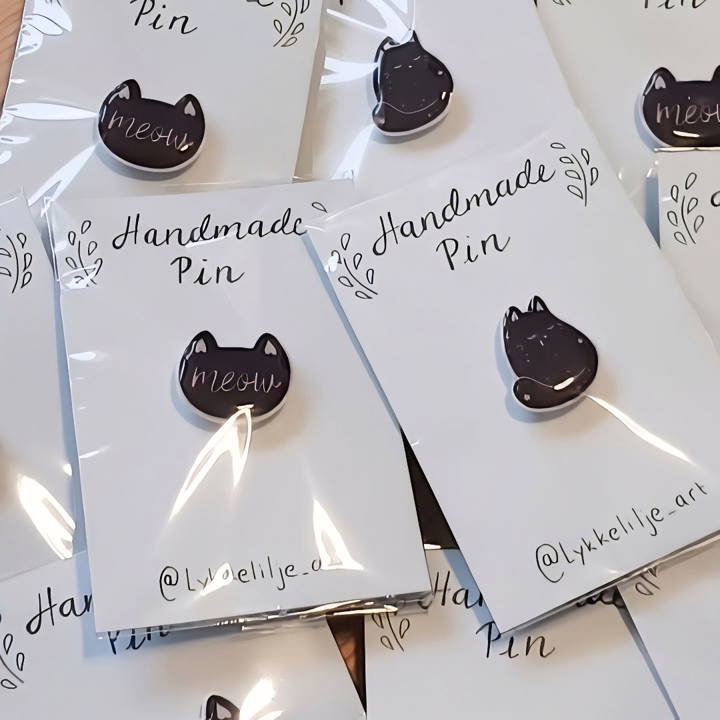
- Designs: I started with cat-themed sketches because, well, cats are adorable! You'll need designs that are close to your heart and resonate with your style.
- Shrink film: This material is crucial for making pins. It allows you to print or draw your designs and then shrink them down to pin size. I found a printable version online, which made replicating my designs easier.
- Oven: To shrink the film. It's a magical step where your designs come to life!
- Mod Podge Dimensional Magic: This adds a beautiful, glossy finish to your pins, making them look professional and vibrant.
- Pin Backings: These are necessary to turn your creations into wearable art.
- E6000 Glue: This ensures the pin backings stay securely attached to your pins.
- Scissors, Oven-safe Tray, Parchment Paper: For cutting, baking, and ensuring your pins don't stick during the baking process.
Step by Step Instructions
Learn how to make DIY pins with our step-by-step instructions. From design to packaging, make unique pins with ease!
Conceptualizing Your Design
First, it's all about the design. I went through my sketchbook, considering various ideas before settling on cat-themed designs. Your design can be anything you like, from simple shapes to intricate artworks. Once you've decided, sketch or make it digitally, aiming for a size that's a bit larger than your desired final pin size (they shrink!).
Turning Designs into Pin Form
After finalizing your designs, print them onto the shrink film. If you're drawing, use the version suitable for markers or pencils. For those printing, ensure your design colors are vibrant; they can lighten slightly when shrunk.
Cutting and Baking
With designs printed, carefully cut them out. Remember, precision matters, but so does leaving a little border around your design for a clean edge post-shrink. The oven is your next stop. Follow the shrink film instructions for temperature and time. Convert Fahrenheit to Celsius if needed to avoid any melting mishaps!
Applying the Glossy Finish
Once shrunk and cooled, it's time for Mod Podge Dimensional Magic. This step can be tricky due to potential air bubbles, so take it slow, applying an even layer to give your pins a shiny, professional look. Let them dry for at least 24 hours.
The Final Touches
Now, attach the pin backings using E6000 glue. Be generous but careful with the glue to ensure a solid bond without overflow. Allow them to dry completely before handling.
Packaging
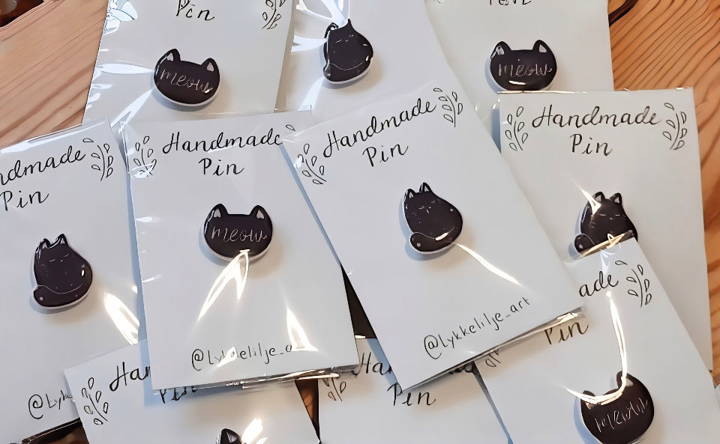
Making a simple but attractive package can enhance the overall presentation of your pins, especially if you plan to sell or gift them. I used small bags and backing cards with a simple design matching the pins' theme.
Additional Tips
- Color Changes: Remember, colors might slightly change upon baking, adding an unexpected charm to your designs.
- Learning Curve: My first attempt had its challenges, especially with bubble formation in the gloss application. Practice makes perfect, so don't get discouraged.
- Patience is Key: From waiting for the pins to bake to letting the gloss finish dry, patience ensures each step results in the best possible outcome.
Customization Techniques for DIY Pins
Making your own DIY pins is not just about crafting something beautiful; it's about making something that represents you. Here are some techniques to personalize your pins in a way that they become a reflection of your unique style.
Choose Your Base Material
Start with selecting a base material that resonates with your personal aesthetic. Common materials include:
- Metal: For a classic, durable pin.
- Plastic: Lightweight and versatile.
- Wood: For a rustic, natural look.
- Recycled Materials: Such as old buttons or fabric, for an eco-friendly option.
Design Your Pin
Think about what you want your pin to say about you. Is it a symbol of a cause you support, a fandom you're part of or just a quirky design that makes you smile? Sketch out your ideas on paper first.
Add Color
Color can bring your pin to life. Use:
- Enamel Paints: For a glossy, professional finish.
- Markers or Pens: For a hand-drawn, personal touch.
- Stickers: To add patterns or images easily.
Personalize with Text
Adding a name, initials, or a short message can make your pin uniquely yours. You can:
- Handwrite: For a personal touch.
- Stamp: For a clean, uniform look.
- Engrave: If you're working with metal.
Attachments and Backings
The back of your pin is just as important as the front. Choose a backing that suits your style and needs:
- Butterfly Clutch: The most common backing, secure, and easy to use.
- Magnetic Clasp: No holes in your clothes, great for delicate fabrics.
- Safety Pin: For a vintage feel.
Final Touches
Consider adding embellishments like:
- Glitter: For a bit of sparkle.
- Beads: Sewn or glued on for texture.
- Charms: To add movement and interest.
The key to customization is to make something that feels right to you. There's no wrong way to express yourself through your DIY pins.
Maintenance and Care for DIY Pins
Taking care of your DIY pins ensures they stay looking great for years to come. Here's how to maintain and care for your pins with simple, easy-to-follow steps.
Cleaning Your Pins
Keep your pins clean to maintain their shine:
- Wipe Gently: Use a soft, dry cloth to remove dust or dirt.
- Avoid Water: If your pins are not waterproof, keep them away from moisture.
- Polish Metal Pins: For metal pins, a bit of metal polish can keep them gleaming.
Storing Your Pins
Proper storage is key to protecting your pins:
- Pin Boards: Display them on a corkboard or fabric-covered foam board.
- Individual Bags: Store them in small bags to prevent scratching.
- Cool, Dry Place: Keep your pins in a location away from direct sunlight and humidity.
Regular Checks
Inspect your pins regularly:
- Clasps and Backings: Make sure the clasps are secure, and the backings are tight.
- Edges and Surfaces: Look for any signs of wear or damage.
Handling Your Pins
Be mindful when handling your pins:
- Gentle Touch: Handle your pins by the edges to avoid fingerprints on the design.
- Secure Attachment: When wearing them, ensure they are fastened securely to avoid loss.
Repairing Your Pins
If your pins get damaged, here are some tips for repair:
- Glue Loose Parts: Use a strong adhesive to reattach any pieces that come loose.
- Replace Backings: If a backing is lost, you can buy replacements online or at craft stores.
By following these maintenance and care tips, your DIY pins will remain a vibrant part of your collection.
FAQs About DIY Pins
Discover essential FAQs about DIY pins, including materials, techniques, and tips to make your unique designs effortlessly and creatively.
Absolutely! You can make custom designs using simple graphic design programs or even hand-draw them. The key is to have a clear and bold design that can be easily translated into a pin. If you're not confident in your art skills, consider using online resources or templates to get started.
After cutting out your design from the shrink film, preheat your oven according to the shrink film’s instructions. Place your pins on a parchment-lined baking sheet and bake them for the specified time. Keep an eye on them to prevent overheating or burning. Once baked, let them cool completely before moving on to the next step.
For a professional-looking finish, apply epoxy or sealant evenly over your pin. This will give it a smooth, glossy surface. Make sure to cover the entire surface and allow it to dry completely. If you’re using epoxy, be careful to remove any air bubbles that might form during the application.
Making DIY pins can be quite cost-effective, especially if you buy materials in bulk. The initial investment in materials might be a bit higher, but per pin, the cost is usually low. Yes, you can sell your homemade pins online! Platforms like Etsy or your own website are great places to start. Just make sure to factor in the cost of materials, time, and shipping when pricing your pins.
To ensure your DIY pins last a long time, it's important to use high-quality materials from the start. For enamel pins, using a good-quality shrink film and epoxy resin will make a difference. After baking and sealing your pins, consider adding a second layer of sealant for extra protection against scratches and wear. Additionally, store your pins in a cool, dry place when not in use to prevent any damage from humidity or heat.
Closing Thoughts
Making DIY pins is easier than you think! Get your materials ready, and let your creativity flow. Start today, and see the magic happen.


