Starting to make your own shoes can be a rewarding experience. I remember my first attempt—choosing the right materials, measuring carefully, and following each step closely. With patience and attention to detail, I saw the shoe take shape. It wasn't perfect, but it was mine, crafted by my hands. Making something from scratch gave me a sense of pride and accomplishment.
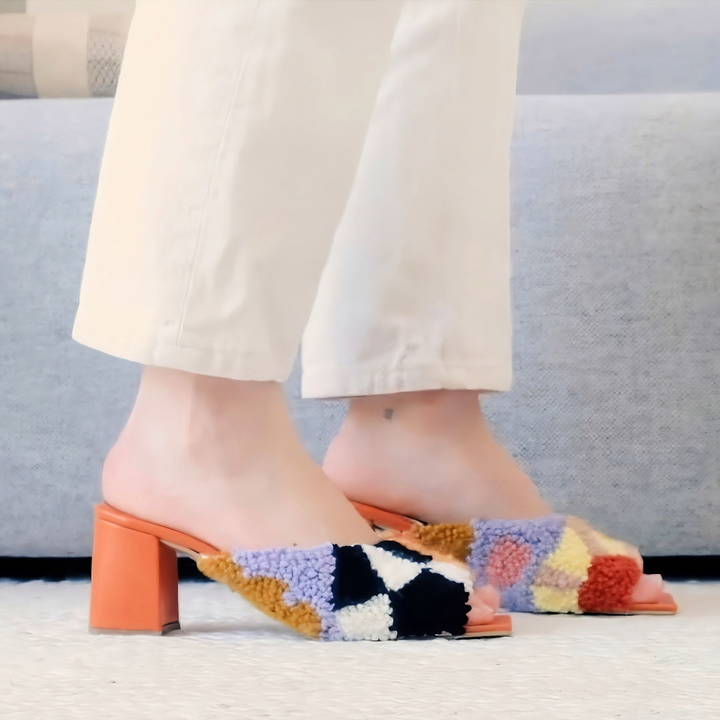
Now, I want to help you get started with this step-by-step guide on how to make shoes. You'll find useful tips on materials, tools, and techniques that can make the process easier and more enjoyable. With the right guidance and some effort, you, too, can make a unique pair of shoes that perfectly fits your style and needs.
Step by Step Instructions
Learn how to make shoes with step-by-step instructions. From selecting lasts to crafting uppers and soles, master every detail for durable and stylish footwear.
Selecting Your Shoe Lasts
Selecting your shoe lasts: ensure perfect fit and comfort. Discover why choosing the right lasts is essential for your shoe-making success.
Why You Need the Right Lasts
The journey into shoemaking begins with choosing the right pair of shoes. Think of shoe lasts as the foundation of your project—a dressmaker's mannequin for shoes if you will. These rigid forms determine the size, heel height, and toe shape of your finished shoe. My first pair of lasts was a simple, round-toe design, suitable for a beginner looking to craft a classic, low-heel shoe. Remember, the right lasts are crucial; they set the stage for everything that follows.
The Upper: Crafting Your Shoe's Identity
The upper: crafting your shoe's identity. Discover top material and design tips and understand the importance of insoles for ultimate comfort and style.
Selecting Materials and Design
Next, the upper part of the shoe, which can range from simple straps for sandals to more complex designs for boots, forms the visible identity of your footwear. Your choice of material here—an exciting opportunity for personal expression—will wrap around the last, forming the shape of your future shoe. I opted for a durable yet supple leather for my first project, aiming for a balance between ease of work and a luxurious finish.
The Importance of Insoles
Depending on the desired final product, the type of insole board you select—flat, mid-high, or high heel—must correspond with the pitch of your lasts. This component is pivotal, as it serves as the bridge between the comfort of the shoe and its structural integrity. I learned early on that a mismatch here could lead to an uncomfortable, or even unwearable, final product.
Stiffeners and Structure: Ensuring Durability
Ensure your structure's durability with stiffeners. Discover why you can't skip stiffeners in construction and boost the longevity of your projects.
Why You Can't Skip Stiffeners
The potential inclusion of stiffeners is a step that underscores the shoe's longevity. These materials reinforce the shape, ensuring the shoe maintains its form long after the last is removed. In crafting my first pair of boots, integrating stiffeners around the heel and toe was a revelation, marking the transition from a loose collection of parts to a recognizable shoe silhouette. This step may vary based on style, but its impact on the final product's quality cannot be overstated.
The Sole: Grounding Your Creation
Discover the sole: grounding your creation – a guide to crafting a deep connection with the earth for ultimate creativity and balance.
Crafting the Connection to the Earth
Arguably the most rewarding step is attaching the sole, which connects your creation to the world. Whether you're making a flat shoe needing a slight lift or a high heel requiring precise attachment, this stage brings your shoe to life. My first flat shoe project involved making a minimalistic sole with just enough lift to ensure comfort and wearability. Learning to attach this correctly was a milestone, symbolizing the near completion of a fully wearable shoe.
The Final Touch: The Insole Sock
The final touch is the insole sock, which ensures comfort and finishes touches for every step. Discover the perfect balance of support and style today.
Ensuring Comfort and Finishing Touches
The insole sock might seem a minor detail, but it embodies the essence of custom, handmade shoemaking. Covering any internal imperfections and providing a smooth, comfortable surface for the foot, this element allows for personalization not just in design but in comfort. Adding a layer of foam beneath my insole sock, I was struck by the transformation, as my makeshift collection of materials suddenly felt like a luxurious, bespoke shoe.
Customization Techniques
Personalize your shoes to reflect your style. Whether updating old pairs or adding flair to new ones, use these tips to make them unique.
- Choose Your Canvas: Start with a plain pair of shoes as your base. White canvas sneakers are a great option because they're like a blank slate for your creativity.
- Design Planning: Before you begin, sketch your design on paper. Consider using stencils or masking tape to make clean lines and patterns on your shoes.
- Color It Up: Fabric markers and acrylic paints are your best friends when it comes to adding color. They're easy to use and come in a wide range of vibrant colors. Remember to apply a base coat if you're painting, and let it dry completely before adding your designs.
- Add Some Texture: Glue on sequins, beads, or embroidery for a 3D effect. You can also use fabric glue to attach patches or fabric cut-outs to your shoes.
- Lace Them Differently: Laces don't just have to be functional; they can be decorative, too! Try lacing your shoes with colored or patterned laces, or learn new lacing techniques to make interesting patterns.
- Seal the Deal: Once you're happy with your design, make sure to seal it with a clear sealant spray. This will protect your artwork from the elements and ensure it lasts longer.
- Wear with Confidence: The most important part of customizing your shoes is to wear them proudly. Your shoes are now a reflection of your unique style and creativity.
By following these simple steps, you can transform any pair of shoes into a masterpiece that stands out from the crowd.
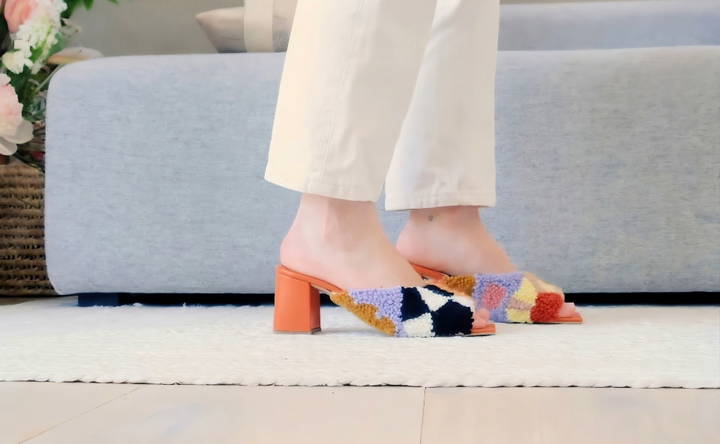
Comfort and Fit Optimization
When it comes to shoes, comfort is king. A well-fitting shoe can make the difference between a good day and a bad one. Here's how to ensure your shoes fit well and feel comfortable.
- Measure Your Feet: Feet can change size over time, so measure them twice a year. Use a ruler or a brannock device to get an accurate measurement.
- Understand Shoe Sizing: Shoe sizes can vary between brands. Always refer to the brand's size chart when buying new shoes.
- Mind the Width: Not just length, but width is important too. Make sure the shoes you choose are not too tight or too loose.
- Break Them In: New shoes often need a little time to mold to your feet. Wear them around the house with thick socks to gently stretch them.
- Cushioning is Crucial: Insoles can enhance comfort. Look for cushioned insoles that support the arch and heel.
- Lacing Techniques Matter: How you lace your shoes can affect their fit. Experiment with different lacing methods to find what feels best for you.
- Listen to Your Feet: If you feel discomfort, don't ignore it. Your feet are telling you something about the fit of your shoes.
By following these tips, you can optimize the comfort and fit of your shoes, ensuring they're a pleasure to wear every day.
Shoe Repair and Maintenance
Keeping your shoes in top condition not only makes them last longer but also ensures they look good and stay comfortable. Here's a straightforward guide to shoe repair and maintenance.
- Regular Cleaning: Dirt and grime can wear down your shoes. Clean them regularly with a soft brush or cloth. For leather shoes, use a cleaner designed for leather, and for canvas, a mild soap and water will do the trick.
- Dealing with Scuffs and Scratches: For leather shoes, apply a matching shoe polish to cover scuffs and scratches. Buff them out with a brush or cloth to restore the shine.
- Sole Care: Check your soles for signs of wear. If they're starting to thin, take them to a cobbler for resoling. This can breathe new life into a favorite pair of shoes.
- Waterproofing: Protect your shoes from water damage by applying a waterproofing agent. This is especially important for leather and suede shoes.
- Odor Control: Keep your shoes smelling fresh by sprinkling baking soda inside them overnight. Just remember to tap it out in the morning!
- Laces and Eyelets: Replace frayed laces to prevent them from snapping at an inconvenient time. Also, keep an eye on the eyelets and fix any that are coming loose.
- Storage: Store your shoes in a cool, dry place away from direct sunlight. Use shoe trees or stuff them with newspaper to help them keep their shape.
By following these simple steps, you can extend the life of your shoes and keep them looking their best.
FAQs About How to Make Shoes
Discover answers to FAQs about making shoes, including essential materials, tools, and step-by-step guides for crafting your own footwear.
Start by deciding the type of shoe you want to make, such as loafers, sneakers, or sandals. Sketch out your ideas or find a basic shoe template online. If you're new to shoemaking, stick to simple designs and consider using a free template for your first project.
Yes, harvesting parts from old shoes can save time and add a professional touch. Focus on reusing soles as they provide a reference for your stitching. Carefully remove the parts you need with a scalpel knife.
After preparing your materials and design, follow these steps:
Cut the parts of the shoe to size based on your design.
Assemble the pieces, starting with the upper part and then attaching it to the sole.
Stitch the parts together, ensuring precision and durability.
Once the shoe is assembled, you can add finishing touches like laces, buckles, or decorations. Inspect your shoes for any imperfections and make adjustments as needed. Wear them around to test for comfort and fit.
To ensure the longevity of your handmade shoes, focus on quality materials and meticulous construction. Use durable materials like thick leather or heavy-duty canvas for the upper part of the shoe. For the soles, consider rubber or dense foam. During assembly, double-stitch seams and reinforce areas prone to wear, such as the heel and toe. Apply a water-resistant coating to protect against the elements. Regular maintenance, like cleaning and conditioning the leather, will also extend the life of your shoes.
Reflections and Moving Forward
I'm excited to share these steps with you. They will guide you through the process of making your own shoes, turning a simple idea into something real. Give it a try; you'll see how satisfying it can be!


