Making silicone molds at home can be a rewarding and fun activity. One day, I decided to make my own molds to make some unique shapes for my crafts. It was surprisingly easy to get started, and I found that I didn't need any special tools. I gathered my supplies and began by mixing the silicone thoroughly.
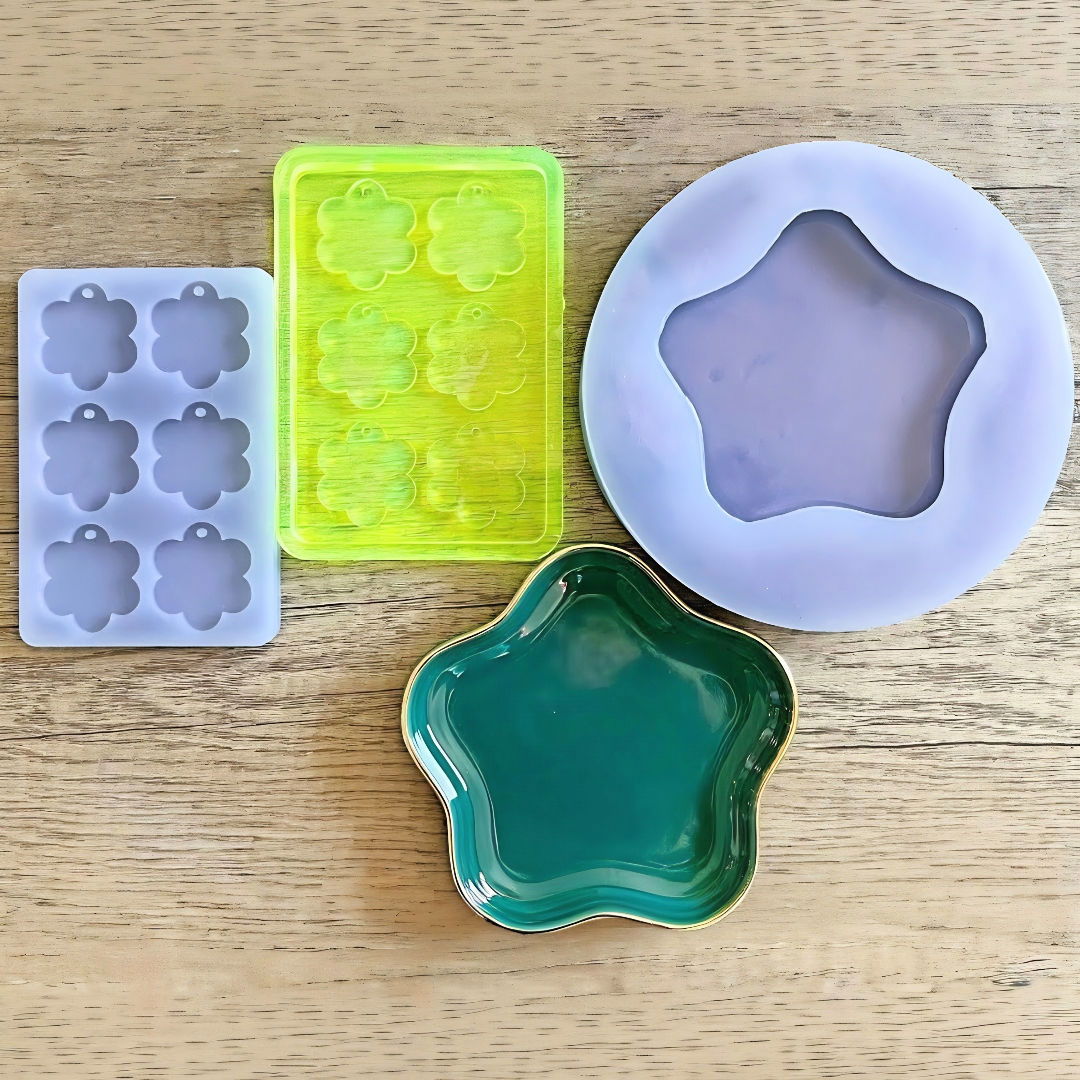
In just a few hours, I had maked custom molds for my projects. The molds were perfect for making replicas of small items and saved me a lot of time. I'm excited to share this process with you so you can also experience the same joy and convenience. This guide will help you make your own silicone molds with easy steps and tips.
Why Silicone?
Silicone is the material of choice for mold-making due to its incredible properties. It's non-toxic, heat-resistant, and capable of capturing fine details, making it ideal for a wide range of applications. Plus, silicone molds are reusable, giving you great value over time.
Choosing the Right Silicone
There are various types of silicone, each suited for different projects. For instance, tin-cured silicone is cost-effective and has a longer shelf life, while platinum-cured silicone offers greater durability and is less prone to shrinkage. Consider your project's requirements when selecting your silicone.
Follow these guidelines to make quality silicone molds. Practice makes perfect, so don't worry if the first tries aren't perfect. Each mold will improve your technique and understanding of silicone.
Materials Needed
Discover the essential materials needed for silicone mix and blanks, ensuring you have all the supplies for your project.
For the Silicone Mix:
- Silicone Rubber: I used Smooth-On's Dragon Skin 20 for its high durability and flexibility.
- Mixing Bucket: Preferably with volume markings for easy measurement.
- Mixing Stick and Mixer Attachment: A simple wooden stick and a drill mixer attachment make mixing easier.
- Mica Pigments: These add a beautiful color to your molds. Choose any color you like; I went with purple.
- Vacuum Chamber (Optional): Helps eliminate bubbles from the silicone, ensuring a smoother mold.
For the Blanks:
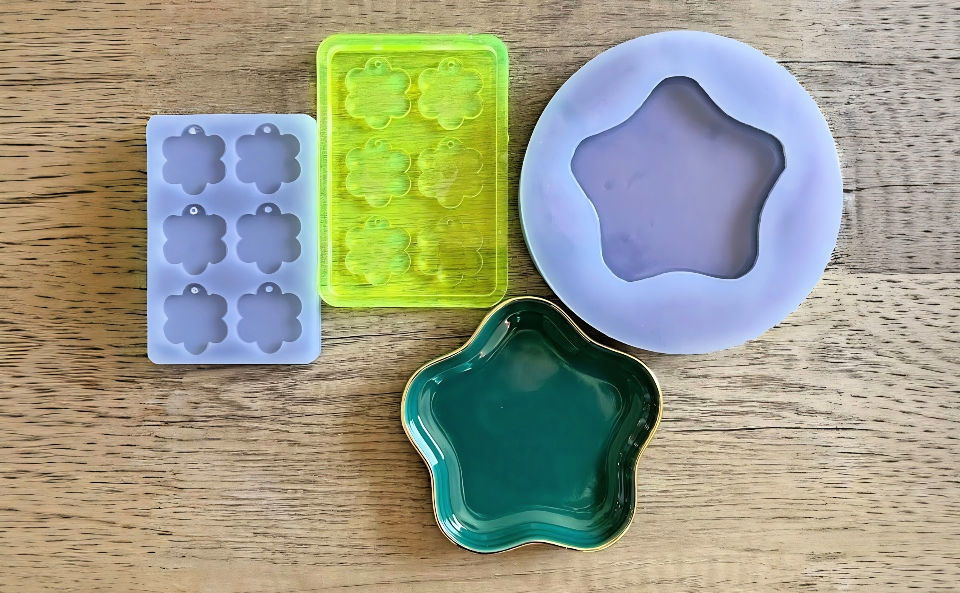
- Flower Trinket Tray and Flower Earrings: I chose these because of their aesthetic appeal and popularity.
- Mold Housing: 3D printed or any container that fits your blank.
- Aura Mask Stencil Film and Gorilla Tape: These help secure your blanks and prepare them for molding.
Step by Step Instructions
Learn how to make your own silicone molds with our step-by-step guide. Perfect for beginners, this tutorial ensures success in your DIY projects!
Preparing the Silicone Mix
- Measure the Silicone: Pour equal parts of parts A and B into your mixing container. For my project, I went with 8 ounces of each.
- Add Color: Sprinkle some mica pigment into the mix. I love how purple turns out, so that was my go-to color.
- Mix Well: Use your mixing stick or attach the mixer to your drill and blend the components for about two minutes. Ensure you scrape the sides and bottom for an even mix.
Dealing with Bubbles
- Using a Vacuum Chamber: After mixing, you'll notice some bubbles. If you have a vacuum chamber, now's the time to use it to degas the silicone. It's not mandatory but highly recommended for a bubble-free mold.
Preparing the Blanks
- Securing the Tray: Apply the aura mask stencil film on the flower dish to fix it inside the mold housing. Make sure it's clean for a flawless mold.
- Preparing the Earrings: Peel off any protective layers on the acrylic earrings. Use gorilla tape if necessary to avoid scratches.
Molding Process
- Pouring the Silicone: Begin by pouring the silicone over your blanks in the housing. If you're working with intricate designs, like the flower earrings, pour a bit and use a staple to poke through holes to allow trapped air to escape.
- Eliminate Bubbles: Again, if bubbles form, gently poking with a staple or similar tool helps free them. This ensures the silicone fills every part of your design, especially small details.
Waiting Game
- Cure Time: Let your silicone sit for about 4 hours or as per the manufacturer's recommendation. Patience is key here; ensure it's completely cured before moving to the next step.
Demolding
- Removing the Silicone: Carefully extract the silicone from the mold housing and reveal your new mold. The moment of demolding is always thrilling - seeing your project come together is quite satisfying.
Post-Processing
- Cleaning the Mold: Use a cuticle trimmer or a small knife to clean any overflows or spurs for a neat finish.
https://www.youtube.com/watch?v=LY9MxPABnzw&ab_channel=EllafulDeco
Design and Customization of Silicone Molds
Customizing silicone molds lets you personalize projects, whether for art, crafts, or industry. Customization is a key aspect of mold making.
- Starting with Design The design phase is crucial. Begin by sketching your idea on paper or using digital design software. Consider the size, shape, and complexity of the object you want to replicate. Think about how the mold will open and how you will pour the casting material into it.
- Adding Textures and Patterns Textures and patterns can add a unique touch to your molds. You can make textures by pressing objects with interesting surfaces into the mold before the silicone sets. Alternatively, you can carve patterns directly into the silicone once it's partially cured.
- Embedding Objects Silicone molds allow for the embedding of objects to make complex designs. You can place items like wires, fibers, or smaller objects into the silicone before it cures. This technique is great for making molds with built-in supports or for making artistic effects.
- Coloring Silicone You can color silicone using special silicone pigments. This is done by mixing the pigment into the silicone before pouring it into the mold box. Use colors to differentiate parts of a multi-part mold or to match the color scheme of your project.
- Making Flexible Molds For molds that need to bend or flex to release the cast, consider adding a softener to the silicone mixture. This will make the final mold more pliable and easier to work with, especially for intricate designs.
- Personalizing with Logos and Branding If you're making molds for a business, you can personalize them with your logo or brand name. This can be done by making a stamp or a 3D-printed insert that is placed in the mold box before pouring the silicone.
- Ensuring Originality Always strive for originality in your designs. While it's okay to draw inspiration from existing works, make sure your customizations are unique to your vision and serve a specific purpose in your project.
Use these design techniques to turn a basic silicone mold into art or a functional tool. Your imagination is the limit, so try different designs and methods to make the perfect mold.
Advanced Techniques in Silicone Mold Making
When you've mastered the basics of silicone mold making, you might be ready to explore some advanced techniques. These methods can help you make more complex molds and can be especially useful for projects that require precision and detail.
Two-Part Molds
For objects with undercuts or irregular shapes, a two-part mold is often necessary. This involves making two separate silicone pieces that fit together perfectly to capture the complete form of your model.
- Designing the Parting Line: Identify the best line where the mold will separate into two halves. This line should minimize undercuts and ensure easy demolding.
- Applying a Release Agent: Before pouring the second half of the mold, apply a release agent to the first half to prevent the silicone from sticking together.
- Aligning the Halves: Make registration keys, like small bumps or indentations, in the first half of the mold to ensure the two halves align correctly.
Pressure Casting
Using a pressure pot can greatly improve the quality of your casts by eliminating air bubbles. After pouring the resin into the mold, place it in a pressure pot and apply pressure according to the manufacturer's recommendations. This compresses any bubbles to a size that is virtually invisible, resulting in a clearer and more professional-looking cast.
Additives for Silicone
There are various additives available that can modify the properties of silicone. For example:
- Thickeners: Increase the viscosity of the silicone, allowing you to brush it onto vertical surfaces without dripping.
- Softeners: Make the silicone more flexible, which can be helpful when demolding intricate designs.
- Accelerators: Speed up the curing process, which is useful when you're on a tight schedule.
Cold Casting
Cold casting is a technique where metal powders are mixed with resin before being poured into a silicone mold. This makes a cast that looks and feels like metal but is much lighter and easier to work with.
Mold for Food Use
If you're making molds for food, such as chocolate or fondant, ensure that you use food-grade silicone. Always follow the manufacturer's instructions for curing and post-curing to ensure the mold is safe for food contact.
Use advanced techniques in silicone mold making to expand project options and enhance product quality. Practice and experimentation will help you perfect these methods.
Troubleshooting Common Issues in Silicone Mold Making
Making silicone molds is generally straightforward, but sometimes you might encounter issues that can affect the quality of your molds. Here's a guide to troubleshooting some common problems, ensuring your mold-making process is as smooth as possible.
Air Bubbles
Air bubbles are a frequent concern and can result in imperfections in your mold.
- Prevention: Slowly mix and pour the silicone to minimize air entrapment. Use a vacuum chamber to degas the silicone if available.
- Solution: If you notice bubbles after pouring, gently tap the mold box to bring them to the surface or use a needle to pop them.
Sticky or Uncured Silicone
Sometimes silicone may not cure properly, leaving a sticky residue.
- Prevention: Measure the silicone and curing agent accurately. Mix thoroughly to ensure a complete reaction.
- Solution: If the silicone remains tacky after the curing time, you may need to remove the uncured silicone and start over, ensuring the mix ratio is correct.
Mold Tears
A mold might tear when demolding your cast.
- Prevention: Use a mold release agent and ensure the silicone has fully cured before demolding.
- Solution: If a tear occurs, you can patch it with fresh silicone, although this may not always be a permanent fix.
Inaccurate Details
If the details of your original object aren't captured, the mold might not be precise.
- Prevention: Ensure the model is clean and free of debris. Pour the silicone carefully to avoid trapping air against the model's surface.
- Solution: Clean the model and try again, perhaps adjusting the viscosity of the silicone to better capture fine details.
Mold Distortion
The mold should retain its shape but may distort if not stored correctly.
- Prevention: Store the mold flat or suspended to maintain its shape.
- Solution: If distortion occurs, place the mold in a container that supports its original shape and leave it to regain form.
Parting Lines
Visible lines can appear where multi-part molds join together.
- Prevention: Ensure the edges are smooth and the mold halves align correctly when pouring the second part.
- Solution: Sand down any rough edges after the mold has cured, or seal the parting line with a thin layer of silicone.
Color Transfer
Sometimes, the color from the silicone or embedded objects can transfer to the cast.
- Prevention: Use non-reactive pigments and materials that don't bleed color.
- Solution: Seal the embedded objects with a clear coat before molding, or use a mold release to minimize transfer.
Understanding and addressing common issues improves silicone mold quality. Patience and practice are crucial. Keep experimenting and seek advice if problems persist.
Safety Precautions in Silicone Mold Making
When working with silicone for mold making, it's crucial to prioritize safety. Silicone is generally safe to handle, but it's important to take precautions to protect yourself and your workspace. Here are some safety tips to follow:
Work in a Ventilated Area
Silicone can produce fumes, especially when curing. Work in a well-ventilated space or use a fan to disperse fumes.
Wear Protective Gear
- Gloves: Wear gloves to protect your skin from uncured silicone and cleaning solvents.
- Safety Glasses: Use safety glasses to prevent splashes from getting into your eyes.
- Apron: An apron or old clothes will protect your garments from spills.
Read Product Labels
Always read the manufacturer's instructions and safety data sheets. They provide valuable information on the safe handling and use of silicone products.
Measure and Mix Carefully
- Accurate Measurements: Use precise measurements to ensure the silicone cures properly.
- Gentle Mixing: Mix the silicone gently to reduce the risk of making air bubbles, which can also minimize fume production.
Safe Handling of Tools and Materials
- Sharp Objects: If using sharp tools for cutting or adjusting molds, handle them with care to avoid injury.
- Chemical Products: When using solvents or cleaners, ensure they are compatible with silicone and use them sparingly.
Dispose of Waste Properly
- Cured Silicone: Dispose of cured silicone as solid waste according to local regulations.
- Uncured Silicone: Treat uncured silicone as hazardous waste and follow local guidelines for disposal.
Be Prepared for Spills
Keep a spill kit nearby, including absorbent materials and a sealable container to safely dispose of any spills.
Store Materials Safely
Keep silicone and related chemicals in their original containers, tightly sealed, and stored away from children and pets.
First Aid
Know the first aid procedures for silicone exposure. If silicone gets on your skin, wash it off with soap and water. If it gets in your eyes, rinse immediately with water and seek medical attention if irritation persists.
By adhering to these safety precautions, you can enjoy the creative process of silicone mold making while keeping yourself and your environment safe.
FAQs About How to Make a Silicone Mold
Discover essential FAQs about making a silicone mold, covering materials, techniques, tips, and troubleshooting for perfect DIY mold-making.
Silicone molding is a process where liquid silicone rubber is shaped into flexible molds. These molds can replicate intricate details and are used for various applications, from crafting to industrial design.
Absolutely! With basic materials and tools, you can make silicone molds at home. It's a popular DIY project for making custom parts, jewelry, or even baking molds. Just ensure you work in a well-ventilated area and follow safety precautions.
For a successful mold:
Measure the silicone and hardener accurately.
Mix thoroughly to avoid air bubbles.
Pour slowly to capture all details.
Allow the mold to cure completely before demolding.
Yes, there are several methods, such as using 2-part liquid silicone for detailed work, brush-on silicone for larger items, and silicone putty for quick, less intricate molds. Each method suits different project needs.
To extend the life of your silicone molds, proper care is crucial. Here are some tips:
Clean your molds after each use with mild soap and water.
Dry them thoroughly before storing to prevent mold or mildew.
Store them flat without stacking to maintain shape and avoid distortion.
Avoid using sharp objects that can cut or tear the silicone.
Follow the manufacturer's guidelines for the maximum temperature and chemical exposure to prevent degradation.
Final Thoughts
Making your own DIY silicone molds is simple and very satisfying. Follow this guide, and you'll be making like a pro in no time.


