When it comes to Halloween, theater makeup, or simply experimenting with new looks, white face paint is an essential tool. Unfortunately, many commercial face paints contain harmful ingredients that can cause irritation, breakouts, or allergic reactions, particularly for people with sensitive skin. That's why a DIY approach, using natural and safe ingredients, is a great solution for those seeking a healthier option. Whether you're going for a corpse paint look for a metal concert, making a ghostly effect for Halloween, or simply having fun with cosplay, this guide will help you make your own DIY white face paint with ease.

Why Choose DIY White Face Paint?
- Health and Safety Concerns: Commercial face paints can contain harmful ingredients such as heavy metals like arsenic, lead, and mercury, which are toxic in large quantities, especially for children. For individuals with sensitive skin or acne-prone skin, these chemicals can be a recipe for irritation, redness, and breakouts.
- By making your own white face paint, you can control exactly what goes onto your skin, ensuring that the ingredients are safe and non-toxic. This DIY version is made with natural, easily accessible materials that you probably already have at home.
- Environmental Benefits: Opting for a DIY face paint means you are reducing reliance on products that often come in non-recyclable packaging and contain environmentally damaging ingredients. Many cosmetics have a negative impact on the environment, both in terms of their production and disposal. Homemade options are more sustainable and eco-friendly.
- Customizable to Your Needs: Whether you're aiming for a thick, opaque coverage for corpse paint or something lighter for a subtle effect, this DIY recipe is completely customizable. You can adjust the ingredients to suit your preferences and skin needs.
Materials You'll Need
Making this face paint requires just a few simple ingredients:
- Cornstarch: This is the base of your face paint, providing an opaque white color. Cornstarch is also non-toxic and gentle on the skin, making it perfect for those with sensitivities.
- Unscented, Mild Facial Lotion or Sunscreen: This acts as the binder for your paint. A facial lotion or sunscreen helps the paint adhere to your skin while keeping it moisturized. Choose a product without fragrances or harsh chemicals to avoid irritation.
- Olive Oil: Olive oil adds moisture and improves the spreadability of the face paint. It also prevents the paint from drying out too quickly or becoming too cakey on your skin.
- Distilled Water: Used to adjust the consistency of the paint. Distilled water has a lower pH than tap water, which is beneficial for sensitive skin. It helps make a smooth, spreadable mixture.
- Optional: Essential Oils: If you want to add a light fragrance or additional skin benefits, a drop or two of essential oils like lavender or tea tree can be included. However, this step is completely optional and should be avoided if you have particularly sensitive skin.
Recommended Tools:
- Mixing bowl
- Measuring spoons (though this recipe is forgiving if you prefer to estimate)
- Fork (for mixing and breaking up clumps)
- Brushes (makeup brushes or paintbrushes for application)
- A small container (for storing any leftover paint)
Step by Step Instructions
Learn how to make DIY white face paint with our easy step-by-step guide. Perfect for safe application and easy removal. Get customizable tips!
Step 1: Prepare Your Base
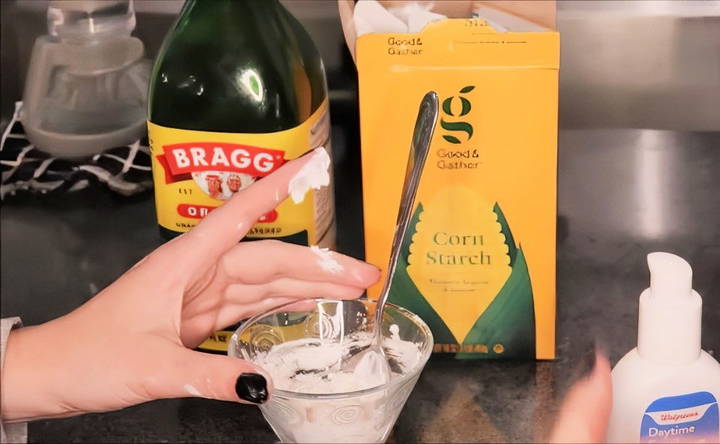
Start by adding 2 tablespoons of cornstarch to a small mixing bowl. Cornstarch will give your face paint its white color and make the solid, matte base that is essential for achieving that opaque look.
Step 2: Add Lotion or Sunscreen
Mix in equal parts of unscented facial lotion or sunscreen. The key here is to use a mild product that won't irritate your skin. If you want to include sun protection in your face paint (ideal for outdoor events like Halloween), opt for a mineral-based sunscreen. Blend about 2 tablespoons of lotion into the cornstarch, mixing until smooth. Adjust the amount depending on your desired consistency.
Step 3: Incorporate Olive Oil
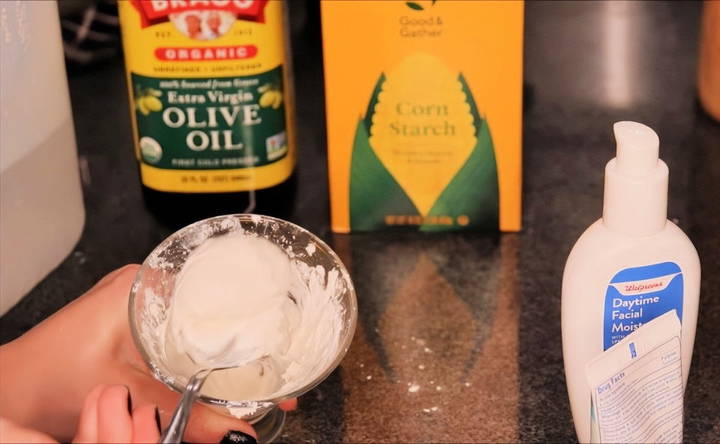
Drizzle a small amount of olive oil into the mixture. You don't need much — just about 1 teaspoon. Olive oil helps the paint glide more smoothly across your skin and keeps it from clumping. If the mixture starts to look too thick or dry, feel free to add more oil until you reach a creamy consistency.
Step 4: Adjust with Water
To thin out your face paint and make it easier to apply, slowly add distilled water. Start with just a teaspoon, and mix well. Continue adding small amounts of water until the mixture is at your desired thickness. The paint should be thick enough to stay on your skin without dripping but thin enough to spread easily.
Step 5: Test the Consistency
Once your mixture is smooth, it's time to test it out. Dab a small amount of the paint onto the back of your hand or your face to see how it feels. The paint should be opaque and easy to spread. If it feels too thick, add a bit more water or olive oil. If it's too runny, mix in a little more cornstarch.
Step 6: Application Tips
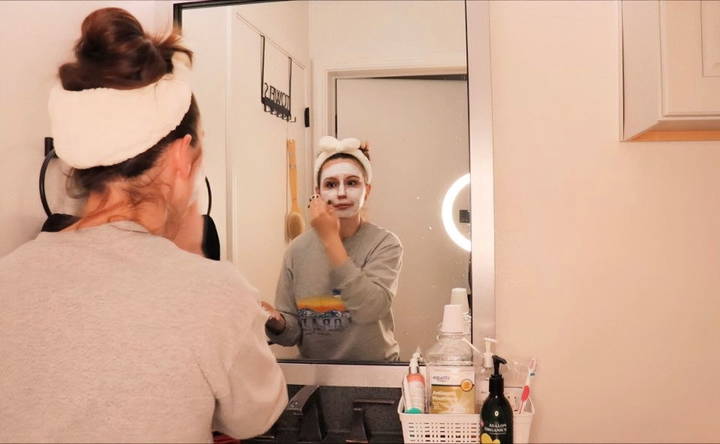
When applying the face paint, you can use your fingers for a simple and fun experience, or you can apply it with makeup brushes for more precision. If you're going for a full coverage look, like for corpse paint, apply one layer, allow it to dry, and then apply a second coat if needed. The face paint dries relatively quickly, but it's essential to let each layer set before adding another for maximum opacity.
Customizing the Recipe
One of the benefits of making your own DIY white face paint is that you can tailor the recipe to suit your specific needs. Here are a few ways to customize it:
- For a Matte Finish: If you prefer a more matte look, increase the amount of cornstarch slightly or dust a bit of cornstarch over the paint once it's applied.
- For Hydration: If you have dry skin, add a little extra olive oil or substitute it with another moisturizing oil, such as jojoba or almond oil.
- For Extra Durability: If you're going to be wearing the paint for an extended period, add a bit more lotion or sunscreen to improve the staying power and prevent cracking.
How to Remove the Face Paint
After a long night of fun, removing the face paint is simple. The natural ingredients in this recipe make it easy to wipe off with a gentle cleanser and warm water. You can also use a soft cloth or cotton pads soaked in micellar water or a gentle oil cleanser to break down the makeup without causing irritation.

- Pro Tip: Follow up with a moisturizer after removal to ensure your skin stays hydrated and balanced.
Safety and Storage
While this DIY face paint is made from safe, natural ingredients, it's still important to do a patch test before applying it to your entire face, especially if you have sensitive skin. Apply a small amount to your wrist or neck, and wait 24 hours to see if any reaction occurs. If not, you're good to go!
This paint is best used immediately after making it, as the consistency can change over time. If you do have leftovers, store them in an airtight container in the refrigerator for up to a week. You may need to re-mix it and add a little water before use.
Final Thoughts
Making your own DIY white face paint is not only a fun project but also a safer, healthier alternative to store-bought options. With just a few simple ingredients, you can make a paint that's perfect for sensitive skin, free from harmful chemicals, and totally customizable to your needs. Whether you're dressing up for Halloween, a cosplay event, or a black metal concert, this easy-to-make paint will give you the look you want without compromising your skin's health.
So, why not give it a try? Not only will you save money and avoid toxic chemicals, but you'll also have the satisfaction of knowing exactly what's in the product you're using on your skin.
FAQs About DIY White Face Paint
Discover the answers to common questions about DIY white face paint, including tips for safe application and removal.
If your paint is too thick, add more distilled water or olive oil to thin it out. If it's too runny, simply mix in a little more cornstarch to thicken it. Play around with small amounts until you get the right consistency.
Yes, you can store leftover paint in an airtight container for up to a week. Keep it in the fridge to prevent spoilage, and re-mix with a little water if it thickens.
You can use makeup brushes or small paintbrushes for more precise and detailed applications, especially for complex designs like corpse paint.
Yes, this face paint dries relatively quickly. You can apply a second coat once the first one is dry if you need a more opaque look.
If the paint forms a film or thickens after sitting for a while, just re-mix it, adding a bit of water or oil to restore the desired consistency.
Yes, you can substitute olive oil with other gentle oils like jojoba or almond oil, which can also improve skin hydration and spreadability.
This paint can be easily removed with a gentle facial cleanser and warm water. For stubborn areas, use an oil-based cleanser.


