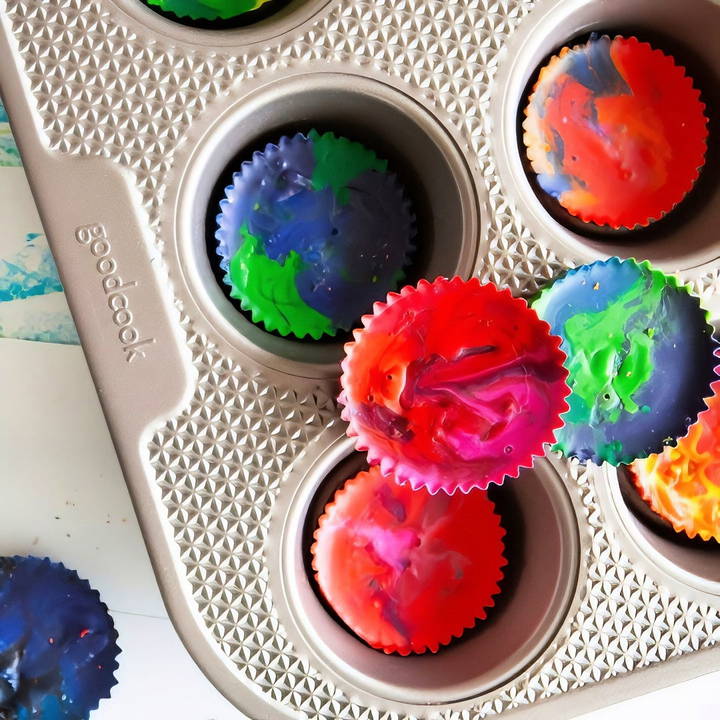
Do you have old, broken crayons lying around? Rather than tossing them out, why not turn them into something new and exciting? Learning how to melt crayons is a fun, easy project that's perfect for kids and adults alike. This guide will teach you everything you need to know about how to melt crayons and make vibrant, new pieces of artwork or even functional items like colorful crayons that your children will love. Whether you want to make multi-colored crayon discs, unique shapes, or even crayon art on canvas, this tutorial covers all the methods and creative possibilities!
Why Melt Crayons?
Crayons are a household staple, especially in homes with children. Over time, crayons tend to break, wear down, or accumulate until you have a pile of unused, stubby pieces. Instead of letting them go to waste, melting crayons can breathe new life into those old pieces. This craft allows you to:
- Repurpose and recycle broken crayons.
- Teach children about the wonders of color mixing.
- Explore creative art projects.
- Engage in an enjoyable and safe crafting experience.
Tools and Materials Needed
Before you start melting crayons, gather the following materials:
- Old crayons: Any brand will work, but you might notice different results in texture or smoothness depending on the brand.
- Muffin tin or silicone molds: You can use a standard muffin tin or get creative with silicone molds shaped like stars, hearts, or animals.
- Parchment paper or muffin liners: These will make it easy to remove your melted crayon creations.
- Oven: Set at 250-275°F.
- Baking sheet: To catch any potential spills from the muffin tin or molds.
- Toothpick (optional): To swirl the colors together after melting.
- Oven mitts: To safely handle hot pans.
Step by Step Instructions
Learn how to safely melt crayons with step-by-step instructions and make fun, colorful projects using different methods. Perfect for all ages!
Prepare the Crayons
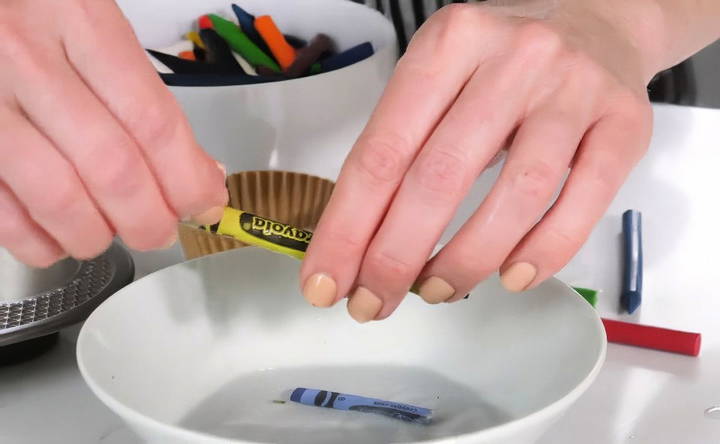
- Remove the wrappers: Start by peeling the paper off the crayons. For easier removal, soak the crayons in warm water for about 10 minutes. This will loosen the paper and make it easy to peel off.
- Break crayons into pieces: Depending on the size of the mold or tin you're using, break the crayons into smaller pieces so they fit better. This is also helpful when mixing different colors.
Prepare the Molds
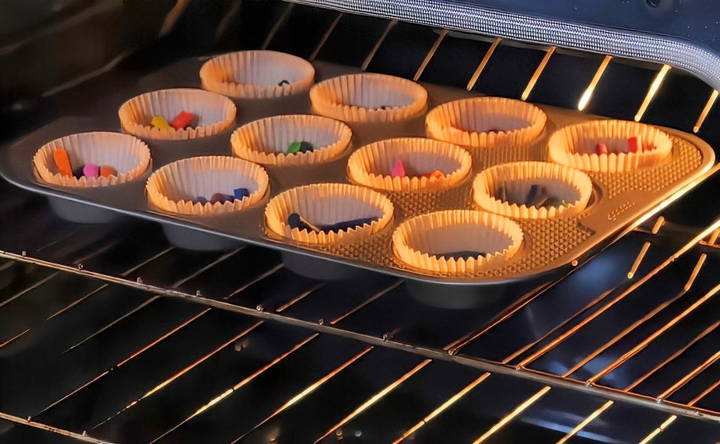
- Line your tin: If you're using a muffin tin, place muffin liners or parchment paper inside each cup to prevent the melted crayons from sticking. For silicone molds, parchment paper isn't necessary because they are non-stick by nature.
- Choose color combinations: Decide which colors you'd like to mix. Choose complementary or contrasting colors for different effects. You can place two to four crayon pieces of different colors in each mold for a swirled effect or keep them monochromatic.
Melt the Crayons
- Preheat the oven: Set your oven to a low temperature, between 250°F and 275°F. Keeping the temperature low ensures that the crayons melt evenly without burning.
- Melt the crayons: Place your muffin tin or mold on a baking sheet to catch any overflow. Put it in the oven for about 7-10 minutes. Keep an eye on the crayons, as they melt quickly. Once you see the wax liquefy, it's time to remove them from the oven.
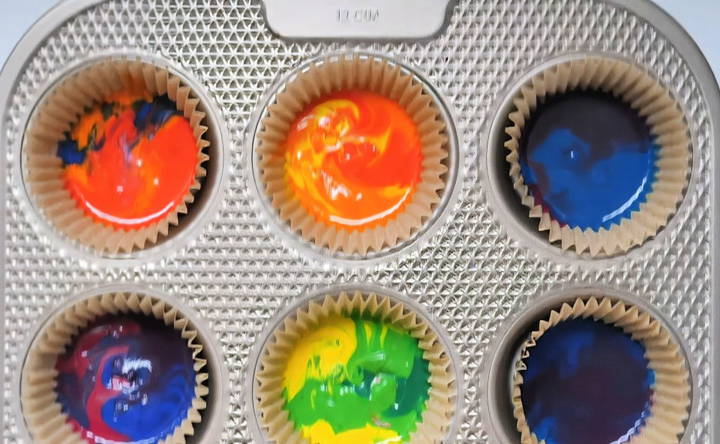
- Optional – Swirl the colors: If you'd like, use a toothpick to gently swirl the colors in each mold. This makes beautiful, marbled patterns in your finished crayon creations.
Cool and Remove from Molds
- Let them cool: Allow the crayons to cool for at least 30 minutes. You can speed up the process by placing the molds in the refrigerator for 10-15 minutes.
- Remove the crayons: Once they are completely cool and hardened, pop them out of the molds. If you used a muffin tin, simply lift them out by the parchment paper liners. Silicone molds will release the crayons easily with a gentle push.
Enjoy Your New Creations
- Now that your crayons are ready, they can be used for drawing, given as gifts, or simply admired as beautiful art pieces. They make for great party favors or gifts for kids!
Different Methods of Melting Crayons
Explore various methods for melting crayons: using a microwave, melting on canvas, or with a double boiler for creative projects.
Using a Microwave
If you don't want to use the oven, melting crayons in the microwave is an easy and quick alternative:
- Place broken crayon pieces in a microwave-safe container, such as a silicone mold or paper cup.
- Heat the crayons in 30-second intervals, stirring between each interval, until fully melted.
- Pour the melted crayons into molds and let them cool.
Melting Crayons on Canvas
For an exciting art project, you can make crayon drip paintings:
- Glue unwrapped crayons to the top of a canvas.
- Use a hairdryer on a low setting to melt the crayons, causing them to drip down the canvas.
- Tilt the canvas to control the direction of the drips for a unique, abstract artwork.
Melting Crayons with a Double Boiler
Another option is to use a double boiler if you want more control over the melting process:
- Place crayons in a heatproof container, such as a glass jar, and set it over a pot of boiling water.
- Stir as the crayons melt, ensuring an even consistency. This method is excellent if you want to pour the melted wax into specific molds or shapes with precision.
Creative Ideas for Your Melted Crayons
There are endless ways to use melted crayons to make fun and colorful items. Here are a few ideas to inspire your next project:
- Crayon Blocks for Kids: Use larger molds to make chunky crayon blocks that are perfect for little hands. They'll enjoy coloring with multi-colored blocks, making this not only fun but practical for toddlers learning to grip objects.
- Crayon Jewelry: Using smaller silicone molds, you can make colorful crayon pendants or beads. Drill small holes into them and string them together to make one-of-a-kind crayon jewelry.
- Crayon Candles: Mix melted crayons with clear wax to make vibrantly colored candles. Layer different colors for a striped candle effect, or swirl the wax for a marbled look. These make beautiful and creative gifts.
- Crayon Lip Balm: Believe it or not, crayons are non-toxic and can be used to make colorful lip balm! Melt down crayons with a bit of coconut oil for a fun, homemade lip balm with your favorite hues.
Safety Tips for Melting Crayons
While melting crayons is a fun and simple craft, it's important to follow a few safety guidelines:
- Supervise children: Melting crayons should always be done with adult supervision, especially when using the oven or microwave.
- Avoid overheating: Crayons melt at a low temperature, so keep your oven between 250°F and 275°F. Overheating can cause the wax to burn, making an unpleasant smell and potentially harmful fumes.
- Use oven mitts: Always handle hot pans and molds with care, using oven mitts to avoid burns.
- Choose non-toxic crayons: Most crayons, like Crayola, are labeled non-toxic, but it's still a good idea to verify before using them for projects like candles or lip balm.
Conclusion
Melting crayons is an excellent way to recycle old, broken crayons and make something new and exciting. Whether you're making colorful crayon blocks for your kids, making art for your walls, or even experimenting with crayon candles, the possibilities are endless. This activity is a fun, low-cost, and creative way to spend time with your children or indulge in some artsy self-care.
So the next time you find yourself surrounded by a pile of broken crayons, don't throw them out—melt them into something spectacular!
FAQs About How to Melt Crayons
Discover answers to FAQs about how to melt crayons safely and creatively with simple step-by-step instructions and tips.
It usually takes about 30 minutes for melted crayons to cool at room temperature. However, placing the mold in the fridge can speed up the process to around 10-15 minutes. Be sure to use a pot holder to avoid damaging your fridge shelves with sudden temperature changes.
Yes, melting crayons may leave a waxy smell in your kitchen and a slight residue in the oven. To minimize this, consider using a separate tray for crafts or place a sheet of parchment paper under your muffin tin.
Melting crayons can leave residue that may be difficult to remove, and repeated use could cause permanent damage to your muffin tin. To avoid this, use parchment paper liners or silicone molds designed for easy removal.
Yes, you can melt crayons in the microwave. Place the broken pieces in a microwave-safe container and heat them in 30-second intervals, stirring in between until fully melted. Be cautious as the container can become very hot.
To clean your tin or molds, fill them with hot water and dish soap to soften the wax. After a few minutes, scrub them with a sponge. If the residue is stubborn, try using baking soda as a gentle abrasive.
Yes, you can mix different brands of crayons. However, be aware that some brands may have different melting points or textures, which could result in varied consistency. Stick to non-toxic crayons for safe melting.


