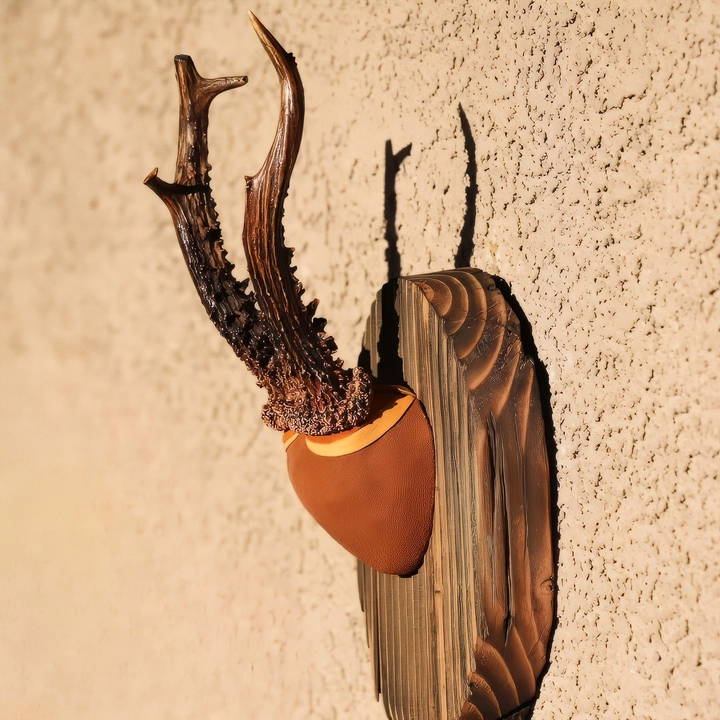
Building a DIY deer antler mount is an excellent way to honor your hunting memories and display antlers with pride. This guide breaks down each step in mounting antlers using a quick, affordable, and effective method. By the end of this guide, you'll know how to crown mount antlers with basic materials, resulting in a polished piece that's ready for display.
Materials and Tools You'll Need
Before you get started, gather the following materials and tools. The entire process uses readily available items, so you may already have some of them at home:
- Antlers (with a small skull plate)
- Piece of wood (scrap plywood or fencing works great)
- Jigsaw
- Screws and screwdriver or drill
- Plaster of Paris and speedy set concrete (equal parts for mixing)
- Water (hot or cold depending on setting speed)
- Plastic tubs for mixing
- Utility knife or old kitchen knife for shaping
- Leather pieces for covering
- Spray adhesive or hot glue gun
- Rustic wood plaque for display (e.g., pine panel or barn wood)
- Polyurethane stain for finishing (optional)
- Epoxy for sealing (optional)
Let's break down each step in detail.
Step by Step Instructions
Learn how to make a DIY deer antler mount with easy step-by-step instructions, from preparing antlers to attaching the crown to the plaque.
Step 1: Preparing the Antlers
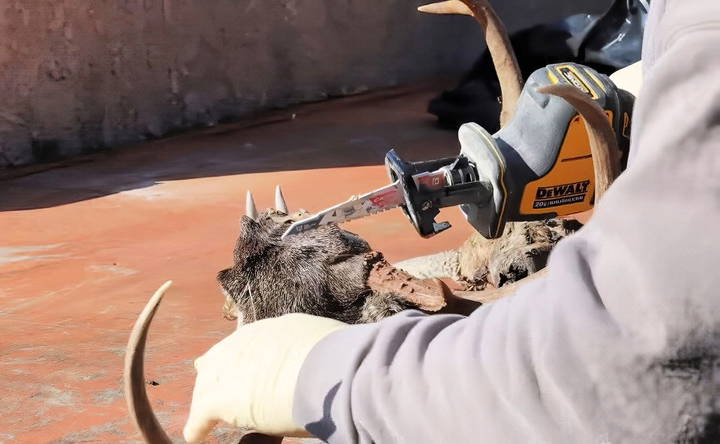
- Cut the Skull Plate: Start by cutting the skull plate down to a minimal amount of bone. Aim to leave just enough for securing screws, which will attach the antlers to the mounting board.
- If there's any dry hide remaining, soak it in warm water until it softens. This makes it easier to clean off any remnants, ensuring a smooth crown for mounting.
- Don't worry about cracks or imperfections in the skull plate—they won't affect the outcome.
- Prepare Your Board: Choose a piece of scrap wood as the base for mounting the antlers. Trace a rough outline that mimics the shape of the skull plate to help guide the attachment process. Cut the wood with a jigsaw and keep it handy for the next steps.
Step 2: Securing the Antlers to the Board
- Drill Pilot Holes: To prevent wood splitting, drill pilot holes in the board where the screws will attach the skull plate.
- Attach the Skull Plate: Use two screws through the top of the skull plate and into the wood base. Make sure the antlers are positioned as desired before fully tightening the screws.
- Troubleshoot Splitting: If the wood cracks, don't worry—it's fixable. Use additional screws in unaffected areas to secure everything firmly.
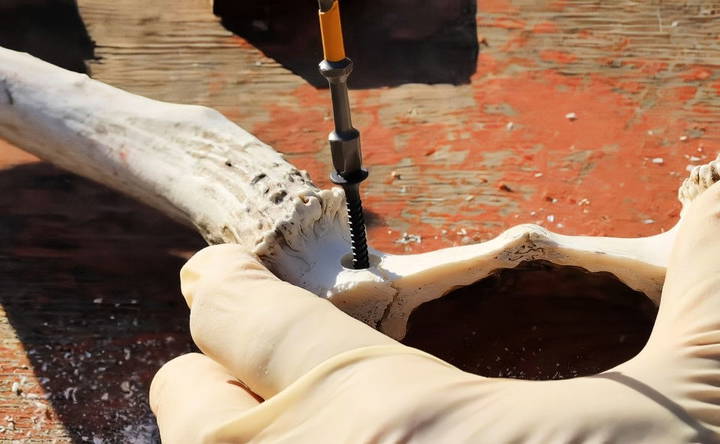
Step 3: Mixing and Applying the “Crown Dust”
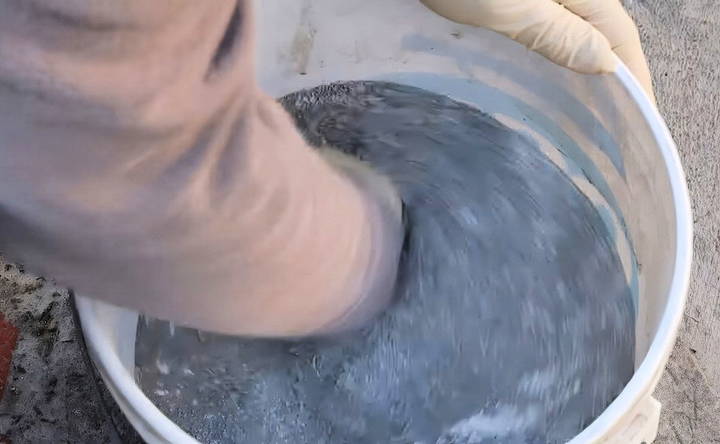
The "crown dust" mixture is the core of this mounting method. Equal parts plaster of Paris and speedy set concrete make a durable, easy-to-shape base.
- Mix the Plaster and Concrete: Combine plaster of Paris and speedy set concrete in equal amounts. Use a plastic tub for easy cleanup. Add water until you achieve a clay-like consistency. Note:
- Cold water slows the setting, giving more time to work.
- Hot water accelerates the setting, so be prepared to move quickly if using hot water.
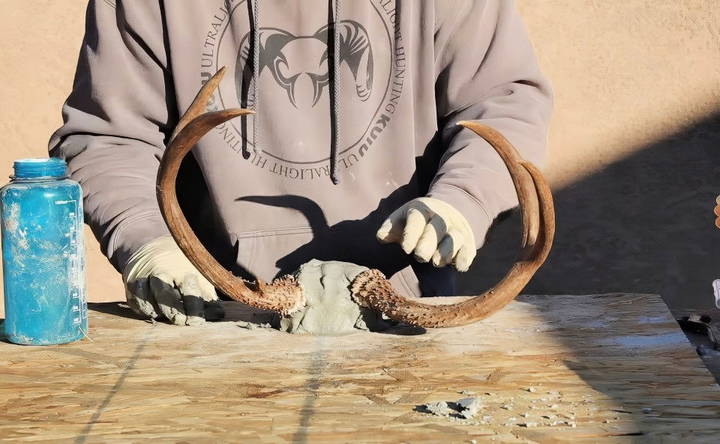
- Apply the Mixture to the Skull Plate: Begin packing the mixture into every crack and crevice of the skull plate. Cover all visible bone to make a smooth, seamless look. This will set fast, so work in small sections if you need more time.
- Shape the Crown: With a utility knife or an old kitchen knife, shape the mixture around the antlers to your desired look. Smooth out any bumps or rough areas, as these will be more visible once dry. Remember:
- Any uneven spots will become exaggerated once the mixture is fully dry, so aim for a uniform surface.
- If needed, add more “crown dust” to fill in gaps or reshape as you go.
Step 4: Finishing and Smoothing the Crown
Once the crown has dried, you'll likely see small cracks due to the nature of the concrete and plaster mix. Here's how to address these imperfections and prepare for the final cover:
- Sand Rough Edges: Use sandpaper to smooth any sharp or rough edges. This gives the crown a clean look and prepares it for the leather covering.
- Optional: Apply Epoxy or Bondo: For a more polished finish, fill any remaining cracks with epoxy or Bondo. Epoxy also adds a protective, glossy layer, which can be beneficial if you want a smoother finish.
Step 5: Preparing the Mounting Plaque
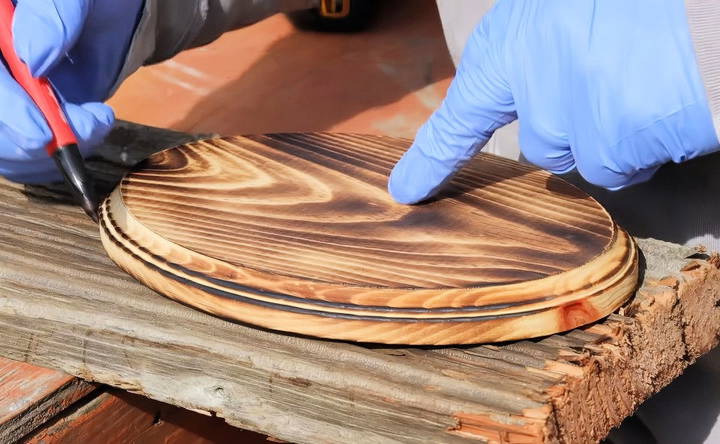
A rustic plaque adds character and frames the antlers beautifully. Here's how to prepare one on a budget.
- Choose a Base Material: Rustic pine panels or reclaimed barn wood work well. You can often find these at craft stores for a reasonable price.
- Burn and Stain: Use a torch to lightly burn the surface, making a natural, rustic look. Then apply a thin coat of polyurethane stain to seal and add depth to the wood's color.
- Attach Hanging Hardware: Secure two hanger brackets to the back of the plaque, ensuring it won't swivel when hung. You can position them side by side or vertically.
Step 6: Wrapping the Crown with Leather
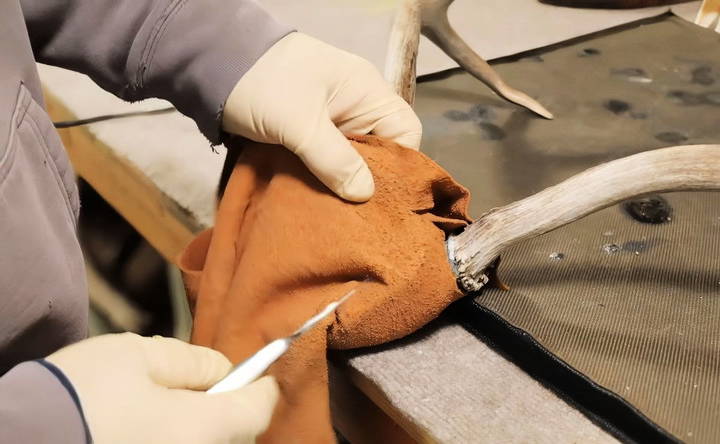
Leather adds a refined finish to the mount. Use thin, stretchy deer leather for a snug fit.
- Cut and Stretch the Leather: Cut a piece of leather large enough to cover the entire crown. Spray adhesive or hot glue works well for attaching the leather to the crown.
- Start by placing the crown on the edge of your workbench for better control.
- Stretch the leather over the crown, smoothing out any creases as you go.
- Trim Excess Leather: With a sharp utility knife or scalpel, carefully trim any excess leather around the base of the crown. This makes a neat, tailored look.
- Hot Glue Around the Pedicle: To secure the leather around the pedicle (the base of the antler), hot glue is ideal. Fold a small strip of leather, apply hot glue to make a seam, and carefully wrap it around the pedicle for a seamless finish.
Step 7: Attaching the Crown to the Plaque
Now that the crown and plaque are ready, it's time to bring everything together.
- Align the Crown on the Plaque: Position the crown in the center of the plaque and mark where the screws will go.
- Secure the Crown: Drive screws through the back of the plaque and into the wood base of the crown mount. Ensure the screws are tight, so the antlers stay secure when hung on the wall.
Final Thoughts and Tips
This DIY deer antler mount process is not only rewarding but also budget-friendly. Here are a few final tips:
- Use Epoxy for a Sealed Finish: Adding epoxy over the leather and crown dust can give your mount a glossy, professional look. This step is optional but recommended for durability.
- Embrace Imperfections: Don't be discouraged by minor cracks or imperfections in the concrete and plaster. These add to the rustic charm of your mount.
- Explore Different Plaque Options: Experiment with various wood types and finishes to match your home decor or make a unique look for each mount.
- Practice Patience: While the process is simple, taking your time with each step, especially with shaping and smoothing, will pay off in the end.
By following this guide, you can make a stunning DIY deer antler mount that preserves memories and adds rustic elegance to any space. Whether you're a seasoned hunter or just getting started, crown mounting is an excellent way to showcase the beauty of deer antlers in your home. Now, gather your materials, put on some music, and enjoy the creative process!
FAQs About DIY Deer Antler Mount
Discover answers to common questions about DIY deer antler mounting. Learn tips and techniques for making your own stunning display.
Yes, you can, but plaster alone tends to crack more easily. Concrete adds durability and weight to the mount, making it feel sturdy. For a lighter alternative, using just plaster may work if you’re careful about handling the mount.
Wrap the base of the antlers with painter's tape before applying the cement or plaster mixture. This protective layer makes cleanup easier and keeps the antlers pristine during the process.
Some users have successfully used spray foam for a lighter base, which can be carved once dried. However, spray foam lacks the same durability as the cement and plaster combination.
Minor cracks are normal and can be filled with super glue or epoxy. Sand any rough spots after the adhesive sets to achieve a smooth finish.
Use cold water in the mix, as it helps to extend curing time. Some users also suggest adding ice to the water, which gives a bit more working time for shaping.
Look for thin, supple leather (around 1mm thick) from suppliers like leather specialty stores or online. If only thick leather is available, soaking it in warm water can make it more flexible for stretching.
For shed antlers, secure them directly to a wooden backing with screws, and use filler material around the base to make a cohesive look. Wrapping with leather or adding epoxy can help cover gaps for a polished finish.
Removing the hardened base may damage the antlers or wood, as plaster and concrete bond well with rough surfaces. It's best to decide on a permanent mount setup before starting the process.
Air-dry clay is generally not recommended because it can become brittle and break over time, especially where it is applied thinly. For added strength, the plaster and concrete mix is more durable.
For small spills, a damp cloth or fine sandpaper can gently remove dried residue. For larger areas, carefully scrape with a blade, ensuring not to scratch the antlers.


