Painting a car at home can be both cost-effective and rewarding. This guide on how to paint a car will walk you through the steps, from preparation to the final touches. Learn the necessary tools, materials, and techniques to achieve a professional-looking finish. Proper planning and careful application are key to success.
Repainting a car requires attention to detail and patience. This guide provides detailed instructions to help you understand how to repaint a car correctly. We'll cover everything from surface preparation to choosing the right type of paint. With these insights, you can give your vehicle a fresh new look.
Ready to start? Let's dive into the next section to explore the essential tools and materials needed for painting a car.
Materials Needed and Their Purpose
- Epoxy Primer: Seal the car's body, providing a stable base for body filler and paint.
- Body Filler: Smooth out dents, pits, and imperfections.
- Sanding Blocks & DA Sanders: Essential for shaping the body filler and sanding down surfaces to a smooth finish.
- Pre-painting Prep: A cleaner that removes oils, dust, and contaminants, ensuring paint adheres properly.
- Basecoat and Clearcoat: The basecoat gives the car its color, while the clearcoat adds depth, gloss, and protection.
- Safety Gear: Always wear gloves, goggles, and a respirator to protect against dust and fumes.
Step by Step Instructions
Learn how to paint a car step by step, from stripping and priming to applying body filler and final sanding for a flawless finish.
Initial Preparation: Stripping and Priming
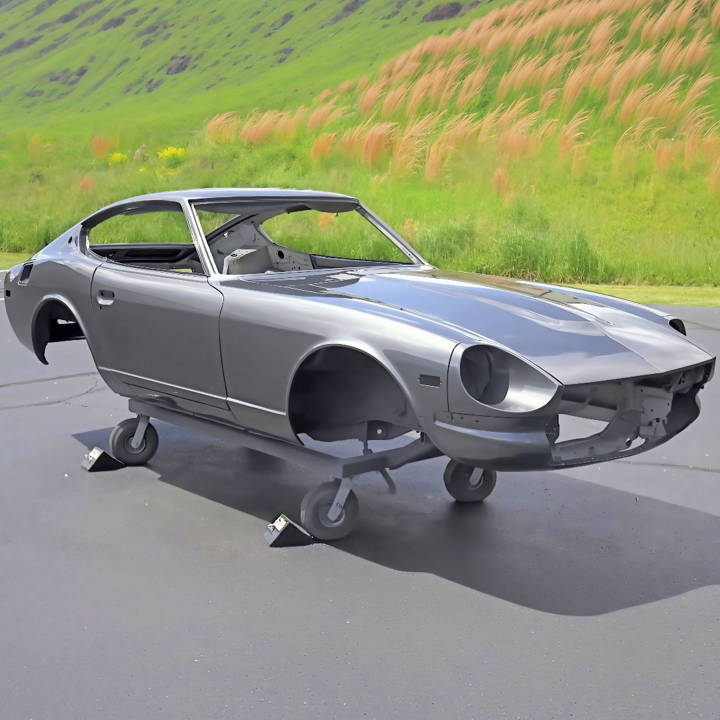
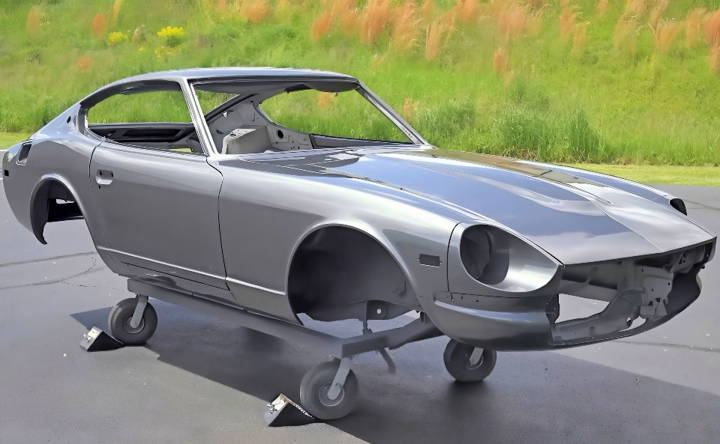
After some research and preparation, I decided to strip my Datsun to bare metal using a combination of DA Sanders and chemical stripping. Stripping the car allowed me to identify and address any hidden issues like old, hidden body filler.
Step 1: Apply Epoxy Primer
With the car stripped, I applied two coats of epoxy primer over the entire car. This primer not only prevented rust but also gave me a solid base to work from. Epoxy primer is excellent for this because it adheres well to both metal and filler, ensuring durability and stability for the bodywork to come.
Body Filler and Sanding
Once the primer was fully cured (about 2-3 days), I cleaned the surface with a pre-painting prep to remove any contaminants. Using a dustless sanding block (DSB), I started blocking the car with 80-grit sandpaper. The DSB was a game-changer, collecting about 95% of the dust and keeping my workspace clean.
Step 2: Application of Body Filler
In areas where I had performed metalwork or found dents, I applied body filler. Opting for both spot repairs and skim coats depending on the panel's condition ensured that I addressed each imperfection comprehensively. The following sanding brought out highs and lows, helping me identify where further attention was needed.
Priming for Paint
After my last round of sanding and filler adjustments, another wipe down with pre-painting prep was necessary. Choosing the right primer for your final coats is crucial. I used a polyester primer over the areas needing extra attention, offering a forgiving layer that filled in any minor imperfections missed earlier.
Step 3: Final Sanding and Cleaning
Sanding with progressively finer grits (up to 600) removed scratch marks, preparing the surface for paint. Each step required thorough cleaning to ensure no particles would mar the final finish.
Painting: Basecoat and Clearcoat
Now, for the exciting part—painting. After setting up a DIY paint booth for ventilation, I started with a test panel to adjust the paint gun settings. The basecoat went on first, followed by the clearcoat, transforming the car with each layer.
Step 4: Color Sanding and Buffing
Upon curing, I noticed some orange peel and minor imperfections in the clearcoat. Color sanding with 1500-2000 grit wet sandpaper, then buffing with a cutting compound, restored the shine and achieved a mirror-like finish.
Advanced Techniques for Car Painting
When it comes to car painting, advanced techniques can elevate the quality of your work and provide a finish that stands out. Here, we’ll delve into some sophisticated methods that require a bit more skill but yield impressive results.
Pre-Paint Preparation
- Surface Leveling: Before you begin painting, ensure the car’s surface is impeccably smooth. Use a fine-grit sandpaper to level out any imperfections. This step is crucial for a flawless finish.
- Tack Cloth Use: After sanding, wipe down the surface with a tack cloth to remove all dust particles. This will help prevent any bumps or unevenness in the paint job.
Painting Techniques
- Layering: Apply multiple thin layers of paint rather than one thick layer. This technique allows for better drying and a more even coat.
- Blending: To achieve a seamless transition between old and new paint, especially during touch-ups, mastering blending is essential. It involves gradually thinning out the new paint into the existing coat.
- Detailing with Airbrush: For intricate designs or adding shadows and highlights, an airbrush tool is invaluable. It offers precision and control for detailed work.
Post-Paint Finishing
- Color Sanding: After the paint has dried, color sanding with extremely fine sandpaper can remove any texture and provide a glass-like finish.
- Buffing: Use a high-speed buffer with a polishing compound to bring out a high gloss. Be cautious with the pressure and speed to avoid burning the paint.
- Ceramic Coatings: For long-lasting protection, consider applying a ceramic coating. It not only adds extra gloss but also provides resistance against scratches and UV rays.
Safety and Environmental Tips
- Proper Ventilation: Always work in a well-ventilated area to avoid inhaling fumes. Use a respirator mask designed for paint fumes.
- Eco-Friendly Products: Opt for water-based paints and eco-friendly solvents that are less harmful to the environment.
Use advanced techniques for a professional, durable car paint job. Practice to perfect it; stay patient and detail-oriented for shining results.
Troubleshooting Common Issues in Car Painting
Car painting can be a rewarding DIY project, but it’s not without its challenges. Here are some common issues you might encounter and how to resolve them:
Paint Runs and Sags
- Cause: Paint runs and sags often occur when too much paint is applied too quickly.
- Solution: To fix this, wait for the paint to dry completely. Then, sand the run-down and repaint the area, applying thin coats of paint.
Orange Peel Texture
- Cause: This texture resembles the surface of an orange and is usually caused by improper painting techniques or conditions.
- Solution: Sand the area with fine-grit sandpaper and polish it to smooth out the texture. Ensure the painting environment is clean, and the paint is properly mixed.
Fish Eyes
- Cause: Small craters or fish eyes can form when there is contamination on the car’s surface.
- Solution: Clean the surface thoroughly before painting. If fish eyes appear, let the paint dry, sand the area, and reapply the paint.
Dust and Dirt in the Paint
- Cause: Dust and dirt can settle on the wet paint if the painting area isn’t clean.
- Solution: Always paint in a clean, dust-free environment. If contamination occurs, let the paint dry, sand the area lightly, and apply another coat.
Blistering or Bubbling
- Cause: Bubbling can happen when painting over a surface that has moisture or when the paint is exposed to extreme heat too soon.
- Solution: Remove the affected paint, allow the surface to dry completely, and repaint. Avoid painting in humid conditions or direct sunlight.
Mismatched Color
- Cause: This can occur due to incorrect color mixing or differences in paint batches.
- Solution: Always double-check the paint mix and use a test panel before applying it to the car. If the color doesn’t match, remix and test again.
Lack of Gloss
- Cause: A dull finish might be due to under-thinning the paint or not using a clear coat.
- Solution: Apply a clear coat over the paint for added gloss and protection. Ensure the paint is thinned according to the manufacturer’s instructions.
Understanding common issues and solutions will better prepare you for your car painting project. Patience and attention to detail are key for a professional finish.
Maintenance Tips for Your Car’s Paint
Maintaining the paint on your car is crucial for preserving its appearance and value. Here are some straightforward tips to help you keep your car looking as good as new:
Regular Washing
- Frequency: Wash your car every two weeks to prevent dirt and grime from building up.
- Technique: Use a gentle car wash soap, a soft sponge, or a microfiber cloth to avoid scratching the paint.
Protective Waxing
- Benefits: Waxing provides a protective layer against UV rays and environmental pollutants.
- Schedule: Apply a quality car wax every three months to maintain a high-gloss finish.
Immediate Attention to Spills and Bird Droppings
- Action: Clean spills, bird droppings, or tree sap as soon as possible to prevent paint damage.
- Method: Use a specialized cleaner and a soft cloth to gently remove these substances.
Parking Smart
- Indoors: Whenever possible, park your car in a garage to protect it from the elements.
- Outdoors: If you must park outside, look for shaded areas or use a car cover to shield the paint from sun and weather.
Handling Scratches
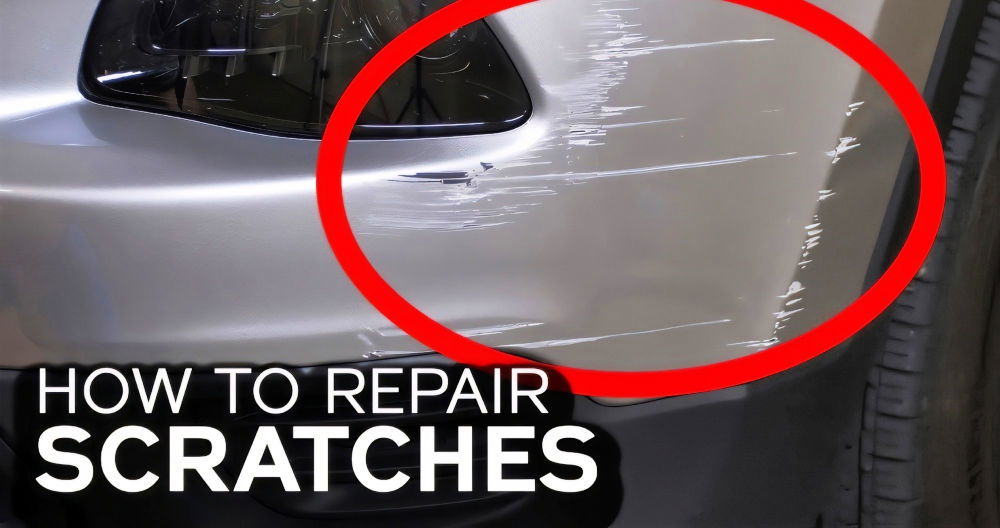
- Minor Scratches: For small scratches, use a scratch removal product that matches your car’s paint.
- Deep Scratches: If the scratch is deep and exposes the metal, it’s best to have it repaired professionally to prevent rust.
Regular Inspections
- Check-ups: Periodically inspect your car’s paint for any signs of wear or damage.
- Professional Help: If you notice any issues, consult with a professional for advice on repair or touch-up.
With these simple tips, you can keep your car’s paint in top shape for years, enhancing its look and resale value - the perfect DIY project for every car owner.
FAQs About How to Paint a Car
Discover answers to common questions about painting a car and learn tips, techniques, and best practices for a professional finish.
To begin painting your car, you’ll need a well-ventilated workspace, safety gear like masks and gloves, sandpaper of various grits, primer, automotive paint, a clear coat, and a spray gun. Ensure you have cleaning supplies like wax and grease remover, and consider using a sealer before applying the base coat for better adhesion.
Start by cleaning your car thoroughly to remove any dirt, grease, or rust. Sand the surface with 400 grit or a maroon scuff pad to smooth out imperfections and create a surface that the paint can adhere to. Fix any dents or scratches, and apply a primer to protect the metal and enhance paint adhesion.
Apply paint in a well-ventilated area, wearing appropriate safety gear. Use a spray gun with a 1.4 tip for the sealer and base coat, and a 1.3 tip for the clear coat. Apply the sealer first, then the base coat in 2-3 thin layers, allowing each layer to dry before applying the next. Finish with 2-3 layers of clear coat for protection and shine.
The time it takes to paint a car can vary greatly. It includes prep work like sanding and priming, which can take several hours to a few days, depending on the car’s condition and size. The painting process itself, including drying time between coats, can take a couple of days. Always allow sufficient time for each layer to dry to avoid imperfections.
Painting a car is a detailed process that requires patience, skill, and the right tools. If you’re a beginner, it’s possible to paint your car yourself by following detailed guides and tutorials. However, for a professional finish, especially if you’re looking for a showroom-quality result, hiring a professional is recommended.
Conclusion:
Wrapping up, mastering how to paint a car with this complete DIY guide can be a rewarding experience. You'll gain essential skills, save money, and achieve a professional finish. Follow our step-by-step instructions, and soon your car will have a fresh, new look. If you're eager to explore more about painting a car, keep practicing and stay patient. Happy painting!


