Learn how to paint a ceiling like a pro with easy steps, expert tips, and tools for a flawless, smooth finish every time. Painting a ceiling might sound intimidating, but with the right tools, techniques, and a bit of preparation, anyone can achieve a professional-looking finish. This guide covers everything from selecting the best tools to applying paint effectively, ensuring a flawless ceiling makeover. Let's dive into the details to make sure you're fully prepared for your ceiling painting project.
Tools and Equipment Needed
Getting the right tools is essential for a smooth ceiling painting experience. Here's a list of recommended items:
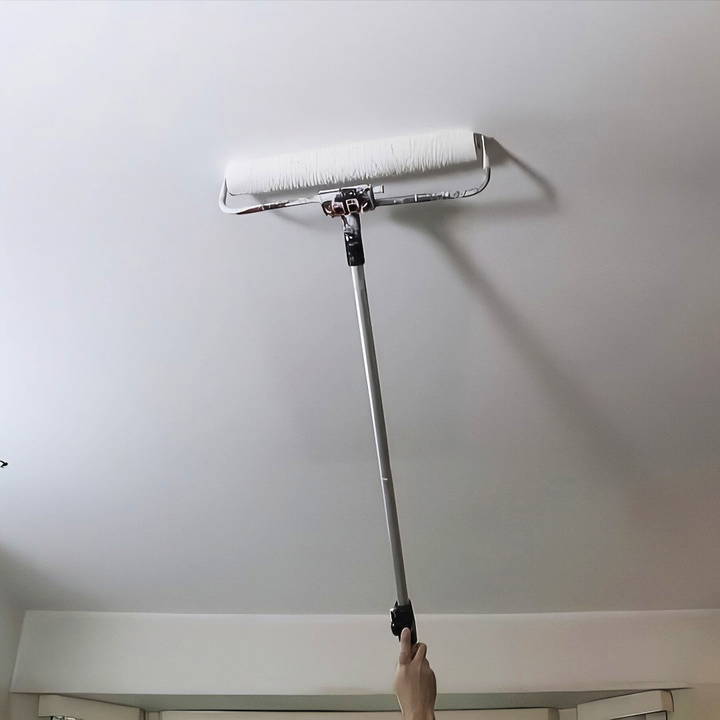
- 18-Inch Wide Roller Frame and Roller Sleeve: A larger roller, such as an 18-inch one, will cover more area, making the job quicker compared to standard rollers.
- Deep Paint Tray: You'll need a deep tray large enough to accommodate the wide roller, ensuring you can evenly load it with paint.
- Extension Pole: Painting a ceiling can be tiring without an extension pole. This tool allows you to reach high areas comfortably, reducing strain.
- Paint Strainer: Pour your paint through a strainer into a bucket to filter out any debris or dried paint chunks, resulting in a smoother finish on the ceiling.
- Handy Paint Pail with Liners: This small, portable pail makes cutting in along the edges much easier. Opt for one with a magnet to hold the brush in place when not in use.
- 3-Inch Angled Brush: This angled brush will help you cut in around the edges, allowing you to paint with precision where the roller can't reach.
Preparing for Ceiling Painting
Preparation is the key to a mess-free and efficient painting process. Here's how to set up your space and ceiling for painting:
Protect Your Space
- Cover the Floor: Use drop cloths or heavy-duty RAM board to protect floors from paint splatter.
- Furniture: Move furniture out of the room if possible or cover it with plastic sheeting.
- Wear Protective Gear: Safety goggles are essential since rollers can spray small droplets of paint, which can irritate eyes.
Check and Prep the Ceiling Surface
- Dust and Clean: Clean the ceiling to remove dust, cobwebs, or grease that might interfere with paint adhesion.
- Repair Any Damage: Patch any cracks or holes with spackle, then sand them smooth once dry.
- Prime the Ceiling (if needed): For new ceilings or significant color changes, apply a primer before painting. Priming ensures even color and enhances paint adhesion.
Choosing the Right Paint and Direction
Discover tips on selecting ceiling paint and why paint direction matters. Achieve perfect results with expert advice on paint and application.
Selecting Ceiling Paint
- Flat or Matte Paint: Ceilings often look best with flat or matte paint because it hides imperfections and doesn't reflect light.
- Color Choice: While white is a common choice, consider light neutrals for a unique touch.
Paint Direction Matters
- Natural Light Direction: Always paint in the direction away from the room's main light source (like a window). Painting toward the light source can highlight any ridges or roller marks.
- Layering Strategy: If the ceiling requires multiple coats, alternate painting directions between coats to minimize visible streaks.
Step by Step Instructions
Discover step-by-step instructions on how to paint a ceiling for a flawless finish. Learn tips for smooth application and professional edges.
Step 1: Load the Roller
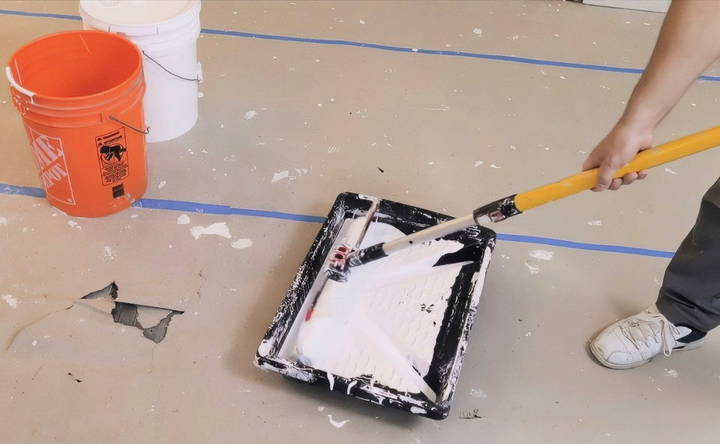
- Pour Paint and Strain: After straining the paint, pour it into the deep paint tray.
- Load the Roller Evenly: Dip the roller into the paint, ensuring it's evenly saturated but not dripping.
- Test Coverage: Roll off excess paint on the tray's textured area to avoid dripping on the ceiling.
Step 2: Apply Paint in a Pattern
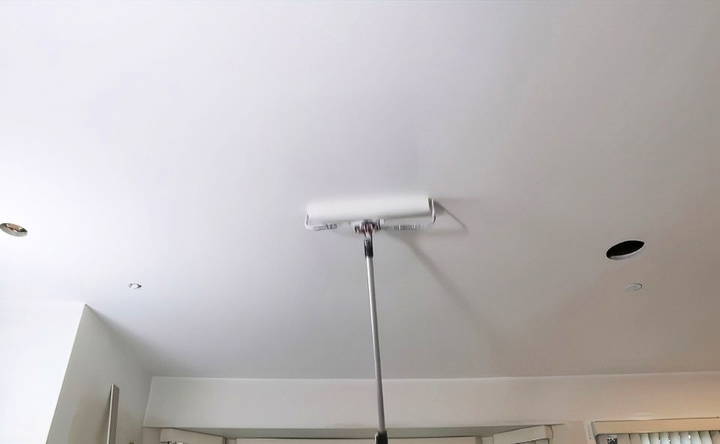
- Start in a Corner: Begin at a corner of the room for a logical and organized approach.
- Paint in 5x5 Foot Squares: Work in sections, rolling in approximately five-foot squares. This approach helps you maintain even coverage and allows you to keep track of your progress.
- Use Even Pressure: Apply a moderate amount of pressure to ensure the paint covers evenly. Avoid pressing too hard, as this can make ridges and an uneven surface.
Step 3: Check for Ridges and Smooth as Needed
- Spot Check with a Light: Hold a bright light (or have ample room lighting) to reveal any ridges or missed spots.
- Smooth Out Ridges: If you spot ridges, gently go over them with the roller to smooth them out.
Step 4: Painting Around the Edges (Cutting In)
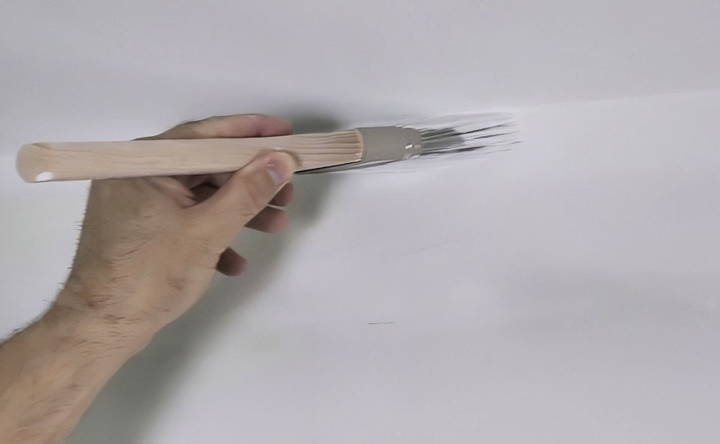
- Using the Angled Brush: Dip the angled brush into the paint, wiping off any excess. Use it to paint a few inches away from the wall's edge where the roller can't reach.
- Use a Paint Pail: The handy paint pail with a magnetic brush holder is perfect for cutting in, as it keeps paint within easy reach.
- Apply Painters Tape (Optional): If your walls are already painted and you're concerned about getting paint on them, apply painters tape along the ceiling line for a clean edge.
Tips and Tricks for a Professional Finish
- Avoid Overloading the Roller: Overloading can lead to dripping, streaking, and a heavy, uneven coat. Aim for even, moderate coverage on the roller to avoid these issues.
- Keep the Roller Wet While Working: A wet roller ensures consistent application. If it starts to feel dry, reload it with paint.
- Check Your Work as You Go: Step back occasionally to examine the ceiling from different angles. This practice helps you catch missed spots or streaks before the paint dries.
- Clean Up Any Mistakes Quickly: Have a damp cloth or small paintbrush on hand for quick fixes if paint drips or splatters occur.
- Apply Multiple Coats if Necessary: One coat may be enough, but for ceilings with significant color change or previous imperfections, a second coat may be necessary for full coverage. Allow the first coat to dry completely before applying the second.
Additional Tips for Specialty Ceilings
- Textured Ceilings: Textured ceilings require a bit more paint to ensure even coverage. Consider using a thicker nap roller (around ¾ inch) for better application.
- Vaulted Ceilings: Vaulted or high ceilings may require a sturdy ladder in addition to an extension pole. Take extra care when painting at different angles to prevent streaking.
- Using a Spray Gun: For larger or textured ceilings, a paint sprayer can save time. However, it requires more preparation, including masking off walls and furniture. Sprayers also demand practice to avoid overspray and achieve an even coat.
Post-Painting Tips and Cleanup
- Clean Your Tools: Rollers and Brushes: Clean rollers, brushes, and trays with soap and water if using water-based paint, or mineral spirits for oil-based paint.
- Strain Leftover Paint: If you have leftover paint, strain it back into the can to avoid contaminating it with dust or debris.
- Allow the Ceiling to Dry Completely: Drying times vary depending on the paint type and room humidity. Avoid touching or bumping the ceiling until it's fully dry to prevent smudges.
- Inspect and Touch Up: Once the ceiling is dry, inspect for any missed areas. Lightly touch up any spots with a brush for a uniform finish.
- Remove Painters Tape (if used): Gently peel off the tape at an angle to prevent pulling up any paint, especially along the edges.
Final Thoughts
Painting a ceiling doesn't have to be daunting. By carefully preparing, selecting the right tools, and following these steps, you can transform any room with a fresh, clean ceiling that enhances the overall look of your space. Take your time, pay attention to detail, and enjoy the process of rejuvenating your ceiling with a crisp, professional finish.
With these steps, your ceiling painting project is bound to be a success!
FAQs About How to Paint a Ceiling
Discover expert tips and answers to FAQs about how to paint a ceiling effectively. Improve your space with these ceiling painting insights.
One practical tip is to place a plastic bag over your paint tray before pouring in the paint. When you’re done, simply turn the bag inside out, trapping any leftover paint and keeping your tray clean.
Cutting in after rolling can save time since you only need to cover areas missed by the roller. However, if you prefer cutting in first, that works too—both approaches can achieve professional results.
Cover floors and furniture, as these areas are more vulnerable to paint drips. For walls and windows, go slowly at the edges to minimize splatter; using painters’ tape can also help if precision is needed.
For a smooth ceiling, a roller with a 3/8” nap works well. Thicker naps, like 3/4”, are better for textured ceilings to ensure full coverage.
If the old ceiling paint is dry and clean, you can paint directly over it without primer. However, for glossy or heavily aged surfaces, a primer may help the new paint adhere better.
When a room has windows on adjacent walls, paint in the direction of the window that receives the most sunlight to minimize visible streaks from light exposure.
Yes, but keep in mind that ceiling paint is typically flat to hide imperfections. Wall paint may have a slight sheen, which can highlight flaws on the ceiling.
Watering down paint (e.g., 30% water) for a first coat can help with coverage on new surfaces but may reduce durability. Ensure a full-strength topcoat for the best finish.
If patchy areas are noticeable, it's best to color match the existing paint or repaint the entire ceiling for a seamless finish.
A sprayer can be efficient for large or textured ceilings but requires thorough prep work to protect walls and furniture. Rolling may be simpler for smaller projects.


