Painting an accent wall can dramatically transform a room, adding depth, personality, and a focal point. Whether you're refreshing your living space or adding character to a room, a well-painted accent wall is a rewarding DIY project. This guide will break down the process into manageable steps, covering everything from preparation to finishing touches.
Why Choose an Accent Wall?
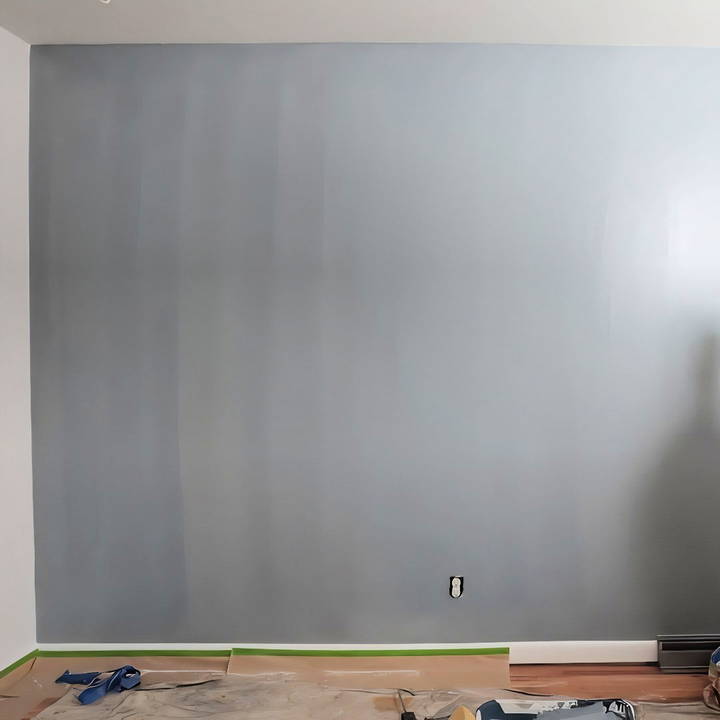
An accent wall is a single wall painted in a contrasting color or design that stands out from the other walls in a room. It can highlight architectural features, frame a focal point like a fireplace or a TV, or simply add visual interest to an otherwise plain space. Darker colors, in particular, can make a bold statement while making a cozy and intimate atmosphere.
Materials and Tools You'll Need
Before starting your accent wall, gather the following supplies:
- Paint: Choose a high-quality paint suitable for the wall's surface. Darker colors work well for accent walls, with flat finishes recommended for hiding imperfections.
- Painter's Tape: Frog Tape or similar brands provide clean, crisp lines.
- Rollers and Brushes: Use a 9-inch roller for most surfaces, complemented by a smaller angled brush for cut-ins.
- Caulking: Accelerator caulking works well for sealing edges.
- Spackle and Scraper: For repairing imperfections in the wall.
- Sandpaper: To smooth spackled areas.
- Drop Cloths and Masking Paper: Protect floors and adjacent surfaces.
- Ladder: If the wall is tall or has hard-to-reach areas.
- Heat Source (Optional): For speeding up the drying process.
Step by Step Instructions
Learn how to paint an accent wall step by step with our guide, featuring tips for a flawless finish and expert techniques for success!
Step 1: Prepare the Wall
Preparation is key to achieving a professional finish. Follow these steps to get the wall ready:
Inspect and Repair the Wall
- Remove Imperfections: Scrape off any bumps, old paint residues, or uneven surfaces.
- Fill Holes and Cracks: Use a high-quality vinyl spackle to fill dents and gaps. Let it dry before sanding the area smooth.
- Sand the Surface: Sand the entire wall lightly to ensure better paint adhesion.
Mask the Surrounding Areas
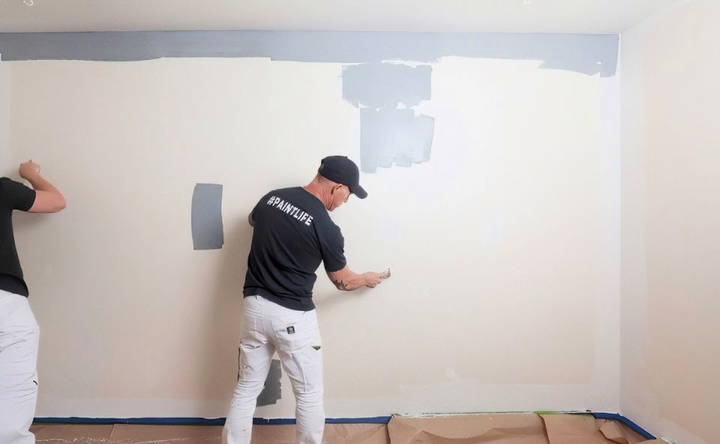
- Apply Painter's Tape: Use painter's tape along the edges where the wall meets the ceiling, baseboards, and adjacent walls.
- Cover Furniture and Floors: Lay down drop cloths and use masking paper for added protection.
Step 2: Apply the First Coat
With the wall prepped, you're ready to paint the first coat:
Load Your Roller
- Prime the Roller: Load it with paint until evenly saturated to avoid what professionals call "dry nap."
- Apply a Thin Coat: The first coat should be light and even. Avoid overloading the roller, as a heavy application can lead to drips and uneven drying.
Roll with Technique
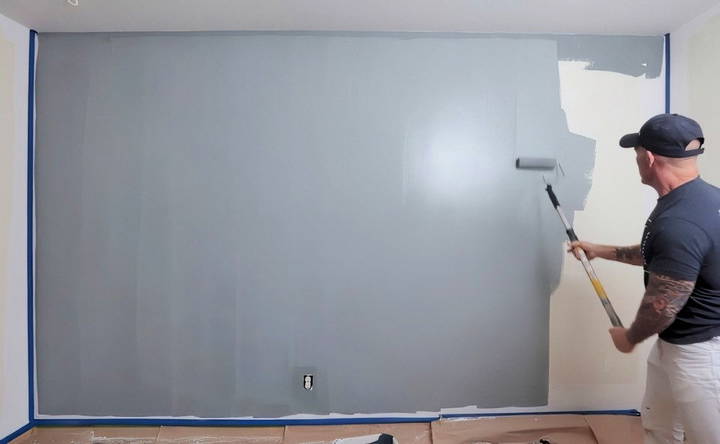
- Start in the Middle: Begin rolling in the center of the wall, then work your way outwards.
- Top-to-Bottom Strokes: Ensure your strokes are consistent from top to bottom to prevent lap marks.
Handle Edges and Corners
- Cut-In: Use an angled brush to paint along the edges and corners, staying close but not touching the painter's tape. This ensures a smooth transition between sections.
Step 3: Let the First Coat Dry
Drying time can vary based on factors like room temperature and humidity. To speed up the process:
- Increase Heat: If possible, crank up the heat to encourage faster drying.
- Allow Adequate Time: Most first coats dry within 45 minutes to an hour under optimal conditions.
Step 4: Apply the Second Coat
The second coat ensures full coverage and vibrant color:
Maintain a Wet Edge
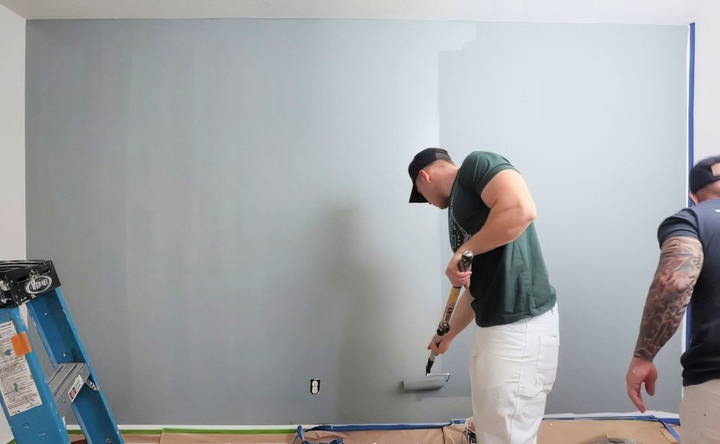
- Work in Sections: Divide the wall into smaller sections to prevent the paint from drying too quickly.
- Teamwork Helps: If possible, have one person cutting in while another follows with the roller.
Use Consistent Pressure
- Load the Roller Generously: A well-saturated roller provides smooth, even coverage.
- Avoid Overworking: Overlapping or pressing too hard can leave streaks or patches.
Peel the Tape Carefully
- Timing Matters: Remove the painter's tape before the second coat dries to prevent the paint from bridging and tearing.
- Pull at an Angle: Peel the tape at a 45-degree angle for the best results.
Step 5: Finishing Touches
Once the second coat is dry, focus on final details:
Inspect for Imperfections
- Touch Up: Check for any missed spots or uneven areas and fix them with a brush or roller.
- Crisp Edges: Ensure all edges are sharp and clean.
Clean Up
- Remove Protective Covers: Carefully fold and remove drop cloths and masking paper.
- Clean Tools: Wash brushes, rollers, and trays for future use.
Tips for Success
Here are some pro tips to achieve a flawless accent wall:
- Choose Quality Paint: A high-quality brand like Benjamin Moore ensures better coverage and finish, especially for dark colors.
- Mind the Lighting: Paint colors can appear differently under various lighting conditions. Test swatches on the wall before committing.
- Flat Finishes for Imperfect Walls: Use flat paint to hide imperfections in older homes or uneven walls.
- Practice Patience: Allow sufficient drying time between coats to avoid smudges or uneven layers.
Advanced Techniques for a Perfect Accent Wall
In this section, we'll explore advanced tips and techniques to elevate your painting skills and tackle any challenges that might arise. From dealing with uneven surfaces to making sharp, crisp lines, these steps will ensure your accent wall looks like it was done by a professional.
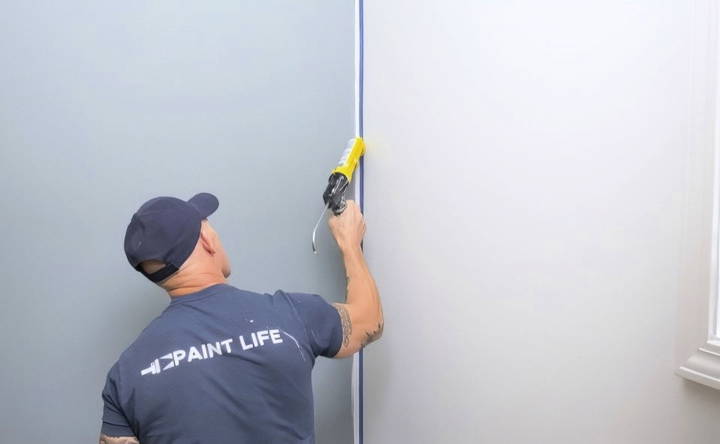
Step 6: Perfecting Edges with Caulking
Achieving sharp, clean lines between your accent wall and adjacent surfaces can be challenging, especially on bumpy or imperfect walls. Caulking can make all the difference.
Why Use Caulking?
- Seals Tape Edges: Prevents paint from bleeding under the tape on uneven surfaces.
- Makes Smooth Lines: Fills gaps and ensures a straight, seamless transition.
How to Apply Caulking
- Apply a Thin Bead: Use a light bead of caulking along the tape edge.
- Smooth it Out: Wipe excess caulking with a damp sponge or finger to ensure it sits flush with the wall.
- Paint Over Quickly: Brush paint over the caulking immediately. If it dries before painting, it can peel or bridge when the tape is removed.
Step 7: Rolling the Final Coat
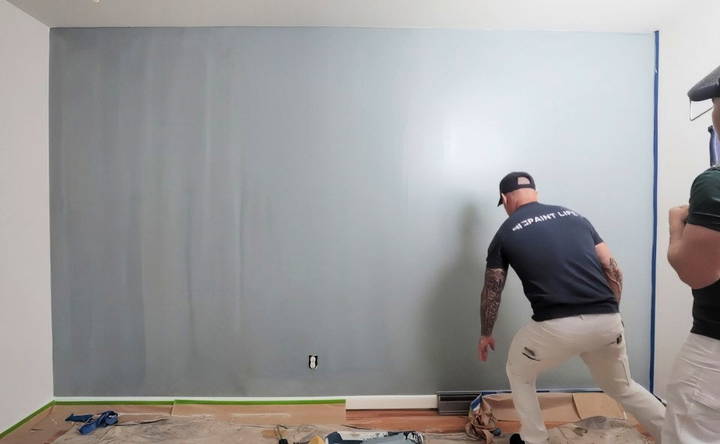
The final coat is where your wall truly comes to life. This step requires attention to detail and proper technique to ensure a uniform and polished appearance.
Tips for Rolling the Final Coat
- Load the Roller Generously: Each time you reload your roller, ensure it's evenly saturated to prevent streaks.
- Work in Sections: Divide the wall into manageable sections to keep the paint wet and maintain consistency.
- Keep a Wet Edge: Always roll into wet paint to avoid lap marks and uneven patches.
- Lay Out the Paint Consistently: Whether you're rolling top-to-bottom or bottom-to-top, stick with one direction to ensure uniform coverage.
Monitor Drying Conditions
If the room is too hot or dry, the paint may set too quickly, leading to streaks. Adjust room temperature as needed to give you more working time.
Step 8: Removing Tape for Crisp Lines
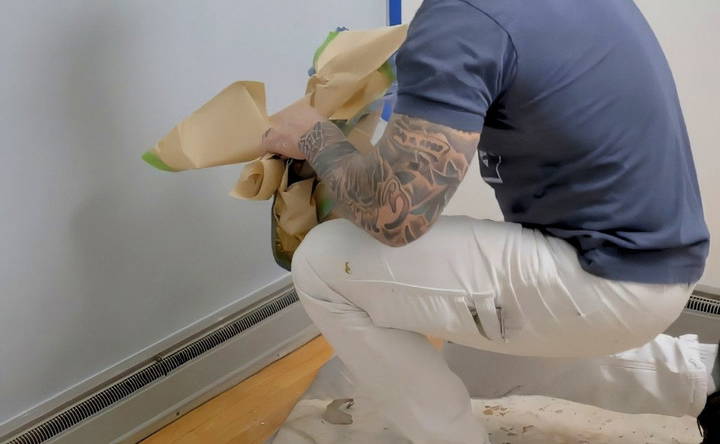
Once the final coat is applied, removing the painter's tape is a delicate but crucial step.
Timing is Key
- Remove Tape While Wet: The best time to peel the tape is when the paint is still wet to avoid bridging or tearing.
- Peel at an Angle: Gently pull the tape away at a 45-degree angle for a clean edge.
What to Do If Paint Bleeds
- Quick Fix: Use a small artist's brush to touch up any areas where paint may have bled under the tape.
- Plan for Next Time: Consider using high-quality tape and caulking for better results on future projects.
Step 9: Troubleshooting Common Issues
Even with careful planning, challenges can arise during painting. Here's how to address common problems:
Uneven Coverage
- Cause: Paint roller not fully loaded or inconsistent pressure.
- Solution: Apply an additional thin coat, ensuring the roller is evenly saturated.
Lap Marks or Streaks
- Cause: Paint dried too quickly or was overworked.
- Solution: Maintain a wet edge and work in smaller sections to prevent drying mid-process.
Paint Bleeding Under Tape
- Cause: Uneven surfaces or low-quality tape.
- Solution: Use caulking to seal the edges, and ensure the tape is pressed down firmly before painting.
Step 10: Finishing Touches and Cleanup
With the painting complete, it's time to bring everything together for a polished look.
Inspect and Touch Up
- Final Inspection: Examine the wall from different angles and lighting conditions to spot any imperfections.
- Touch Up: Use a small brush to fix missed spots or uneven edges.
Clean Tools and Workspace
- Wash Brushes and Rollers: Clean tools immediately to extend their lifespan.
- Dispose of Paint Properly: Follow local regulations for disposing of leftover paint and materials.
Reassemble the Room
- Remove Protective Covers: Take down masking paper and drop cloths carefully to avoid disturbing wet paint.
- Replace Fixtures: Reattach switch plates, outlet covers, and other hardware.
Enhancing the Accent Wall with Decor
Now that your accent wall is painted, it's time to style the space to showcase your work.
Highlight the Wall
- Furniture Placement: Arrange furniture to draw attention to the accent wall.
- Lighting: Use strategically placed lights or lamps to enhance the color and texture of the wall.
- Artwork and Decor: Frame the wall with artwork, mirrors, or shelving to add dimension and personality.
Pro Tips for Future Projects
As you admire your finished accent wall, here are some tips to keep in mind for future painting endeavors:
- Invest in Quality Paint: High-quality paint may cost more upfront but saves time and effort with better coverage and durability.
- Plan for Maintenance: Dark colors may show scuffs and marks over time. Keep leftover paint for quick touch-ups.
- Experiment with Patterns: Once you've mastered the basics, try geometric patterns, stenciling, or ombre effects for a unique touch.
The Reward of a Stunning Accent Wall
Painting an accent wall can feel like a big project, but with the right preparation and techniques, the results are worth the effort. Whether you're framing a focal point, adding drama to a room, or simply refreshing your space, an accent wall can transform your home.
With crisp lines, vibrant colors, and a professional finish, your new accent wall will be a conversation starter and a source of pride for years to come.
FAQs About Painting an Accent Wall
Discover top FAQs about painting an accent wall, including tips, colors, and techniques to enhance your room's style effortlessly.
Haloing refers to visible edges or streaks where paint overlaps unevenly, often due to dried or improperly blended areas. To prevent this, maintain a wet edge while painting. Work in small sections, and ensure that cut-in edges are rolled over immediately.
Caulking is recommended for uneven or bumpy surfaces to prevent paint from bleeding under the tape. If the wall is perfectly smooth, caulking might not be necessary, but it can still provide added assurance for sharp lines.
If paint bleeds under the tape or lines are uneven, lightly sand the affected areas once the paint is dry. Reapply tape carefully and repaint the section using proper sealing techniques like caulking or pre-painting with the wall's base color.
Yes, priming spackled areas is essential, especially with darker colors, to prevent uneven absorption and ensure a consistent finish.
A roller with a medium nap, such as 3/8 inch or 15mm, is ideal for dark colors. It holds sufficient paint for even application without leaving visible streaks.
Allow the first coat to dry for at least 45 minutes to an hour under optimal conditions. However, drying time may vary based on temperature and humidity. Ensure the paint is fully dry to the touch before applying the next coat.
Flat paint is excellent for accent walls with imperfections, as it hides flaws and enhances the depth of dark colors. It also minimizes the visibility of brush or roller marks.
If working solo, paint one wall at a time. Cut in small sections, then immediately roll over the cut-ins to maintain a wet edge and prevent haloing.
Tape may pull off paint if it was removed too late or if the paint wasn't properly cured. Remove tape while the paint is still wet or shortly after drying to avoid peeling.
Use a high-quality angled brush and practice steady, controlled strokes along edges. While tape and caulking are helpful for beginners, skilled painters can often achieve sharp lines without them.


