Transform your kitchen by learning how to paint kitchen cabinets like a pro, following these simple tips and techniques. Painting your kitchen cabinets can be an affordable and effective way to refresh the look of your space. By using the right materials and methods, you can achieve a smooth, durable finish. This guide provides step-by-step instructions for prep work, painting, and finishing touches.
First, gather all necessary supplies and ensure your workspace is ready. Proper preparation includes removing the cabinet doors, cleaning surfaces, and sanding for optimal paint adhesion. To achieve professional results, follow the detailed painting tips and tricks provided in the following sections.
Learn how to paint kitchen cabinets in easy steps. Transform your space with our comprehensive guide for a DIY kitchen makeover.
Choosing the Right Paint and Supplies
Choose the right paint and supplies: discover tips on selecting the best paint and essential tools for a flawless finish on your next project.
The Right Paint Makes a Difference
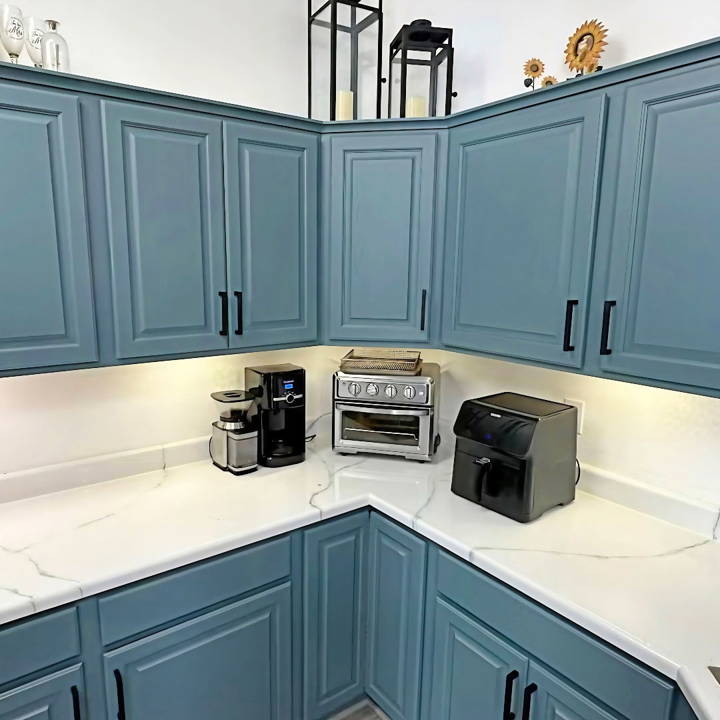
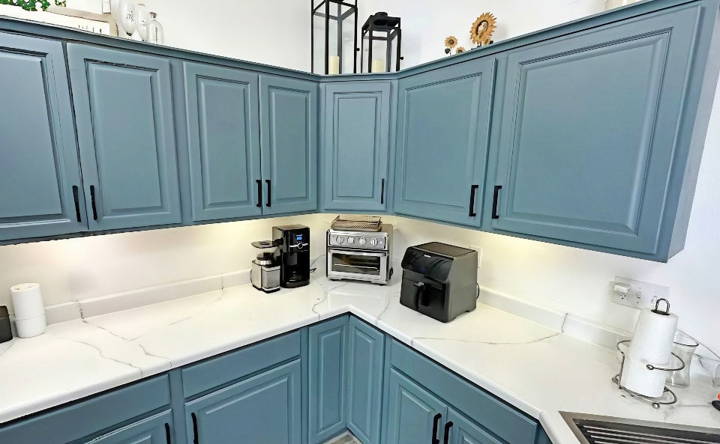
I kicked off this project by selecting the right paint. My choice was the Heirloom Traditions all-in-one paint in spruce color. What attracted me to this paint was its claim that you don't need to sand or prime your cabinets before painting. This was a game-changer for me, considering the time and effort it saved.
Essential Supplies
Before diving headfirst into painting, gathering all necessary supplies was crucial. Here's a breakdown:
- A Small Paint Cup: To make handling paint easier without lugging around the gallon.
- A Paint Mixer: A small, but mighty tool. If you don't have one, a simple wooden stir stick will do.
- Foam Roller and Brushes: Specifically designed for smooth surfaces, perfect for cabinet faces.
- TSP Substitute and Scotch Bright Pads: For cleaning the cabinets, ensuring a smooth application.
- Painter's Tape: An essential item for protecting areas you don't want painted.
- A Drill or Screwdriver: For removing hardware from cabinet doors and drawers.
Understanding the purpose of each material helped me approach the project with more confidence, knowing I was prepared for the task ahead.
Step by Step Instructions
Transform your kitchen with our step-by-step instructions on how to paint kitchen cabinets. Achieve a pro finish with our easy guide!
Step 1: Preparation
Preparation was key. I started by using the TSP substitute to cleanse the cabinet surfaces thoroughly. After removing grease and grime with the Scotch Brite pads, I ensured each surface was clean, setting the stage for a smooth painting process.
Step 2: Painting Technique
My technique involved first using a paintbrush to cover the entire surface, followed by a foam roller to smooth everything out. This approach helped me avoid brush marks and achieve a professional-looking finish. The key is to ensure even coverage, working from the center outward and avoiding drips at all costs.
Step 3: Applying Multiple Coats
Patience played a huge role in this step. After the first coat, I allowed at least 30 minutes for drying, although this varied slightly depending on the humidity of my workspace. Two coats seemed to be the magic number for the perfect finish, maintaining the wood grain's visibility while ensuring thorough coverage.
Step 4: Reinstallation
Once the paint was dry, I carefully reattached all the hardware and reinstalled each cabinet door and drawer. This step was a little nerve-wracking, as I didn't want to chip the freshly painted surfaces. I recommend having a touch-up brush at hand for any necessary corrections.
Tips and Tricks
Discover essential tips and tricks for seamless hardware installation and touch-ups to ensure your projects are flawless and professional.
Hardware Installation
When installing new hardware, I made a simple template to ensure consistent placement. For those with a large kitchen, investing in a hardware jig can save time and prevent headaches.
Touch-ups
Keep your paint can and a small brush handy for quick touch-ups. Despite careful painting, nicks and scratches are inevitable, especially during reinstallation. A quick touch-up can make them virtually disappear.
Color Selection Advice
When it comes to painting your kitchen cabinets, selecting the right color is crucial. It can transform the look and feel of your kitchen. Here's a guide to help you make the best choice:
- Understand Your Space: The size and lighting of your kitchen play a significant role in how a color looks. Light colors can make a small kitchen feel larger and brighter, while dark colors can add sophistication to a spacious kitchen.
- Consider the Mood: Colors evoke emotions. Decide what mood you want to make. Warm colors like reds and yellows bring energy, whereas cool colors like blues and greens make a calm atmosphere.
- Test Before You Commit: Paint swatches on a small section of your cabinets and observe them at different times of the day. This will give you a real sense of how the color will look in your kitchen's unique lighting.
- Complement Your Countertops and Floors: Choose a cabinet color that complements the other elements in your kitchen. If you have patterned countertops, go for a solid color that doesn't compete for attention.
- Trends vs. Timelessness: While it's tempting to go with the latest color trends, consider whether you'll still love it in five years. Classic colors like whites, grays, and neutrals have staying power.
- Finish Matters: The finish of the paint can affect the color's appearance. High-gloss finishes are durable and easy to clean but will highlight imperfections. Matte finishes hide imperfections but are less durable.
- Eco-Friendly Options: If you're environmentally conscious, look for paints with low or no volatile organic compounds (VOCs). These are better for indoor air quality and the environment.
Choose a cabinet color you'll love daily. Research and select a hue that matches your style and kitchen. Your kitchen is your home's heart—show your taste and personality.
Troubleshooting Common Issues
Painting kitchen cabinets can sometimes present challenges. Here's how to tackle some of the most common issues you might encounter:
- Drips and Runs: If paint drips occur, smooth them out immediately with your brush or roller. For dried drips, sand the area lightly and touch up the paint.
- Streaks: To avoid streaks, use a high-quality brush or roller. Apply paint in thin, even layers, and always paint in the same direction.
- Uneven Coverage: Ensure you're using the right amount of paint. Too little can lead to patchiness, while too much can cause drips. Apply multiple thin coats rather than one thick coat.
- Paint Not Sticking: Clean your cabinets thoroughly before painting. Any grease or residue can prevent paint from adhering. Lightly sanding the surface can also help.
- Brush Marks: Avoid brush marks by not overloading your brush with paint and using the right type of brush for your paint. For water-based paints, use synthetic bristles; for oil-based paints, natural bristles work best.
- Color Mismatch: Always test your paint color before committing to the entire project. Paint a small section and let it dry to see the true color.
- Peeling Paint: Peeling can occur if the surface isn't properly prepared. Remove peeling paint, sand the surface, apply a primer, and then repaint.
- Difficulty Cleaning: Choose a semi-gloss or high-gloss finish for easier cleaning. Matte finishes are harder to clean and more susceptible to staining.
Addressing common issues ensures a smoother painting process and a professional finish. Patience and attention to detail are key for the best results with kitchen cabinets.
Maintenance Tips
Keeping your painted kitchen cabinets looking fresh and clean is important for their longevity. Here are some maintenance tips to help you take care of them:
- Regular Cleaning: Wipe down your cabinets regularly with a soft, damp cloth. For tougher stains, use a mixture of warm water and mild dish soap. Avoid harsh chemicals that can damage the paint.
- Immediate Spill Response: If anything spills on your cabinets, clean it up immediately to prevent staining. Be gentle to avoid scratching the paint.
- Touch-Up Kit: Keep leftover paint and a small brush on hand for quick touch-ups. Address chips and scratches promptly to prevent further damage.
- Avoid Excessive Moisture: Kitchens can be humid, but too much moisture can damage your paint. Use exhaust fans when cooking and avoid hanging damp towels over cabinet doors.
- Protect from Heat: The heat from your stove and oven can cause paint to peel or discolor. Use heat shields or maintain a safe distance between heat sources and your cabinets.
- Gentle Products: Use cleaning products designed for painted surfaces. Natural solutions like vinegar and baking soda can be effective for stubborn grime.
- Regular Hardware Checks: Loose handles and hinges can cause wear and tear on your cabinets. Tighten them periodically to ensure they function smoothly.
Maintain your painted kitchen cabinets with these simple tips to keep them looking great for years. A bit of care preserves their beauty and functionality.
FAQs About How to Paint Kitchen Cabinets
Get answers to faqs about how to paint kitchen cabinets, including best practices, tools needed, and step-by-step guidance for a flawless finish.
Follow these steps to prepare your cabinets:
Clear the workspace: Remove items from your cabinets and drawers.
Dismantle cabinets: Take off doors and remove drawers.
Clean surfaces: Use detergent or trisodium phosphate (TSP) to clean.
Sand surfaces: Lightly sand the cabinets for better paint adherence.
Apply primer: Use a primer to make a good base for the paint.
Opt for a latex paint with a 100% acrylic formulation for better adherence and durability. Latex paints are user-friendly, dry quickly, and can be cleaned up with water.
Painting your kitchen cabinets can save you money compared to replacing them, is eco-friendly as it reduces waste, and allows you to customize your kitchen's look with the color and finish of your choice.
The time it takes to paint kitchen cabinets can vary, but generally, you should allocate a weekend for the project to allow for proper preparation, painting, and drying times. To ensure a smooth finish:
Prepare the surface: Clean and sand your cabinets thoroughly before starting.
Quality tools: Use high-quality brushes and rollers for even application.
Thin coats: Apply paint in thin, even layers to avoid drips and streaks.
Drying time: Allow sufficient drying time between coats, typically 24 hours.
Sanding between coats: Lightly sand between coats to remove any imperfections.
While it is possible to paint cabinets without removing the doors, it is not recommended. Removing the doors ensures a more thorough job, as it allows you to:
Paint all edges and surfaces evenly.
Avoid drips and runs that may occur when painting vertically.
Access hard-to-reach areas more easily for a cleaner look.
Conclusion
In conclusion, learning how to paint kitchen cabinets like a pro can dramatically transform your kitchen space. With the right tools and techniques, this project can be fun and rewarding. So, gather your supplies and get started on painting kitchen cabinets to bring renewed life and vigor to your home. Enjoy the process and the stunning results!


