Starting with how to polish rocks was a fascinating experience for me. I had some unpolished rocks scattered around my house, and I was curious about how to make them shine. I searched online and found different methods. This journey taught me that patience and the right steps could transform dull stones into beautiful gems.
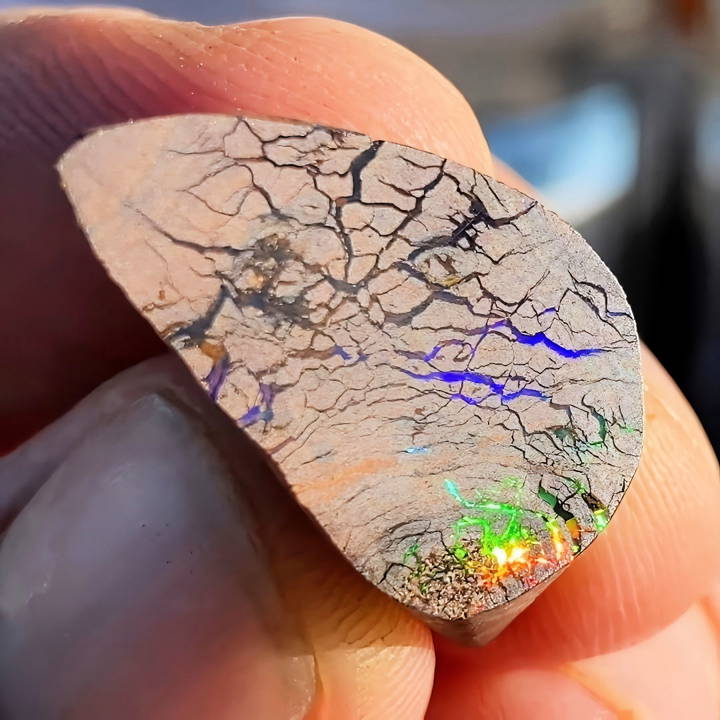
Learning how to polish rocks without a tumbler was a bit challenging but worth it. I found that sandpaper and elbow grease can do wonders. I started with coarse-grit sandpaper and worked my way down to fine-grit. Lastly, using a leather cloth for the final polish added an amazing shine. It felt incredibly rewarding to see the stones' transformation.
What is Rock Polishing?
Rock polishing is the art of smoothing and shining rocks and minerals. The process involves grinding away the rough edges and surfaces of rocks and then using finer and finer abrasives to achieve a polished finish. It's like sanding wood: you start with coarse sandpaper and work your way to fine-grit paper to get a smooth surface.
Why Polish Rocks?
People polish rocks for many reasons. Some enjoy the beauty of the stones, while others use them for jewelry-making or decorative purposes. Polished rocks can also serve as educational tools, helping to illustrate the diverse properties of minerals and geology.
Why You Need Certain Materials
- Piece of Glass: Acts as a smooth, flat surface necessary for evenly spreading the grit and polishing the rock.
- Tumble Grit: This is the magic powder that, in various grain sizes, helps smooth out the rough edges and polish the rock.
- Spray Bottle with Soapy Water: Keeps the grit moist and effective, while also aiding in the cleaning process between grit sizes.
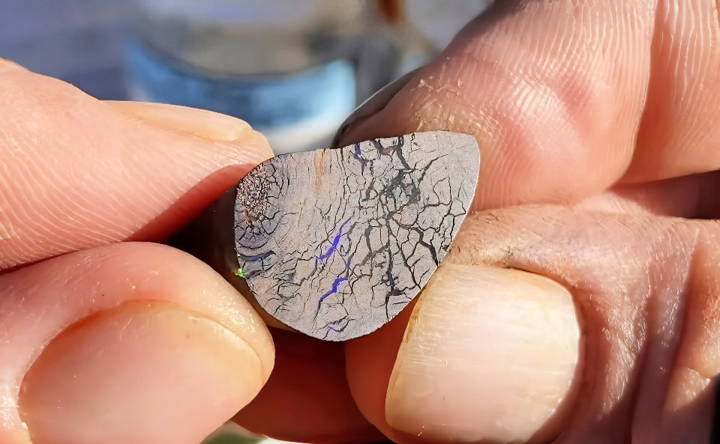
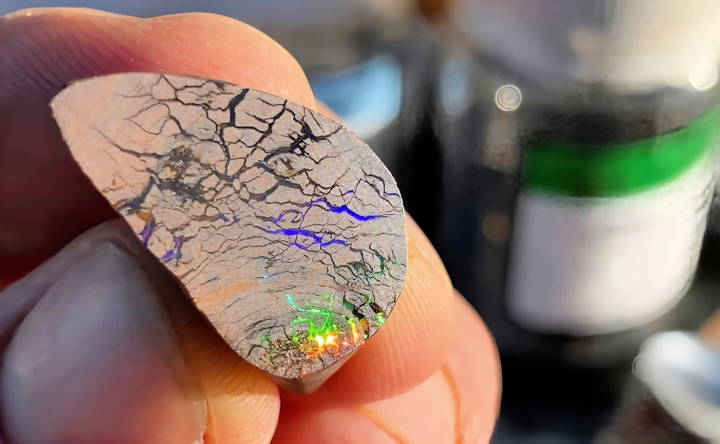
- Rocks: Of course, these are the stars of the show. I chose a piece of boulder opal and calcitini for my project.
- Old Leather/Polishing Cloth: For the final polish, this helps achieve that gleaming finish.
Step by Step Instructions
Learn how to polish rocks with step-by-step instructions, from preparation to final polish, for a stunning finish.
Preparing the Space and Materials
My adventure in rock polishing began with setting up a dedicated space. A sturdy table, covered with a protective sheet, held my piece of glass. Beside it, I placed my rocks, a bowl with my tumble grit, my spray bottle filled with soapy water, and, for the final touch, an old piece of leather.
Starting with the Coarse Grit
- The First Grind: I started with the coarse 80 grit. Just a little sprinkle on the glass, a squirt of soapy water to moisten, and I was ready. Placing my calcitini on the glass, I gently but firmly started making figure eights. The key here was letting the grit do its job without applying too much pressure.
- Rinse and Inspect: After a noticeable change in texture, I rinsed the stone and the glass. It's crucial to remove all the grit before moving to a finer grade to avoid scratches.
Moving Through Finer Grits
- Repeating the Process: With each stage, using finer and finer grit, I repeated the process, consistently rinsing my rock and the glass to ensure no coarse grit contaminated the finer stages.
- Patience Is Key: It's surprising how the rock starts to change. What began as a dulled surface slowly started to reveal a smooth, semi-polished sheen. Each stage took less time than the last, dropping from 20 minutes with the coarse grit down to around 4-6 minutes with the finer ones.
The Final Polish
- The Magic Touch: For the final polish, I switched to an old piece of leather. Using the finest grit, I applied it directly to the leather, added a drop of water, and began to rub the rock firmly against it.
- The Reveal: It's a slow reveal, but as the final bits of grit worked their magic, a polished, shiny surface emerged. It was incredible to see the transformation, from a rough stone to a gleaming gem.
Reflections and Tips
- Patience Pays Off: The most critical lesson I learned is that patience and care at each step can lead to stunning results. Rushing through the grits or not thoroughly cleaning between stages can lead to scratches that mar the final product.
- Learning Through Experience: Not every step was perfect. At one point, I feared I moved to a finer grit too soon, noticing potential premature scratches. However, these mistakes are valuable learning moments.
- The Right Materials Matter: Quality grit, a solid working surface, and the right polishing cloth can make a significant difference in the outcome.
- Practice Makes Perfect: Each rock has its unique challenges, from hardness to initial roughness. The more you polish, the better you'll become at judging how much pressure to apply, how long to spend on each grit, and when a rock is ready for the next stage.
Types of Rocks Suitable for Polishing
Not all rocks polish equally. Some yield great results, while others don't. The key to successful rock polishing is choosing the right kind of rocks.
Understanding Rock Hardness
The hardness of a rock is a critical factor in determining whether it will polish well. The Mohs Scale of Hardness measures a mineral's resistance to scratching, which is directly related to how well it will take a polish. Rocks with a Mohs hardness between 6 and 8 are ideal for polishing. This range includes rocks like quartz, agate, and jasper.
The Best Rocks for Polishing
- Quartz: With its hardness and variety of colors, quartz is a favorite among rock polishers.
- Agate: Known for its fine grain and bright colors, agate is perfect for achieving a high shine.
- Jasper: This opaque rock comes in many patterns and polishes to a nice luster.
Characteristics of Good Polishing Rocks
- Hardness: Aim for rocks that are hard enough to withstand the tumbling process without breaking apart.
- Density: Dense rocks without too many pores are preferable, as they don't trap grit that can ruin the polish.
- Texture: Smooth rocks with a fine grain are easier to polish and result in a better finish.
- Uniformity: Rocks that are uniform in texture and composition will polish evenly.
- Lack of Fractures: Avoid rocks with visible fractures or cracks, as these can break during tumbling.
Finding Rocks to Polish
You can find suitable rocks for polishing in various places:
- Nature: Look for rocks along streams, beaches, or in your own backyard.
- Rock Shops: These stores often have a selection of pre-sorted rocks perfect for polishing.
- Online: There are many online retailers that sell rocks specifically for tumbling.
Preparing Your Rocks
Before you start polishing, inspect your rocks carefully. Make sure they are clean and free from loose material. If you're using a rock tumbler, it's important to group rocks of similar hardness together to ensure an even polish.
Start with the right rocks to get beautifully polished stones. Knowing good rocks and their sources is crucial. Patience and detail matter.
Advanced Techniques in Rock Polishing
Once you've mastered basic rock polishing, advanced techniques can elevate your results to extraordinary. These methods require patience, precision, and deeper material understanding.
Understanding the Rock's Characteristics
Before diving into advanced techniques, it's crucial to have a thorough understanding of the rock's natural properties. This includes its hardness, potential for fractures, and grain structure. Such knowledge will inform your approach to polishing and help prevent damage to the rock.
Pre-Polish Preparation
Advanced polishing often involves a pre-polish step, which is a finer grind that precedes the final polish. This step uses a finer grit than the standard smoothing phase and prepares the rock for a high-gloss finish.
The Use of Cerium Oxide
Cerium oxide is a popular compound used in the final polishing stage for rocks with a hardness of 7 or higher on the Mohs scale. It provides a superior shine and is especially effective for transparent minerals.
Burnishing for Extra Shine
Burnishing is a technique used after the final polish to give the rock an extra level of shine. It involves tumbling the rocks with a small amount of water and a burnishing compound, such as soap, which cleans any residue from the polishing process and enhances the stone's luster.
Lapping for Flat Surfaces
Lapping is a technique used to make perfectly flat surfaces on a rock. It involves grinding the rock on a flat plate with abrasive grits. This method is ideal for preparing slabs for display or making materials for jewelry.
Dopping for Small Stones
Dopping is a method used to polish small stones that are too tiny to be processed in a tumbler. The stone is attached to a dop stick with wax, allowing you to hold and manipulate the stone against the grinding wheel or lap.
Custom Grit Sequences
Experienced polishers may experiment with custom sequences of grits, moving beyond the standard coarse, medium, fine, and polish stages. This can involve using different types of abrasives or varying the duration of each stage to achieve the desired finish.
Temperature and Speed Control
Maintaining the right temperature and rotational speed during the tumbling process is crucial. Too much heat can cause cracks, while the wrong speed can result in an uneven polish. Advanced polishers will carefully monitor and adjust these variables.
Polishing by Hand
Hand polishing is a skillful technique that allows for greater control and precision. It involves using hand tools and abrasives to manually smooth and polish the rock. This method is time-consuming but can yield exceptional results.
Advanced rock polishing techniques yield professional, stunning results. With knowledge, patience, and attention to detail, you can turn ordinary rocks into art.
Project Ideas Using Polished Rocks
Polished rocks, with their smooth surfaces and vibrant colors, are great for creative projects. Whether you're a hobbyist looking for a new challenge or want to make practical items with a personal touch, there's a project for you. Here are some ideas to start:
Jewelry Making
One of the most popular uses for polished rocks is making unique pieces of jewelry. You can wire-wrap stones to make pendants, earrings, or bracelets. The beauty of this is that each piece is one-of-a-kind, reflecting the natural beauty of the stone.
Home Decor
Polished rocks can add an earthy, organic touch to your home decor. Consider making:
- Bookends: Use larger polished stones to make functional and decorative bookends.
- Candle Holders: Embed smaller stones in clay or cement bases to make rustic candle holders.
- Coasters: Glue felt to the bottom of flat, polished stones to protect surfaces from hot or cold beverages.
Garden Enhancements
In the garden, polished rocks can serve both decorative and practical purposes. They can be used as:
- Pathway Stones: Make a colorful walkway by setting polished rocks into the ground.
- Plant Markers: Write the names of plants on flat stones and place them in your garden as natural-looking markers.
- Water Features: Add polished rocks to a fountain or bird bath for added visual interest.
Games and Education
Polished rocks can also be educational tools or components for games. They can be used as:
- Counting Stones: Teach children about numbers and colors with brightly polished stones.
- Board Game Pieces: Replace lost or generic game pieces with polished rocks for a personalized touch.
Arts and Crafts
For those who enjoy arts and crafts, polished rocks offer endless possibilities. You can:
- Make Mosaics: Use small polished stones to make intricate mosaic art pieces.
- Decorate Picture Frames: Glue polished rocks around a plain picture frame for a unique look.
- Make Magnets: Attach a magnet to the back of a polished stone for a functional piece of art.
Personalized Gifts
Polished rocks can be turned into thoughtful, personalized gifts. Consider making:
- Keychains: Drill a small hole in a polished rock and attach it to a key ring.
- Paperweights: Larger, heavier stones make excellent paperweights and can be engraved for a personal touch.
Polished rocks offer endless creative uses. From jewelry and decor to gardens and gifts, they add natural beauty and function. Grab your stones and start making.
Troubleshooting Common Issues in Rock Polishing
Rock polishing is a rewarding hobby, but it has its challenges. Here are common issues and solutions to ensure stunning results.
Rocks Not Polishing Evenly
If you find that your rocks are not polishing evenly, it could be due to a variety of factors. It's important to ensure that you're using the correct amount of grit and water. The rocks should tumble with enough room to fall freely in the barrel. If the barrel is too full, they won't polish evenly.
- Solution: Adjust the amount of rocks, grit, and water. Make sure the barrel is filled to the recommended level, usually about two-thirds full.
Rocks Taking Too Long to Polish
Sometimes, rocks take longer to polish than expected. This can happen if the rocks are particularly hard or if the grit is not coarse enough to grind down the rock's surface efficiently.
- Solution: Be patient and give the rocks more time. If necessary, use a coarser grit to speed up the process.
Rocks Not Polishing at All
If your rocks are not polishing at all, it could be because the rocks are too soft or the grit is too fine. Soft rocks can disintegrate during the tumbling process, while too fine a grit won't be abrasive enough to polish the rocks.
- Solution: Choose rocks that are suitable for polishing, with a hardness of 6-8 on the Mohs scale. Start with a coarser grit and gradually move to finer grits.
Tumbler Making Too Much Noise
Rock tumblers can be noisy, which might be inconvenient depending on where you live. The noise is typically caused by the rocks and grit tumbling inside the barrel.
- Solution: Place the tumbler in a space where noise is less of an issue, like a garage or basement. You can also try insulating the space around the tumbler with foam or placing it on a rubber mat to reduce noise.
Breakage During Tumbling
Breakage can occur if the rocks have internal fractures, if they're mishandled during washing, or if the tumbler is operating at too high a speed or with low solution viscosity.
- Solution: Inspect your rocks for fractures before tumbling and handle them gently. Ensure the tumbler operates at the correct speed and with the right viscosity by following the manufacturer's instructions.
Rocks Losing Shine After Polishing
If your polished rocks lose their shine, it could be due to improper cleaning between stages or the use of inferior polishing compounds.
- Solution: Clean the rocks thoroughly between each stage of tumbling. Use high-quality grit and polishing compounds to ensure a lasting shine.
Rocks Are Too Dull After Tumbling
Rocks that come out of the tumbler looking dull may not have been tumbled long enough with the final polish. They may also benefit from a burnishing step.
- Solution: Extend the time you polish the rocks with the final polish. Consider adding a burnishing step with a mild abrasive, like soap, to give the rocks an extra shine.
By addressing these common issues with patience and care, you can improve your rock polishing technique and enjoy the beautiful results of your efforts.
Safety Precautions in Rock Polishing
Rock polishing can be a delightful and rewarding activity, but it's important to prioritize safety to prevent accidents and health issues. Here are some essential safety precautions to keep in mind:
Wear Protective Gear
- Eye Protection: Always wear safety glasses to shield your eyes from flying debris. This is crucial as small rock fragments can cause serious eye injury.
- Dust Masks: Fine dust generated during polishing can be harmful if inhaled. Use a dust mask or respirator to protect your lungs, especially when working with materials like malachite and chrysocolla, which contain toxic compounds.
- Gloves: Protect your hands with gloves to prevent cuts from sharp rock edges and to avoid skin irritation from prolonged contact with rock dust.
Proper Ventilation
- Ensure that your work area is well-ventilated. Rock dust can accumulate in the air and pose a health risk if breathed in over time. A well-ventilated space helps to disperse the dust and reduce inhalation risks.
Safe Handling of Chemicals
- If you're using any chemicals or homemade polishes, handle them with care. Always follow the safety guidelines for each substance, and work in a ventilated area to avoid inhaling fumes.
Equipment Maintenance
- Keep your polishing equipment in good condition. Regularly check for any signs of wear and tear, and replace any damaged parts promptly. This not only ensures safety but also the longevity of your equipment.
Educate Yourself
- Understand the properties of the rocks you're working with. Some rocks may contain hazardous materials that require special handling. For example, rocks with high copper content can be toxic, so it's important to handle them with care and clean any dust off your skin promptly.
First Aid
- Keep a first aid kit nearby in case of accidents. It should include bandages, antiseptic wipes, and other basic supplies to treat minor injuries immediately.
Stable Work Surface
- Make sure your rock polisher and other equipment are securely fastened to a stable surface. This prevents the equipment from tipping over and causing injuries.
Follow these safety steps to enjoy rock polishing safely. Always prioritize safety to protect yourself and others around you.
FAQs About How to Polish Rocks
Rock polishing can be a rewarding hobby, transforming rough stones into shiny treasures. Here's a simple guide to help you start and answer common questions.
To polish rocks by hand, you’ll need a few basic supplies:
Coarse and fine-grit sandpaper: Start with a coarser grit to shape and smooth the rock, then use a finer grit to polish.
Rock polish: After sanding, apply a rock polish to give your stone a shiny finish.
Water: Keep your rock and sandpaper wet to reduce dust and help with smoothing.
Safety gear: Wear goggles and a dust mask to protect yourself from rock particles.
Selecting the right rocks is important for a successful polish:
Hardness: Rocks of similar hardness should be polished together to avoid damage.
Shape: Rounded rocks without major protrusions are easier to polish.
Type: Softer stones like onyx, limestone, or calcite are easier for beginners.
Yes, you can polish rocks without machines by using sandpaper and manual effort. It's a slower process but allows for more control over the shaping and polishing of the rock.
A rock tumbler can polish multiple rocks at once:
Fill the tumbler: Add rocks, grit, and water to your tumbler.
Tumble: Let the tumbler run for several days, checking progress periodically.
Change grits: Start with a coarse grit and move to finer grits until you reach a polish.
Polish: Use a polishing compound for the final shine.
Safety is key when polishing rocks:
Protective gear: Always wear safety goggles and a dust mask.
Ventilation: Work in a well-ventilated area to avoid inhaling dust.
Careful handling: Be cautious with tools to avoid injury.
Conclusion
In the end, discovering how to hand-polish rocks opened a new hobby for me. With just a few simple tools and techniques, anyone can turn rough stones into shiny treasures. These steps can help you find joy in this inexpensive and rewarding activity. Give it a try, and you'll be amazed at what you can make!


