When your car's air conditioning (AC) system starts blowing warm air, it's usually a sign that it needs to be recharged. In this detailed guide, we will walk you through how to recharge your car's AC system, which can often be done in less than five minutes with the right tools and knowledge. Learning to recharge your car's AC yourself can save you both time and money.
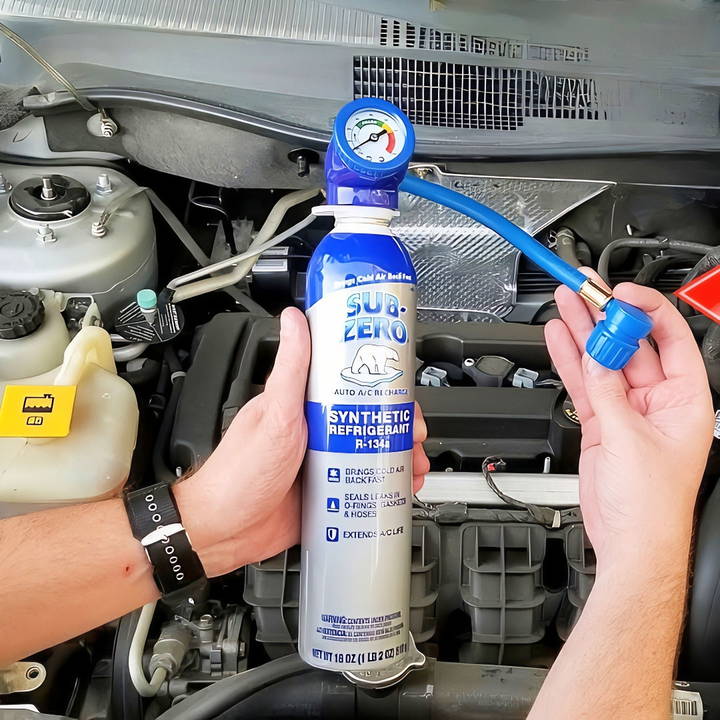
This step-by-step process is easy, even for beginners. By following the instructions below, you'll have your AC back to blowing cold air in no time.
Understanding Your Car's AC System
Before diving into the recharging process, it's helpful to understand how your car's AC system works. The system uses refrigerant, a special fluid that absorbs heat from inside your car and releases it outside, leaving the air inside cool. Over time, the refrigerant level in your AC system may drop due to leaks or natural depletion, causing the system to function poorly.
To restore cooling performance, you need to recharge the system with new refrigerant. Most cars today use R134a refrigerant, but it's always best to check your car's manual to ensure you are using the right type.
Tools and Materials You'll Need
- R134a Refrigerant: This is the most commonly used refrigerant for modern cars. Double-check your car's manual to ensure you purchase the correct type of refrigerant for your vehicle.
- Can with Gauge and Hose: When buying refrigerant, ensure the can includes a gauge and a hose attachment. The gauge helps you monitor the pressure while recharging, preventing overfilling.
- Thermometer: A small thermometer to measure the air temperature from your car's AC vents is helpful for ensuring that the system is cooling properly.
All of these materials are widely available at auto parts stores or online.
Step by Step Instructions
Learn how to recharge your car AC with our step-by-step guide. Follow our detailed instructions to prepare, recharge, and test your AC system.
Step 1: Prepare the Refrigerant Can and Hose
Start by buying a can of R134a refrigerant with an attached gauge and hose. The gauge helps you monitor the pressure during the recharge, ensuring you don't overfill the system.
- Unscrew the protective tab or cap on the can. Some cans may have a safety lock tab that must be removed first.
- Attach the hose to the refrigerant can. When the hose is attached, it pierces the can, making the refrigerant ready for use. Once you're done with the can, the hose can be reused with a new can of refrigerant next time.
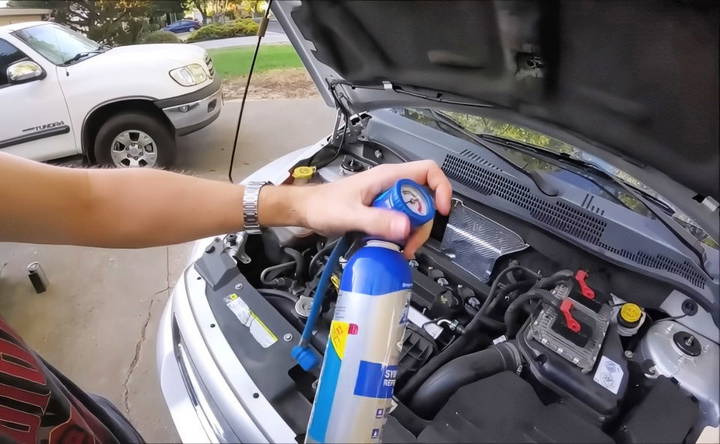
Step 2: Locate the Low-Pressure Port
Under your car's hood, you'll find two refrigerant lines: one thicker and one thinner. The thicker line is the low-pressure side, which is the one you'll use for recharging. The low-pressure port usually has a cap with an "L" on it, while the high-pressure port is marked with an "H".
- Remove the dust cap from the low-pressure port. Keep it safe, as you'll need to replace it after recharging to keep dirt and debris out of the system.
Step 3: Attach the Hose to the Low-Pressure Port
Now that you've located the low-pressure port, it's time to attach the hose.
- Pull back the locking tab on the end of the hose.
- Firmly press the hose fitting onto the low-pressure port, then release the tab to secure the connection. Give the hose a slight tug to ensure it's securely attached.
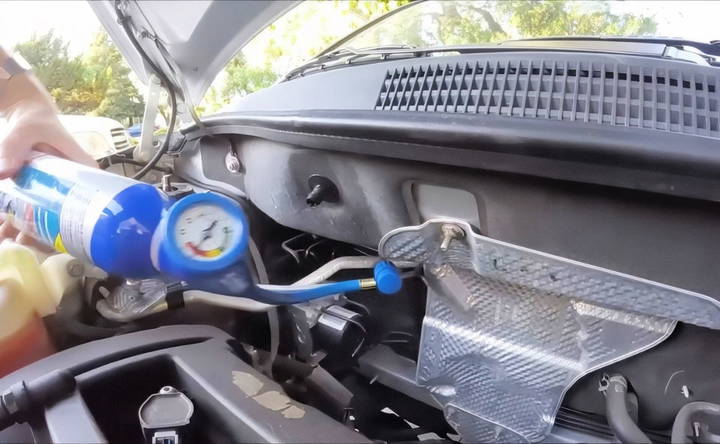
Step 4: Start the Car and Turn on the AC
With the refrigerant hose attached, it's time to start your car.
- Turn the engine on and set your AC to the maximum setting, with the fan on full blast. Make sure the AC is set to the coldest temperature available.
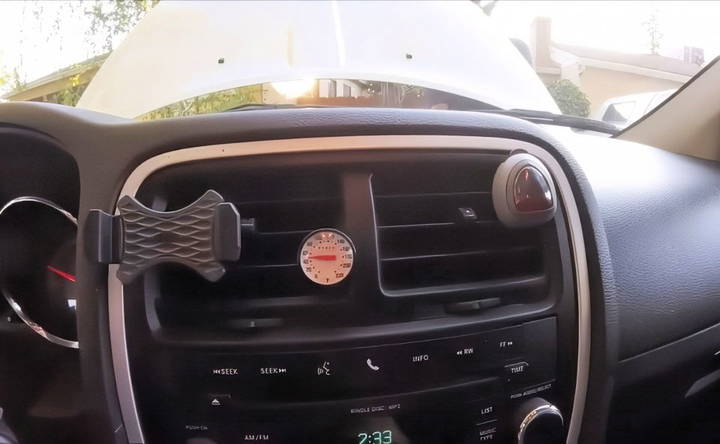
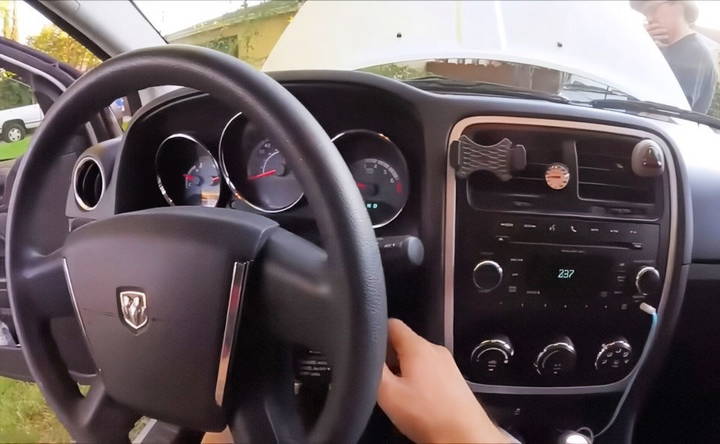
- Place a thermometer in one of the AC vents inside the car. This will allow you to track the temperature change as you add refrigerant.
Step 5: Monitor the Initial Temperature
Let the AC run for a minute or two. Ideally, the air coming out of your vents should be between 35 and 45 degrees Fahrenheit when the system is fully charged. If the temperature is higher than this, you likely need to add refrigerant.
Check the initial temperature of the air coming from the vents before you begin adding refrigerant. It's common to see temperatures over 50 degrees if the system needs recharging.
Step 6: Add Refrigerant
Now it's time to start adding refrigerant to your car's AC system. It's important to do this gradually to avoid overcharging, which can be just as problematic as undercharging.
- Begin by shaking the refrigerant can.
- Squeeze the trigger on the can to release refrigerant into the system. Use short bursts, not a continuous stream, to prevent overfilling. Shake the can occasionally while doing this to maintain pressure inside.
- Keep an eye on the pressure gauge attached to the can. The needle should stay in the green zone, which indicates the optimal pressure. If the pressure starts to rise into the yellow or red zones, stop adding refrigerant immediately.
Step 7: Check the Temperature
Periodically go back inside the car to check the temperature on your vent thermometer. You're aiming for a reading between 35 and 45 degrees Fahrenheit. As the refrigerant fills the system, you should see the temperature drop gradually.
If the air is still too warm, go back under the hood and add more refrigerant in small bursts. Each time, check the temperature to ensure you're not overfilling the system.
Step 8: Finalize and Check the System
Once the vent temperature falls within the desired range, and the pressure gauge reads in the green, you can stop adding refrigerant.
- Turn off your car's engine.
- Remove the hose from the low-pressure port by pulling back the locking tab and lifting it off the fitting. Be cautious, as the engine and components might be hot.
- Replace the dust cap on the low-pressure port to protect it from dirt and debris.
Step 9: Test Your AC
With the system fully charged, it's time to enjoy the cool air. Turn the car on again and check the air temperature from the vents. You should now feel a noticeable improvement in the cooling performance of your AC.
Important Tips for a Safe and Efficient AC Recharge
- Do Not Overcharge: Overfilling the system can cause high-pressure buildup, which could damage your AC compressor and other components. Always follow the gauge readings to avoid this issue.
- Look for Leaks: If your AC system needs frequent recharges, it might have a leak. You can purchase an AC leak sealant or take your car to a mechanic for a more thorough diagnosis.
- Use the Correct Refrigerant: Always use the refrigerant specified in your car's manual. Using the wrong type can damage your system.
- Check for Compressor Issues: If your AC compressor doesn't engage even after adding refrigerant, there may be a more serious issue at play, such as a failed compressor or electrical fault. In such cases, professional assistance may be required.
Conclusion
Recharging your car's AC system is a simple task that most people can do themselves. With the right tools, you can save money and restore the cooling efficiency of your car in just a few minutes. The key steps include selecting the proper refrigerant, attaching the hose to the low-pressure port, and adding refrigerant while monitoring both pressure and temperature.
By following this guide, you'll be able to keep your car cool and comfortable throughout the hottest months of the year. However, if your AC continues to perform poorly after recharging, you may need to seek professional help to address underlying issues like leaks or component failures.
FAQs About How to Recharge Car Ac
Learn how to recharge your car AC with these FAQs. Get tips, steps, and solutions for common air conditioning issues. Stay cool on the road!
It's normal for the refrigerant can to get cold as you recharge. The refrigerant cools as it turns from liquid to gas. If the can becomes warm, it's likely empty and no longer adding refrigerant.
Yes, if your can has a self-sealing valve, you can save it and use it later. These cans are typically reusable, but it's important to check the label to ensure it has a self-sealing feature.
For optimal results, the AC should be running at full blast during the recharge. However, if you forget, the refrigerant may not be fully absorbed into the system. You can retry the process correctly without major issues.
If your system is functioning properly, it may take years before a recharge is necessary. However, if you notice the system blowing warmer air, recharging can be done annually, or more frequently if there's a slow leak.
Yes, small leaks can happen due to worn seals or minor cracks in the system. These leaks are slow, and a simple recharge can temporarily resolve the issue. However, it's important to monitor the system over time.
Yes, overfilling the system is possible and can cause significant damage, such as seal failure or compressor issues. To avoid this, add refrigerant in small bursts and monitor the temperature closely.
Vacuuming the system is necessary if it's been opened or fully drained, as air and moisture in the system can reduce performance. However, for minor recharges, you can simply top it up without vacuuming.
If your AC system requires frequent recharging, it likely has a leak. You can purchase AC stop leak products, but for larger leaks, professional diagnosis is recommended.
Make sure the engine is running and the AC is on full blast. If the gauge still doesn't move, check that the nozzle is securely attached. If everything seems fine, the system might be too low on refrigerant for the compressor to engage.
No, you should only connect the hose to the low-pressure port, marked with an "L." Using the high-pressure port (marked "H") can be dangerous.


