Replacing an old light fixture can instantly refresh a room's look and functionality. However, dealing with specific bulb bases like the GU24 can be challenging, especially if you're unsure how to remove them without damaging your ceiling. In this guide, I'll share step-by-step instructions on removing the GU24 base and exploring possible LED conversion options to modernize your lighting.
Understanding the GU24 Light Bulb Base
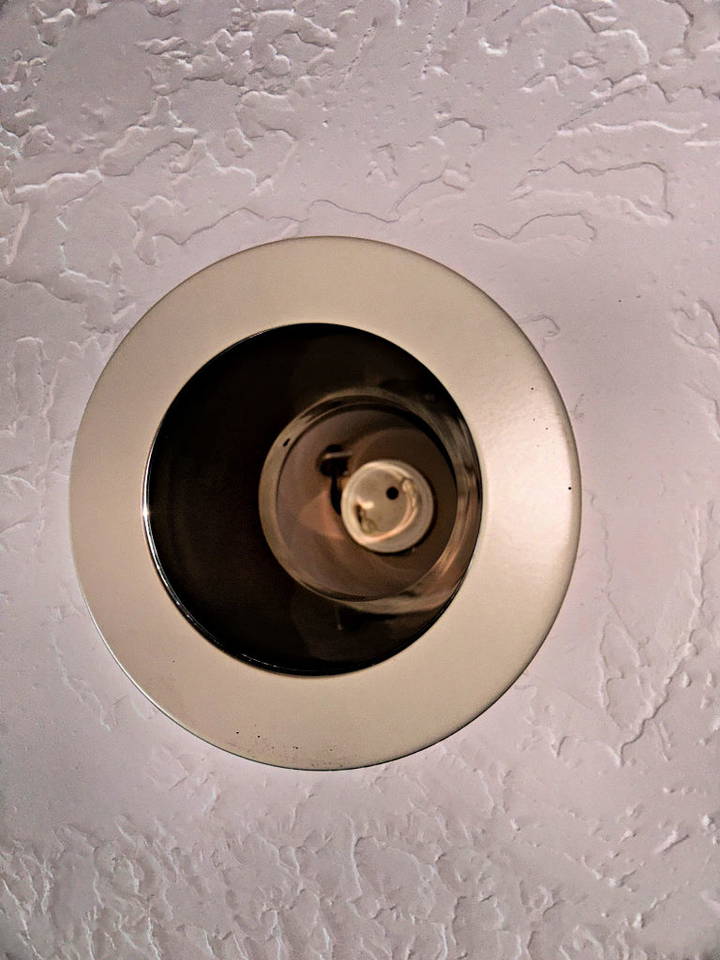
The GU24 bulb base is a relatively unique fixture type characterized by its twist-and-lock mechanism rather than the more common screw-in bases. While this design is intended for energy efficiency and safety, many users, including myself, have found it frustrating due to its limited bulb options and awkward installation process. Before starting the removal, it's essential to understand the components involved to avoid unnecessary damage.
Key Components of a GU24 Fixture
- Bulb Base (GU24): The base has two prongs that twist and lock into the socket.
- Trim and Housing: Most recessed lights, including GU24, come in two parts – the visible trim and the hidden housing inside the ceiling.
- Spring Clips: These often hold the trim in place against the ceiling.
- Junction Box: Contains power wires that connect to the fixture.
Step-by-Step Guide to Removing the GU24 Fixture
Step 1: Turn Off the Power
Safety first! Before you begin, make sure to turn off the power at the breaker box. Simply switching off the light switch is not enough; cutting power from the breaker will prevent any risk of electrical shock while you're working.
Step 2: Remove the Bulb
If there's still a bulb in the fixture, remove it first. With GU24 bulbs, you need to twist the bulb base counterclockwise to unlock it from the socket. This will expose the interior mechanism of the fixture and provide a better view of how it's mounted.
Step 3: Identify the Trim and Housing
Recessed lights typically consist of two main parts: the trim (the part you see from the room) and the housing (the part inside the ceiling). The trim is often attached to the housing using spring clips.
Step 4: Detach the Trim
To remove the trim:
- Gently pull on the trim to expose the spring clips.
- Squeeze the clips together to release them from the housing.
- Carefully lower the trim out of the ceiling.
Tip: If the trim seems stuck, try twisting it slightly. Some trims have a twist-and-lock mechanism instead of clips.
Step 5: Access the Housing
Once the trim is removed, you can see the housing and how it is attached inside the ceiling. Some housings are screwed directly into the ceiling joists, while others may use a bracket or clamp system.
- Check for Screws: Look for any screws that might be holding the housing in place.
- Remove the Housing: Unscrew any visible screws and gently pull the housing down. If it’s secured with brackets, you may need to maneuver it to release.
Note: If the housing is too large to pull out entirely, you might need to disassemble it in parts.
Step 6: Disconnect the Wires
Inside the housing, you’ll find a junction box where the fixture’s power wires are connected. Carefully open the junction box to expose the wire nuts.
- Remove the Wire Nuts: Unscrew the wire nuts to disconnect the fixture wires from the house wiring.
- Label the Wires: It’s a good idea to label the wires (live, neutral, ground) so you know where to connect your new fixture.
- Pull Out the Fixture: With the wires disconnected, you can fully remove the old housing from the ceiling.
Step 7: Inspect for Damage
Check the ceiling and surrounding area for any damage caused during removal. Small nicks or cracks can be patched with spackle or drywall compound.
Options for Upgrading Your Lighting
With the old GU24 fixture removed, it's an excellent opportunity to consider upgrading to a more modern and efficient lighting solution. Here are some options:
1. LED Conversion Kits
LED conversion kits are a popular choice because they are easy to install and highly energy-efficient. You can find kits that screw directly into the existing GU24 socket, eliminating the need to rewire the fixture. These kits provide bright, long-lasting light and come in various color temperatures and styles.
2. Canless Recessed Lights
Canless recessed lights are a sleek, modern option that requires less installation space than traditional recessed cans. These lights connect directly to the junction box and have integrated LED drivers, making them simple to install in the existing ceiling opening.
3. Surface-Mount Fixtures
For an even more straightforward solution, consider surface-mount fixtures that attach directly to the ceiling. These are particularly useful if you want to cover any imperfections left by the old housing. Surface-mount LED fixtures are available in many styles, from flush mounts to more decorative options.
Tips for a Smooth Installation
- Use a Conversion Adapter: If you prefer not to mess with the junction box wiring, consider using a conversion adapter that fits into the existing GU24 base.
- Check for Compatibility: Ensure any new fixture or conversion kit you purchase is compatible with your ceiling type and wiring.
- Follow Local Electrical Codes: Always follow local building and electrical codes when replacing light fixtures to ensure safety and compliance.
Final Thoughts
Removing a GU24 light bulb base can seem daunting, but with the right approach and a bit of patience, it’s a manageable DIY project. By carefully removing the trim, housing, and disconnecting the wires, you can safely remove the old fixture and prepare for a new, modern lighting solution. Whether you opt for LED conversion kits, canless recessed lights, or surface-mount fixtures, you can enjoy brighter, more energy-efficient lighting in your home.
FAQs: Removing a GU24 Light Bulb Base
Quickly and safely learn how to remove a gu24 light bulb base with our easy, step-by-step guide. Get expert tips and FAQs answered here.
A GU24 light bulb base is a type of socket that uses a twist-and-lock mechanism rather than the common screw-in design. It has two prongs that lock into place when twisted into the socket, making it slightly different from standard light bulb bases.
To remove a GU24 base:
Turn off the power at the breaker to avoid electrical shock.
Remove the bulb by twisting it counterclockwise to unlock it from the socket.
Detach the trim by gently pulling it down and squeezing the spring clips to release it.
Unscrew the housing if it’s attached to the ceiling and pull it down.
Disconnect the wires in the junction box by unscrewing the wire nuts.
No, you don’t typically need to go into the attic. Most recessed light housings, including GU24 fixtures, can be removed from below. However, ensure that the power is off and follow the steps to remove the trim and housing carefully.
If the GU24 base is broken:
Turn off the power to the fixture at the breaker.
Remove any loose or damaged parts of the bulb or base.
Use needle-nose pliers to grip the remaining pieces of the base. Twist counterclockwise to unscrew it from the socket.
Check the socket for damage after removing the broken base. If the socket is damaged, consider replacing the fixture entirely.
There is a chance of minor damage, especially if the trim is stuck or the housing is tightly secured. Carefully removing the trim and housing can minimize this risk. If there is damage, it can usually be patched with drywall compound.
Yes, you can convert a GU24 fixture to LED lighting. You can use an LED conversion kit that screws directly into the existing GU24 socket. Alternatively, you can replace the entire fixture with canless recessed lights or surface-mount LED fixtures for a more modern look.
You may need the following tools:
Screwdriver (Phillips or flathead)
Needle-nose pliers
Ladder
Wire strippers (if you are disconnecting the wires)
Ensure that the power is turned off at the breaker. Check for any signs of loose or damaged wires, and proceed cautiously when handling electrical components.
If you’re not comfortable handling electrical work or if the fixture is difficult to remove, consider hiring a licensed electrician. Safety is the top priority when dealing with electrical fixtures.
Yes, you can use an adapter to convert the GU24 socket to a standard screw-in base. This allows for more bulb options without replacing the fixture. However, this may not be as efficient as upgrading to an LED system.
If you’ve encountered any unique challenges or have your tips for handling GU24 bases, feel free to share them!


