Learn how to remove a stripped screw effortlessly with our step-by-step guide. Removing a stripped screw can seem tricky, but it doesn't have to be. When dealing with a stripped screw, the first step is to make sure you have the right tools. Using a rubber band for extra grip or an extractor kit specifically designed for stripped screws can make the job much easier.
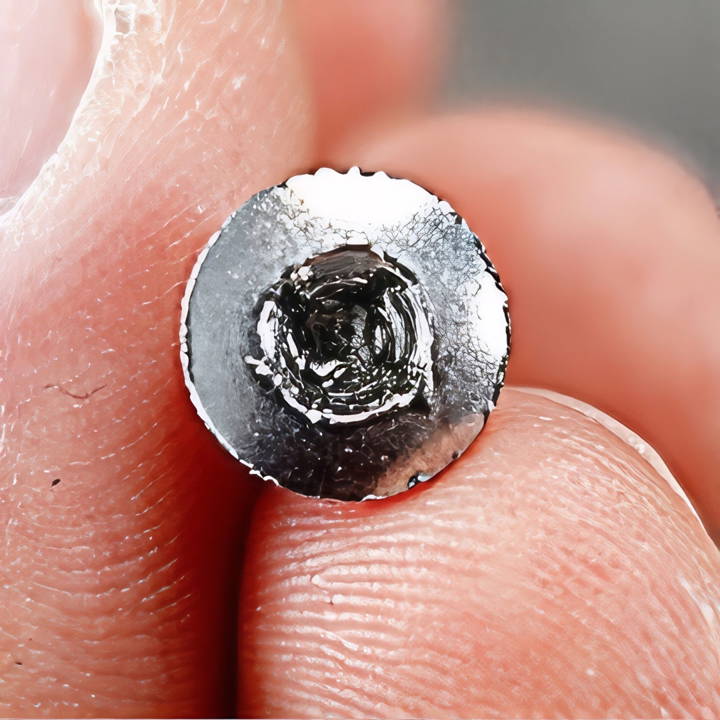
Each stripped screw presents its unique challenge, so it's helpful to stay patient and try different techniques. Sometimes, simply switching to a different screwdriver or applying some lubricant can make a big difference in getting the screw out. If one method doesn't work, don't give up; another approach might be the solution you need.
Why Do Screws Strip?
Screws may strip for several reasons:
- Incorrect Tools: Using a screwdriver that doesn't fit the screw head properly is the most common cause.
- Over-tightening: Applying too much torque can cause the screw head to become worn or deformed.
- Material Quality: Screws made from softer metals can strip more easily than those made from harder materials.
- Age and Wear: Over time, screws can become worn out, especially if they have been screwed and unscrewed multiple times.
The Impact of A Stripped Screw
A stripped screw can halt your project in its tracks. It can be frustrating and time-consuming to remove, and if not handled correctly, it can damage the material it's embedded in.
How to Identify a Stripped Screw
You'll know you have a stripped screw if:
- The screwdriver slips or spins freely when you try to turn the screw.
- The screw head has visible damage, such as rounded edges.
What You'll Learn
In this section, we'll guide you through the process of dealing with stripped screws. You'll learn how to remove them safely and effectively and how to prevent stripping screws in the future. By understanding the causes and solutions, you'll be better equipped to tackle this common problem with confidence.
Materials You'll Need
For this guide, you'll need:
- Thick Rubber Bands: Provides grip and fills the gaps in the stripped screw head.
- Screw Extractor Kit: A specialized tool designed for extracting stripped screws.
- Drill (with reverse function): For using the screw extractor kit.
Step by Step Instructions
Learn how to remove a stripped screw with our step-by-step guide. Discover the rubber band trick and use a screw extractor kit for effortless removal.
Method 1: The Rubber Band Trick
It might sound too simple to be true, but a thick rubber band can be your savior when dealing with a stripped screw. Here's how:
- Select a Thick Rubber Band: Thin ones won't offer enough grip.
- Position the Rubber Band: Place it over the stripped screw head.
- Apply Pressure and Turn: Use your screwdriver to press down on the rubber band and slowly turn the screw. Remember, patience is key. The rubber band might get worn, so you might need to reposition it for a better grip.
This method requires perseverance and works best for screws that are not excessively damaged.
Method 2: Using a Screw Extractor Kit
When the rubber band method doesn't cut it, it's time to bring out the big guns – a screw extractor kit. Here's a step-by-step guide:
- Select the Right Size Extractor: Match the extractor size with your screw.
- Set Your Drill in Reverse: This is crucial for the extractor to work correctly.
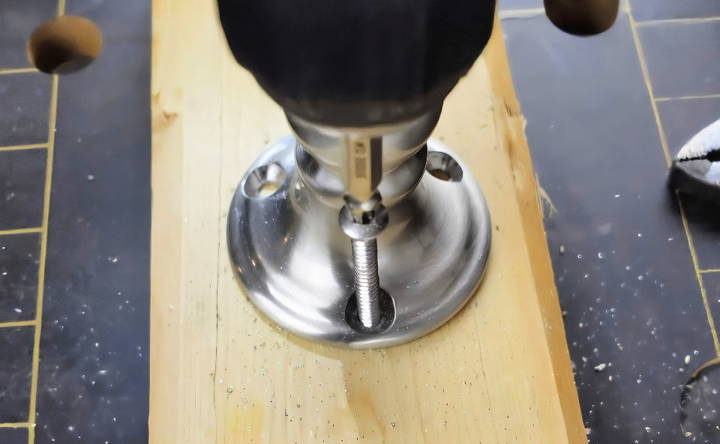
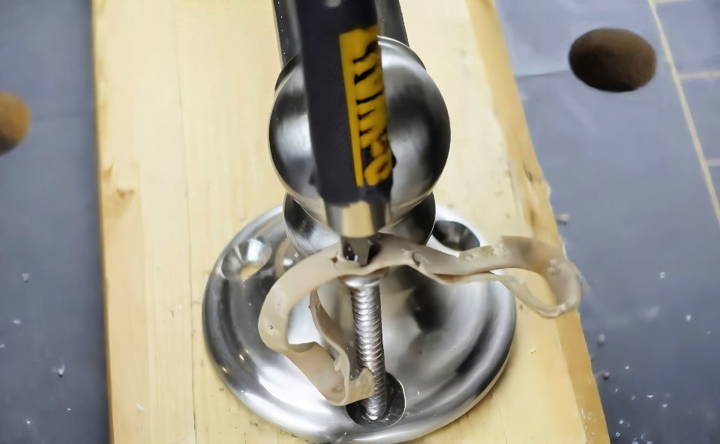
- Drill a Guide Hole: Using the extractor kit, drill a small guide hole into the head of the stripped screw. This provides a pathway for the extractor.
- Extract the Screw: With the drill still in reverse, switch to the extraction end of your tool and slowly drill into the guide hole. The screw should begin to loosen, allowing you to remove it.
This method is highly effective for stubborn screws and does not require significant physical strength, just a bit of patience and the right tools.
Additional Tips for Success
- Right Tools Make a Difference: Investing in a quality screw extractor kit can save time and frustration in the long run.
- Patience is Key: Whether you're using the rubber band method or the screw extractor, take it slow to avoid further damaging the screw.
- Safety First: Always wear protective eyewear when using drills or extracting screws.
Advanced Techniques for Removing Stripped Screws
When you encounter a stripped screw that resists all the standard removal methods, it's time to bring out the advanced techniques. These methods should be used with caution and precision to avoid further damage to the workpiece.
Making a New Drive Pattern
Sometimes, the best way to remove a stripped screw is to create a new drive pattern:
- Notching: Use a rotary tool with a cutting disc to cut a single-slot drive pattern into the head of the screw. This allows you to use a flathead screwdriver to turn the screw.
- Drilling: Carefully drill a small hole into the center of the screw head. Then, use a specialized screw extractor bit to grip and remove the screw.
Using Heat to Loosen Tight Screws
Heat can be an effective way to loosen a screw that's been sealed with a thread-locking compound or is corroded:
- Applying Heat: Use a soldering iron or a heat gun to apply heat directly to the screw head. The expansion of the metal can help break the bond.
- Safety First: Always wear protective gloves and glasses when using heat to prevent burns and injuries.
Chemical Aids
In some cases, chemicals can assist in the removal process:
- Penetrating Oils: Apply a penetrating oil to the screw and let it sit for several hours. This can help lubricate and loosen the screw.
- Adhesive Removers: If the screw is stuck due to adhesive, use a commercial adhesive remover to weaken the bond.
Professional Help
If you're not comfortable using these advanced techniques, or if the screw is in a sensitive or critical piece of equipment, it may be best to seek professional help. A skilled technician can remove the screw without causing damage to the surrounding area.
Advanced techniques need patience and a steady hand. Take your time; don't rush. With the right approach, even stubborn stripped screws can be removed.
Safety Precautions
When dealing with stripped screws, safety is paramount. The process can involve sharp tools and small parts, so it's important to take the necessary precautions to prevent injury.
Wear Protective Gear
Always start by wearing the right safety gear:
- Safety Glasses: Protect your eyes from metal filings and debris.
- Gloves: Use gloves to safeguard your hands from sharp edges and to improve grip.
Choose the Right Tools
Selecting the appropriate tools not only makes the job easier but also safer:
- Quality Screwdrivers: Ensure they fit the screw heads properly to avoid slippage.
- Clamps: Secure the workpiece to prevent movement while you work.
Work Area
Keep your work area clean and well-lit:
- Clear Space: Remove any unnecessary objects that could cause you to trip or distract you.
- Good Lighting: Ensure you have enough light to see what you're doing clearly.
Handling Tools
Be mindful of how you handle tools:
- Gentle Force: Apply force slowly and steadily to avoid sudden slips.
- Correct Usage: Use tools as they are intended to be used. Don't use a screwdriver as a chisel, for example.
Chemical Safety
If you're using chemicals like penetrating oils or adhesive removers:
- Ventilation: Work in a well-ventilated area to avoid inhaling fumes.
- Follow Instructions: Read and adhere to the product's safety instructions.
Electrical Safety
If you're using power tools or applying heat:
- Unplug: Ensure the power tool is unplugged when changing bits or not in use.
- Heat Caution: Be cautious when applying heat. Keep flammable materials away and use heat-resistant surfaces.
Know Your Limits
If you're unsure about how to proceed safely:
- Ask for Help: Consult someone with more experience or consider hiring a professional.
- Take Breaks: If you're feeling tired or frustrated, take a break. Mistakes are more likely to happen when you're not at your best.
By following these safety precautions, you can tackle the challenge of removing stripped screws without putting yourself at risk.
FAQs About How to Remove a Stripped Screw
Discover effective solutions in our FAQs about how to remove a stripped screw. Get step-by-step guidance for successful screw removal.
A stripped screw is one where the head has been worn down or damaged, making it difficult to remove with a standard screwdriver. This often happens when using the wrong size screwdriver or bit, applying too much force, or due to the screw’s age and wear.
You can use a rubber band to fill the gaps in the screw head, providing extra grip for your screwdriver. A piece of duct tape can also give you the friction needed to turn the screw. Additionally, steel wool or friction drops can be placed over the screw head to enhance grip.
Yes, if the screw head is raised above the surface, you can use locking pliers to grip the sides of the screw and turn it counterclockwise. Ensure the pliers are clamped tightly to avoid slipping.
Absolutely! A screw extractor kit is specifically designed for this purpose. It usually involves drilling a small hole into the head of the screw and then using the extractor to remove it. There are also multi-spline screw extractors and left-handed drill bits that can be very effective.
Avoid using excessive force or the wrong tools, as this can cause further damage to the screw or the material it's embedded in. Also, refrain from using methods that are too aggressive for delicate materials like plastic, as they can damage the material around the screw.
Final Thoughts
In conclusion, removing a stripped screw doesn't have to be frustrating. By following these simple and effective techniques, you can quickly learn how to get a stripped screw out. Remember to use the right tools and be patient to avoid further damage. Happy fixing!


