Understanding the basics before starting can make window replacement smooth and simple. I remember replacing my old living room window last summer. At first, I was overwhelmed, but clear steps and a few tools made it manageable. I'm here to share what I learned to help you through it, too.
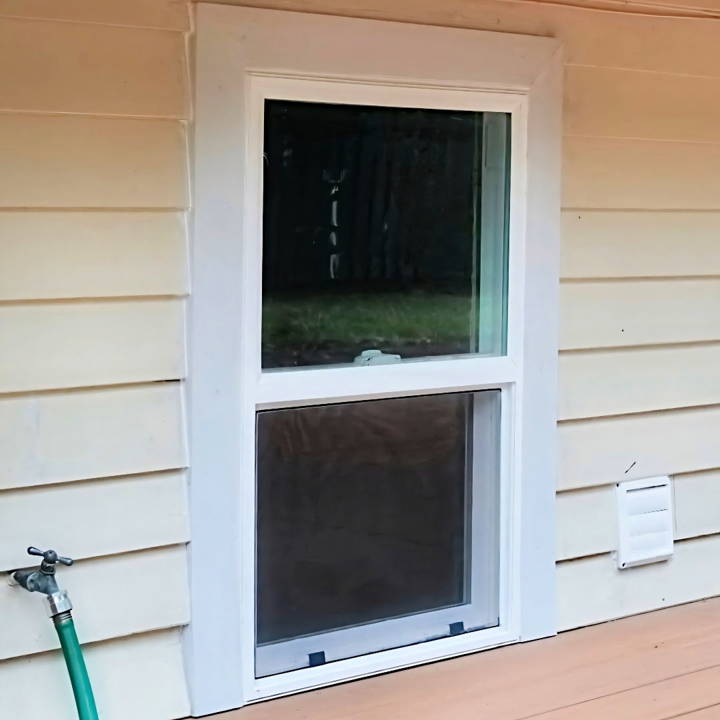
Start by gathering what you need: a replacement window, a crowbar, hammer, nails, measuring tape, and caulk. You'll first remove the old window carefully to avoid damaging the frame. Measure the opening before getting a new window to ensure it fits well. Detailed prep can save you a lot of time later. I'm helping with this; read on and learn how to replace a window like a pro with our step-by-step guide.
Materials and Tools Needed
Before we dive into the steps, let's talk about the materials and why each is important:
- New Windows: I selected double-pane windows for improved energy efficiency, which keeps your home warm in the winter and cool in the summer.
- Circular Saw and Multi-tool: These were essential for removing the old window and preparing the space for the new one.
- Safety Gear: Safety goggles and gloves protected me from sharp edges and flying debris.
- Flashing Tape: This is crucial for waterproofing the window frame, ensuring no water seeps through.
- Silicone Sealant: A 100% waterproof sealant is key for sealing the window in place, protecting it from the elements.
- Screws and Fasteners: GRK fasteners were used for securing the window due to their durability and low profile.
- Level: Essential for ensuring the window is perfectly aligned and installed straight.
- Trim Boards: I used PVC trim boards for a durable and aesthetic finish.
- Paintable Sealant: This is used to seal the edges of the trim and ensure a seamless look that can be painted to match the home.
Step by Step Instructions
Learn the easiest way to replace a window with our step-by-step guide. Follow our instructions for a smooth and successful window replacement.
1. Remove the Old Window
I began by carefully removing the old aluminum frame window. Using a circular saw, I cut around the frame, taking care not to damage the surrounding wall. In some hard-to-reach areas, a multi-tool made the job easier. Remember, the key here is patience and precision; you want to ensure a clean space for the new window.
2. Prepare the Opening
After removing the old window, I checked the opening for any damage. I applied flashing tape around the frame, starting with the bottom. Proper flashing is critical for preventing water ingress, a lesson I learned from prior research.
3. Test Fit the New Window
Before adding any sealant, I placed the new window in the opening to ensure a perfect fit. Adjustments at this stage are much easier than after you've begun sealing it in place.
4. Seal and Install the Window
Next, I applied a generous bead of silicone sealant around the opening and carefully placed the window into the frame. I then secured the window with screws, checking with a level that it was perfectly horizontal and vertical.
5. Apply Flashing Tape and Install Trim
With the window in place, I applied flashing tape to the sides and top, overlapping each piece to channel water away from the window. I then measured, cut, and installed the trim boards using a special fastening system designed for a clean, concealed finish.
6. Seal the Trim
To ensure a watertight seal around the trim, I applied a paintable sealant along the edges. I opted for a product that was not only waterproof but also paintable, allowing for a seamless integration with the rest of my home's exterior.
7. Paint (Optional)
Once the sealant dried, I had the option to paint the trim to match my home. I decided to wait on this step, but it's a great way to customize the look of your new window further.
Energy Efficiency Insights
Replacing windows can greatly affect your home's comfort and energy bills. Let's look at new window tech that boosts aesthetics and benefits the environment.
- Smart Windows: The Future of Energy Efficiency Smart windows represent a revolutionary step in energy-efficient home design. These windows adapt to weather conditions to optimize your home's heating and cooling. In the winter, they can harvest the sun's energy to warm your space, and in the summer, they reflect heat to keep your home cool. This adaptability means you can enjoy natural light without compromising on comfort or energy consumption.
- Solar Window Innovations Imagine a window that not only provides a view but also generates power. Solar window technologies are making this a reality. These windows can convert sunlight into electricity, offering a new way to power your home while reducing energy costs.
- Vacuum-Insulated Glazing Another cutting-edge technology is vacuum-insulated glazing. This type of window offers superior insulation by building a vacuum between two panes of glass, significantly reducing heat transfer. It's like having the thermal protection of a thermos right in your window.
- Aerogel-filled Windows Aerogel, known for its incredible insulating properties, is now being used in window designs. Windows filled with aerogel can block out extreme temperatures while still letting light pass through, providing excellent thermal insulation without darkening the room.
- Electrochromic Technology Electrochromic windows can change their tint with the touch of a button. This means you can control the amount of light and heat entering your home, enhancing privacy and reducing reliance on artificial lighting and air conditioning.
Using these technologies in your window replacement improves energy efficiency and supports sustainability, leading to savings and a more eco-friendly home.
Troubleshooting Tips for Window Replacement
Replacing a window can be a straightforward task, but sometimes, you might encounter issues that need a bit of troubleshooting. Here are some tips to help you overcome common problems:
- Measuring Mistakes One of the most common issues is incorrect measurements. Always measure the width and height of the window from different points, as walls can be uneven. If you find discrepancies, use the smallest measurement to ensure the new window will fit.
- Stuck Windows: If the old window won't budge, it could be painted shut. Gently score the paint seal with a utility knife. If it's still stuck, use a putty knife or a flat bar to pry it open carefully.
- Damaged Frames Discovering rot or damage on the window frame can be disheartening. If the damage is minor, use wood filler to repair it. For more significant damage, you may need to replace the entire frame.
- Insulation Issues: After installing the new window, check for drafts. If you feel air coming through, use weather stripping or expanding foam insulation to seal any gaps.
- Difficulty Opening or Closing New windows should open and close smoothly. If they don't, check for obstructions or misalignment. Adjust the hinges or tracks as needed to ensure smooth operation.
- Condensation Between Panes Condensation between the panes of double-glazed windows indicates a seal failure. Unfortunately, this usually means the insulated glass unit needs replacing.
- Hardware Problems Sometimes, new windows come with defective hardware. If locks or handles aren't working, contact the manufacturer for replacements.
Having patience and attention to detail can solve window replacement problems. If unsure, consult a professional to ensure the correct installation for better performance and longevity.
FAQs About How to Replace a Window
Learn how to replace a window with ease. Discover faqs, tips, and step-by-step guides for a smooth window replacement process.
Measuring for a new window is crucial. Measure the width and height of the existing frame in three places: top, middle, and bottom for width, and left, middle, and right for height. Use the smallest measurements to ensure a proper fit. If you’re unsure, consider watching a tutorial or consulting a professional.
Removing the old window involves several steps:
Carefully pry off the interior trim.
Cut any paint seals with a utility knife.
Remove the old window sashes.
Take out any parting beads or stops holding the frame.
If necessary, remove the old frame.
Be gentle to avoid damaging the surrounding wall
After the window is secured, you should:
Reapply the interior trim.
Caulk the exterior of the window to seal any gaps.
Apply paintable caulk around the interior trim for a clean finish.
Check the window’s operation to ensure it opens, closes, and locks smoothly.
To ensure a perfect fit for your new window, it's important to:
Double-check the measurements of both the window and the opening.
Consider any irregularities in the wall that may affect the fit.
Allow for a small gap around the window for expansion and insulation.
If you find rot or damage:
Remove the affected wood carefully.
Treat the area with a wood preservative.
Fill the void with a wood filler or replace the damaged section.
Ensure the frame is structurally sound before installing the new window.
Conclusion
With patience and clear steps, replacing your window becomes straightforward. Remember, careful preparation leads to success. Follow along, and these tips will assist you.


