Learn how to reupholster a chair with our step-by-step guide. Transform any chair with ease and give it a fresh, stylish look. It may sound like a complex project, but it's a DIY task that almost anyone can do with a little patience and the right tools. This guide covers every step, from removing the old upholstery to reassembling everything, so you'll be ready to turn your chair into a beautiful new piece.
Why Reupholster a Chair?
Reupholstering allows you to customize your furniture to match your decor without spending a fortune on new pieces. It's an excellent way to preserve well-constructed chairs that just need a facelift. Plus, the materials required are relatively inexpensive, and the skills you develop can be applied to other upholstery projects like benches and stools.
Tools and Materials You'll Need
Before you start, gather the following tools and materials to ensure a smooth process:
- Staple Remover or Flathead Screwdriver
- Staple Gun with Staples
- Spray Adhesive
- Fabric of your choice (ensure it's durable and suitable for upholstery)
- Scissors
- Tack Hammer (optional for securing staples)
- Measuring Tape
- Sharpie or Fabric Marker
- Screwdriver (for removing and reattaching the seat)
- Foam Padding (if the old foam needs replacing)
- Duster Cambric Fabric (for the underside of the seat)
- Hairdryer (optional, for speeding up paint drying if you choose to paint chair legs)
Step by Step Instructions
Learn how to reupholster a chair with our step-by-step guide. From disassembling to reassembling, master every step for a fresh look!
Step 1: Disassembling the Chair
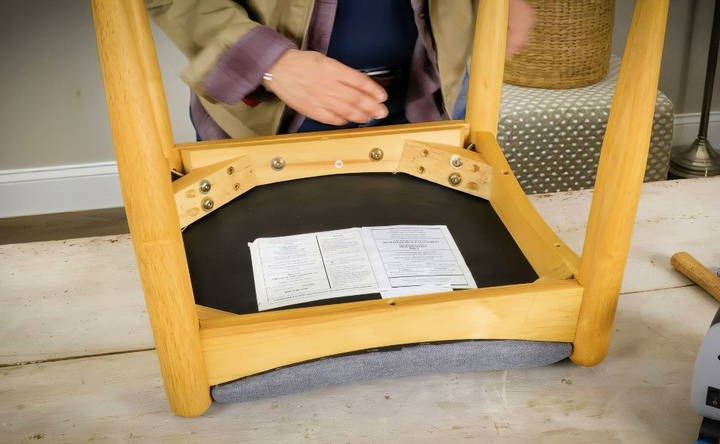
- Turn the Chair Upside Down: Place the chair upside down to access the screws that hold the seat to the frame.
- Remove the Seat: Most chairs have an underframe with screws holding the seat in place. Use a screwdriver to remove these screws carefully.
- Remove the Staples: Use a staple remover or flathead screwdriver to pull out all the staples holding the old fabric in place. Be patient—this can take a bit of time.
- Preserve the Duster Cambric Fabric: If the dust cover fabric (the fabric on the underside of the seat) is still in good condition, set it aside for reuse.
Step 2: Preparing the Seat and Fabric
- Assess the Padding: Check the condition of the foam padding. If it's in good shape, you can reuse it. If it's worn out or damaged, replace it with new foam.
- Use the Old Fabric as a Template: Lay out the old fabric on top of the new fabric. Use a Sharpie or fabric marker to trace the shape, ensuring you have enough fabric to cover the seat with extra room for stapling.
- Cut the Fabric: Cut the new fabric along the traced lines. Be sure to leave a few extra inches around the edges to pull the fabric taut when stapling.
Step 3: Attaching the New Fabric
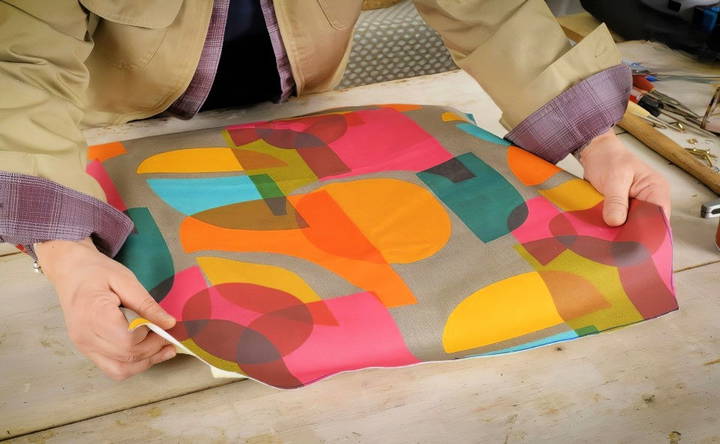
- Align the Fabric: Place the new fabric on a flat surface with the seat centered on top, ensuring that any patterns or designs are aligned as desired.
- Mark the Front of the Fabric: To keep track of the fabric's orientation, mark the front side with an "F" using a Sharpie. This will help ensure that your fabric aligns properly when attaching it to the seat.
- Secure with Spray Adhesive: Lightly spray the seat base with adhesive to prevent the fabric from shifting during the stapling process.
Step 4: Stapling the Fabric
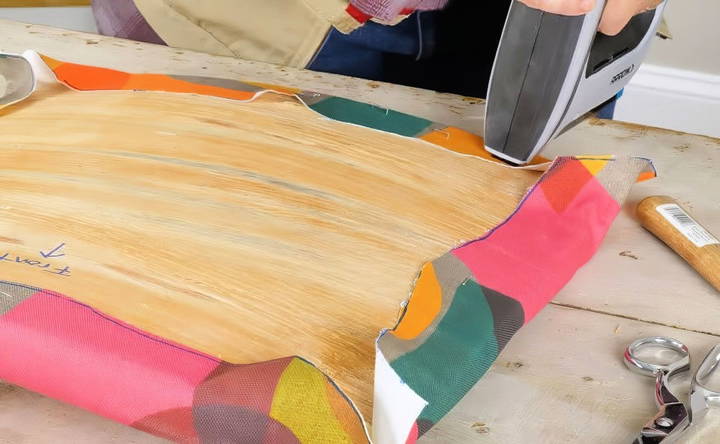
- Start with Opposing Sides: Begin by pulling the fabric tight over one side and place a staple in the center. Then, do the same on the opposite side, ensuring the fabric stays smooth and taut.
- Work Around the Seat: Continue stapling by alternating sides, pulling the fabric tight each time to avoid wrinkles. This approach helps keep the fabric evenly stretched.
- Handle the Corners: For a neat finish, fold the corners as if wrapping a present, tucking in excess fabric to minimize bulk. Secure these folds with additional staples.
- Trim Excess Fabric: Once the fabric is fully attached, use scissors to trim any excess material, being careful not to cut too close to the staples.
Step 5: Reattach the Dust Cover
- Position the Duster Cambric Fabric: Place the cambric fabric over the underside of the seat. If you're using the old one, align it to cover the same area.
- Staple the Dust Cover: Staple around the edges of the cambric fabric, making sure to avoid placing staples in the same spots as before to prevent the fabric from tearing.
Step 6: Reassemble the Chair
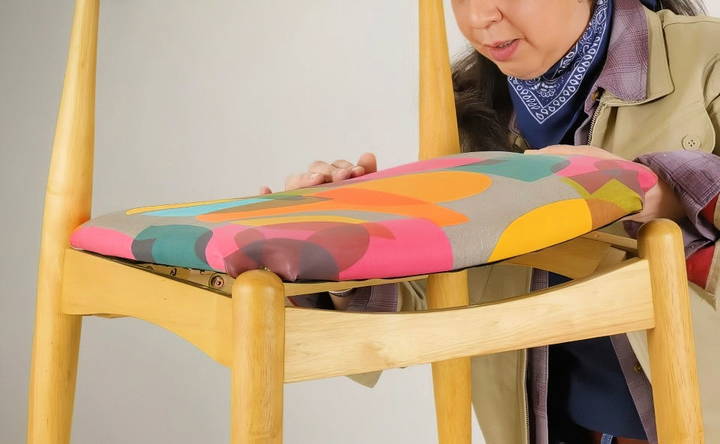
- Reattach the Seat: Position the seat back onto the chair frame, aligning the screw holes. Use a screwdriver to secure the seat with the original screws.
- Check for Stability: Ensure the seat is securely fastened and check the chair for any wobbles.
Optional Step: Painting the Chair Legs
If you want to refresh the look of the entire chair, consider painting the legs:
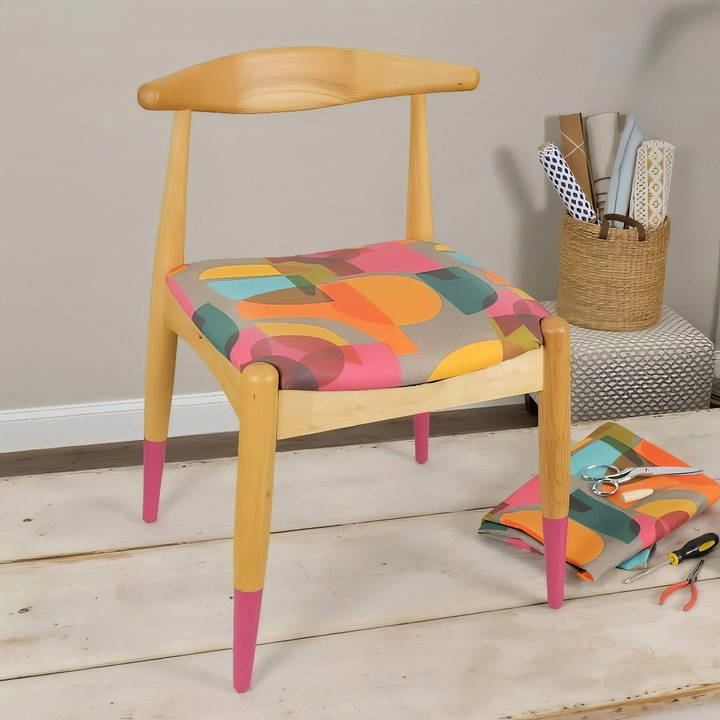
- Choose a Paint Color: A vibrant color like fuchsia or magenta can add a pop to your chair.
- Apply Paint: Use painter's tape to mark off the area you want to paint, typically around one-third of the leg for a balanced design.
- Let It Dry: Use a hairdryer to speed up the drying process if needed. Apply additional coats as necessary for even coverage.
- Remove Tape: Carefully peel away the painter's tape once the paint is dry to reveal crisp, clean lines.
Tips for Success
- Take Your Time: Don't rush through the process, especially when removing the old staples or aligning the new fabric.
- Practice on Scrap Fabric: If you're new to using a staple gun, practice on some scrap material before starting on your chair.
- Choose Durable Fabric: Upholstery fabric comes in various weights. Opt for a thicker fabric that can withstand regular use.
- Inspect the Chair Frame: While the seat is removed, check the chair frame for any loose joints or damage. Tighten any loose screws to ensure the chair remains sturdy.
Final Thoughts
Reupholstering a chair is a creative DIY task that offers a fresh update for your furniture. With a bit of time, patience, and creativity, you can transform a dated chair into a statement piece that complements your home decor. The skills you learn can also be applied to other projects, such as benches or stools, making reupholstering a valuable addition to your DIY repertoire. Happy crafting!
By following this guide, you'll be able to confidently tackle your own reupholstery projects and enjoy the satisfaction of bringing old furniture back to life. And remember, if you make a mistake, it's easy to start over—just pull out a few staples and try again!
FAQs About Reupholstering a Chair
Get answers to common questions about reupholstering a chair, including costs, materials, and tips for a successful DIY project.
High-density upholstery foam is ideal for reupholstering a chair. It provides comfort and durability, especially for frequently used furniture. Look for foam with a density rating of at least 2.5 lbs/ft³ for long-lasting support.
Use staples that are 1/4-inch to 3/8-inch long for attaching fabric to the seat base. These lengths ensure a secure hold without penetrating too deeply into the seat or frame.
A sturdy hardwood like oak, maple, or birch is typically best for a chair base. These woods provide the necessary strength to support the seat and the staples used during reupholstering.
Use a spray adhesive to secure the foam to the seat base. Lightly spray both the foam and the seat base before pressing them together. This prevents the foam from shifting while you re-cover the chair with fabric.
Yes, the old fabric is an excellent guide for cutting your new fabric. Lay it flat on the new material, trace around it with a marker, and cut it out, allowing extra space for stapling. This ensures an accurate fit.


