Screen printing at home can be a fun and creative activity. This guide will help you understand the basic steps of how to screen print at home. You'll learn how to gather the right materials, set up your working area, and prepare your design. With just a few simple supplies and a bit of patience, you can make your own unique prints on t-shirts, bags, and more.
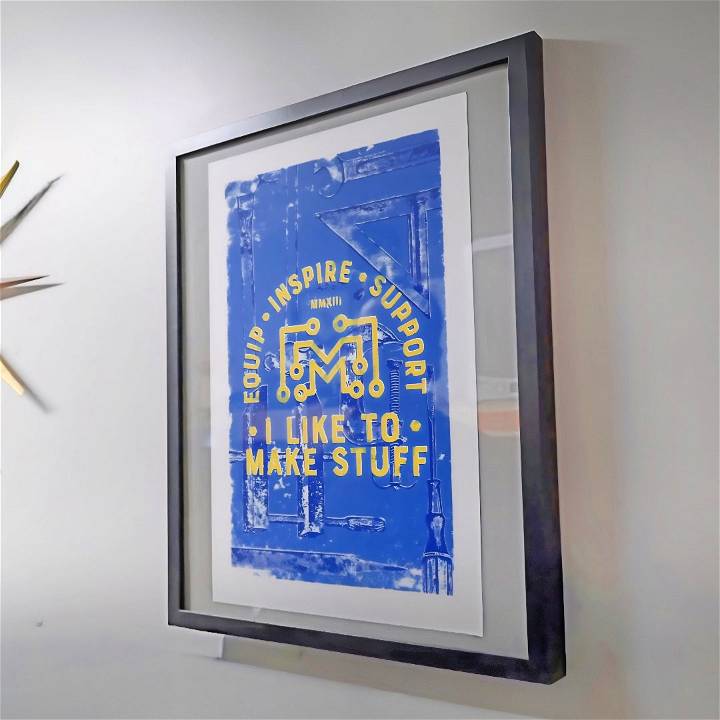
Become increasingly popular due to its cost-effectiveness and personalized results, DIY screen printing can be an accessible and creative venture for many individuals. Ready to start? Let’s dive deeper into the materials you will need in the next section and make screen printing an enjoyable experience for you!
The Materials - Why Each Is Critical
Discover the critical role of the screen, emulsion, transparency film, exposure unit, washout station, inks, and printing surfaces in "the materials - why each is critical."
1. Screen and Mesh
The heart of screen printing lies in its screen. It's a mesh stretched over a frame, which acts as a stencil for your design. The type of mesh (counted in threads per inch) directly affects the detail and quality of your print. For beginners, a 160 mesh count is versatile enough for both detailed and larger designs.
2. Emulsion and Scoop Coater
The photo-sensitive emulsion is applied to the screen to make the stencil. I used a scoop coater for an even layer. This step was crucial, as the quality of your stencil dictates the final print's clarity and sharpness.
3. Transparency Film
I printed my design on transparency film. This film acts as a mask during the exposure process, allowing light to harden the emulsion everywhere but the design, which gets washed out to leave negative space for the ink to pass through.
4. Exposure Unit (or Alternative)
Exposing the emulsion-covered screen to UV light hardens it, except where the design blocks the light. This makes the stencil. I started with a DIY setup, using an LED light, which was affordable and effective.
5. Washout Station
After exposure, the screen needs to be washed to reveal the stencil. I used a simple setup with a hose but noted that a pressure washer would make this process quicker and cleaner.
6. Inks and Squeegee
The choice of ink can vary based on the substrate you're printing on. I started with water-based ink for its easy cleanup. The squeegee is essential for applying even pressure to push ink through the stencil onto your printing surface.
7. Printing Surface
I practiced on various surfaces, from t-shirts to thick poster paper. Each material interacts differently with the ink, teaching me the importance of testing.
Step by Step Instructions
Learn how to make stencils, print, and overcome challenges. Expand your skills and reflect on your journey with advice for beginners.
Making the Stencil
After settling on a design, I printed it onto a transparency film. I coated my screen evenly with photo-sensitive emulsion using the scoop coater, then left it to dry in a dark room. Once dry, I placed the film on the screen and exposed it to UV light. Testing was key here, as different lights and emulsions have specific exposure times. My first screen took a few tries to get right, highlighting the importance of patience and practice in screen printing.
The Printing Process
With my stencil ready, I clamped the screen over my printing surface. I applied a generous amount of ink across the top of the screen and used the squeegee to press the ink through the mesh. The first few tries were admittedly imperfect, teaching me the value of pressure consistency and angle. However, every print got better, showcasing the rewarding nature of this craft.
Overcoming Challenges
One of my biggest challenges was alignment, especially when attempting multi-color prints. Learning how to use registration marks was a game-changer. Another hurdle was washing out the screens without damaging the stencil. It took a few attempts to understand the right pressure and technique.
Expanding My Skills
As I grew more comfortable with the basics, I began experimenting with different inks, mesh counts, and substrates. Each project brought its unique challenges and learnings, slowly building my confidence and skill set.
Reflecting on My Journey
Looking back on my screen printing journey, I'm amazed at how far I've come from my first, slightly blurry print to making detailed, multi-color designs. This process taught me not just the technical skills of screen printing but also the value of patience, precision, and creativity.
Advice for Fellow Beginners
Start simple, and don't be discouraged by initial failures. Each mistake is a learning opportunity. Invest time in understanding the materials and their purpose. Most importantly, enjoy the process and let your creativity flow. Screen printing opens up a world of customization and artistic expression. Embrace it!
Advanced Techniques for Experienced Printers
For those who have mastered the basics of screen printing, exploring advanced techniques can open up new possibilities for creativity and precision. Here’s a guide to some sophisticated methods that can elevate your screen printing projects.
Multicolor Printing
Multicolor printing allows you to make vibrant designs with more than one color. To achieve this:
- Prepare separate screens for each color.
- Align the screens accurately to ensure the colors register correctly.
- Use test prints to adjust the alignment before printing on the final material.
High-Detail Stenciling
Making stencils with high detail involves:
- Using a high-resolution artwork to capture all the details.
- Choosing the right screen mesh count; higher counts are better for intricate designs.
- Ensuring your emulsion is evenly spread and properly cured to prevent bleeding.
Special Effects Inks
Special effects inks can add texture and visual interest to your prints. Examples include:
- Glow-in-the-dark inks for designs that light up at night.
- Metallic inks for a shiny, reflective finish.
- Puff inks that rise when cured make a 3D effect.
Screen Exposure Times
Proper exposure is crucial for screen longevity and print quality. Consider:
- The type of emulsion used, as different types require different exposure times.
- The strength of your exposure unit; more powerful units will expose screens faster.
- Ambient conditions, such as humidity and temperature, can affect exposure.
Troubleshooting Common Issues
Experienced printers know that issues can arise. Here’s how to tackle them:
- If the ink is not transferring well, check the off-contact distance and squeegee pressure.
- For blurred edges, ensure the screen is taut, and the substrate is flat.
- Pinholes can be prevented by checking the screen for defects before printing.
Experienced printers can expand DIY screen printing limits with advanced techniques. Practice and experimentation help perfect unique projects.
Maintenance and Care for Screen Printing Equipment
Taking care of your screen printing equipment is essential for producing high-quality prints and extending the life of your tools. Here’s a straightforward guide to maintaining your screen printing gear.
Cleaning Screens After Use
After printing, remove any excess ink from the screen. Use a squeegee to scrape it off. Then, wash the screen with a gentle cleaner suitable for the type of ink you’ve used. For water-based inks, warm water may suffice. For plastisol inks, you’ll need a specialized cleaner.
Storing Screens Properly
Store your screens in a dry, cool place away from direct sunlight. Sunlight can harden the emulsion, making the screen unusable. Keep them vertical if possible to avoid warping.
Keeping Squeegees in Shape
Wipe your squeegees clean after each use. Store them flat or hanging to prevent the blade from becoming curved or distorted, which can affect your print quality.
Caring for the Press
Regularly lubricate moving parts of your press with a suitable lubricant. Check for loose bolts and wear and tear on a monthly basis. Replace parts as necessary to ensure smooth operation.
Managing Inks
Keep lids on ink containers when not in use to prevent them from drying out. Store them in a cool, dark place to maintain their consistency and color quality.
Emulsion and Exposure Units
Check your exposure unit’s bulbs regularly for any signs of wear. Replace them as needed to maintain consistent exposure times. Keep your emulsion in a cool, dark environment and tightly sealed to prevent premature hardening.
Follow these steps to keep your screen printing gear in prime shape for future projects. Regular care enhances print quality and saves you time and money.
FAQs About DIY Screen Printing
Explore faqs about DIY screen printing: learn essential tips, techniques, and insights for successful home screen printing projects.
Mix the emulsion with the sensitizer as per the instructions. Apply a thin layer of this mixture to both sides of the screen with a scoop coater or squeegee. Let it dry in a dark room. Once it’s dry, expose it to light to harden the emulsion except where your design is placed, making a stencil.
Place your prepared screen over the printing surface. Pour ink onto the screen and use the squeegee to press the ink through the mesh onto your material. Make sure to apply even pressure and cover the entire design area. Lift the screen off carefully to avoid smudging.
Common issues include ink bleeding, which can be solved by using a thicker emulsion layer or a higher mesh count screen. If the ink is not passing through the mesh, ensure the screen is not clogged and that the emulsion has been properly exposed. For fuzzy edges, make sure the screen is making good contact with the printing surface.
To ensure your design is properly aligned, first, mark the center point of your printing surface. Then, use a ruler or a T-square to align your frame accordingly. You can also make registration marks on your screen that correspond to marks on your printing surface. This will help you place the screen accurately every time.
Yes, screens can be reused. After printing, clean the screen thoroughly with water and a soft brush to remove all ink. If you want to remove the emulsion stencil, use a screen opener or emulsion remover. Apply it to both sides of the screen, scrub gently, and rinse. Once the screen is clean and dry, you can apply a new layer of emulsion for your next design.
Final Thoughts
Wrapping up, learning how to screen print at home can be a rewarding and enjoyable experience. This beginner's guide has covered DIY screen printing techniques, tips, and essential steps for success. By following these steps, anyone can make unique and personalized prints without the need for professional equipment. Explore your creativity and start your screen printing journey today!


