Staining concrete can completely change the look of your floors and patios. This technique proves to be long-lasting and offers a touch of style to any space. Whether it's indoor floors or outdoor patios, DIY concrete staining can enhance the aesthetics. The process involves applying a specialized stain that penetrates the concrete surface, giving it a rich and permanent color.
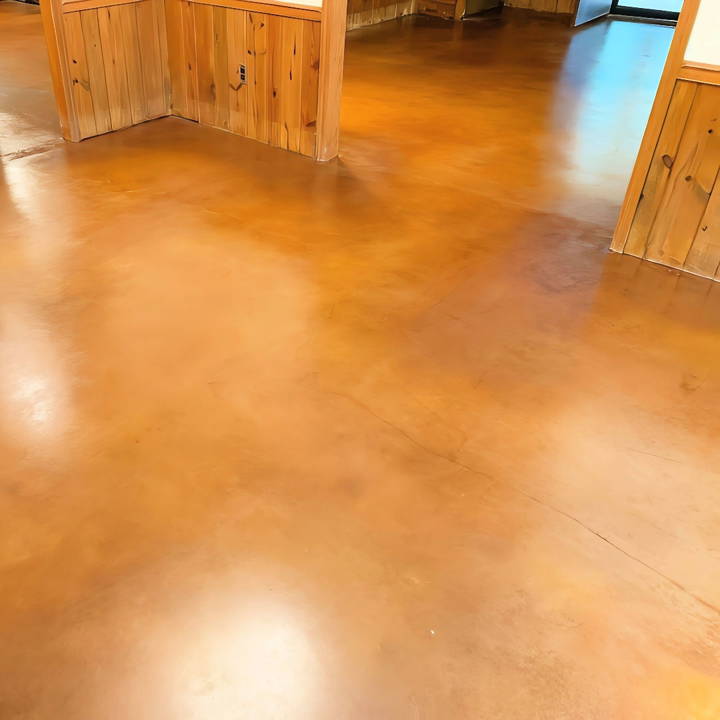
Many people choose stained concrete because it is both visually appealing and practical. The maintenance is minimal, and the stained surface is resistant to fading or peeling. Knowing how to stain concrete properly ensures that your floors and patios look their best.
Ready to dive deeper? Continue to the next section and learn how to build beautiful surfaces with ease.
Materials Needed and Why
- Floor Grinder or Sandpaper: Essential for cleaning the floor and opening pores in the concrete. A grinder is faster but sandpaper can work for smaller spaces.
- Vacuum with HEPA Filter: Post-grinding, you'll need to remove all dust and particles to avoid imperfections in the staining process.
- Concrete Stain: I chose an acetone-based stain for quicker drying times, but water-based stains are a safer option for indoor use and less experienced DIYers.
- Sealer (Water-based): To protect the stain and enhance the floor's appearance.
- Pump Sprayer: For an even application of both the stain and sealer.
- Protective Gear: Including masks (especially if using acetone-based products), goggles, and gloves for safety.
- Plastic Sheeting and Tape: To protect walls and any other surfaces from stain splashes.
Step by Step Instructions
Learn how to stain concrete with our step-by-step instructions. Clean, stain, and seal your concrete effectively for long-lasting results.
Step 1: Cleaning and Opening the Concrete Pores
The first critical step I took was ensuring the concrete was impeccably clean and ready to absorb the stain. Given that the basement floor was smooth yet dirty, it lacked the porosity necessary for the stain to adhere and penetrate effectively. I tackled this challenge by using a walk-behind floor grinder, equipped with diamond polishing pads, to both clean and open up the pores of the concrete. The difference in the floor's appearance, even before staining, was night and day – it went from looking uniformly gray to showcasing a more textured, lively surface.
Note: It's crucial to vacuum thoroughly after this step to ensure no dust or debris interferes with the staining process.
Step 2: Applying the Stain
With the floor prepared, I moved onto staining. Opting for an acetone-based dye for its quick drying time was a decision based on experience, but I caution beginners to consider water-based stains for better indoor air quality and easier cleanup. Regardless of the type, the application method remains similar. Using a pump sprayer, I applied the stain evenly across the floor, taking care to maintain consistent motion to avoid pooling or blotching.
Expert Tip: Test the stain in an inconspicuous area first to ensure it's the color and saturation you desire.
Step 3: Sealing the Deal
After letting the stain dry completely, which varies by product, I applied a water-based sealer using the same pump sprayer technique. The sealer not only protects the floor from wear and tear but also enhances the depth and vibrancy of the stain beneath it. I applied three coats, allowing adequate drying time between each, to ensure a durable, lasting finish.
Personal Reflections and Recommendations
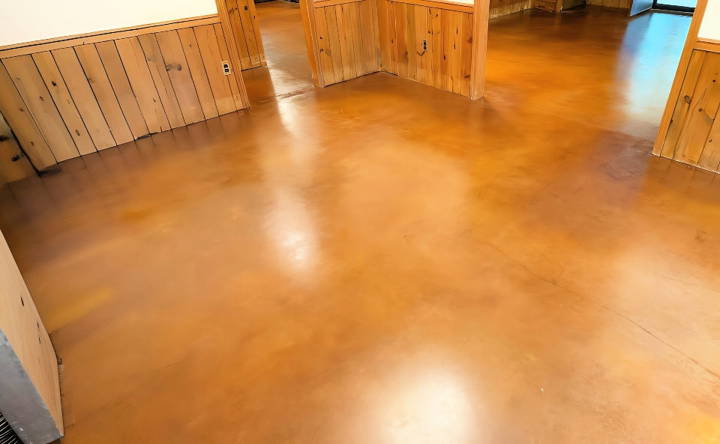
The final result was a beautifully stained concrete floor that far exceeded my initial expectations. The once dull and neglected basement floor was now a point of interest and conversation, its rich tones and unique variegations adding character to the space.
For those considering this project, here are a few additional tips based on my experience:
- Ventilation is Key: If using acetone-based products, ensure the area is well-ventilated to avoid inhaling fumes.
- Patience Pays Off: Take your time with each step, especially cleaning and sealing, as rushing can lead to subpar results.
- Embrace Variations: The beauty of stained concrete lies in its unique variations; embrace the imperfections and natural look it provides.
Troubleshooting Common Issues with Concrete Staining
When staining concrete, achieving the perfect finish can sometimes be a challenge. Here are some common issues you might encounter and how to address them effectively:
Uneven Coloration
- Cause: Uneven coloration can occur if the concrete surface is not uniformly absorbent, which leads to a mottled appearance.
- Solution: To prevent this, ensure the concrete is clean and free of any previous coatings or residues. A uniform surface profile is key for even stain absorption.
Blotchiness
- Cause: Blotchiness can result from over-application of the stain or uneven spreading.
- Solution: Apply the stain in thin, even coats using a sprayer and then work it into the concrete with a brush to avoid pooling.
Poor Adhesion
- Cause: Stain may not adhere well if the concrete surface is too smooth or has not been properly prepared.
- Solution: Properly profile the surface by cleaning and etching to open up the pores of the concrete, allowing for better stain penetration and adhesion.
Stain Sealer Issues
- Cause: Sealer problems such as bubbling, peeling, or discoloration can arise from improper application or incompatible products.
- Solution: Ensure the stained surface is completely dry and clean before sealing. Apply the sealer in thin, even coats, and use products that are compatible with the stain.
Light Coloring
- Cause: Light coloring can happen if the stain is not left on the surface long enough to penetrate deeply.
- Solution: Allow the stain to sit for the recommended time before neutralizing and rinsing. This will help achieve a richer, more vibrant color.
Successful concrete staining requires proper preparation. Always test a small area first. If problems persist, consult a professional for assessment and correction.
Safety Precautions for Concrete Staining
When undertaking a concrete staining project, safety should be your top priority. Here's a comprehensive guide to the safety precautions you should follow to ensure a safe and successful staining process:
Personal Protective Equipment (PPE)
Discover essential PPE tips for safety, including ventilation, handling chemicals, using equipment, and preparing for weather. Ensure maximum protection daily.
Always Wear:
- Eye protection: to shield your eyes from splashes.
- Waterproof gloves: to protect your hands from chemicals.
- Long-sleeve shirt and long pants: to cover your skin and prevent irritation.
- Closed-toe shoes: to protect your feet from spills and drops.
Ventilation
- Work in well-ventilated areas to avoid inhaling fumes, especially when using acid-based stains.
- If you're indoors, open windows and use fans to circulate air.
- For outdoor projects, ensure the area is open and air can move freely.
Preparing the Area
- Protect surfaces and landscaping around your work area with drop cloths to prevent accidental staining.
- Use painter's tape to cover areas you don't want to stain.
Handling Chemicals
- Read the manufacturer's instructions carefully before using any stain products.
- Use acid-based stains with caution as they can cause skin and eye irritation.
- Consider water-based acrylic stains for indoor projects as they typically have lower volatile organic compound (VOC) content and are safer for enclosed spaces.
Using Equipment
- When using spray equipment, wear a NIOSH-approved respirator to prevent inhalation of airborne mist.
- Ensure all equipment is in good working condition and you're familiar with its operation.
Weather Considerations
- Plan outdoor staining projects for dry days to prevent rain from washing away the stain before it sets.
- Avoid staining in direct sunlight or high temperatures to prevent uneven drying and splotchiness.
Follow these safety measures to reduce risks and ensure your concrete staining project is successful and safe. Proper preparation makes the process smoother and more enjoyable.
FAQs About How to Stain Concrete
Discover essential FAQs about staining concrete, including techniques, tips, and safety precautions for a flawless finish.
There are two main types of concrete stains: acid-based and water-based. Acid-based stains react chemically with the concrete to build a permanent bond, resulting in rich, translucent tones. Water-based stains provide a broader range of colors and are easier to apply. Consider the desired finish and the location of the concrete when choosing your stain.
Staining concrete can be a DIY project if you’re comfortable with the process and have the necessary tools. However, if you’re looking for more intricate designs or are not confident in handling acid-based stains, hiring a professional might be a better option. Remember, mistakes can be hard to fix once the stain is applied.
Maintaining stained concrete is relatively simple. Regularly sweep or dust mop to remove debris. For indoor surfaces, occasional damp mopping with a neutral cleaner is recommended. Avoid using harsh chemicals that can damage the sealer. Reapply sealer as needed, typically every few years, to maintain the protective layer.
Safety is paramount when working with concrete stains, especially acid-based ones. Always wear protective gear including gloves, goggles, and a respirator mask to protect against fumes. Ensure the area is well-ventilated, and keep children and pets away from the workspace. If you're using an acid-based stain, have a baking soda and water solution ready to neutralize any spills immediately.
The time it takes to stain concrete can vary depending on the size of the area and the complexity of the project. Generally, the staining process itself can be completed within a day. However, you must allow the stain to dry and react with the concrete, which can take from 4 to 24 hours. After staining, you should wait at least another 24 hours before sealing the concrete. Remember, the concrete must be fully cured, which typically takes between 21 and 28 days for new slabs, before beginning the staining process.
Conclusion:
Wrapping up, learning staining concrete is an affordable way to transform your floors and patios. By following the steps in this guide on how to stain concrete, you can achieve professional-looking results. Explore your creativity and give your spaces a fresh look with stain options that suit your style. Happy staining!


