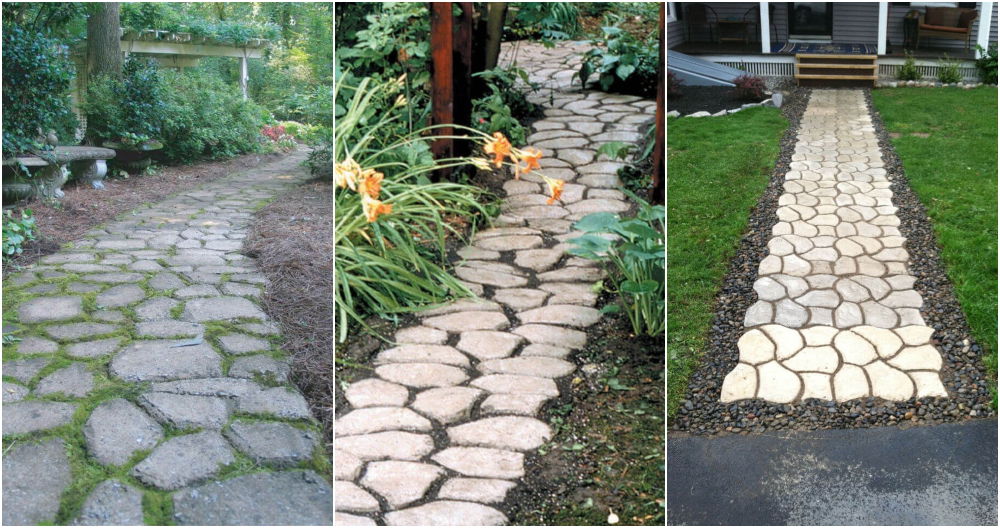
Making a stamped concrete walkway can seem a bit daunting, especially if it's your first time working with concrete. I remember the day I decided to embark on this journey, feeling both excited and a little nervous. However, with the right guidance and a step-by-step process, it's possible to achieve amazing results that enhance the appeal of your yard.
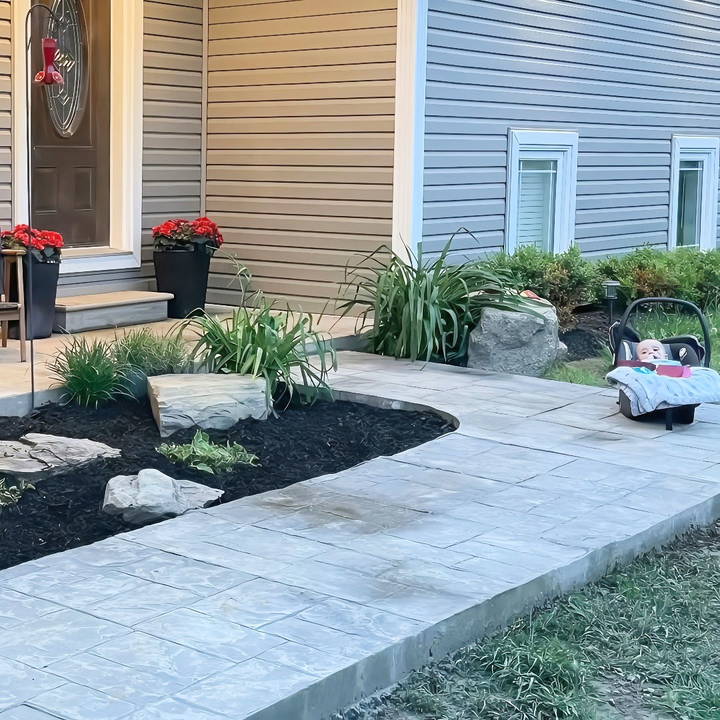
Today, I'm excited to walk you through my personal experience and guide you through each stage of this DIY adventure, ensuring you have all the insights and practical tips necessary to build your own stunning stamped concrete masterpiece.
Step by Step Instructions
Learn how to stamp concrete with our step-by-step guide, covering everything from planning and design to curing and finishing for a perfect result.
Planning and Preparation: Setting Up for Success
Proper planning and preparation are essential before starting the actual concrete work. This includes designing your walkway, measuring the space, and gathering the necessary materials.
Designing Your Walkway
One of the first steps I took was to sketch out a clear plan. This involved determining the shape and dimensions of my walkway. I opted for a straight path leading up to my garden, making sure to leave enough width for comfortable navigation while accommodating any landscaping features.
Materials You'll Need
The choice of materials can significantly impact the success of your project. Here is a list of what I used, along with reasons why they're necessary:
- Concrete Mix: The foundation of your project. I chose a mix with small rocks for added structural support.
- Stamped Mats: These are crucial for making the desired pattern. Though pricey, I invested in one good stamp, making sure to rotate for pattern consistency.
- Concrete Release Powder: Essential for allowing the stamp to release easily from the concrete, preventing the pattern from sticking.
- Wire Mesh: To reinforce the concrete and reduce cracking over time.
- 2x4 Boards: These served as both forms and tools for leveling the concrete surface.
- Shovels and Wheelbarrows: Critical for mixing and transporting the concrete.
- Plastic Bags: A budget-friendly option to replicate textured concrete skin.
- Bucket and Broom (for improvisation): Creative solutions when lacking professional tools like a flick brush.
Preparing the Site
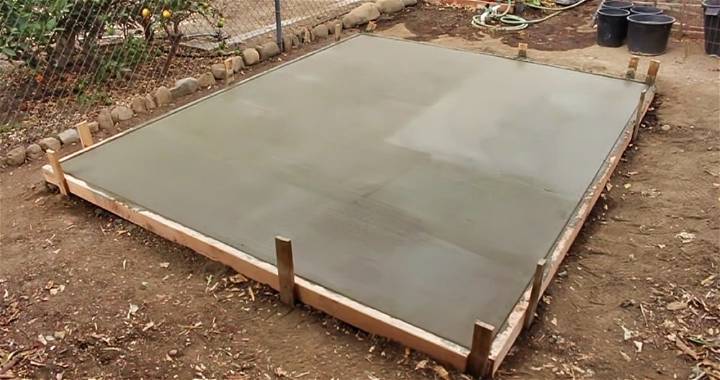
Once the design was final and materials were secured, I began preparing the site. This involved clearing vegetation, leveling the ground, and setting up the forms using my 2x4s. In my form-building journey, I learned the importance of ensuring the forms are perfectly aligned and secure, as they shape the ultimate structure of your concrete path.
Mixing and Pouring the Concrete
With my site prepared, the next significant phase was mixing and pouring the concrete. Here's how I approached it.
Mixing Concrete
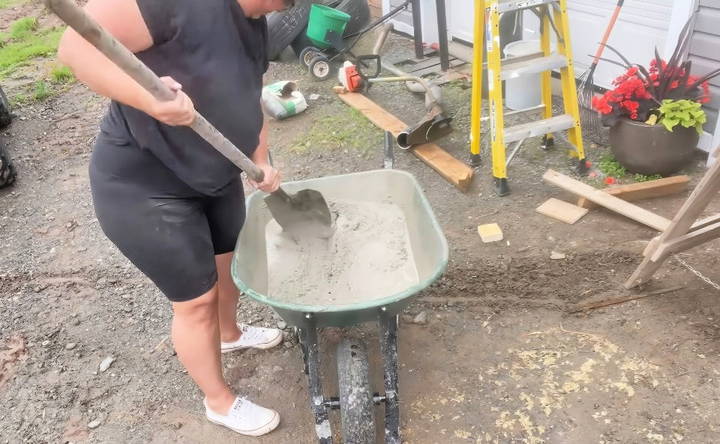
Mixing the right consistency of concrete is crucial. I aimed for a pudding-like texture—not too thick nor too runny. This balance ensured that the concrete could fill in the detailed patterns of the stamp while maintaining structural integrity. I opted to mix my concrete manually using bags, as the project scale was manageable. Having a helper made the process enjoyable and efficient, ensuring we maintained the right consistency throughout.
Pouring and Leveling
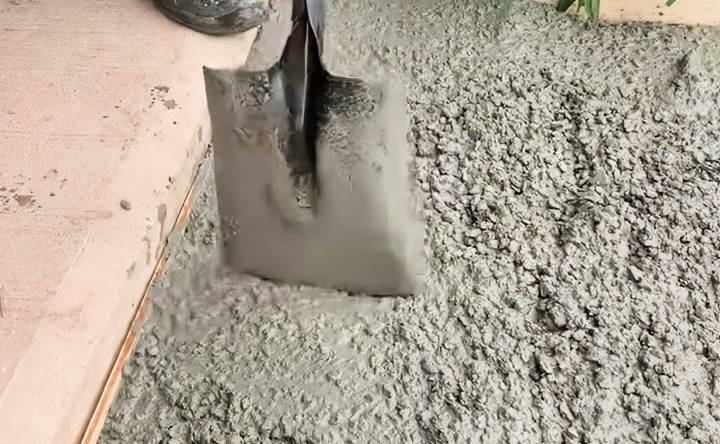
With my concrete mixed, it was time to pour it into the forms. Each section was filled in manageable portions, about two feet in length. As I filled the forms, I used my shovel to vibrate and settle the concrete, which helped eliminate air bubbles and ensured complete adherence to the ground.
Once nearly filled, using the 2x4, I screeded the surface by dragging it across the pour while applying slight pressure. This technique not only brought up the smooth finish I wanted but also settled the aggregates just below the surface.
Introducing Patterns: The Art of Stamping
Making those appealing patterns in concrete wasn't just about aesthetics; it was an art form that had its own rhythm and timing.
Timing the Stamping
One of the key lessons I learned was understanding the perfect timing to start stamping. The concrete must appear dry on the surface but still soft enough to hold the stamped impression. Initially, I stamped a section too early and learned the hard way. It's vital to observe the dryness and make sure there's no visible water before stamping.
Using a Plastic Bag for Texture
I stumbled upon a great tip online to use a plastic bag to add a slight texture to the concrete, replicating a concrete skin. This trick proved to be extremely cost-effective, allowing the first layer of texture to appear seamlessly natural.
Stamping the Concrete
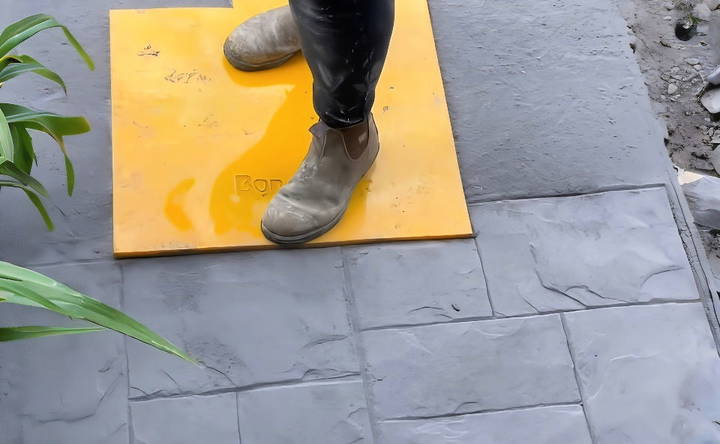
For stamping, I generously applied concrete release powder, ensuring the stamp wouldn't stick to the fresh concrete. Using a single stamp, I carefully laid it down and applied even pressure, then gently lifted and repositioned it for the next section. This careful approach helped maintain a consistent pattern throughout the walkway.
Curing and Finishing Touches
After stamping, my focus shifted to the curing process and adding any final touches to perfect the pathway.
Curing the Concrete
The stamped concrete needs time to cure. I covered it lightly with plastic sheets to protect it from direct sunlight, which could cause rapid drying and unwanted cracking. This curing process spans about 24-48 hours, depending on weather conditions.
Removing Forms and Sealing
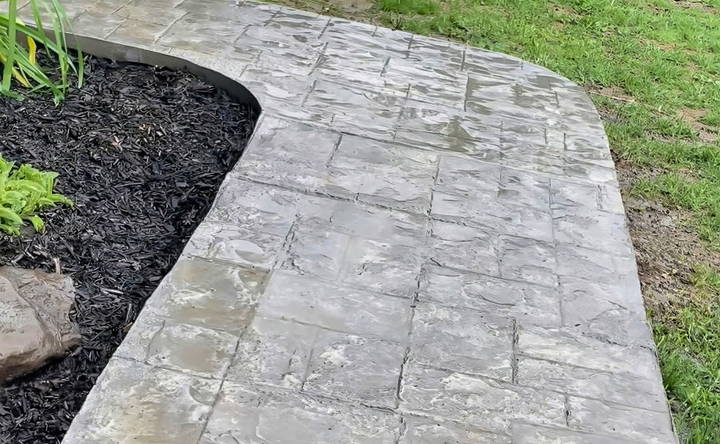
Once the concrete was dry to the touch, I carefully removed the forms and cleaned the surface to remove any remaining release powder. Finally, sealing the concrete is critical to protect it and enhance its color. A good quality concrete sealant not only provides a shiny finish but also adds durability to the stamped concrete.
Common Mistakes and How to Avoid Them
When working on a DIY stamped concrete project, it's easy to make mistakes that can affect the final result. Here are some common mistakes and tips on how to avoid them:
Improper Site Preparation
- Mistake: Not preparing the site properly can lead to uneven surfaces and poor drainage.
- Solution: Ensure the ground is level and compacted. Remove any debris and use a gravel base to improve drainage.
Incorrect Concrete Mix
- Mistake: Using the wrong concrete mix can result in weak or crumbly concrete.
- Solution: Follow the manufacturer's instructions for the correct mix ratio. Use high-quality materials and mix thoroughly.
Inadequate Stamping Timing
- Mistake: Stamping too early or too late can cause poor impressions.
- Solution: Wait until the concrete is firm enough to hold the stamp but still pliable. Test a small area first to ensure the timing is right.
Uneven Stamping Pressure
- Mistake: Applying uneven pressure can lead to inconsistent patterns.
- Solution: Apply even pressure across the stamp. Use a tamper to ensure uniformity.
Skipping the Release Agent
- Mistake: Not using a release agent can cause the stamp to stick to the concrete.
- Solution: Apply a release agent to the stamp before pressing it into the concrete. This helps build clean, crisp patterns.
Poor Curing Practices
- Mistake: Not curing the concrete properly can weaken it and cause cracks.
- Solution: Keep the concrete moist for at least a week after stamping. Cover it with plastic sheeting or use a curing compound.
Ignoring Weather Conditions
- Mistake: Working in extreme weather can affect the concrete's setting time and quality.
- Solution: Avoid working in very hot, cold, or wet conditions. If necessary, use additives to adjust the setting time.
Neglecting Maintenance
- Mistake: Failing to maintain the stamped concrete can lead to fading and damage.
- Solution: Regularly clean and reseal the concrete to protect it from wear and tear. Address any cracks or chips promptly.
By being aware of these common mistakes and following these tips, you can achieve a beautiful and durable stamped concrete surface.
Safety Precautions
When working on a DIY-stamped concrete project, safety should be your top priority. Here are some essential safety precautions to ensure a safe and successful project:
Wear Protective Gear
- Importance: Concrete work can be hazardous to your skin, eyes, and lungs.
- Precaution: Always wear safety goggles, gloves, long sleeves, and pants. Use a dust mask or respirator to protect your lungs from dust and fumes.
Handle Tools Safely
- Importance: Improper use of tools can lead to injuries.
- Precaution: Read the instructions for all tools and equipment. Use tools as intended and keep them in good condition. Store them safely when not in use.
Work in a Well-Ventilated Area
- Importance: Concrete and sealers can release harmful fumes.
- Precaution: Ensure your workspace is well-ventilated. If working indoors, open windows and use fans to circulate air.
Be Cautious with Heavy Lifting
- Importance: Concrete bags and tools can be heavy and cause strain.
- Precaution: Lift with your legs, not your back. Use a wheelbarrow or dolly to transport heavy items. Ask for help if needed.
Avoid Working Alone
- Importance: Having someone nearby can be crucial in case of an emergency.
- Precaution: Work with a partner or have someone check on you periodically. Keep a phone nearby in case you need to call for help.
Stay Hydrated and Take Breaks
- Importance: Working with concrete can be physically demanding.
- Precaution: Drink plenty of water and take regular breaks to avoid fatigue. Rest in a shaded area if working outdoors in hot weather.
Handle Chemicals with Care
- Importance: Concrete sealers and additives can be hazardous.
- Precaution: Read and follow the safety instructions on all chemical products. Store chemicals in their original containers and keep them out of reach of children and pets.
Secure the Work Area
- Importance: A cluttered workspace can lead to accidents.
- Precaution: Keep your work area clean and organized. Remove any tripping hazards and ensure that tools and materials are stored safely.
Be Mindful of Weather Conditions
- Importance: Weather can affect both safety and the quality of your work.
- Precaution: Avoid working in extreme weather conditions. Protect yourself from sun exposure by wearing sunscreen and a hat. If it starts to rain, cover your work area to prevent water damage.
Know First Aid Basics
- Importance: Being prepared can make a difference in an emergency.
- Precaution: Keep a first aid kit on hand and know how to use it. Familiarize yourself with basic first aid procedures for cuts, burns, and other common injuries.
By following these safety precautions, you can minimize risks and ensure a safer working environment for your DIY-stamped concrete project.
FAQs About DIY Stamped Concrete
Find answers to FAQs about DIY stamped concrete, including preparation, stamping tips, and maintenance advice to achieve stunning results.
Stamped concrete is a decorative technique where patterns and textures are imprinted into wet concrete to mimic the look of materials like brick, stone, or wood. This method is popular because it offers a high-end appearance at a lower cost compared to using actual materials.
Preparation is crucial for a successful stamped concrete project:
Excavate the area: Remove any grass, rocks, or debris.
Install forms: Use wooden or metal forms to outline the area.
Add a sub-base: Lay down a layer of gravel or crushed stone.
Pour and level the concrete: Ensure the surface is smooth and even.
Maintaining stamped concrete involves:
Regular cleaning: Sweep and wash the surface to remove dirt and debris.
Sealing: Reapply a concrete sealer every 2-3 years to protect against wear and weather.
Repairing cracks: Fill any cracks with a concrete patching compound to prevent further damage.
Yes, you can stamp existing concrete, but it requires some additional steps:
Clean the surface: Remove any dirt, oil, or debris.
Apply a bonding agent: This helps the new layer of concrete adhere to the old surface.
Pour a thin overlay: Use a concrete overlay mix designed for stamping.
Stamp the overlay: Follow the same steps as you would for new concrete.
Here are some common mistakes to avoid:
Not preparing the surface properly: Ensure the area is clean and level.
Using the wrong mix: Choose a concrete mix suitable for stamping.
Skipping the release agent: This can cause the stamps to stick and ruin the pattern.
Not applying enough pressure: Ensure even pressure when stamping to get a consistent pattern.
Ignoring curing time: Allow the concrete to cure properly before using the surface.
Reflecting on the Journey
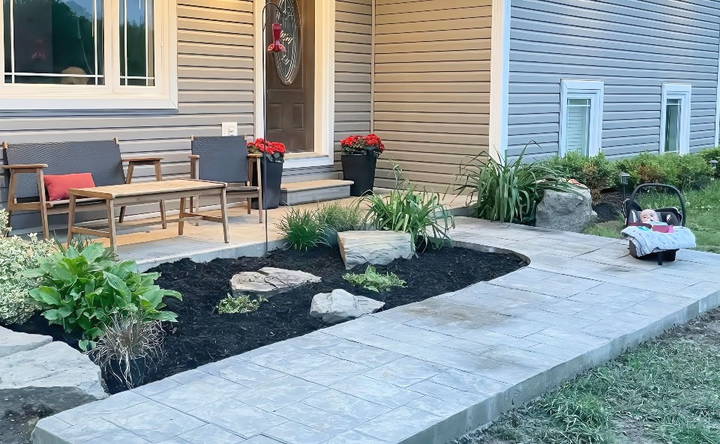
Completing my stamped concrete walkway was an incredibly rewarding experience. Despite the initial mistakes and learning curve, the project instilled confidence and a sense of accomplishment. With perseverance and the right guidance, transforming a plain piece of earth into a beautiful stamped concrete path is not only feasible but fulfilling.
I hope my personal journey and this step-by-step guide inspire you to take on your own DIY stamped concrete project. Remember, mistakes are part of the learning process, and with each step, you get closer to mastering the art of concrete. So grab your tools, gather your courage, and build something beautiful in your home. If you have any questions or need further clarification, feel free to drop them in the comments below.


