Learn how to vinyl wrap a car step-by-step with expert tips for a smooth, professional finish. Vinyl wrapping a car is one of the most popular methods to customize a vehicle's appearance without the permanence of paint. Whether you're aiming for a new color, a matte finish, or even a graphic design, vinyl wraps offer flexibility and creativity. Wrapping your car at home might seem like a daunting task, but with the right tools, technique, and a bit of patience, it's completely achievable. In this guide, we'll break down the process step-by-step to make it approachable for beginners and those looking to save on professional installation fees.
What You'll Need to Vinyl Wrap Your Car
Before you start the process of vinyl wrapping your car, it's important to gather all the necessary tools and materials. Having everything ready will ensure a smoother process and prevent any last-minute delays. Here's what you'll need:
Essential Tools and Materials
- Vinyl wrap: Choose the color and finish you want. Wraps come in gloss, matte, satin, and chrome finishes, among others. The size of the wrap depends on the size of your car.
- Isopropyl alcohol (70%): Used to clean the surface before applying the vinyl.
- Clay bar or clay mitt: Helps remove contaminants from the car's surface.
- Knifeless tape: Essential for cutting the vinyl without damaging your car's paint.
- Heat gun: Helps stretch and set the vinyl, especially around curves and tricky areas.
- Wrap gloves: Protect your hands and provide a better grip when smoothing out the vinyl.
- Squeegee: Used to press the vinyl onto the surface and remove air bubbles.
- Sharp knife or blade: For trimming excess vinyl.
Optional but Helpful Tools
- Magnets: These can hold the vinyl in place while you adjust and cut.
- Lint-free towels: Used to clean and prepare the surface.
- Wrap magnets: Help to position large sections of vinyl on the car without shifting.
Step by Step Instructions
Learn how to vinyl wrap a car with step-by-step instructions. From prepping to finishing touches, achieve a flawless wrap every time!
Preparing Your Car for the Vinyl Wrap
Before applying any vinyl, proper surface preparation is critical. A dirty or contaminated surface will not allow the vinyl to adhere properly and may lead to peeling, bubbles, or other imperfections. Follow these steps to ensure your car is ready for wrapping:
Step 1: Washing the Car
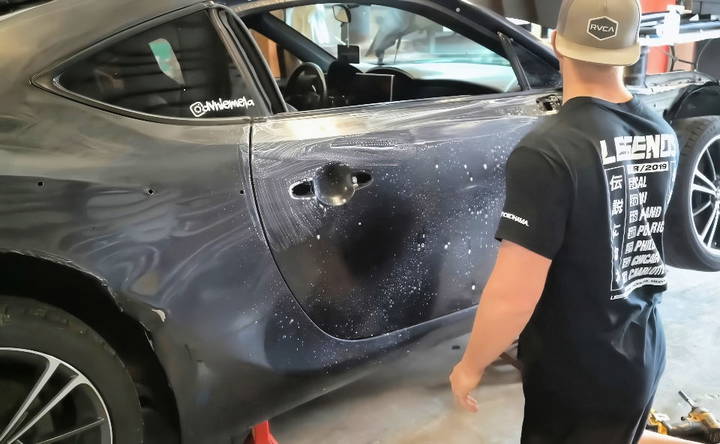
The first step in vinyl wrapping is to thoroughly wash your car. Use a regular car wash soap, and make sure to clean every nook and cranny of the vehicle. Focus especially on areas like door handles, wheel wells, and edges where dirt and debris tend to accumulate. You don't want any grime left behind, as it can create bumps or prevent the vinyl from sticking.
Step 2: Clay Bar Treatment
Once the car is clean, the next step is to use a clay bar or clay mitt. This will help remove any embedded contaminants, such as tree sap, industrial fallout, or road tar, that a standard wash might miss. Gently rub the clay bar over the surface of the car to ensure the paint is completely smooth. The smoother the surface, the better the vinyl will adhere, giving you a more professional-looking result.
Step 3: Wipe Down with Isopropyl Alcohol
After the clay bar treatment, wipe down the entire car with isopropyl alcohol using a lint-free towel. This step removes any remaining oils or residues, ensuring a pristine surface for the vinyl to bond to. Pay particular attention to edges, corners, and areas that tend to accumulate dirt.
Applying the Vinyl Wrap
Now that your car is properly prepped, it's time to apply the vinyl. Here's where patience and precision come into play. Follow the steps below to get started:
Step 1: Position the Vinyl
Start by cutting the vinyl sheet to fit the panel you are working on. It's better to cut a slightly larger piece than the actual area, as you will trim off the excess later. Use wrap magnets to help hold the vinyl in place while you position it.
Step 2: Trim Excess Vinyl
Once the vinyl is positioned over the car panel, use a sharp knife or blade to trim off the excess vinyl. Make sure to leave about an inch of extra vinyl around the edges, which will be tucked in later. Be cautious not to cut too close, as this can lead to the vinyl pulling back after application.
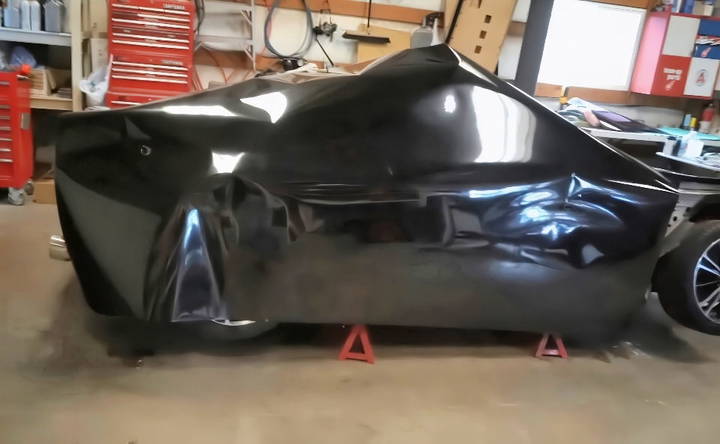
Step 3: Peel and Apply
Peel the backing paper off the vinyl and start applying the wrap to the car. Begin at the top of the panel and work your way down. It's crucial to keep the vinyl taut as you apply it to avoid wrinkles or air bubbles. A second person can help hold the vinyl to keep it from sticking in the wrong place.
Step 4: Smooth and Stretch the Vinyl
Using your squeegee, start pressing the vinyl onto the surface, smoothing it out as you go. For tricky areas or curves, use your heat gun to soften the vinyl and allow it to stretch. Be sure not to overheat the vinyl, as this can damage it or cause it to warp. The heat will make the vinyl more pliable, which is especially helpful for corners and rounded sections of the car.
Dealing with Difficult Sections: Corners, Edges, and Curves
Some parts of your car will naturally be more difficult to wrap than others. Corners, edges, and curves require extra attention to ensure a seamless finish. Here's how to handle these tricky areas:
Step 1: Use Heat for Stretching
For corners and curves, applying heat will help the vinyl stretch and conform to the shape of the car. Keep your heat gun a few inches away from the vinyl and move it in a back-and-forth motion to avoid overheating. Once the vinyl is warm and pliable, you can gently stretch it over the curve or into the corner.
Step 2: Tuck the Vinyl into Edges
When working on edges or panel gaps, use a wrap glove or your fingers to tuck the vinyl into the edges. Once tucked in, use the squeegee to smooth out the material. Always work slowly to avoid creating wrinkles or bubbles.
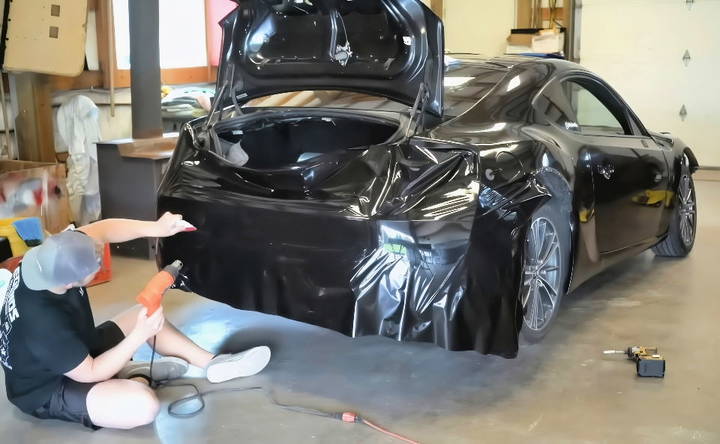
Step 3: Cut Excess Vinyl with Knifeless Tape
For areas where a clean cut is necessary, such as around door handles or windows, knifeless tape is a lifesaver. Apply the tape along the line where you want to cut, lay the vinyl over it, and then pull the tape to slice through the vinyl without damaging the paint underneath. This technique allows for precise and professional-looking cuts.
Finishing Touches
Once you've applied the vinyl to all panels, it's time for the finishing touches to ensure a smooth, long-lasting wrap.
Step 1: Post-Heat the Vinyl
After the vinyl has been applied, go over the entire surface with your heat gun again to set the material. This process, called "post-heating," ensures that the vinyl properly adheres to the surface and reduces the chances of lifting or peeling later on. Be careful not to overheat the vinyl during this step.
Step 2: Trim Final Edges
With a sharp knife, carefully trim away any remaining excess vinyl around edges, such as window seals, door panels, and wheel wells. Take your time with this step to avoid accidental cuts or damage to the wrap.
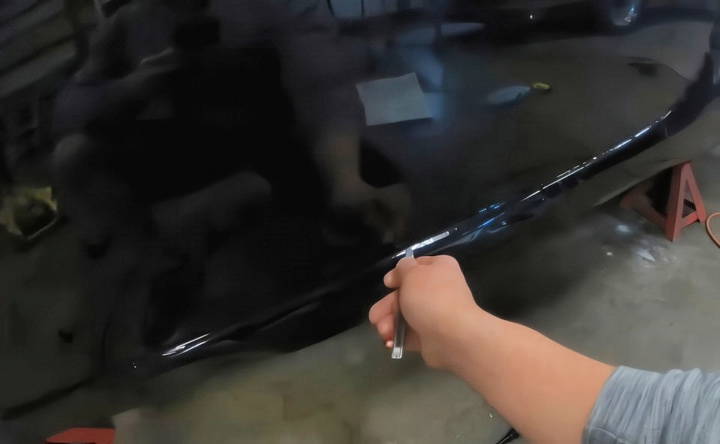
Step 3: Inspect for Air Bubbles
Finally, go over the entire surface again, looking for any air bubbles that might have been trapped during the application. If you find any, use a pin or small blade to carefully puncture the bubble and then smooth it out with your squeegee.
Wrapping Larger Surfaces: Hood, Roof, and Bumpers
After mastering the basic panels, it's time to tackle the larger, more complex sections of your car such as the hood, roof, and bumpers. These areas can be more challenging due to their size and shape, but with careful planning and patience, you can achieve a seamless finish.
Step 1: Wrapping the Hood
The hood of the car is one of the largest and flattest areas, but it still requires precision due to its curved edges. Here's how to approach it:
- Cut the Vinyl to Size: Measure out a piece of vinyl that covers the hood with a few extra inches on each side. This excess will help you grip and stretch the material during application.
- Position the Vinyl: Just like with smaller panels, position the vinyl on the hood and secure it with magnets or by lightly tacking it down on the edges.
- Apply in Sections: Start at the center of the hood and work your way outwards. Use your squeegee to press the vinyl onto the surface in smooth, even strokes. This ensures that you avoid trapping air bubbles under the material.
- Stretch Around the Edges: Use your heat gun to soften the vinyl when you get to the edges. Stretch it gently over the curved sections of the hood, then tuck and trim the excess as needed.
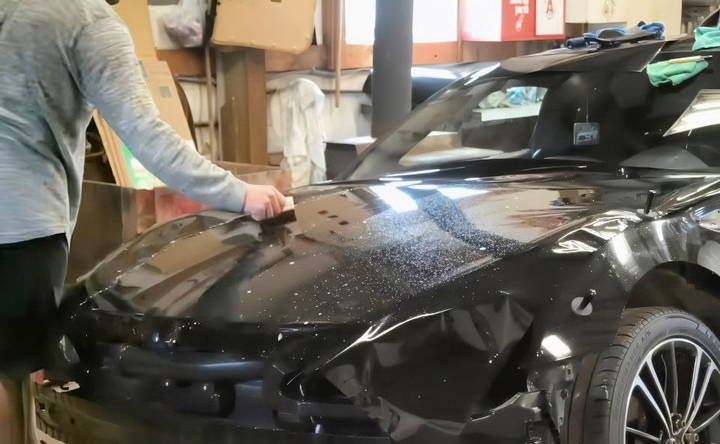
Step 2: Wrapping the Roof
The roof can be a bit more challenging due to its elevated position and the need for a ladder or stool to reach comfortably. Additionally, it's important to work carefully to prevent bubbles, as they can be harder to notice and fix in this area.
- Start with a Clean Surface: Ensure that the roof is clean and free of any contaminants, as you did with the rest of the car.
- Position and Apply: Lay the vinyl over the roof and begin applying from the center outward, just like with the hood. Be patient and work in sections, applying heat as needed to ensure a smooth application.
- Handling Antennas and Roof Racks: If your car has an antenna or roof racks, you'll need to remove these before applying the vinyl. If removal is not possible, carefully cut around these areas using knifeless tape for precise edges. Always leave a bit of extra vinyl to tuck under any roof accessories to ensure a clean finish.
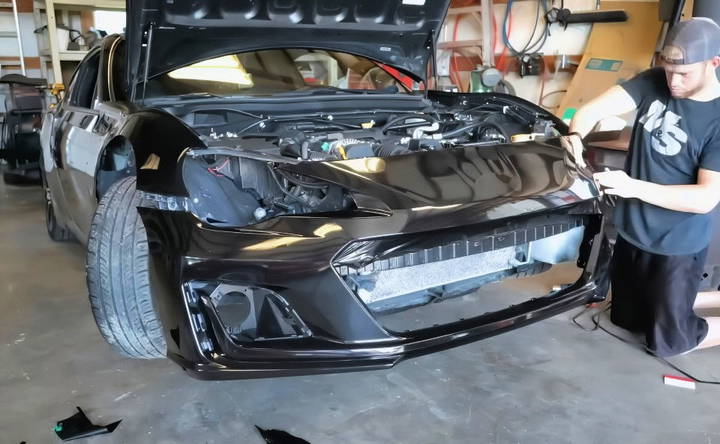
Step 3: Wrapping the Bumpers
Bumpers are perhaps the most difficult part of a car to vinyl wrap due to their complex shapes and contours. They often require more heat and stretching to ensure the vinyl conforms to the curves. Follow these steps to ensure a professional look:
- Plan for Multiple Sections: Unlike flat surfaces, bumpers will often require multiple pieces of vinyl or “inlays” to fully cover the area. Inlays are small pieces of vinyl that are applied to sections where the material cannot stretch enough.
- Apply Heat Generously: Use your heat gun to make the vinyl more pliable as you apply it to the bumper. Work slowly and methodically, applying small sections of vinyl at a time.
- Use Inlays for Complex Curves: For deep recesses or complex curves, apply inlays. These small pieces of vinyl are laid in the recessed areas first, then the larger piece of vinyl is applied over them. The seams should be carefully aligned to ensure they are not visible.
- Post-Heat the Edges: Once the bumper is fully wrapped, post-heat the entire surface to set the vinyl. This ensures it adheres properly, particularly on the intricate curves and edges.
Common Mistakes and How to Avoid Them
Even the most experienced DIY enthusiasts can run into problems when vinyl wrapping a car. Here are some common mistakes and how you can avoid them:
Not Preparing the Surface Properly
A common mistake is skipping or rushing the surface preparation stage. Dirt, grease, or even dust can prevent the vinyl from adhering properly and result in a subpar finish.
- Solution: Take your time with the cleaning process. Use a clay bar to remove any contaminants, followed by an isopropyl alcohol wipe-down. This step is crucial for a smooth, lasting wrap.
Stretching the Vinyl Too Much
Vinyl can only be stretched to a certain extent before it loses its adhesive properties or distorts. Overstretching, especially around curves, can cause the vinyl to fail or warp.
- Solution: When working with complex curves, use a heat gun to gently soften the vinyl and avoid overstretching. If a section feels tight or overstretched, apply more heat and stretch gently.
Trapping Air Bubbles
One of the most frustrating mistakes is discovering air bubbles trapped under the vinyl after it's been applied. These can ruin the smooth finish and are difficult to remove once the vinyl has set.
- Solution: Use a squeegee to smooth out the vinyl as you apply it. Start from the center and work your way outwards to push out any air bubbles. For stubborn bubbles, you can use a pin to pop them and then press down the vinyl.
Cutting Vinyl Too Short
Cutting the vinyl too short can leave exposed paint, especially around edges and seams. This can make the wrap look unfinished and allow the paint color underneath to show through.
- Solution: Always leave extra vinyl around the edges, which can be tucked in or trimmed later. It's better to have too much vinyl than too little.
Post-Wrap Care and Maintenance
Once your car is fully wrapped, you'll want to ensure that the vinyl lasts as long as possible and stays in good condition. Here are some tips for maintaining your vinyl wrap:
Cleaning Your Wrapped Car
- Use Mild Soaps: Avoid harsh chemicals or abrasive cleaning products that could damage the vinyl. Use a mild car soap and a soft sponge or cloth to clean your wrapped car.
- Avoid Pressure Washing: High-pressure washers can damage the edges of the vinyl wrap, causing it to peel. If you must use a pressure washer, keep it at a safe distance from the car's surface.
- Hand Wash for Best Results: The safest way to clean a vinyl-wrapped car is by hand washing. Gently scrub the surface to remove dirt and grime without damaging the vinyl.
Protecting the Vinyl from UV Damage
Over time, exposure to the sun's UV rays can cause the vinyl to fade or degrade.
- Park in the Shade: Whenever possible, park your car in a garage or shaded area to protect the wrap from prolonged sun exposure.
- Use a Vinyl-Safe Wax: If you want to protect your vinyl wrap, use a wax that is specifically designed for vinyl surfaces. Regular car waxes can leave residue or damage the material.
Avoiding Harsh Conditions
- Extreme Heat and Cold: Vinyl can expand and contract with extreme temperature changes, so try to avoid exposing your car to excessive heat or cold for long periods.
- Be Cautious with Snow and Ice: If you live in a region with snow, be careful when scraping ice off the car. Use soft brushes or de-icers to avoid damaging the vinyl.
How Long Does a Vinyl Wrap Last?
On average, a high-quality vinyl wrap can last anywhere from 5 to 7 years, depending on the conditions it's exposed to and how well it's maintained. Over time, the wrap may start to show signs of wear, such as fading or peeling, especially around edges and seams.
Signs It's Time to Replace the Wrap
- Fading or discoloration: UV exposure can cause the vinyl to fade, especially if it's a bright color or chrome finish.
- Peeling edges: If the edges start to peel or come unstuck, it's a sign that the adhesive is breaking down.
- Cracking: Over time, the vinyl may crack due to exposure to the elements, especially in extreme weather conditions.
When it's time to replace the wrap, the removal process should be done carefully to avoid damaging the paint underneath. Heat the vinyl with a heat gun to loosen the adhesive, then peel it off slowly.
Conclusion
Vinyl wrapping a car is a fantastic way to give your vehicle a fresh new look without the permanence of paint. While it requires patience and precision, the process is entirely doable at home with the right tools and technique. From surface preparation to post-application care, this guide has walked you through the entire process to ensure a successful DIY vinyl wrap. Whether you're covering your entire car or just adding a few custom accents, the result will be a head-turning transformation.
With proper maintenance, your vinyl wrap can last for years, protecting your paint and keeping your car looking stylish. So, gather your materials, set aside some time, and get ready to enjoy the rewards of a DIY vinyl wrap job!
FAQs About Vinyl Wrapping Your Car
Discover everything you need to know about vinyl wrapping your car with our comprehensive FAQs, from benefits to maintenance tips.
For most standard-sized cars, around 50 to 60 feet of vinyl is typically enough to cover the entire vehicle. Larger vehicles, such as SUVs, might require closer to 70 to 75 feet of vinyl. Always check your car’s dimensions and order a bit extra for errors.
While removing parts like bumpers, fenders, and mirrors makes the job easier and results in a cleaner finish, it’s not absolutely required. You can cut around these parts, but it may not look as professional and could lead to peeling over time.
It’s important to treat any rust or damaged paint before wrapping. Vinyl will not adhere well to rust, and any damage underneath will show through the wrap. If the rust is minimal, sanding and priming the area before wrapping can improve results.
Yes, you can wrap an unpainted bumper, but it’s crucial to heat the surface before applying the vinyl to help it adhere better. Sanding the surface smooth can also improve the results. Unpainted plastics are trickier but still doable.
With proper maintenance, a vinyl wrap can last between 5 to 7 years. Exposure to harsh weather, improper care, or heavy UV exposure can shorten the lifespan, so it’s important to protect your wrap with proper washing and care.
Yes, vinyl wraps can withstand a range of temperatures. However, extreme heat or cold can impact the wrap’s longevity. In hot climates, parking in the shade can help prevent fading, while in cold climates, avoiding salt buildup is key to preserving the vinyl.
Use a mild car soap and soft cloth or sponge to clean a wrapped car. Avoid abrasive cleaners or high-pressure washes, especially near the edges, as they can cause peeling. Hand washing is recommended to protect the vinyl.
Yes, a clay bar or clay mitt is recommended to remove contaminants from the car’s surface before wrapping. This ensures the vinyl adheres smoothly and helps prevent imperfections like bumps or peeling.
No, it's important to remove any wax or sealant from the surface before applying the wrap. Use a clay bar and isopropyl alcohol to clean the surface thoroughly, ensuring the vinyl can bond properly to the paint.
Air bubbles can be common, but they can be easily fixed by popping the bubble with a pin and using a squeegee to smooth out the vinyl. Applying heat can also help release trapped air and improve the bond.
You can overlap vinyl, especially when using inlays for complex areas like bumpers. If done correctly, seams can be nearly invisible. However, using knifeless tape to create clean cuts is a great way to minimize the appearance of seams.


