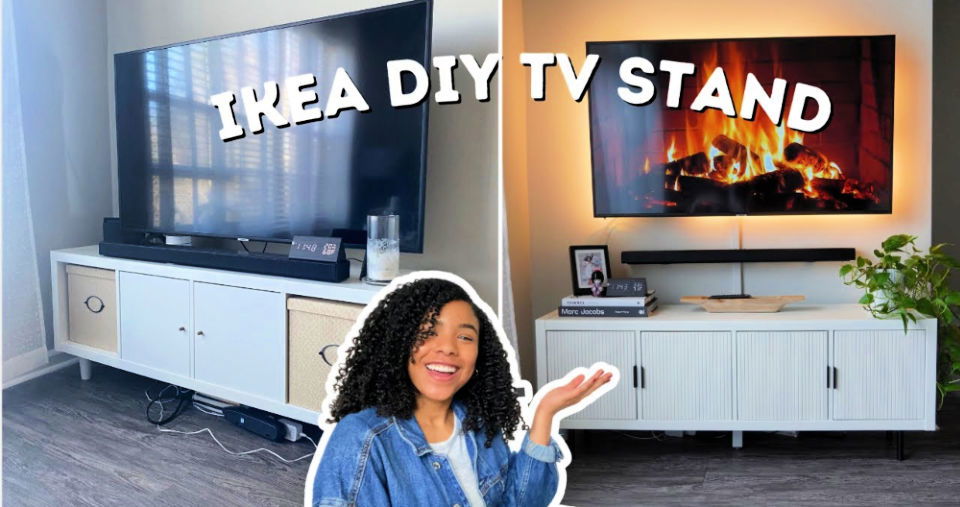
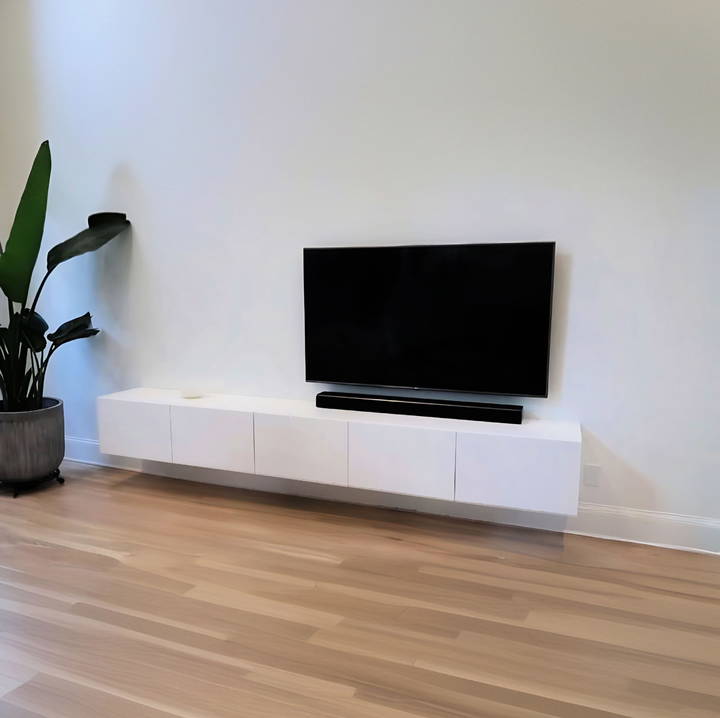
I'm excited to share my experience of upgrading our living room with a sleek and modern TV console using the IKEA BESTA series. This IKEA besta hack was not only a fun and rewarding experience, but it also turned out to be quite an efficient and affordable way to enhance our home decor. In this article, I'll walk you through everything from the initial planning to the final installation. Let's dive right in!
Understanding the IKEA BESTA Series
What is the IKEA BESTA Series?
The IKEA BESTA series is a versatile storage system that can be customized to suit a variety of needs and spaces. It includes a range of cabinets, frames, doors, and shelves that can be mixed and matched to build a unique setup. For our TV console, we specifically chose pieces that matched our desired aesthetic: minimal, modern, and functional.
Why Choose BESTA for a TV Console?
- Quality: Despite the low price point, with the right assembly, the quality of IKEA furniture can rival more expensive brands.
- Affordability: IKEA is renowned for providing great design at affordable prices.
- Customization: The BESTA series offers flexibility in terms of design, allowing you to build a piece that truly fits your space and needs.
Step by Step Instructions
Transform your IKEA besta with our step-by-step instructions. Easy-to-follow IKEA besta hack for a stylish, personalized furniture upgrade.
Assembly and Installation
Effortless assembly and installation: preparation, building the units, and making it seamless for a smooth setup experience. Discover how to guide.
1. Preparation
Firstly, have a clear idea of where you want to place the console. Measure the space to ensure the BESTA units will fit seamlessly. Also, gather all necessary tools - a screwdriver, drill, and a level are must-haves.
2. Building the Units
Following IKEA's instructions, we assembled the units. Pro tip: Take your time with this step to ensure everything aligns perfectly. It's the foundation of your console, after all.
3. Making It Seamless
To achieve a built-in look, we screwed the two units together from the inside. This minimized any visible gap between them, making a more cohesive unit. Accuracy here is key, so align them as closely as possible before securing them together.
Customization for Practicality
Optimize your ikea best with practical customization tips for managing cords, wall mounting, and enhancing functionality with soft-close hinges.
1. Managing Cords
A neat trick we implemented was drilling larger holes in the dividers between compartments for cord management. This allowed us to thread power cables through effortlessly, keeping the setup clean and organized.
2. Wall Mounting the BESTA
Given the size and the potential weight once filled, securing the unit to the wall was non-negotiable for us. However, the standard IKEA wall brackets didn't align with the studs in our wall. Our workaround? We opted out of IKEA's backing board, using sturdy brackets secured directly into the studs, providing a safe and secure mount.
3. Enhancing Functionality with Soft-Close Hinges
Installing soft-close hinges on the doors was a game-changer. Not only did it elevate the feel of the console, but it also added a touch of luxury to the overall experience. Simple yet significant, I highly recommend this small upgrade.
Final Touches
With the major work done, it was all about adding personal touches. We chose not to add feet since ours was wall-mounted, but IKEA offers various options if you prefer a freestanding unit. Lastly, shelves were only added where needed, which allowed for more customization based on what we planned to store.
The finished product was exactly as we envisioned—sleek, modern, and thoroughly practical. It not only enhanced our living space but also reflected our style. The blend of IKEA's design with our personalized tweaks resulted in a piece that we're proud to have as the focal point of our room.
Personalization Tips for Your IKEA Besta Unit
Personalizing your IKEA Besta unit can transform it from a simple storage piece to a standout feature in your home. Here are some tips to help you make the Besta unit uniquely yours:
- Choose Your Color Palette: The Besta series comes in neutral colors, which are perfect for customization. Decide on a color scheme that complements your room. You can paint the exterior, add colorful doors, or use adhesive vinyl for a quick and easy update.
- Swap Out the Hardware: Changing the handles and legs on your Besta can make a big difference. There are many aftermarket options available that can give your unit a high-end look. Consider materials like brass for a touch of elegance or matte black for a modern feel.
- Add Texture and Patterns: Use textured wallpapers or fabrics to add depth to your Besta doors. Geometric patterns can give it a contemporary look, while floral prints can build a softer, more traditional appearance.
- Incorporate Lighting: LED strips or puck lights can be added to your Besta to highlight displayed items or provide ambient lighting. This not only adds functionality but also elevates the overall look of the unit.
- Mix and Match Units: The Besta system is modular, so feel free to combine different units to fit your space and needs. You can build an entire wall unit or a unique TV stand that has both open and closed storage.
- Display Personal Items: Make the Besta your own by displaying personal items like photos, books, or collectibles. This adds a personal touch and makes your space feel more like home.
- Use Organizers: Use organizers inside the drawers and shelves to keep everything tidy. This not only helps with the aesthetics but also improves the functionality of your storage.
The key to personalization is to express your style and needs. Have fun with the process, and don't be afraid to experiment. Your Besta unit is a blank canvas waiting for your personal touch!
Troubleshooting Common Issues with IKEA Besta Units
When customizing or assembling your IKEA Besta unit, you might encounter some common issues. Here's a helpful guide to troubleshoot these problems:
- Doors Not Aligning: If the doors of your Besta unit aren't lining up correctly, check the hinges. You can adjust the screws on the hinges to align the doors horizontally and vertically. Make small adjustments until the doors are even.
- Drawers Sticking: For drawers that aren't sliding smoothly, first ensure they are correctly installed. If they are, apply a small amount of furniture wax or silicone spray to the runners.
- Shelves Sagging: Over time, heavy items can cause shelves to sag. Consider using shelf supports or brackets for additional strength. Also, avoid placing excessively heavy items on the shelves.
- Unit Not Level: If your Besta unit wobbles or isn't level, adjust the feet at the bottom. Turn them clockwise or counterclockwise until the unit is stable and level.
- Scratches or Chips: Minor scratches can be touched up with a matching furniture marker or paint. For chips, use wood filler that matches the color of your unit, then sand it down and touch it up with paint if necessary.
- Missing Parts: If you're missing parts after unboxing, contact IKEA for replacements. Keep your receipt and product information handy for reference.
- Difficulty in Customization: If you're struggling with personalizing your Besta, consider simpler modifications. Stick-on decals, removable wallpaper, or new knobs can make a big difference without complex changes.
Be patient when troubleshooting. Don't rush or force parts. If issues persist, check the IKEA manual or contact customer service.
Maintenance and Care Advice for Your IKEA Besta Unit
Keeping your IKEA Besta unit in top condition ensures it remains a functional and stylish part of your home for years. Here's how to care for your Besta unit:
- Regular Cleaning: Dust your Besta unit regularly with a soft, dry cloth. For tougher spots, use a damp cloth with mild soap. Avoid harsh chemicals that can damage the finish.
- Protect Surfaces: Use coasters under drinks and placemats for dishes to prevent rings and heat damage. If you have a glass top, clean it with a glass cleaner to keep it smudge-free.
- Avoid Direct Sunlight: Prolonged exposure to direct sunlight can fade the colors. Position your Besta away from windows or use curtains to minimize sun damage.
- Be Mindful of Weight: Each shelf has a weight limit. Check the manual for specifics and avoid overloading to prevent sagging or structural damage.
- Tighten Fittings: Over time, fittings can loosen. Periodically check and tighten screws and hinges to keep everything secure.
- Handle with Care: When moving your Besta, lift it rather than drag it to avoid damaging the legs or base.
- Address Spills Immediately: If spills occur, wipe them up quickly to prevent staining or swelling of the material.
- Use Touch-Up Kits: For scratches or chips, IKEA offers touch-up kits that match the colors of their furniture. They're easy to apply and can make your unit look as good as new.
By following these simple tips, your Besta unit will continue to be a versatile and attractive piece in your home.
FAQs About IKEA Besta Hack
Discover FAQs about ikea best hack! Get creative ideas, expert tips, and step-by-step guides to customize your IKEA furniture.
An IKEA Besta hack involves creatively modifying or repurposing the Besta storage series from IKEA to suit personal tastes or needs. It can range from simple changes like adding new knobs or legs to more complex alterations such as combining units to create custom furniture pieces.
To give your Besta unit a mid-century flair, consider replacing the cabinet doors with dark-stained wood doors and adding tapered legs. This style pairs well with modern decor and can be enhanced with the right color scheme and accessories.
Yes, the Besta series can be adapted to include pet-friendly features. For example, you can add a pet door to the side of a Besta cabinet to create a hidden spot for your pet to rest without disrupting the style of your room.
Absolutely! By using two Besta cabinets as the base and adding a wooden desktop, you can build a spacious and stylish desk. This setup offers ample storage for office supplies and electronics, making it a practical solution for a home office.
Consider using a Besta console as a bench. This not only provides additional seating but also offers storage space for dining essentials like extra dishes and decorations. It's a smart way to maximize space and functionality in your dining area.
Final Thoughts
Wrapping up, the IKEA besta hack to build a DIY TV console for your living room offers a creative way to personalize your space. Following this guide, you can easily customize the Besta unit to fit your home décor and needs. Enjoy your new TV console and the satisfaction of a job well done.


