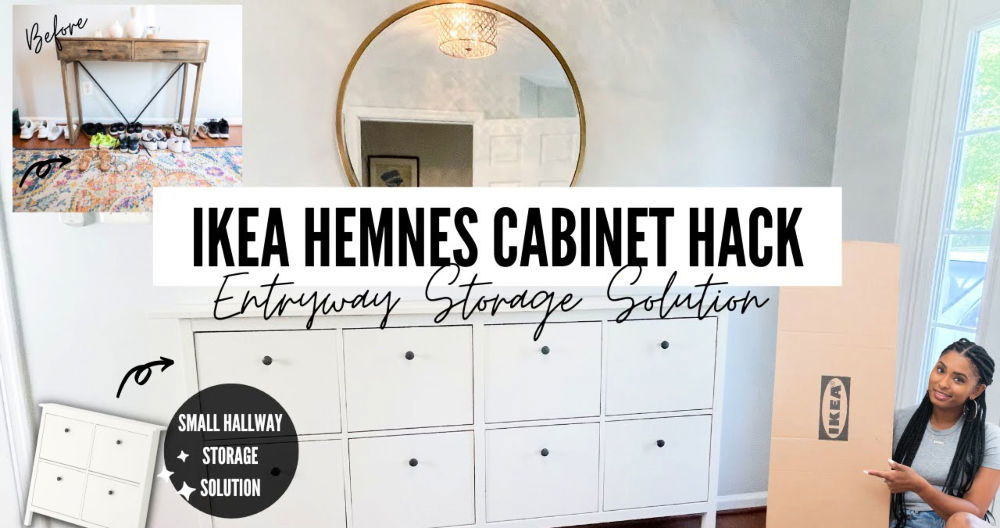
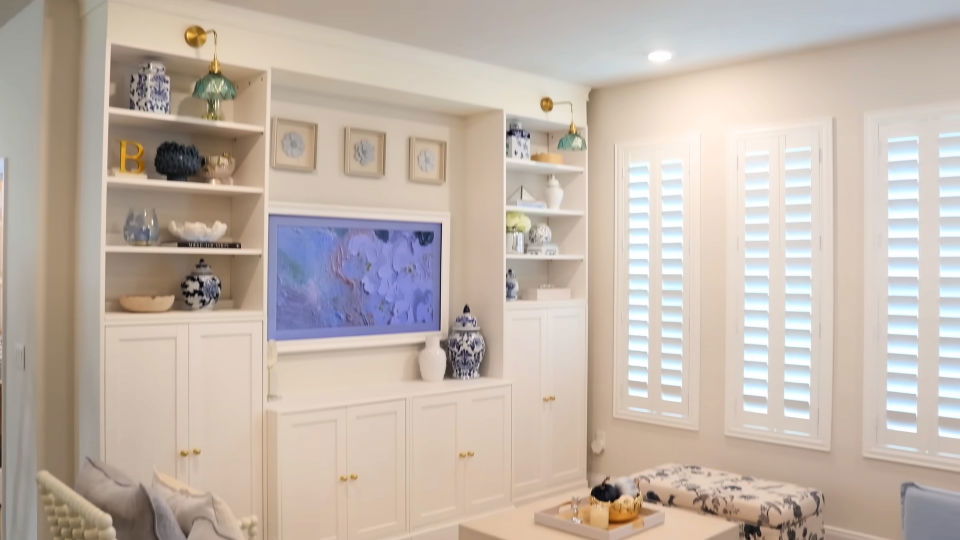
Today, I'm excited to share with you a step-by-step process on how to build stunning IKEA DIY built-in shelves and cabinets using the HEMNES (Hofsta) collection. This project was both rewarding and budget-friendly, giving us an elegant and personalized living room space.
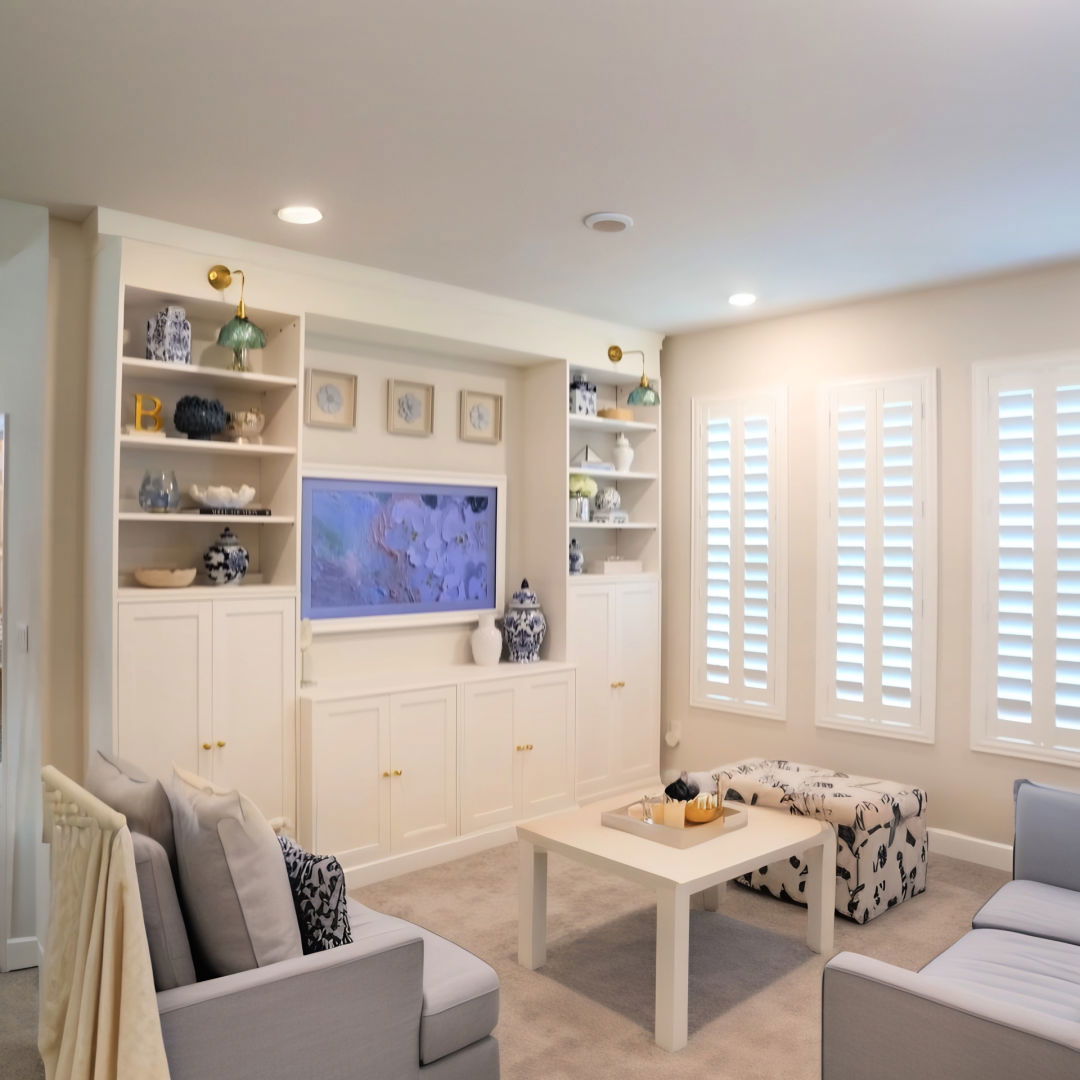
Transform your space with this DIY IKEA Built-In Hack. Follow our simple guide for a custom, seamless look using affordable IKEA units. Let's dive in!
The Materials We Used and Why
Discover the IKEA hemnes and Billy collections, tools, paint, caulk, lighting, and hardware we used and why they were chosen for our project.
Ikea hemnes and Billy collections
Choosing between the popular BILLY collection and the somewhat newer but incredibly stylish HEMNES (correctly, HOFSTA) collection was our first challenge. We opted for HEMNES because of its textured finish, which added a more upscale look. The collection's various sizes also allowed us to design a built-in that fit our space perfectly.
Tools and Hardware
The right tools make all the difference. For this project, we needed a reliable drill, a saw (though you can have wood cut to size at your local hardware store), screws, wall anchors (to securely attach our unit to the wall), and finishing nails for the trim. Each tool had its role, from assembly to ensuring our built-in was secured safely.
Paint and Caulk
Matching the white of the HEMNES units, we chose a paint that closely resembled IKEA's finish. Caulk was our little secret ingredient, bridging any small gaps and ensuring a seamless look that genuinely felt built-in.
Lighting and Hardware
We wanted our built-in to have a touch of elegance. Battery-operated, gold-painted lights provided a sophisticated glow without the need for complex wiring. Swapping the standard IKEA knobs with chic gold ones from Lowe's added an extra layer of personalization.
Step by Step Instructions
Discover clear, easy-to-follow step-by-step instructions on IKEA's built-in hack to transform your space with custom, stylish storage solutions.
Step 1: Planning and Prep
Our blank wall was crying out for something substantial. After measuring our space, we decided on two tall HEMNES units for the sides and shorter ones for the center to accommodate our TV. This layout would give us both storage solutions and decorative display areas, bringing balance and function to the room.
Step 2: Assembly and Modification
The assembly was straightforward, thanks to IKEA's instructions. The real challenge was modifying the shorter units to connect with the tall ones securely and ensuring everything was sturdy. This involved adding support where necessary and precisely drilling into the units to connect them seamlessly.
Step 3: Securing and Trimming
Securing the units to the wall was critical for safety and for achieving that built-in look. We removed the baseboards behind where the units would sit, allowing them to sit flush against the wall. Adding trim painted to match the units was the final touch in blending our built-in with the room.
Step 4: Painting and Caulking
With everything assembled and secured, we painted the trim and any exposed wood to match. Caulking smoothed out any seams, cracks, or gaps, ensuring the built-in looked like a part of the home rather than an addition.
Step 5: Lighting and Decor
The battery-operated lights were a game-changer. Positioned above the tall units, they illuminated the entire setup elegantly. Choosing to paint them gold was a tedious but worthwhile task, as it tied in with our golden hardware. Decorating the shelves with a mix of personal items and stylish decor pieces was the cherry on top, bringing warmth and life to our newly transformed space.
The transformation was nothing short of remarkable. What was once a barren wall now stood a functional and beautiful built-in that looked custom-made. The project, which we initially thought would stretch over weeks, was completed in a dedicated weekend (with a little bit of preparation beforehand.
Customization Tips and Tricks
Customizing your IKEA furniture can transform your space into a personalized and unique area. Here are some tips and tricks to help you customize your IKEA built-ins:
- Choose Your Style: Start by deciding on a style that reflects your personality and fits your space. Whether it's modern, rustic, or eclectic, your chosen style will guide your customization choices.
- Paint It Up: A fresh coat of paint can do wonders. Choose a color that complements your room's palette. Use paints that adhere well to furniture surfaces, and consider a finish that matches your style, like matte, gloss, or satin.
- Add Some Hardware: Swapping out knobs and handles is an easy way to add character. From vintage pulls to modern handles, hardware can significantly change the look of your furniture.
- Get Creative with Doors: If your piece has doors, consider using wallpaper, fabric, or even wood panels to build a new look. Adhesive wallpaper is a great option for an easy and reversible update.
- Mix and Match: Don't be afraid to combine different IKEA pieces. You can build a custom unit by placing bookcases side by side or stacking different storage units.
- Top It Off: Changing the top of your furniture can give it a high-end look. Consider adding a wooden countertop or a piece of stone for a durable and stylish surface.
- Light It Up: Adding lighting inside or under your cabinets can build ambiance and highlight your items. LED strips or puck lights are easy to install and come in various colors.
- Accessorize: Decorative elements like baskets, boxes, and plants can add texture and warmth to your built-ins. Choose accessories that serve both form and function.
- Think Outside the Box: Use your furniture in unconventional ways. Turn a bookshelf into a bar, a dresser into a kitchen island, or a cabinet into a bench.
- Safety First: When customizing, always consider the stability and safety of your furniture. Secure tall units to the wall to prevent tipping, and use appropriate tools and materials for your projects.
The key to a successful IKEA hack is creativity and personal expression. Have fun with the process, and enjoy your one-of-a-kind creation!
Troubleshooting Common IKEA Hack Issues
When you're working on an IKEA hack, you might run into a few snags along the way. Here's a troubleshooting guide to help you solve some common problems:
Furniture Not Fitting Together Properly
- Solution: Double-check the assembly instructions and make sure all pieces are oriented correctly. Measure each part to ensure they match the dimensions given in the manual.
Paint Not Adhering to the Surface
- Solution: Sand the surface lightly to build a rough texture for the paint to grip. Clean the surface thoroughly and apply a primer before painting.
Drawers or Doors Not Aligning
- Solution: Adjust the hinges or drawer tracks. IKEA furniture often has built-in adjustments for alignment. Use a level to ensure everything is straight.
Missing or Damaged Parts
- Solution: Contact IKEA customer service for replacement parts. Keep your receipt and product information handy when you call or visit the store.
Stability Concerns
- Solution: Ensure all screws and connectors are tightened. Use the provided wall anchors to secure tall units to the wall to prevent tipping.
Difficulty Customizing
- Solution: Start with simple modifications. Use stick-on decals or removable wallpaper for an easy and reversible change.
Accessories Not Fitting
- Solution: Measure the interior dimensions of your furniture and compare them with the accessory dimensions before purchasing. Look for adjustable or modular options.
Lighting Installation Issues
- Solution: Choose battery-operated lights if wiring is a concern. Follow the manufacturer's instructions carefully, and consider hiring a professional if you're not confident.
Overwhelmed by Choices
- Solution: Make a mood board with your favorite ideas. This will help you visualize the end result and make decisions easier.
Patience and careful planning are key to a successful IKEA hack. If you encounter a problem, take a step back, review the basics, and try again.
FAQs About IKEA Built-In Hack
Explore faqs about ikea built-in hacks, including tips, ideas, and expert advice for transforming your space efficiently and stylishly.
An IKEA built-in hack is a creative DIY project where you modify and integrate IKEA furniture to look like custom-built pieces in your home. It's a cost-effective way to achieve a high-end look, often involving painting, adding trim, or combining pieces in innovative ways.
To build a built-in bookshelf, you can use the IKEA Billy bookcase. Start by crafting a wooden top unit to fit the bookcase and attach vertical wood pieces to match the columns of the Billy bookcase. Flip the bookcase upside down, attach it to the top unit, then anchor the entire assembly to the wall. Use spackling to fill any gaps and paint to match your walls for a seamless look.
Yes, you can elevate your kitchen with built-in cabinets using IKEA HAVSTA cabinets. Place them against the wall, use cabinet-grade plywood to fill the gap to the ceiling, and add trim or molding. Paint the plywood to match the HAVSTA cabinets for an elegant, built-in appearance.
Absolutely! Customize an IKEA PAX unit into a built-in closet by building a wooden platform that fits between the top of the PAX frames and your ceiling. Secure the PAX frames onto the platform, add baseboard trim, and install drawers and wood trim for a fully integrated look.
To ensure a professional look, make sure to:
Prop your IKEA furniture on wooden bases so they touch your walls and ceilings.
Use caulk and paint to cover the spots where furniture pieces meet.
Add doors, wood packers, and crown molding to enhance the built-in effect.
Customize with knobs, wallpaper, or other personal touches to reflect your style.
Final Thoughts
In conclusion, this DIY IKEA built-in hack offers a practical and stylish solution for making custom built-in shelves and cabinets. This project not only maximizes storage but also enhances the aesthetic appeal of your home. By following our steps, you can achieve a personalized look without breaking the bank. Take advantage of this affordable and creative approach to transform your living space!


