Transform your workspace with a clever IKEA desk hack for an inspiring DIY project. Today, I want to share my experience unboxing and setting up a height-adjustable electric desk frame from Flexispot. If you're thinking of purchasing this particular model, you can find the details in the description below.
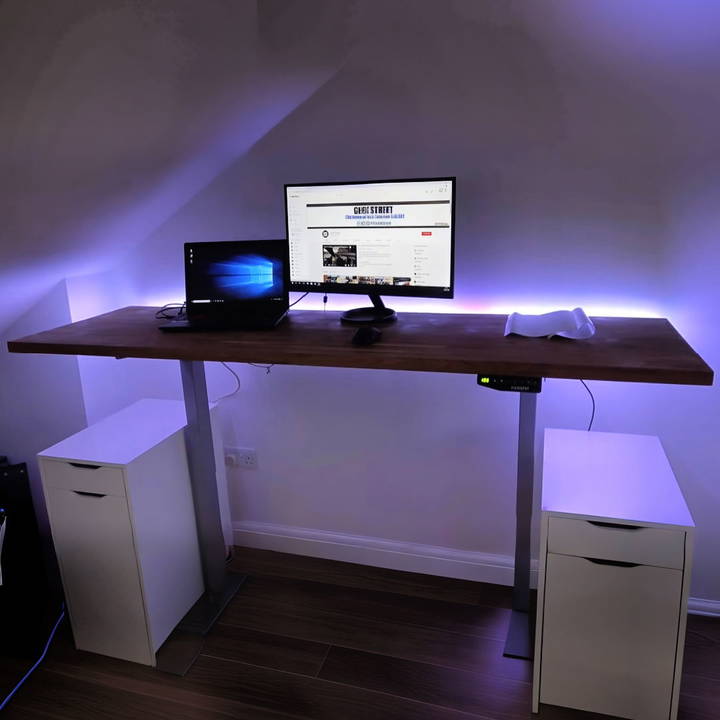
This desk frame allows you to adjust your desk height, which is such a relief when you're working long hours. Whether you're gaming or working, long periods of sitting can really affect your posture and back. So, having the option to switch between sitting and standing is not just a luxury; it's a necessity for good health.
Why Go for a Height-Adjustable Desk?
The health repercussions of long hours spent seated are widely acknowledged. From posture problems to back pain, the damage is far-reaching. This became my main motivation. The Flexispot desk frame seemed like an optimal solution, offering the flexibility to work while standing or sitting, thus promoting a healthier lifestyle.
Required Materials
- Flexispot Electric Desk Frame: The core of this transformation, chosen for its robust build and height customization features.
- Tools Provided in the Package: Including an Allen key and screws to ensure a smooth assembly process.
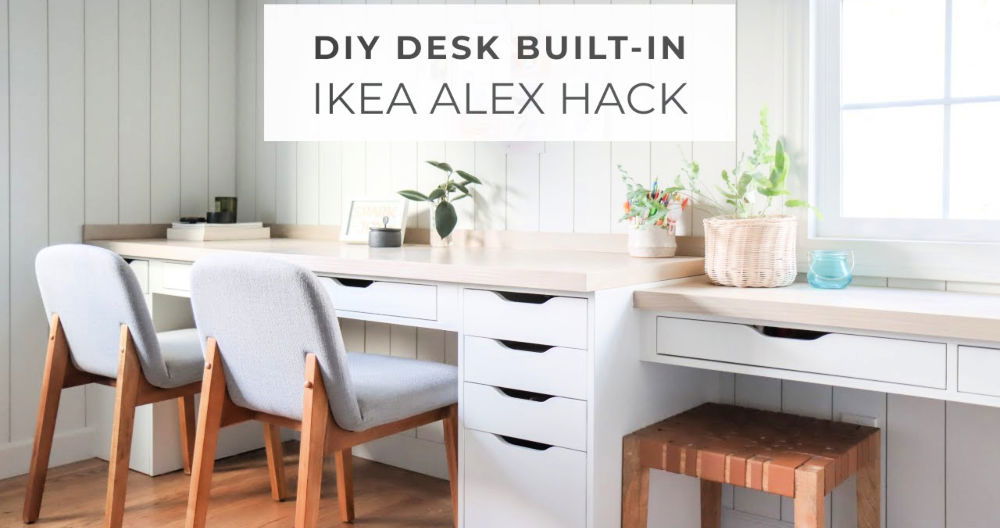
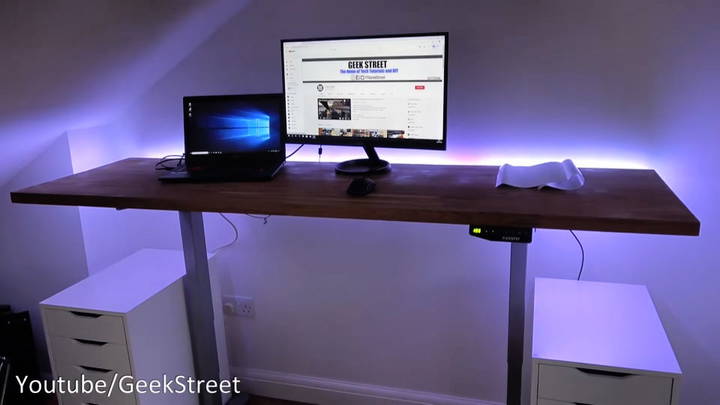
- IKEA Desk or Similar Worktop: I used an existing kitchen worktop laid over two ALEX drawer units.
- Screwdriver: For securing components tightly.
Each material played a crucial role. The desk frame was the upgrade component, the tools facilitated assembly, and my existing worktop and drawer units were repurposed to align with the new setup.
Step by Step Instructions
Transform your space with these easy, step-by-step instructions on IKEA desk hack. This is the perfect guide for a stylish and functional DIY desk makeover.
Step 1: Unboxing and Familiarization
Unboxing was the first step. The Flexispot desk frame came neatly packed with all parts, including the control box, legs, feet, and support beams. Laying everything out allowed me to familiarize myself with the components and consult the installation guide for a seamless setup process.
Step 2: Preparing the Existing Desk
My previous setup involved an IKEA kitchen worktop resting on two ALEX drawer units. This setup had served me well but lacked the ergonomic flexibility I now craved. I removed any attachments and made space for the new frame, ensuring a clear area for installation.
Step 3: Assembling the Frame
I began by attaching the feet to the legs, ensuring a secure fit. Next, I adjusted the support beam to match the width of my desk. This customizability was a plus, allowing me to fit the frame perfectly between the ALEX drawer units. The control box and control set were then connected, forming the desk's operational heart.
Step 4: Attaching the Desk
This was perhaps the most critical part. Before permanently securing the frame to the worktop, I performed a test lift, confirming the frame's functionality. After a successful trial, I proceeded to screw the frame onto the underside of my worktop, transforming it into a height-adjustable desk.
Step 5: Final Adjustments and Testing
With the desk assembled and secured, I made final adjustments, ensuring cables were neatly managed and the desk's operation was smooth. Testing the memory settings was particularly satisfying, allowing me to switch between preset heights effortlessly.
Practical Advice from Personal Experience
- Test Before Finalizing: It is crucial to perform a trial run before securing the desk. This step ensures everything works as intended, saving time and preventing potential issues.
- Cable Management: Take extra care with cable organization. A tidy workspace contributes to efficiency and reduces distractions.
- Safety Considerations: Be mindful of objects and furniture around the desk. The desk's movement should be unhindered, and potential obstructions should be considered to avoid damage.
- Personal Customization: Use the memory settings to tailor the desk to your daily routines. This feature enhances the desk's functionality, suiting various activities from work to gaming.
Future-Proofing Your Workspace
When it comes to making a workspace that can stand the test of time, it's all about flexibility and adaptability. Here's how you can ensure your workspace remains relevant and efficient, no matter what the future holds:
- Choose Modular Furniture: Opt for desks and storage units that can be easily reconfigured or expanded. IKEA's modular systems allow you to add components as your needs change, ensuring your workspace can grow with you.
- Invest in Quality: While hacks can be cost-effective, don't compromise on the quality of key pieces that you use frequently. A sturdy chair or a solid desk frame can last for years and adapt to various setups.
- Tech-Ready Design: Ensure your desk has built-in cable management solutions and can accommodate future tech upgrades. This might mean having enough space for multiple monitors or built-in USB ports for easy charging.
- Ergonomics Matter: Adjustable desk heights and monitor stands can help you maintain a healthy posture. As ergonomic practices evolve, having adjustable furniture will allow you to keep up with the latest recommendations.
- Personalize Your Space: Make your workspace truly yours by adding personal touches that can be changed over time. This could be a pinboard for your ideas, a shelf for plants, or a space for personal mementos.
- Stay Organized: Use desk organizers, drawer dividers, and labels to keep everything in its place. An organized desk can easily be reorganized to suit new tasks or projects.
- Lighting is Key: Good lighting is timeless. Invest in a quality desk lamp with adjustable brightness and color temperature. This will reduce eye strain and build a comfortable environment for any time of day.
Follow these tips to make a workspace that suits your needs now and is ready for future changes.
Troubleshooting Common Issues
When you're working on an IKEA desk hack, you might run into a few snags along the way. Here's a straightforward guide to solving some of the most common issues you may encounter:
- Stability Concerns: If your desk wobbles, check all connections to ensure they're tight. For added stability, consider securing the desk to a wall with brackets or using leg levelers to handle uneven floors.
- Drawer Alignment: Drawers that don't close properly can be a nuisance. Make sure the rails are aligned and evenly spaced. If the problem persists, adjust the screws slightly to achieve a smooth glide.
- Surface Scratches: Desk surfaces can get scratched easily. To prevent this, use a desk pad or apply a clear protective film. If scratches occur, a furniture marker matching the desk's color can help conceal them.
- Difficulty in Assembly: IKEA instructions can be tricky. Take it one step at a time, and use online videos for guidance. Remember, it's okay to ask a friend for help or reach out to online communities for advice.
- Missing Parts: If you're missing screws or other components, IKEA offers free replacements. Just note the part number in the manual and visit your local store or contact customer service.
- Custom Part Fit: When using non-IKEA parts, ensure they fit before starting. Measure twice; cutting once is the golden rule. If something doesn't fit, don't force it; reassess and adjust your plan.
- Cable Management: Tangled cables can be frustrating. Use cable trays or clips to keep them organized. If your desk lacks these, adhesive cable holders or even simple zip ties can do the trick.
By keeping these tips in mind, you'll be well-equipped to handle any hiccups in your IKEA desk hacking journey.
FAQs About IKEA Desk Hack
Discover the top faqs about Ikea desk hack, from best practices to tools needed, and transform your workspace with easy, budget-friendly tips.
IKEA desk hacks are creative modifications and combinations of IKEA products to build personalized desks. They often involve using items like kitchen cabinets, countertops, and drawer units in unconventional ways to create a workspace that fits your needs and style.
For a spacious desk, you can combine two KARLBY countertops with panel clamps for a seamless look. Support the setup with trestles or sawhorse legs. This hack is cost-effective and provides a large working area suitable for multiple users.
Yes, even with limited space, you can maximize functionality. For example, you can expand the IKEA PS 2014 Secretary Desk to accommodate multiple monitors and speakers while maintaining a compact footprint. This allows for a fully functional desk that doesn’t take up much room.
Absolutely! If you need a desk that doesn't dominate the room, consider hacking an IVAR cabinet to hide your workspace. This way, you can have a functional desk that's out of sight when not in use, keeping your living space clutter-free.
Personalization can be achieved by choosing different styles of doors for cabinet-based desks or by adding custom hardware like leather pulls. You can also opt for a custom wooden countertop to add a unique touch to your desk.
Conclusion
Wrapping up, this DIY IKEA desk hack with a Flexispot desk frame is a fantastic way to build a functional and stylish workspace. This project combines the ease of IKEA with the flexibility and stability of a Flexispot desk frame. You'll enjoy a desk that's both customizable and affordable.


