As someone who has dived headfirst into the world of IKEA hacks and DIY projects to make our home both functional and stylish, I wanted to share my journey of making an amazing IKEA Havsta hack that doubled as extra storage space and a charming coffee nook.
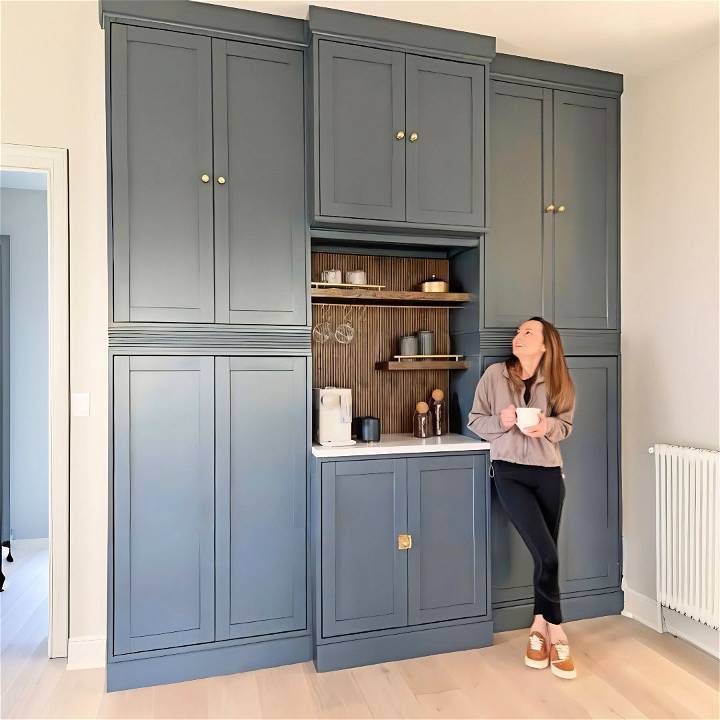
This project was inspired by a desire to utilize a previously underused space in my home and transform it into an area that was not only practical but also pleasing to the eye. The following is a step-by-step guide on how I achieved this, aiming to inspire and assist anyone looking to undertake a similar endeavor.
Why I Chose IKEA Havsta Cabinets
The Havsta series stood out for its versatility and depth, perfect for the limited space I had to work with. It also offered a built-in aesthetic that I was aiming for, complementing our high ceilings and not obstructing our return air vent. The dimensions were just right for making a storage solution that wouldn't impede the flow of the room.
Materials Needed and Why
- IKEA Havsta Cabinets: For their ideal size and built-in look potential.
- 2x4 Lumber: Used to elevate the cabinets to the ceiling, ensuring a custom built-in appearance.
- Crown Molding and Baseboards: To bridge gaps and enhance the built-in illusion.
- Plywood: Additional support is needed across the back of the cabinets.
- Zinsser B-I-N Primer and High-Quality Paint: Essential for painting IKEA furniture to ensure durability and a professional finish.
- Pole Wrap: Used as a stylish backsplash for the coffee nook.
- Quartz Countertop: Though a splurge, it elevated the entire project with a high-end touch.
- 1x2 Lumber and Plywood: For DIY floating shelves above the coffee nook.
Step by Step Instructions
Discover easy, step-by-step instructions for an IKEA Havsta hack to create a stylish storage & coffee nook. Learn preparation, installation, and custom modifications.
Preparation
- Room and Cabinet Measurement: First, measure the space thoroughly to ensure the Havsta cabinets would fit perfectly. Remember to account for any obstacles like vents or outlets.
- Remove Baseboards: This allows the cabinets to fit flush against the wall, making a seamless look.
- Assembly of Havsta Cabinets: Follow the IKEA instructions, but remember my trick: flip the cabinets for a perfect square base at the bottom.
Installation
- Elevating the Cabinets: Use the 2x4s cut to size to lift the cabinets closer to the ceiling. Secure these lumber pieces to both the floor and ceiling, ensuring they are anchored to studs for stability.
- Securing Cabinets to the Wall: Fasten the assembled cabinets to the 2x4s and directly into wall studs wherever possible. This step is crucial for safety and stability.
- Adding Support and Aesthetics with Molding: Crown molding and baseboards were attached to hide any gaps and provide a finished look. This was also where I flipped the Havsta’s base to achieve a leveled top and bottom.
Custom Modifications
- For the Coffee Nook Backsplash, I opted for a pole wrap stained in Dark Walnut, an affordable yet chic solution.
- Countertop Installation: Though this required a professional for the quartz, it was worth the investment for its durability and luxe feel.
- Floating Shelves: By following a simple DIY guide, I crafted floating shelves that added valuable display and storage space.
- Painting: Priming with Zinsser B-I-N before sanding provided a smooth base for painting. Two coats of the chosen color ensured an even and resilient finish. Remember to let the paint cure between coats.
Challenges and Solutions
- Painting IKEA Furniture: To counter the notorious challenge of painting laminate, a solid primer was key, followed by light sanding.
- Building a Built-In Look: Removing baseboards, using crown molding, and ensuring cabinets fit snugly against the wall helped achieve a seamless appearance.
- Budget Management: Opting for DIY solutions like the floating shelves and staining the pole wrap myself saved costs, allowing splurges in areas like the quartz countertop.
Design Customization Ideas
When it comes to personalizing your IKEA HAVSTA unit, the possibilities are as vast as your imagination. Here are some creative ideas to help you transform this classic piece into something uniquely yours:
- Choose a Theme Start by deciding on a theme that reflects your personal style or the ambiance of the room. Whether it’s Scandinavian minimalism, rustic charm, or modern chic, let your theme guide your choices.
- Play with Colors The HAVSTA’s simple design makes it a perfect canvas for a splash of color. Consider painting it in a bold hue for a statement piece, or opt for soft pastels for a subtle touch. Use paints that are suitable for wood and follow the manufacturer’s instructions for the best results.
- Add Texture Applying textured wallpaper or fabric to the back panel can add depth and interest. Choose a pattern that complements your room’s decor and adhere it carefully to avoid bubbles or wrinkles.
- Change the Hardware Swapping out the standard knobs or handles for something more decorative is an easy way to make a big impact. Look for hardware that matches your theme and provides a comfortable grip.
- Build Contrast For a more dynamic look, paint the inside of the cabinet in a contrasting color to the outside. This not only adds visual interest but also highlights the items displayed within.
- Incorporate Lighting: Install LED strips or puck lights inside the shelves to showcase your collectibles or books. Lighting can build a warm ambiance and draw attention to your favorite pieces.
- Functional Add-Ons: Consider adding hooks, rods, or additional shelving inside the doors for extra storage. These can be great for organizing accessories or hanging small items.
- Top It Off The top of the HAVSTA unit is ideal for displaying art, photos, or plants. Arrange your items thoughtfully, considering varying heights and textures to build a pleasing vignette.
- Protective Measures Lastly, protect your customized HAVSTA with a clear sealant or furniture wax. This will help preserve your handiwork and make it easier to clean.
Plan your design, gather materials, and take your time. With effort, your HAVSTA hack can become a functional centerpiece reflecting your style.
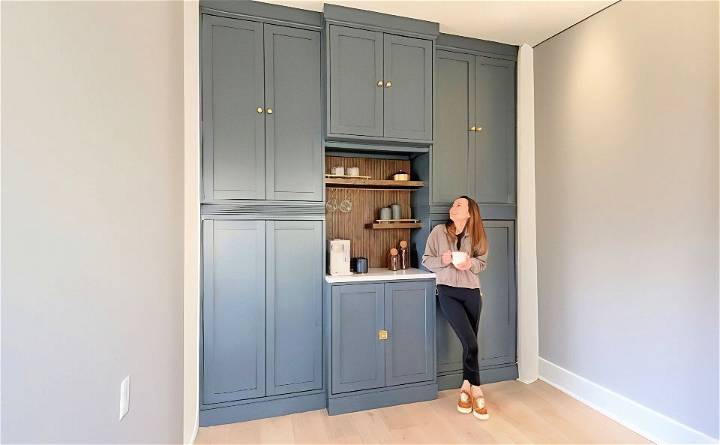
Troubleshooting Common Issues with IKEA HAVSTA
Encountering a hiccup during your IKEA HAVSTA hack project is normal, but don’t worry—most issues have simple solutions. Here’s a guide to troubleshooting common problems:
Paint Not Adhering
- Solution: Ensure the surface is clean and sanded before painting. Use a primer designed for wood furniture to improve paint adhesion.
Doors Not Aligning
- Solution: Check the hinges and adjust the screws to align the doors properly. Refer to the IKEA manual for detailed instructions on hinge adjustments.
Shelves Bowing
- Solution: Avoid placing heavy items on the middle of the shelves. Distribute weight evenly or add extra shelf supports if necessary.
Wallpaper Peeling
- Solution: Use a stronger adhesive or wallpaper paste. Make sure the surface is dust-free before application.
Scratches on the Surface
- Solution: Apply a wood marker or crayon that matches the color of your HAVSTA to fill in minor scratches. For deeper scratches, wood filler may be required.
Stiff Drawers
- Solution: Check for obstructions and ensure the drawer slides are clean. Lubricate the slides with a silicone-based product if needed.
Lighting Not Working
- Solution: Double-check the wiring and connections. Ensure the LED strips are compatible with the power source and that all connections are secure.
Hardware Loosening
- Solution: Tighten any loose screws and bolts. If the problem persists, use thread-locking fluid to keep the hardware in place.
Odor from Paint or Stain
- Solution: Allow the furniture to air out in a well-ventilated area. Use paints and stains with low volatile organic compounds (VOCs) for future projects.
Difficulty Assembling
- Solution: Review the assembly instructions to ensure all steps were followed correctly. Don’t hesitate to reach out to IKEA customer service for assistance.
By addressing these common issues, you can ensure your HAVSTA hack remains both beautiful and functional.
Maintenance and Care Guide
Keeping your IKEA HAVSTA unit in top condition is key to ensuring it lasts for years to come. Here’s a straightforward guide to maintaining and caring for your HAVSTA:
Regular Cleaning
- Dust the unit regularly with a soft, dry cloth.
- For tougher spots, use a damp cloth with mild soap. Avoid harsh chemicals.
Protect Surfaces
- Use coasters under beverages to prevent rings.
- Place felt pads under decorative items to avoid scratches.
Avoid Moisture
- Wipe up spills immediately to prevent water damage.
- Keep the unit away from humid areas to avoid warping.
Sunlight Exposure
- Position your HAVSTA away from direct sunlight to prevent fading.
- Use curtains or blinds to diffuse light during peak sun hours.
Moving and Handling
- When moving the unit, lift rather than drag to protect the legs and flooring.
- Remove contents before moving to reduce weight and prevent shifting.
Hardware Check
- Periodically tighten screws and hinges to keep doors and drawers aligned.
- Lubricate moving parts if they become stiff.
Surface Care
- For painted surfaces, touch up any chips with matching paint.
- For wood finishes, apply furniture oil or wax annually to nourish the wood.
Child Safety
- Secure the unit to the wall with the provided anti-tip hardware to prevent accidents.
Follow these instructions to keep your HAVSTA looking new and working well, extending its life and making your space inviting.
FAQs About IKEA HAVSTA Hack
Discover the top faqs about ikea havsta hack, including tips, tricks, and inspiration for customizing your havsta furniture for a unique home style.
An IKEA HAVSTA hack involves creatively modifying or combining the HAVSTA furniture series to suit personal tastes or needs that aren’t met by the standard configurations offered by IKEA. It’s a DIY approach to customizing furniture, often resulting in a built-in look or a unique design.
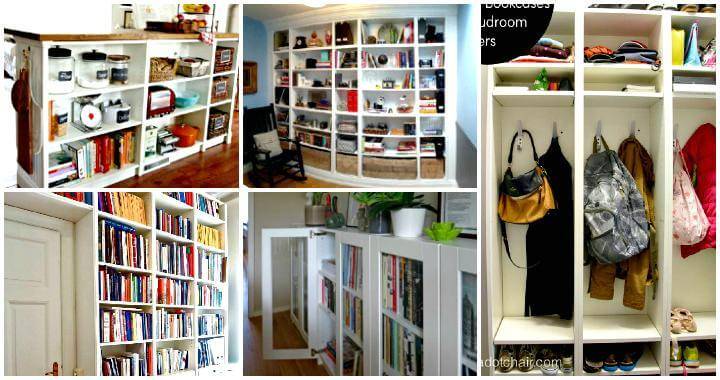
To build a built-in bookshelf, you’ll need several HAVSTA units. Assemble them, omitting the back lip for a seamless look. Connect the units, add MDF sheets for a uniform appearance, and finish with coving and paint. This project can transform your space into one with a classic, custom-built feel.
Yes, the HAVSTA cabinets can be painted to match your decor. They have a matte finish, which means they can be stained or painted with matte paint. This allows for a high degree of customization, whether you want a bold color or a more subdued hue.
Creative hacks include adding marble slabs for a luxurious touch, making graphic door fronts for a modern look, or even transforming the cabinets into a statement piece with scalloped details. The possibilities are limited only by your imagination.
The cost of an IKEA HAVSTA hack can vary widely depending on the complexity of the project and the materials used. A simple paint job might be quite affordable, while a more elaborate built-in bookshelf project could cost around £1,200, including materials and tools.
Final Thoughts
In conclusion, an IKEA havsta hack for storage & coffee nook is an excellent way to combine functionality with style in your home. This simple project can maximize your space and give you a cozy nook to enjoy your coffee. With a little creativity and some basic tools, you can transform your IKEA havsta into a unique piece that perfectly fits your needs. Try this hack and elevate your home with both practicality and comfort.


